Practical how-tos for creators to manage business daily. From marketing and client outreach to workflows and sales, streamline your path to growth.


The digital economy is booming, and the opportunities for earning extra income have never been more abundant in 2025. The digital product economy is generating over $2.5 trillion in value annually as of 2025, with internet users spending $560 billion on digital media like videos, ebooks, music, and games in 2024 alone.
This explosive growth presents an unprecedented opportunity for creators, entrepreneurs, and anyone looking to monetize their skills and knowledge.
You might be a talented writer, graphic designer, photographer, or educator, there's a global market ready to pay for your expertise. The rise of platforms like Mainstack has democratized the process, empowering creators to build sustainable income streams by transforming their knowledge into profitable digital products.
This comprehensive guide will provide you with practical strategies and actionable steps to launch your digital product business and achieve financial freedom in 2025.
Digital products are intangible assets that exist in digital format, including e-books, online courses, templates, software, and digital art. They offer unmatched advantages: instant global distribution, zero shipping costs, and the ability to sell the same product infinitely without additional production expenses.
With 68% of people aged 16+ paying for digital content each month, the demand continues growing rapidly. Modern consumers prioritize convenience, accessibility, and value-driven solutions that can enhance their personal or professional lives.
The appeal of digital products lies in their ability to solve specific problems, provide education, or offer entertainment in a cost-effective, immediately accessible format. As technology adoption accelerates globally, this market shows no signs of slowing down.
The numbers speak for themselves. The global online courses market alone was valued at USD 251.46 billion in 2024 and is expected to reach USD 1080.32 billion by 2032, growing at a CAGR of 17.58%.
The global e-learning market hit $316.2 billion in 2023, driven by increased smartphone use, preference for flexible education, and gamification techniques. Even more specific segments are thriving: online games and virtual goods captured 38% of digital goods market share in 2024, forecast to expand at a 29.8% CAGR through 2030.
This massive market expansion creates opportunities across every niche imaginable, from professional development and creative skills to hobbies and entertainment.
Success in the digital products space starts with understanding what people actually want to buy. 61% of marketers say that generating traffic and leads is their number one challenge, making market validation crucial before investing time in product creation.
Research Techniques That Work:
Social Media Intelligence: Use platforms like TikTok, Facebook, Instagram, and Reddit to identify trending topics and pain points. Search for keywords like "I need," "I want," "how to," and "help me" to uncover market gaps.
Answer the Public: This free tool by Neil Patel reveals what questions people are asking about your topic, providing direct insight into market demand.
Competitor Analysis: Study successful creators in your niche. What products are they selling? What problems are they solving? How are they pricing their offerings?
Community Research: Join Facebook groups, Discord servers, and online forums related to your expertise. Pay attention to frequently asked questions and common struggles.
For example, a video editor researching the market might discover high demand for tutorials on specific software features, transitions, or effect techniques based on TikTok search volumes and Reddit discussions.
Before investing significant time in product development, validate your idea through:
This research phase prevents the costly mistake of creating products nobody wants to buy.

Your product format should align with both your skills and your audience's preferences. Here are the most profitable formats in 2025:
Educational Content:
Creative Products:
Service-Based Digital Products:
The key is choosing a format that showcases your expertise while meeting your audience's learning preferences. If you excel at written communication, start with ebooks. If you're comfortable on camera, consider video courses.
Content marketing and SEO provides the best ROI according to marketers, making quality content creation essential for success. Your content must be engaging, valuable, and distinctly better than free alternatives available online.
Essential Content Creation Principles:
Problem-Solution Focus: Every piece of content should address a specific problem your audience faces. Structure your content around transformation—where they are now versus where they want to be.
Storytelling Integration: Use personal experiences, case studies, and customer success stories to make your content memorable and relatable.
Multi-Modal Learning: Combine text, visuals, audio, and interactive elements to accommodate different learning styles and increase engagement.
Progressive Skill Building: Structure lessons in logical progression, ensuring each module builds upon previous knowledge.
Modern content creation benefits significantly from AI assistance. Tools like ChatGPT can help with:
However, AI should enhance rather than replace your unique expertise and personal insights.
Your content quality directly impacts perceived value and customer satisfaction. Invest in:
Use free tools like Canva for professional-looking graphics, templates, and visual elements without expensive design software.
Choosing the right selling platform significantly impacts your success. While many options exist, Mainstack stands out for several key reasons:
Zero Upfront Costs: Unlike subscription-based platforms, Mainstack operates on a simple 3% transaction fee model—you only pay when you earn.
Global Reach: Accept payments in 135+ currencies including crypto with seamless global payouts, removing geographical barriers to your business growth.
All-in-One Solution: Integrated storefront, payment processing, course hosting, booking systems, and analytics eliminate the need for multiple tools.
AI-Powered Features: Built-in AI content generation helps create product descriptions, course outlines, and marketing copy.
Mobile Optimization: Smartphones and tablets represented 63% of digital goods market revenue in 2024, making mobile-first design crucial.

Your digital storefront serves as your 24/7 salesperson. Optimize it with:
Clear Value Propositions: Immediately communicate what customers will gain from your products.
Social Proof: Display testimonials, student counts, and success stories prominently.
Professional Imagery: Use high-quality product mockups and preview images.
Compelling Product Descriptions: Focus on benefits and transformation rather than just features.
Streamlined Checkout: Integrated biometric authentication and one-click wallets reduce checkout friction, pushing average conversion rates above desktop benchmarks.
Modern digital businesses must think globally from day one. Ensure your payment setup accommodates international customers through:
72% of overall marketing budgets get put towards digital marketing channels, highlighting the importance of strong online presence. Successful digital product businesses require consistent brand building across multiple channels.
Content Marketing Strategy:
Educational Content: Share valuable insights related to your expertise through blog posts, videos, and social media content. This positions you as an authority while building trust with potential customers.
Platform-Specific Optimization:
Email Marketing: Email marketing returns $36 to $40 for every $1 spent, making it one of the highest-ROI marketing channels. Build an email list by offering valuable free content as lead magnets.
Effective Collaboration Strategies:
53% of all website traffic comes from organic searches, and businesses that blog get 55% more traffic to their websites. SEO provides long-term, cost-effective customer acquisition.
SEO Strategies for Digital Products:
Data-driven decision making separates successful digital product businesses from those that struggle. Track key metrics including:
Revenue Metrics:
Marketing Metrics:
Small improvements in conversion rates compound into significant revenue increases. Focus on:
A/B Testing: Continuously test different versions of:
User Experience Improvements:
Value-Based Pricing: Price based on the transformation you provide rather than the time invested in creation.
Psychological Pricing Techniques:
Tiered Pricing: Offer multiple options (Good/Better/Best) to accommodate different budgets and increase average order value.
As your digital product business grows, automation becomes essential for scaling without proportionally increasing workload.
Customer Service Automation:
Marketing Automation:
Once you establish one successful digital product, expand strategically:
Complementary Products: Create products that naturally extend your customers' journey.
Different Price Points: Offer both premium and entry-level options to capture broader market segments.
Format Variations: Convert successful content into different formats (course to ebook, ebook to audiobook).
Advanced Programs: Create higher-value offerings for customers ready for deeper engagement.
The digital product market in 2025 and beyond offers unprecedented opportunities for creators willing to provide genuine value to their audiences. Success requires combining market research, quality content creation, strategic marketing, and continuous optimization.
Remember that building a sustainable digital product business is a marathon, not a sprint. Focus on serving your customers exceptionally well, and the financial rewards will follow naturally.
Start with one product, master the fundamentals, and scale systematically. Your journey to digital product success begins with the first step, and that step is available to you today.
The question isn't whether digital products can generate significant income in the future, the data clearly shows they can. The question is whether you'll take action to claim your share of this growing market. Your expertise has value, and the world is waiting to pay for it.


Community building has evolved significantly in recent times, becoming more strategic and data-driven than ever before. With 88% of community professionals believing that community is critical to their company's mission, and 76% of internet users actively participating in online communities, the stakes have never been higher.
Building a thriving community requires consistent effort and strategic planning. Keeping your community active and engaged means regularly facilitating meaningful interactions and creating value-driven experiences. Without this foundation, even the most promising communities can go dormant and lose their members.
Recent data shows that organizations integrating volunteering and mentoring into their communities experience 124% more community logins and 50% more discussion activity, proving that strategic community building delivers measurable results.
Creating an inclusive environment is no longer optional, it's essential for community success. Community engagement trends show that inclusivity and diversity are central themes shaping how organizations build trust and meaningful connections.
How to implement:
Why it matters: Communities that prioritize inclusivity see higher engagement rates and stronger member retention. When people feel valued for their unique contributions, they're more likely to participate actively and recommend your community to others.
Studies show that 94% of community members use communities as a way to learn new topics, making growth-focused initiatives one of the most effective community building strategies.
Effective challenge strategies:
Implementation tip: Start with achievable goals and gradually increase difficulty. The key is creating a sense of progress and accomplishment that keeps members coming back.
Community professionals identify keeping members engaged as their top challenge, with 55% citing this as their primary concern. Consistency is the antidote to engagement challenges.
Building your rhythm:
Pro tip: Use community management tools and automation to maintain consistency while personalizing member experiences at scale.
Modern community building requires more than intuition, it demands strategic use of technology and analytics. As community management strategies evolve in 2025, data-driven decision making and AI integration are becoming essential.
Technology integration strategies:
Measurement focus: Track meaningful metrics like Monthly Active Users (MAUs), discussion quality, and member retention rather than just follower counts.
Community-driven brands are filling the void left by traditional social media platforms by offering authentic human connections and shared value.
Successful communities in 2025 and beyond will be those that:
Ready to build your thriving community? Start by implementing one of these strategies this week. Remember, community building is a marathon, not a sprint—but with the right approach, you can create lasting connections that drive both member satisfaction and business growth.
The most successful communities don't just happen; they're cultivated through strategic planning, consistent execution, and genuine care for member experience. Which of these strategies will you implement first?


Not every sale needs an ad budget. Many successful affiliate marketers are proving this by growing through community engagement and genuine recommendations instead of paid campaigns.
Currently, Affiliates are doubling their commissions by focusing on community-led marketing, creating organic content, and automating emails that build real relationships, and not just clicks.
This guide will show you how to do the same: turn your affiliate hustle into a steady, scalable system that brings consistent results — no ad spend required.
Affiliate marketing is a performance-based model where you earn a commission for every sale or action made through your unique link.
In the past, affiliates relied on paid ads to get quick results. But today, many are shifting to community-driven and content-focused strategies as a more sustainable way to grow and sell.
A bigger ad budget doesn’t always mean better results. Real growth comes from genuine engagement and consistent value.
Lasting success in affiliate marketing usually comes down to three things:
The best affiliate marketers mix organic strategies with paid ads. That balance helps to boost engagements, as well as conversion rates.
That said, here are some proven ways to double sales without running ads:
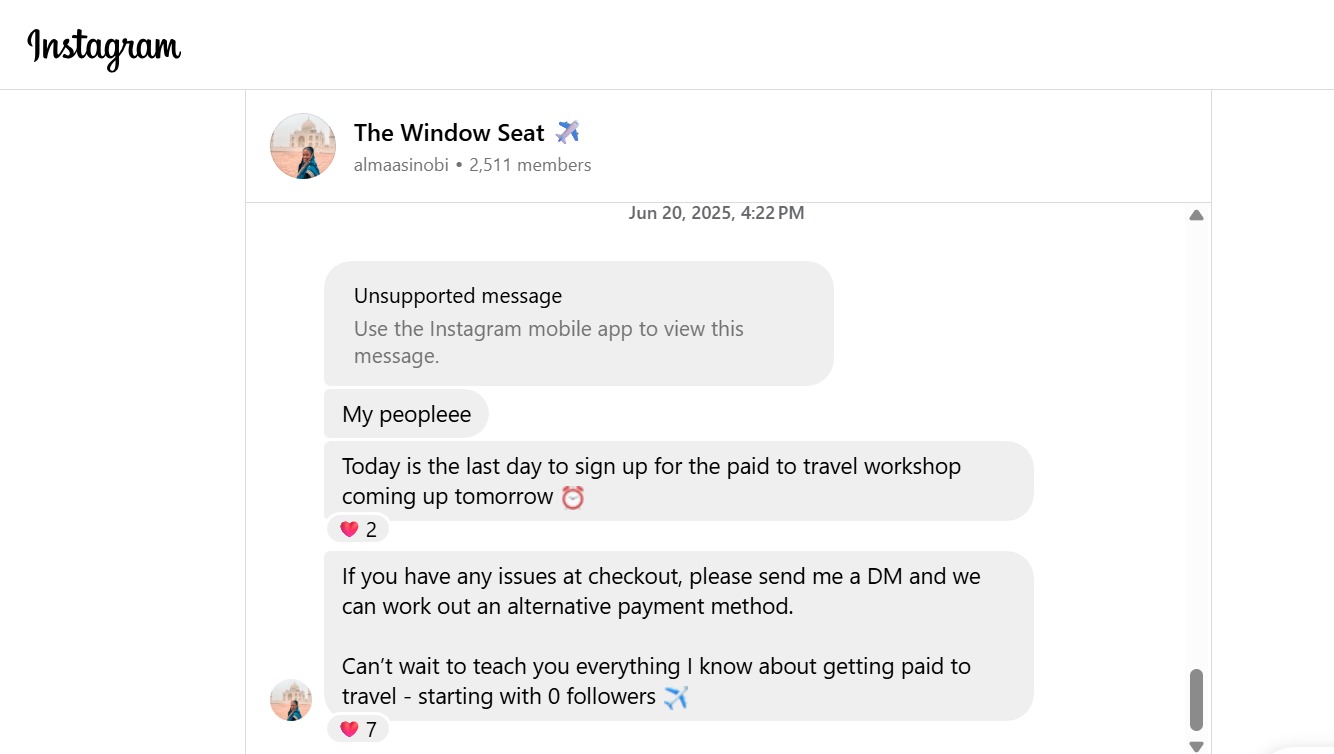
Communities consistently outperform cold ads because it’s built on a foundation of trust which drives conversions better than exposure.
When people connect around shared interests, product recommendations feel natural. That’s why platforms like Facebook Groups, WhatsApp Channels, Telegram, Instagram, and Discord are goldmines for affiliates.
You can create or join communities, share helpful insights, and subtly weave in product mentions without sounding salesy. Instead of hard selling, focus on adding value. Post useful tips, explain how products work, and spark conversations.
Over time, your community starts doing the marketing for you. Members share your recommendations with friends or on social media, expanding your reach without a single naira spent on ads.
These kinds of interactions position affiliates as trusted voices in their niche and ultimately drive consistent sales.
Content marketing is still one of the most dependable ways to drive traffic and sales in affiliate marketing. Writing long-form guides, tutorials, or product comparisons attracts people actively looking for solutions.
Good content naturally positions products as part of the answer. Done well, it brings long-term ROI and passive income without paid promotion.
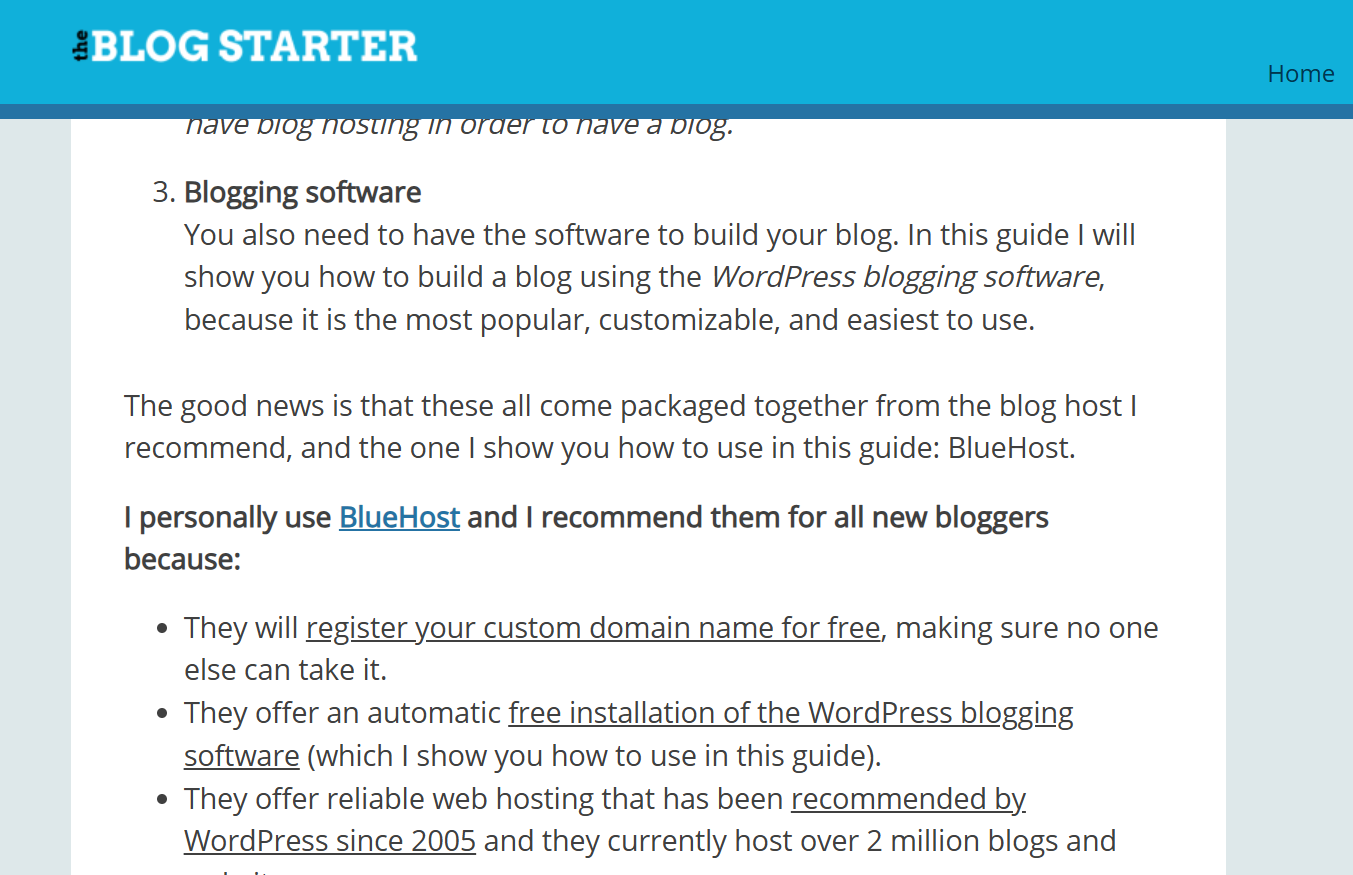
Many bloggers do this successfully by ranking SEO-optimised articles for niche keywords. For example, The Blog Starter promotes hosting platforms like Bluehost through detailed “how to start a blog” guides that rank well on Google.
Social media is a must for affiliates looking to build trust and visibility without ads. Platforms like Instagram, TikTok, and LinkedIn favour authentic, value-first content.
Many affiliates use short videos, tutorials, and user stories to highlight product benefits. The best content focuses on transformation: “How I solved X problem” or “This tool saved me hours.” The goal is to lead with a relatable story before mentioning the product.
For consistent growth, post 3–4 times per week using formats like:
Each post can subtly promote affiliate links while aligning with proven tips and examples that build authority over time.
Email marketing is a reliable, algorithm-proof way to drive affiliate traffic. It’s personal, trackable, and helps affiliates build direct relationships with their audience.
A simple email funnel works like this:
Following these steps positions you as a helpful resource, not just another promoter. For example, Affiliates like Pat Flynn of Smart Passive Income use storytelling emails to share tips, case studies, and examples where he recommends products.
To boost results, segment your list, automate follow-ups, and use storytelling to make recommendations personal. Sections like “tools I use” or “recommended software” help convert cold subscribers.
Creators using Mainstack can add affiliate links to link-in-bio pages or email footers to track clicks and conversions easily.
Hosting live sessions — webinars, mini-workshops, or training — lets affiliates show real value before promoting products. These sessions highlight your expertise and position products as solutions to audience problems.
Because attendees are engaged and actively seeking answers, conversions are often higher than with ads. Boost results by adding affiliate links in slides, follow-up emails, or post-event resources.
Sharing first-hand experience through product reviews, case studies, or tutorials is another way to build trust and drive organic conversions. In this approach, affiliates demonstrate how a product works in real life, highlighting before-and-after results and explaining why it’s effective.
They work well because they combine transparency with value. Embedding affiliate links lets audiences see the product in action, boosting engagement and conversions.
For instance, Poll the People’s AI affiliate case study shows how data-driven storytelling builds credibility, while Growett’s Affiliate Marketing Case Study demonstrates how honest reviews and detailed walkthroughs drive profit.

Such content doubles as both education and persuasion, making it a key part of any affiliate marketing strategy.
Upselling encourages customers to buy a premium or upgraded version of what they already want, while cross-selling suggests complementary products that add value. Both work best when they feel like a natural next step.
For example, if someone buys your “Beginner’s Guide to Freelancing,” you could upsell them a “Pro Freelancer Toolkit” with templates and pitch decks. Or, if you teach personal finance, offer customizable budget or investment templates as an upsell.
Adding these offers at the end of a lesson or during checkout not only boosts revenue. It helps your audience take the next step in their journey with you.
Affiliate links work best when they appear naturally within valuable content, as opposed to being crammed into sidebars or footers. Place them inside paragraphs that discuss related topics, tools, or strategies..
You can also boost conversions by updating old posts. For example, add a quick note like, “Updated for 2025 — here are my go-to tools for creators this year,” and include your affiliate links.
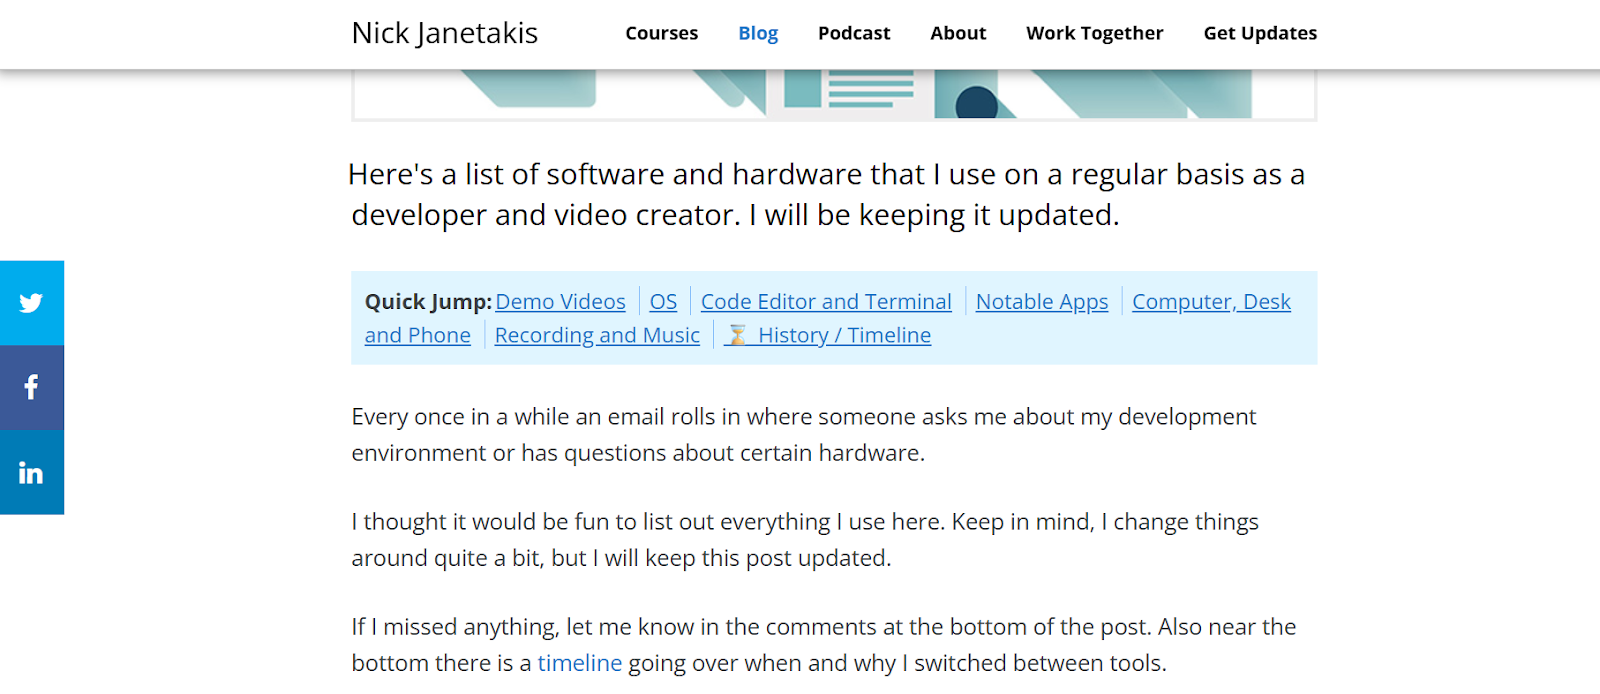
This way, you earn from content you’ve already written while keeping it fresh and useful for readers.
Guest posting is a great way to reach new audiences without paid ads.
Writing for established blogs in your niche lets you showcase your expertise and subtly promote affiliate products. This could either be through direct links or by linking back to your own content with affiliate recommendations.
Publishing content on platforms like YouTube and Medium is one of the best ways to grow your reach without ads. Tutorials, case studies, and in-depth articles with affiliate links attract high-intent audiences actively looking for solutions. Video proof also boosts credibility and conversions since people can see real results.
Listing affiliate products on general marketplaces like Facebook Marketplace isn’t ideal; it can violate their affiliate program policies. Instead, showcase your offers on your own landing page or link-in-bio setup.
Platforms like Mainstack make this easy by letting you organise products, track clicks, and automate promotions while staying compliant. This keeps your setup transparent, policy-safe, and professional — all in one place
A sustainable affiliate strategy starts with offering something free that leads naturally to a paid upgrade. This could be a freemium tool, a limited-access mini course, or a downloadable template with advanced versions behind a paywall.
When the free version delivers enough value, people are more likely to explore the premium option, and if that upgrade includes affiliate products or tools, conversions happen organically.
This works because the audience has already seen value before being asked to buy. It’s a low-pressure way to build trust, nurture interest, and gradually convert free users into paying customers.
Many affiliates hold themselves back with habits that hurt trust and credibility. The goal isn’t simply to “promote” a product; to show genuine value and earn attention. When that balance is off, sales drop. Here are common mistakes
Affiliate marketing works best when it’s grounded in strategy, authenticity, and consistent effort. By applying the methods outlined in this affiliate marketing playbook, you can turn your promotions into steady income streams.
If you want to get started with affiliate marketing, you can sign up on Mainstack at zero cost to launch and manage your offers easily.
.png)


Since affiliate marketing became popular, several Nigerians have adopted it as a way to make an income online. With so much opportunity in this industry, it’s no surprise that dozens of affiliate marketing platforms have popped up, with each promising several benefits.
But here’s the truth:
Choosing the right affiliate marketing platform in Nigeria is confusing. It’s also where most people get stuck. Some platforms exaggerate earnings. Others have poor product quality or delayed payment. And wasting time on testing the wrong affiliate platform can slow down your entire journey.
This article solves that problem. We reviewed and ranked the 9 best affiliate marketing platforms in Nigeria for 2025 based on trust, commission rates, product quality, payout speed, and ease of use.
Affiliate marketing is a performance-based business online where you earn a commission every time a customer buys a product (or service) through your link.
It’s as simple as, you find existing products (or service), promote it to an audience, and get paid for every successful sale you influence.
An affiliate platform is a marketplace that connects people (sometimes called merchants) with existing products (or service) and affiliates who can promote the product. The platform acts as a middle man and provides everything both sides need including unique affiliate links, tracking tools, dashboard to monitor everything and payout details.
To find the best affiliate platforms, it helps to know what to look for. A good affiliate program typically includes:
Affiliate programs work in a pretty simple way. You sign up on the website as an affiliate, and get access to a marketplace of products to promote. Take note that some platforms are free while others might require a small fee, but once you’re in, you get access to the dashboard.
Inside the dashboard, you’ll get access to a list of products, which are often grouped by categories. When you find a product that matches your niche and commission requirements, the platform generates a special tracking link for you to start promoting the product.
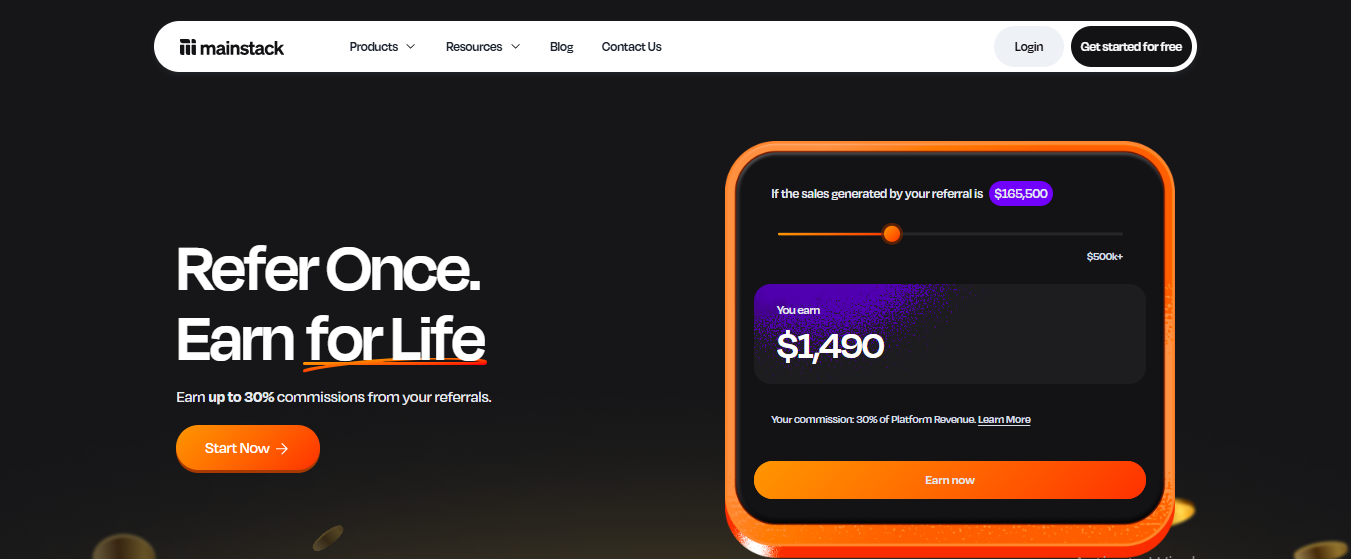
Mainstack’s affiliate marketplace is a popular affiliate marketing platform with thousands of affiliates and a wide range of digital products available for promotion. It’s built on Mainstack’s powerful e-commerce tools.
Mainstack is tailored to serve a global market. This means anyone, anywhere, can register on the platform without worrying about currency barriers or payout restrictions.
Creating a Mainstack account and joining the marketplace as an affiliate is completely free. There’s no restrictions, and you can set up your affiliate account in less than 10-minutes. Unlike traditional affiliate programs that only gives you links, Mainstack affiliates get full access to the entire Mainstack toolset, including analytics, product pages, checkout tools etc.
On the platform, you get access to primarily digital products in different niches, including courses, coaching programs, event tickets etc, in different niches. Commissions are set by the merchant (and not the platform) and affiliates can see commissions before choosing the product.
Affiliate platform features
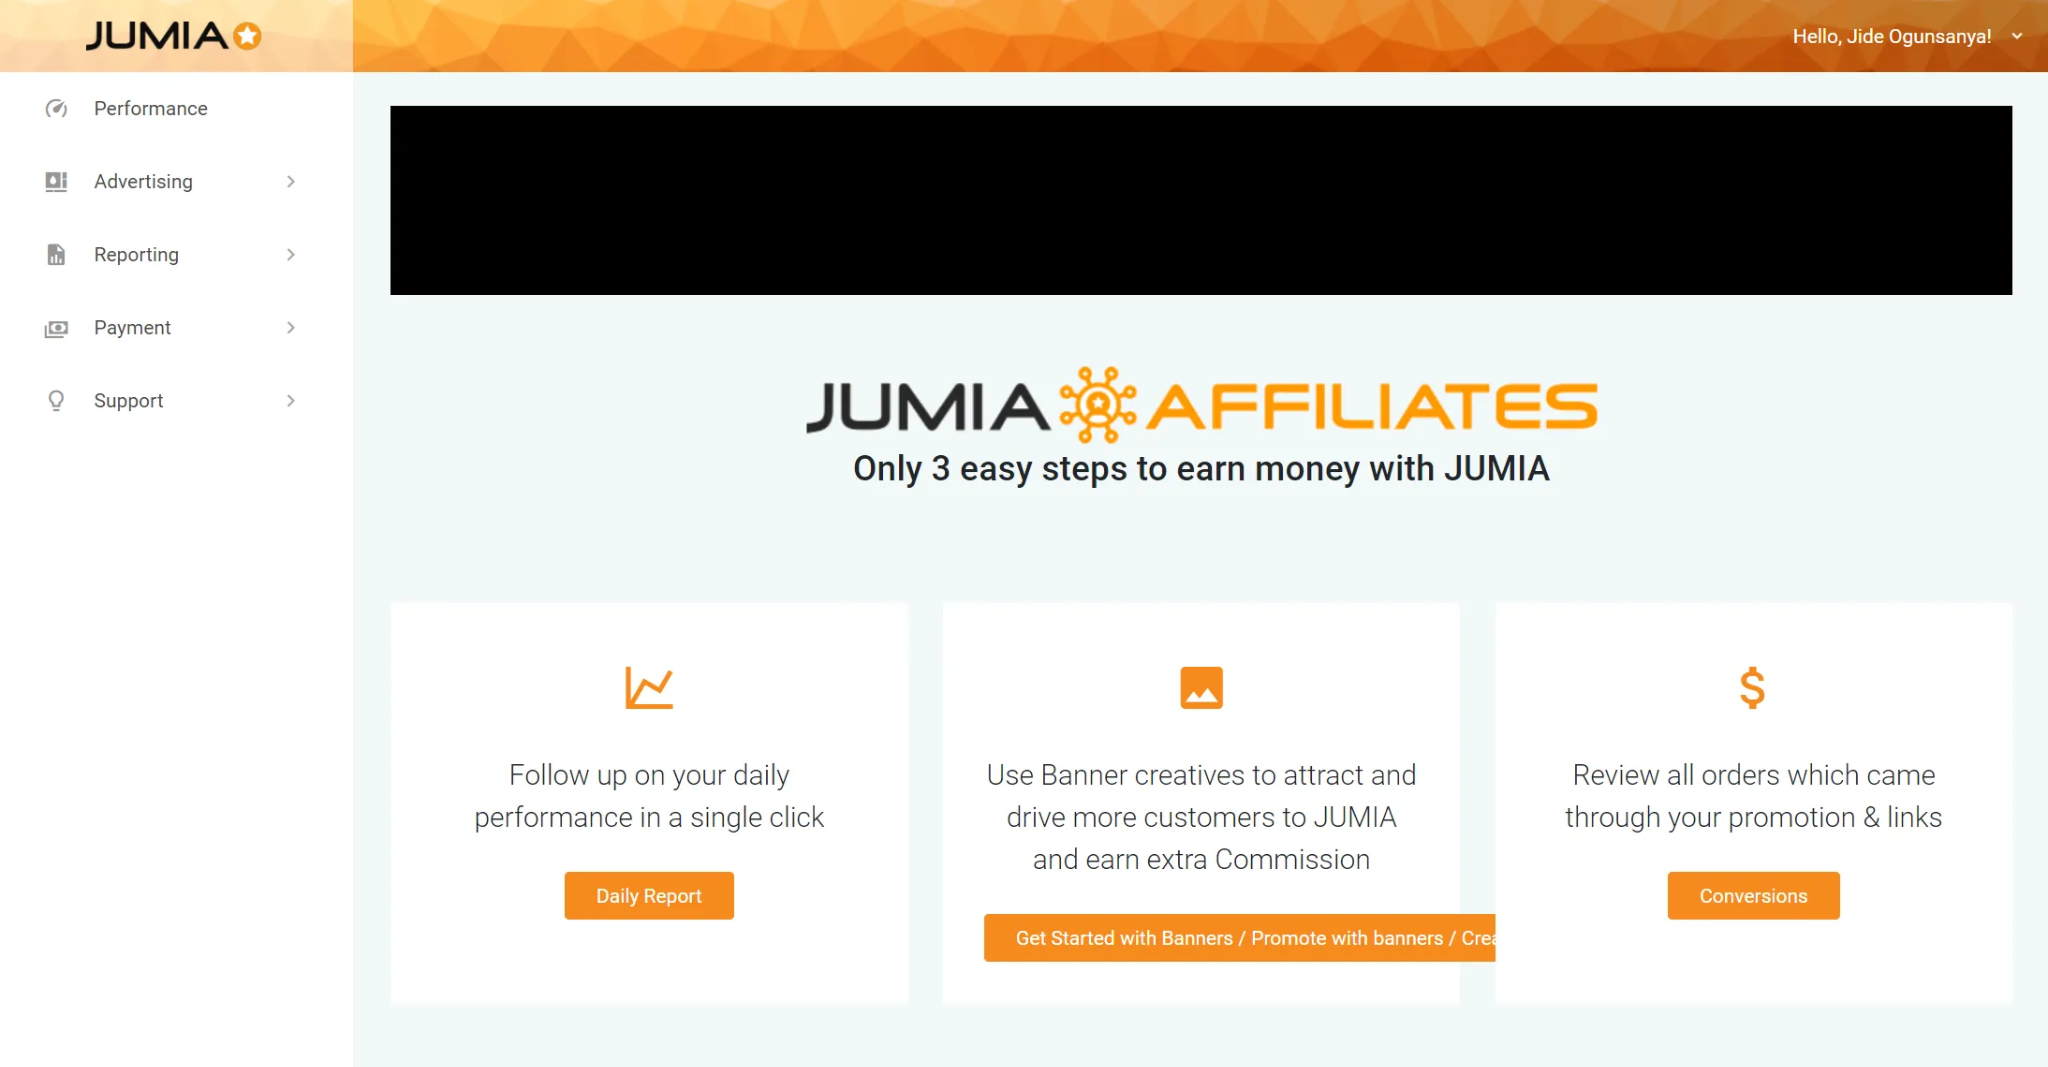
Jumia’s affiliate program gives you a chance to earn commissions by promoting e-commerce products. This ranges from electronics, fashion and even household items that can be found on Jumia.
The product variety and market is one of the best features of the Jumia affiliate market place. That, plus, there’s a wide audience across Africa, which means affiliates have little restrictions even when promoting physical products.
Signing up for the Jumia Affiliate Program is free. There is no entry fee, and registration can be done directly, usually via their affiliate/KOL registration portal. Once approved, you receive unique affiliate links and access to promotional materials (banners, text links, etc.) to start promoting your offer.
Payment commission on Jumia varies by category, by can be up to 11%. For example, electronics may have lower percentages, while fashion or other niches may offer higher.
Affiliate platform features
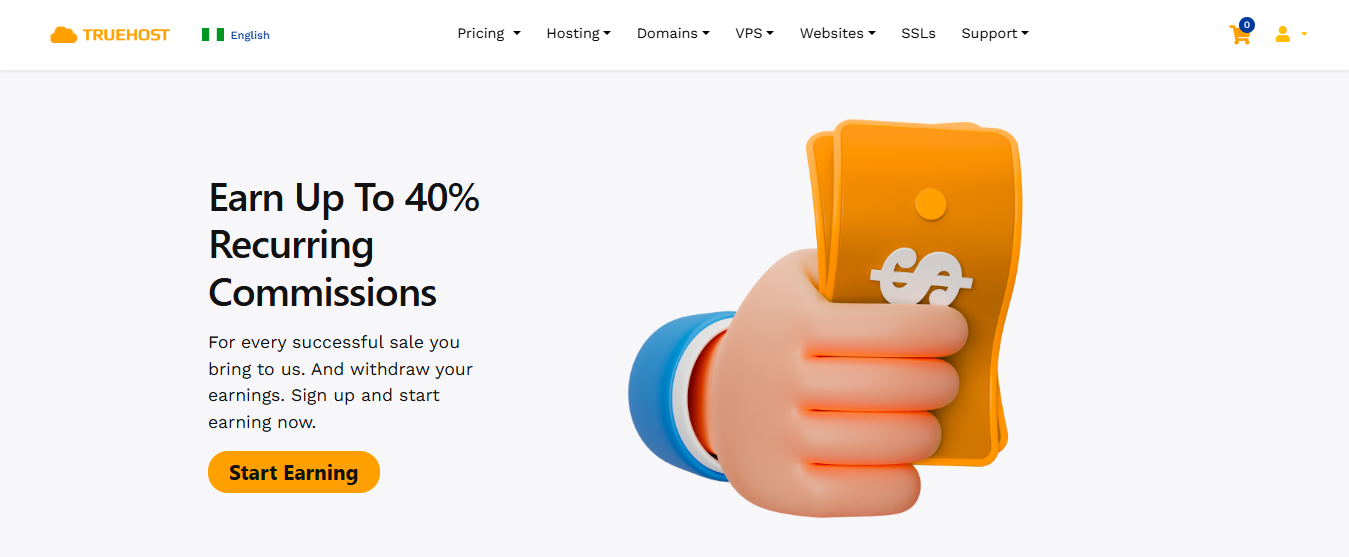
Truehost Cloud is a regional hosting provider that provides web hosting with dedicated servers to clients in Nigeria and Africa. The affiliate program allows you to earn commissions by promoting web hosting and domain registration services. This includes hosting packages, domain names, SSL certificates, and other web services offered on Truehost Cloud.
Signing up for the Truehost Cloud Affiliate Program is free. There is no entry fee, and once approved, affiliates receive unique referral links and access to promotional materials like banners, text links, and landing pages to start promoting immediately.
Commission rates on Truehost Cloud are competitive, usually ranging between 20% to 50% per sale, depending on the product and package sold. Affiliates earn on both one-time purchases and recurring hosting subscriptions, giving an opportunity for ongoing income.
Affiliate platform features
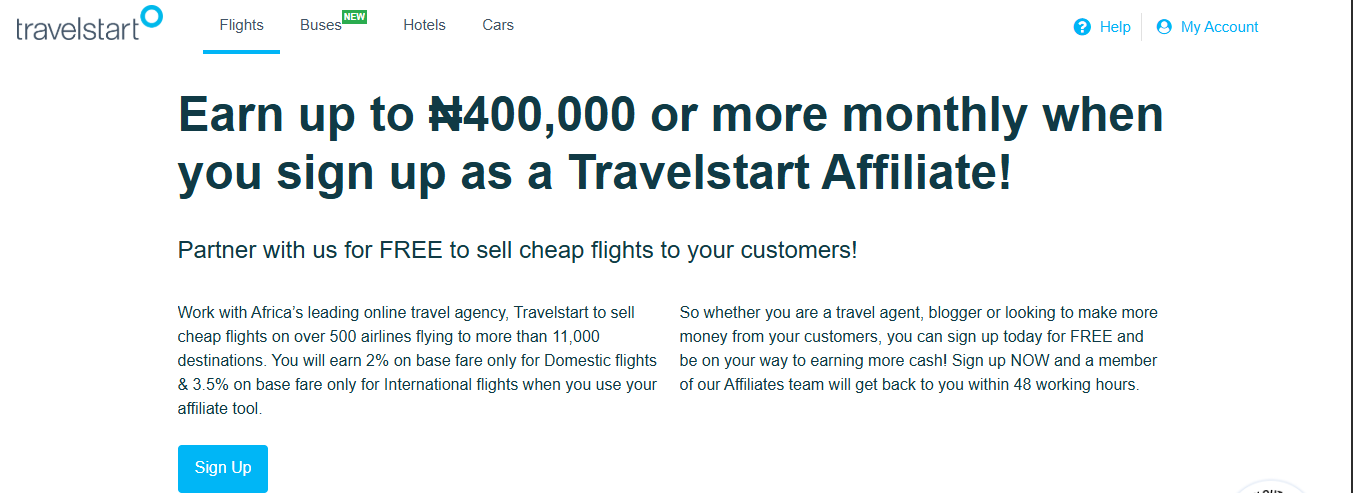
If you’re in the travel space, then Travelstart is a great way to earn extra income as an affiliate.
Travelstart’s affiliate program allows you to earn commissions by promoting flights, hotels, and travel packages across Africa and beyond. Affiliates can earn by referring customers who book flights, hotels, or complete travel deals through Travelstart’s platform. The product variety and market is one of the standout features of Travelstart’s affiliate program.
Signing up for the Travelstart Affiliate Program is free. There is no entry fee, and once approved, affiliates receive unique referral links and access to promotional tools such as banners, text links, and landing pages to help start promoting right away.
Commission rates on Travelstart vary depending on the service promoted. For example, flights may have different commission rates compared to hotel bookings. Rates are generally competitive within the travel affiliate space, allowing affiliates to earn recurring or one-time commissions depending on the customer’s booking behavior.
Affiliate platform features

Oraimo is a brand known for mobile accessories and smart electronics like power banks, earbuds, fast chargers, and smart accessories. In Nigeria and several other countries they run an affiliate system called the Commission Affiliate Program and also a Points Affiliate Program.
The commission affiliate program offers cash benefits to marketers who share their unique affiliate link online as well as recruit other affiliate marketers with cash rewards. The points affiliate program however, rewards the marketers with points that can be used to get discounts on purchases made via the Oraimo shop.
Affiliate platform features
Konga is another leading Nigerian marketplace and remains widely used. Their platform offers a wide range of products with a catalog that covers many categories.
The Konga affiliate program supports affiliates with product links, banners, and commission reports. In recent times, Konga has continued to refine its offering to be competitive with other retailers. Affiliates who already write product reviews, run comparison sites, or manage coupon communities will find this program useful. Strong local logistics and product choices. Works well for price comparison and product review sites.
Affiliate platform features
Shopify is one of the world’s most popular e-commerce platforms, trusted by millions of entrepreneurs, creators and businesses to build, manage and scale online stores. It provides an all-in-one system for selling products, managing inventory, processing payments and marketing to customers globally.
Affiliates earn commissions on the platform by referring new merchants to Shopify through unique referral links. The platform also equips affiliates to tracking dashboards, promotional materials, and dedicated affiliate support to help improve performance.
Affiliate Platform Features
Bet9ja is Nigeria’s major sports betting company that includes an affiliate program where you get a commission from referring players.
You will receive commission based on player activity (stakes, net revenue) via your affiliate/referral link.The commission rate can be up to 20% (depending on your referral activity / traffic). The platform offers the provision of marketing tools such as banners, tracking links, affiliate dashboard.
Affiliate platform features
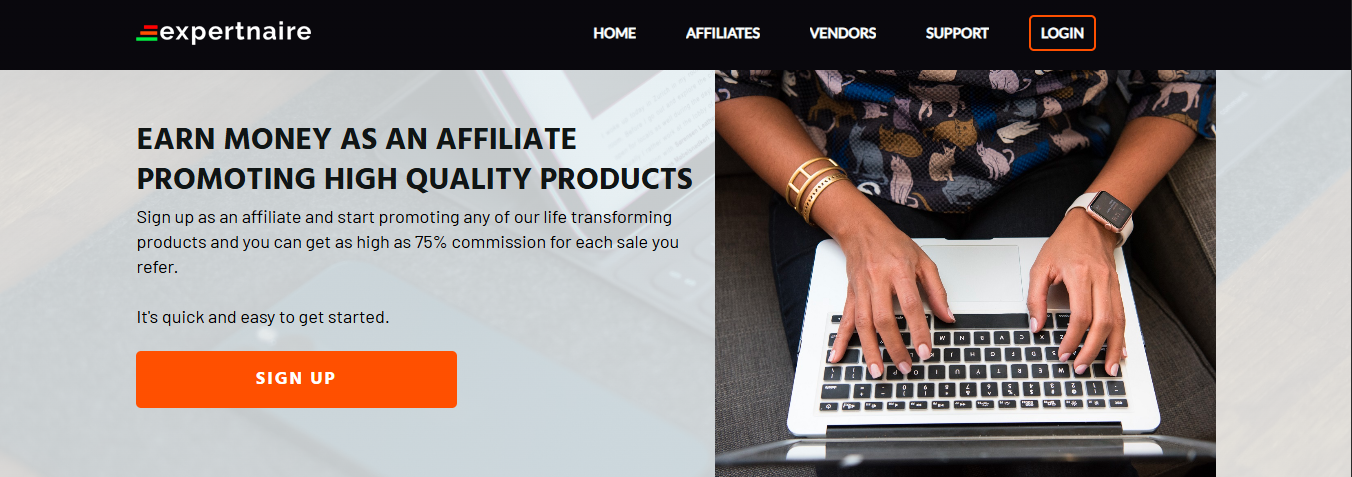
Source: Expertnaire
Expertnaire is a marketplace for digital courses, bootcamps, and information products which are created by vendors and made available for sale through their platform.
Their affiliate program however comes with a catch, to sign up, a prospective affiliate marketer needs to pay a sum of #10,000 naira every year as a sign–up fee. But their commission rates are generous and can go as high up as 75% and their platform is optimized for local payments and conversions.
Affiliate platform features
The Affiliate marketing industry in Nigeria rewards focus and relevance which is why in order to get meaningful results, you need to be consistent. Keep up with the latest trends in the affiliate environment and choose a platform that fits your content style. Promote products you genuinely believe in, and track your performance to see what works. Every click and conversion comes easier when your recommendations feel authentic.
If you want to get started promoting Affiliate products, register on Mainstack's Affiliate marketplace to start promoting your product.


If you’ve ever downloaded a free guide, checklist, or e-book from a business, you’ve experienced a digital product used as a lead magnet. A digital product is any non-physical resource like templates, courses, or toolkits, that can be created once and shared endlessly online.
In marketing, a digital product can be used as a lead magnet and offered to potential customers to turn them into leads. By giving away something valuable, you draw people to your business, build trust, and position yourself as an authority in your field.
In this article, we’ll cover proven strategies, tools, and examples to help you create digital products that generate leads and grow your audience.
If you're wondering how to create a digital product, here's a guide on how to turn your own skills into a digital product.
Digital products work great for lead generation because they help to build trust with the audience. When you give them something that’s helpful for free, they are bound to always come back for more, especially if your resources were beneficial to them.
Here are digital products that you can use for lead generation:
Ebooks and guides give your audience an in-depth look at topics they care about while building your credibility. For example, a cookbook of easy recipes for single men delivers practical value while positioning you as an authority.
Brands like Hubspot use Ebooks as a lead magnet to capture email addresses, build its subscriber base, and nurture potential customers as they move through the sales funnel.
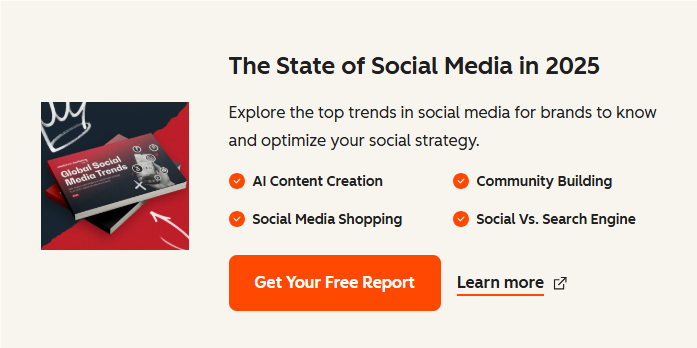
These are practical tools potential customers can use immediately. They tend to convert well because they offer immediate value and convert well .For example, a design template for graphic designers offers instant utility.
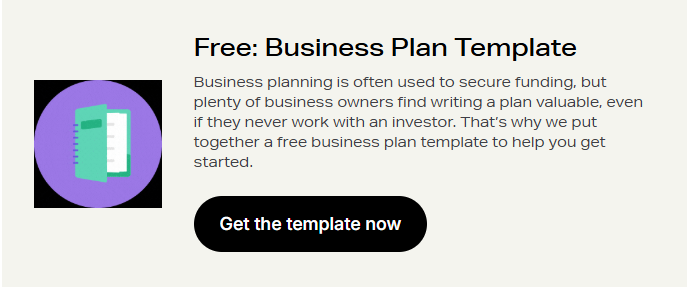
Shopify offers a free Business Plan Template to help new entrepreneurs get started. The value is clear: solve a common problem and, in return, they capture leads through sign-ups.
These are live or recorded sessions you can hold to share your knowledge on what you know. By doing this, you are setting yourself as an expert in your field and signaling to your potential customers you have more knowledge to share.
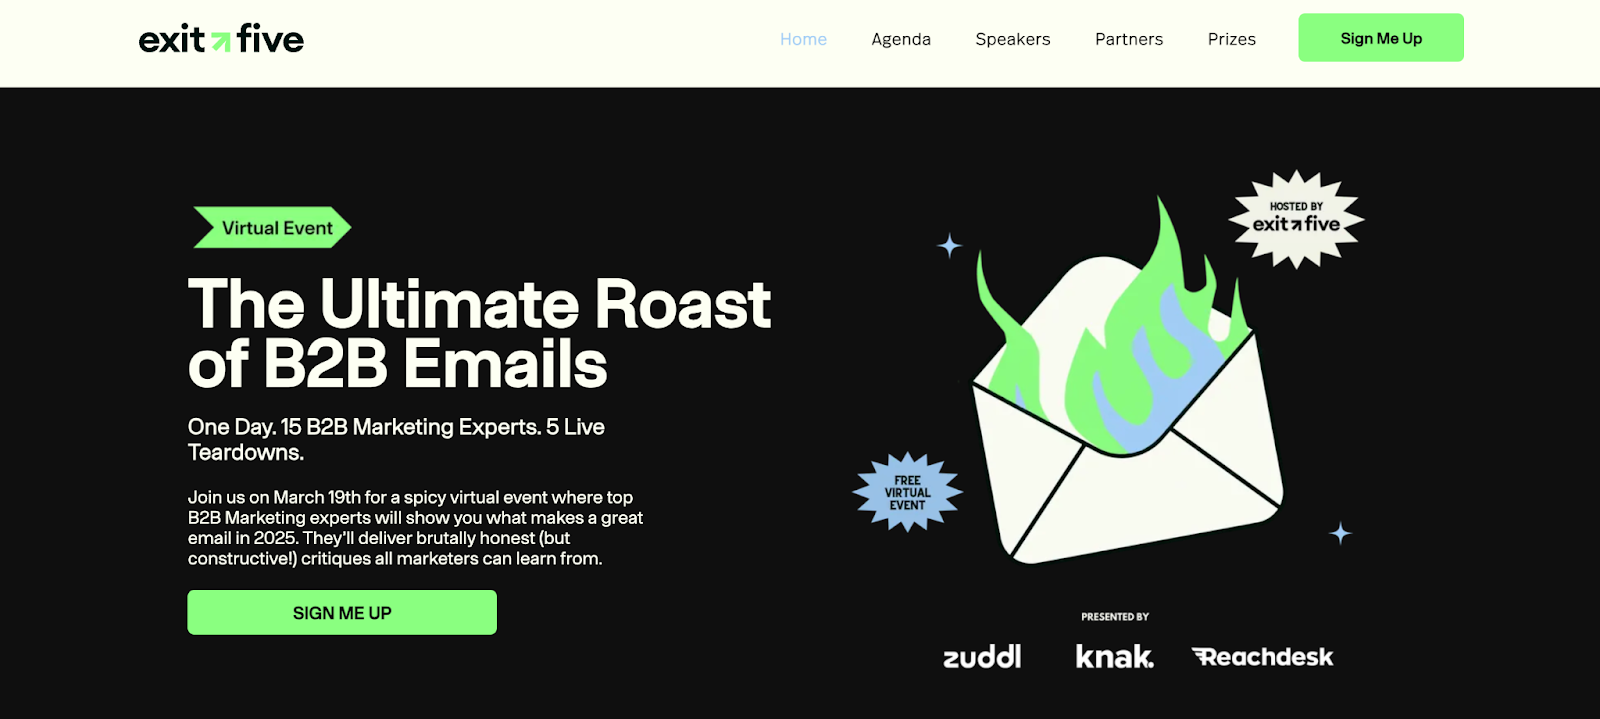
Exit Five, for example, uses virtual events as lead magnets for potential customers. They deliver clear value and use urgency to encourage sign-ups. This results in more leads captured and stronger authority with their audience.
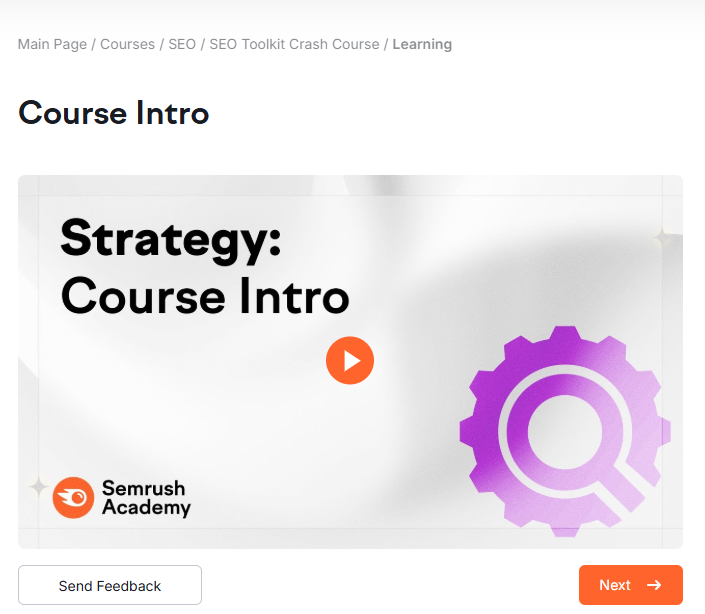
Short courses delivered via email or video help people solve a problem in several steps.
Semrush offers free mini-courses like its SEO Toolkit Crash Course to attract and educate marketers. These short lessons provide quick wins, build trust, and introduce users to Semrush’s tools, which makes them an effective lead magnet
If you have a software product, a trial gives people direct experience. If you don’t, sample lessons (for courses) or partial templates work.
Also note that each type of digital product serves different parts of the lead generation funnel. For example, checklists or templates are great for bringing awareness while webinars or mini courses are stronger for consideration and nurturing.
Take these following steps in creating your digital product for lead generation
The first step to creating a digital product is defining your target audience. Ask yourself: Who are they? What do they need? What problems are they finding difficult and how can you help them to solve those problems?
In order to execute this, you need to research your audience to find out what it is they are looking for. To make your work more efficient, there are a number of tools you can use to research on your target audience and their problems:
Google Analytics: This is a free tool that offers more insights into ongoing trends and searches based on website traffic, user behaviour and demographics
AnswerThePublic: This tool helps you to find out questions people often ask concerning a topic. This can be used when looking for content ideas to create to draw your target audience to your product.
BuzzSumo: BuzzSumo's research and analysis tool offers advanced content insights, trending topic identification, social mention monitoring, and content engagement measurement.
After identifying those problems, research their challenges and needs. For example: If your audience are beginners in graphic design, their pain point would probably be trying to understand the ”Basics of Graphic Design”
Next, match the product type to each stage in your customer’s journey:
Define what value your product has to offer to your audience. By now, you understand your audience and their painpoint. Next step is defining how you want your product to stand out. Answer the question: “What problem does this solve?” Keep it specific and actionable so it’s not too broad or vague to confuse your audience. An example would be naming your design guide” Principles of Graphic design” instead of “A Beginner’s Guide to Graphic design”
Once your value prop is defined, the next step is to create a copy for the digital product. Start with an outline to understand what you’re writing. Ensure the copy written is helpful, insightful and easy to understand.
Remember to use a compelling title and a clear call-to-action (CTA). Make titles benefit-driven (e.g., “The Ultimate Checklist to Double Your Leads in 30 Days”) and a strong CTA on landing page and promotions (e.g., “Get Instant Access,” “Download Free Today”)
Once the writing is complete, design around the copy. Keep content visually appealing, since strong design helps convert customers. Use tools like Canva, Figma, or Google Docs to create polished assets.
Once your digital product is complete, the next step is promoting what you have. From your research, you should have an idea of where your audience hangs out and how to reach them.
Like Hubspot, you could place the digital product on your blog page or Homepage to collect emails from leads organically. Or you could also run paid ads on social media to drive more attention and reach a bigger audience.

To place and store your products digitally, you can make use of all-in-one tools such as Mainstack. It allows its users to create storefronts to sell digital products to their customers, a link-in-bio feature that allows intrigued customers to find all links in one place and an email marketing tool to automate delivery to clients who request for their products.
Attracting a new lead is just the beginning of the relationship. To turn that interest into revenue, you need to nurture and guide prospects toward a purchase. The most effective way to do this is through automated follow-up email sequences.
For example, if someone downloads a Social media growth guide, they should receive a tailored series of emails with tips, case studies, and free insights on social media growth before being introduced to a paid service or course.
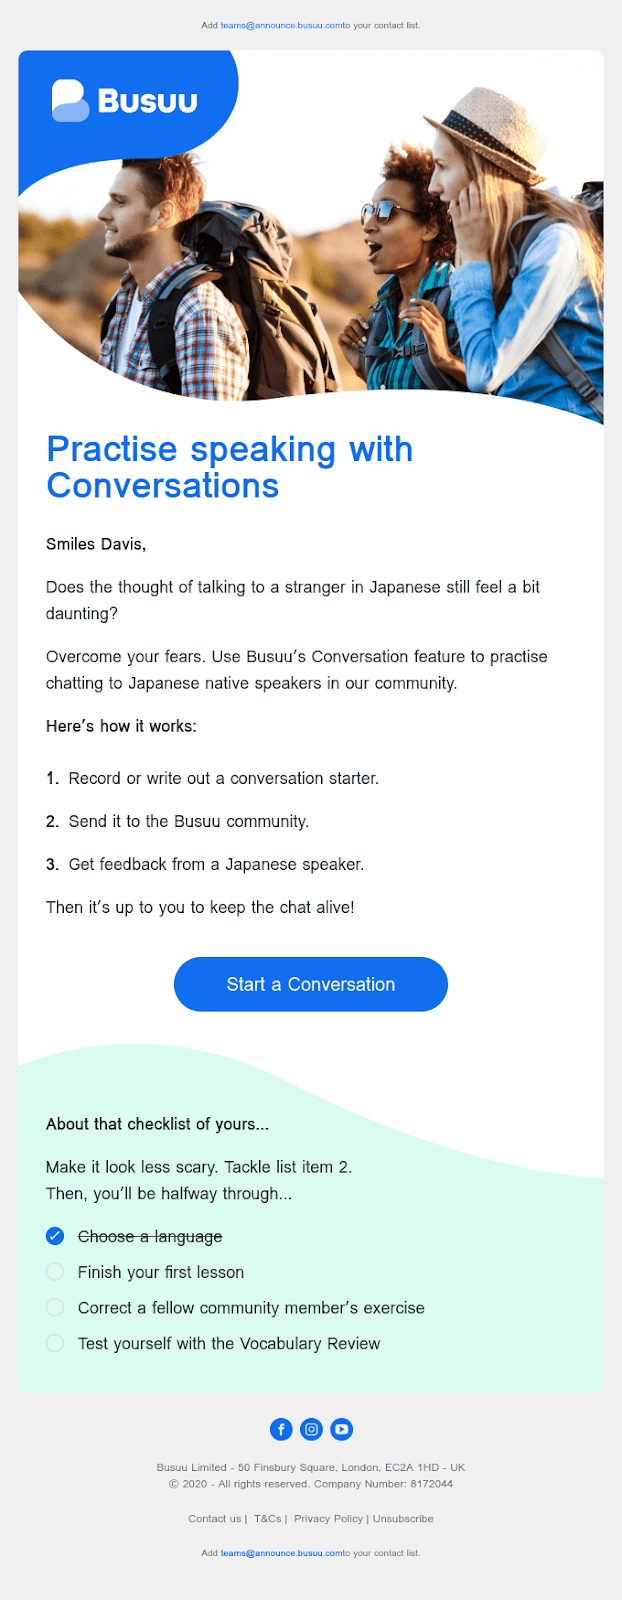
Use lead nurturing emails to share testimonials, educate prospects or announce new products or features. Here's an example of an educational lead nurturing email from Busuu.
Creating your digital product is one part of the equation, but you also need to ensure they drive high-quality leads and that requires a strategy. Here are some proven best practices:
Even with the best intentions, creators often stumble when building lead generation funnels. To stay on the right track, you need to avoid:
To get results, identify your target audience, match them with the right product, design it well, promote it, and follow up consistently. This is how you attract quality leads. You need to also remember to be patient with the process, not everyone will convert immediately and that’s okay. By staying consistent and providing real value, you build trust, and your audience becomes far more likely to invest in your premium products. Follow this guide to know how to price your digital products.
.png)


Selling products online is more competitive than ever, and Facebook remains one of the most effective platforms to reach your audience. With billions of active users and advanced targeting options, Facebook ads enable creators, entrepreneurs, and businesses to showcase their business offerings directly to the people most likely to buy.
While scrolling through Facebook or Instagram, you’ve probably noticed ads popping up between posts, Stories, or Reels. But those aren’t random; they’re targeted campaigns businesses use to reach people just like you. And the reason they’re everywhere is simple: Facebook ads improve reach.
Facebook, through the Meta Ads Manager, gives businesses of all sizes the ability to target the right audience with precision. Whether you aim to drive traffic, boost sales, or generate leads, you can create a campaign tailored to your specific goals.
This step-by-step guide will walk you through exactly how to run Facebook ads in 2025, from setup to monitoring, so you can launch campaigns that convert.
Facebook ads are paid promotions that businesses create to reach specific audiences across Facebook, Instagram, Messenger, and the Audience Network— Meta’s group of partner apps and websites. This means your ads aren’t limited to Meta platforms alone; they can also appear in mobile apps or news sites outside of Facebook that are part of Meta’s advertising network.
Unlike regular posts, which only reach your followers (and maybe a few friends through shares), ads are designed to target people based on their demographics, interests, and behavior, giving you a much wider and more precise reach.
It’s important to understand the difference between a boosted post and a full Facebook ad campaign, because while they may look similar, they serve very different purposes:
This is achieved when you take an existing post from your page and pay Meta to show it to a larger audience. It’s a quick and simple way to increase visibility, but it offers limited control over who sees the post, where it appears, and what specific outcome you’re optimizing for.
This gives you full control over your advertising strategy. With a Facebook ad campaign, you can choose exactly what you want to achieve (like driving sales, getting leads, or boosting website traffic), define your audience in detail, set your budget and schedule, decide where your ads will appear, and even test multiple versions of the same ad to see which performs best. This flexibility makes Ads Manager the recommended option for running serious, goal-driven campaigns.
Ultimately, whether you’re running a single ad or a full campaign, everything is managed through Meta Ads Manager, the centralized hub where all ads are created, managed, and optimized. It’s also a tool you’ll need to master to get consistent results. Now that you know what Facebook ads are, it’s important to understand why they are powerful tools for growing your business.
Advertising on Facebook offers clear advantages for businesses of any size, and three of the most important are:
Getting started with Facebook ads might feel overwhelming at first, but Meta Ads Manager makes the process a lot more structured. By following a step-by-step approach, you can go from setting up your account to launching your first ad without missing anything important. Here’s a simple breakdown of how to run ads on Facebook.
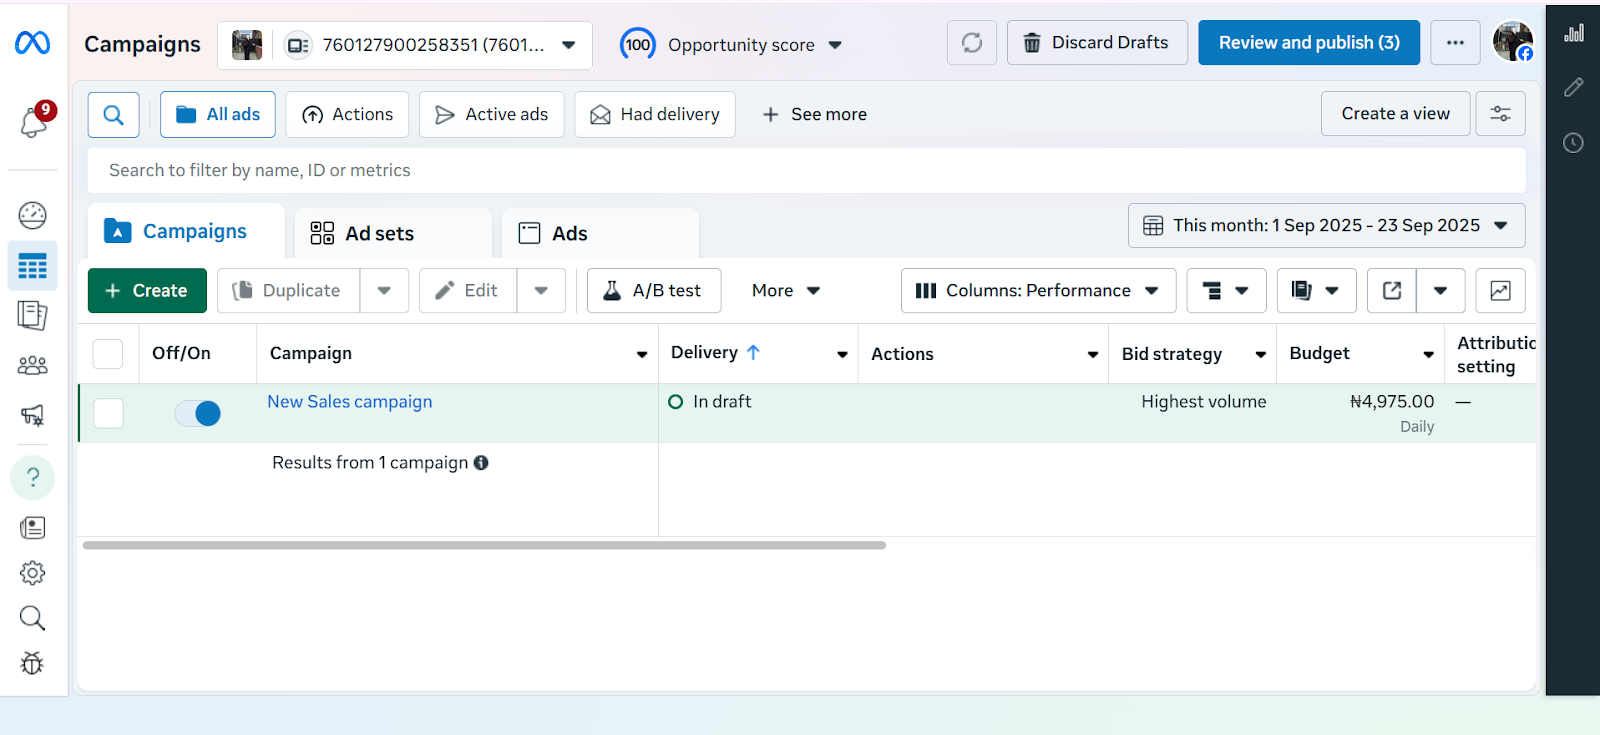
Before you can create digital product ads, you need the right setup.
1. Create a Meta Business Manager Account
2. Create a Facebook Business Page
Ads cannot be run from personal profiles. You’ll need a business page.
3. Add Payment Information
Once your foundation is ready, it’s time to build your campaign.
1. Go to Ads Manager
2. Click “+ Create”
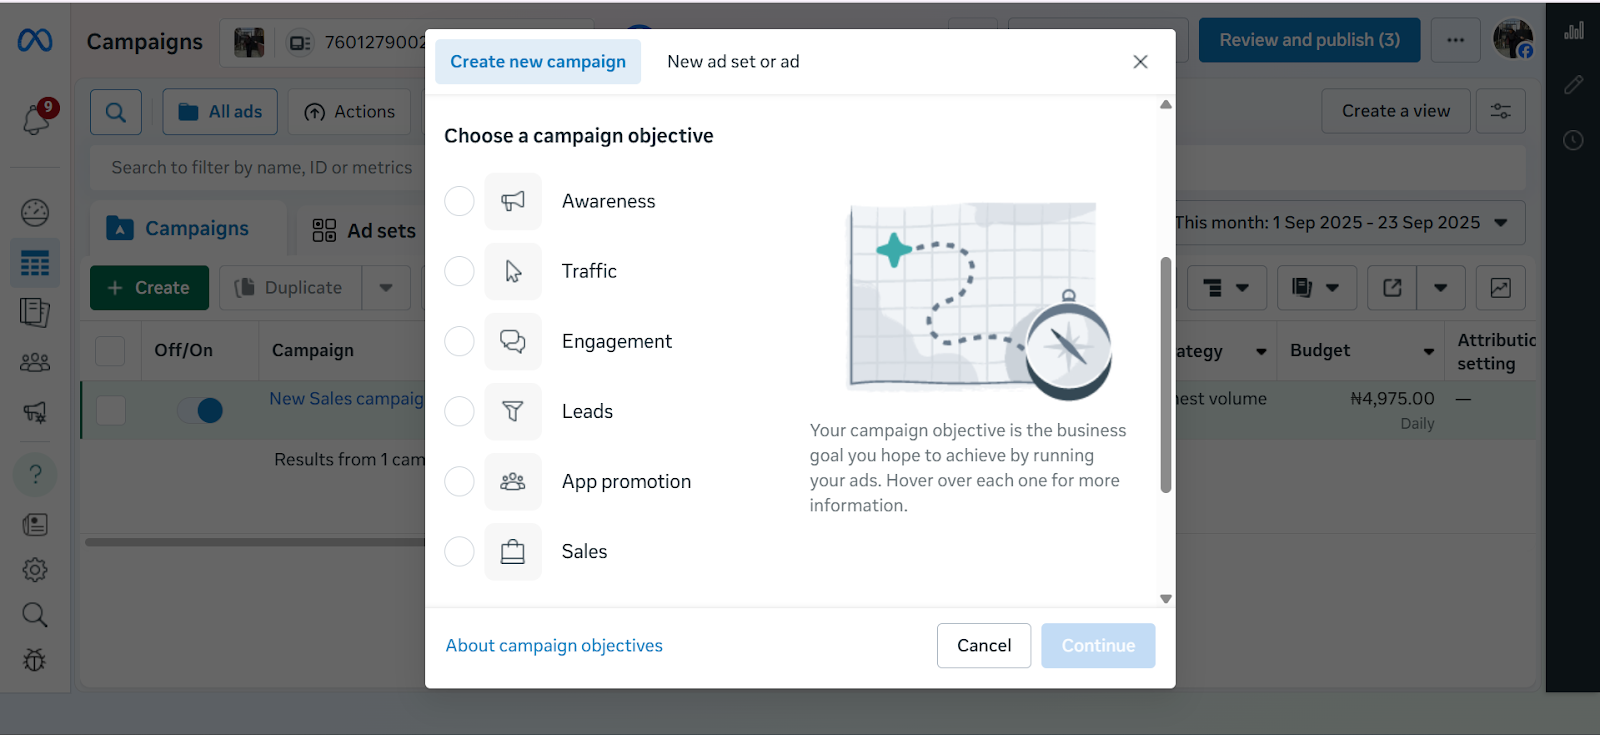
When creating a campaign in Meta Ads Manager, the first step is choosing your advertising objective which is the main thing you want your ad to achieve. Meta currently offers six objectives:
Awareness – Best for getting your brand in front of as many people as possible. Useful if you’re just starting out or launching something new.
Traffic – Drives people to a website, landing page, or app. Helpful if you want more visits to your online store or product page.
Engagement – Encourages actions like likes, comments, shares, or event responses, making it easier to build a community around your brand.
Leads – Collects contact details (like emails or phone numbers) directly through Facebook forms or your own landing page.
App Promotion – Helps you get more people to download or use your mobile app.
Sales – Optimises your ads to drive actual purchases, either on your website, in your app, or directly through Facebook and Instagram Shops. Meta does this by showing your ads to people most likely to buy based on their past activity, e.g., clicking “add to cart” or completing a purchase. You can also connect your product catalogue so your ads automatically display items in stock, making it easier for customers to shop directly.
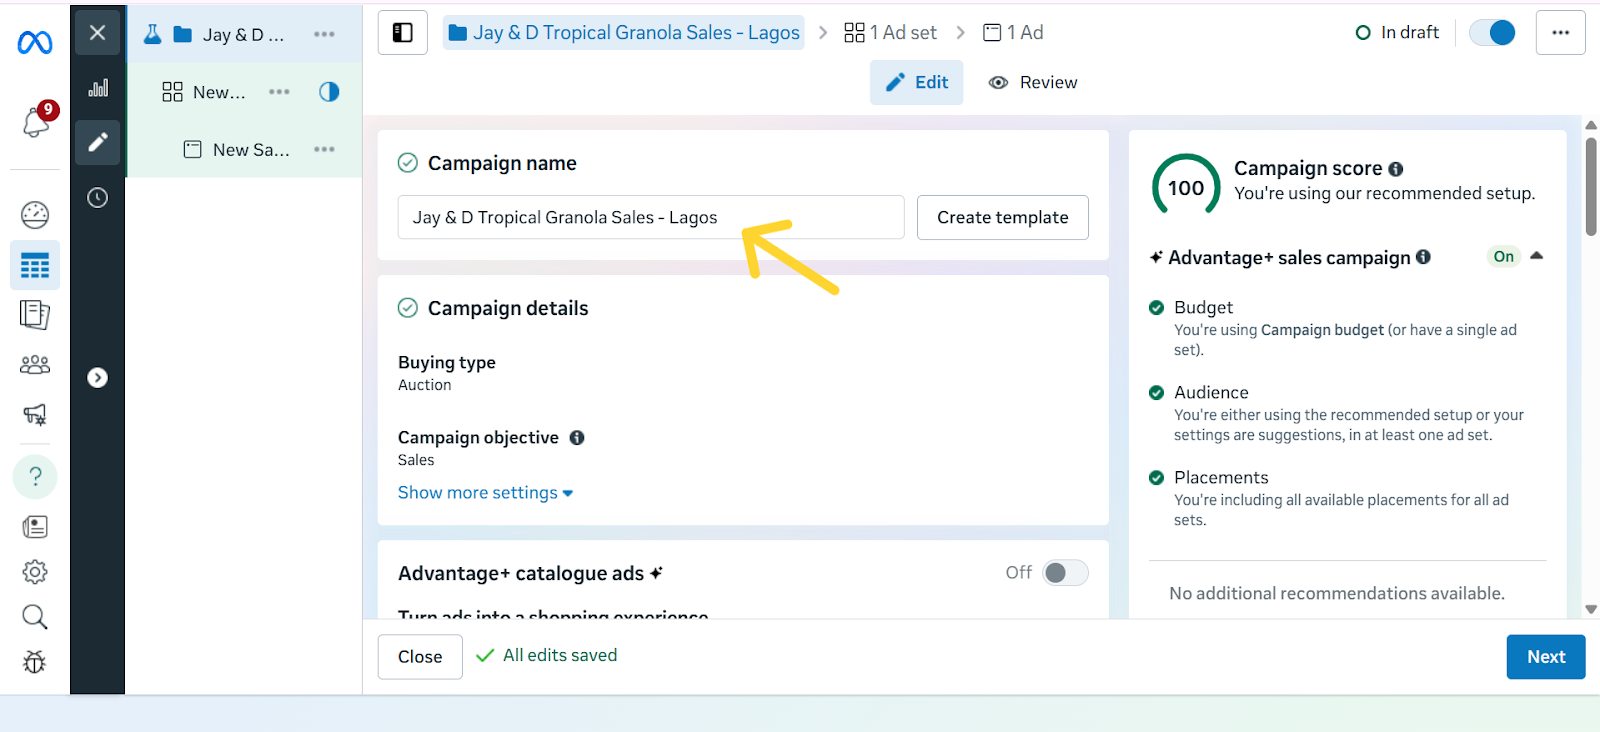
Give your campaign a clear, descriptive name so you can easily identify it later. A good rule of thumb is to include the product, audience, and goal in the name. For example: “Tropical Granola – Abuja – Traffic” or “Ebook Launch – US – Sales.” This makes it easier to stay organised, especially once you start running multiple campaigns at the same time.
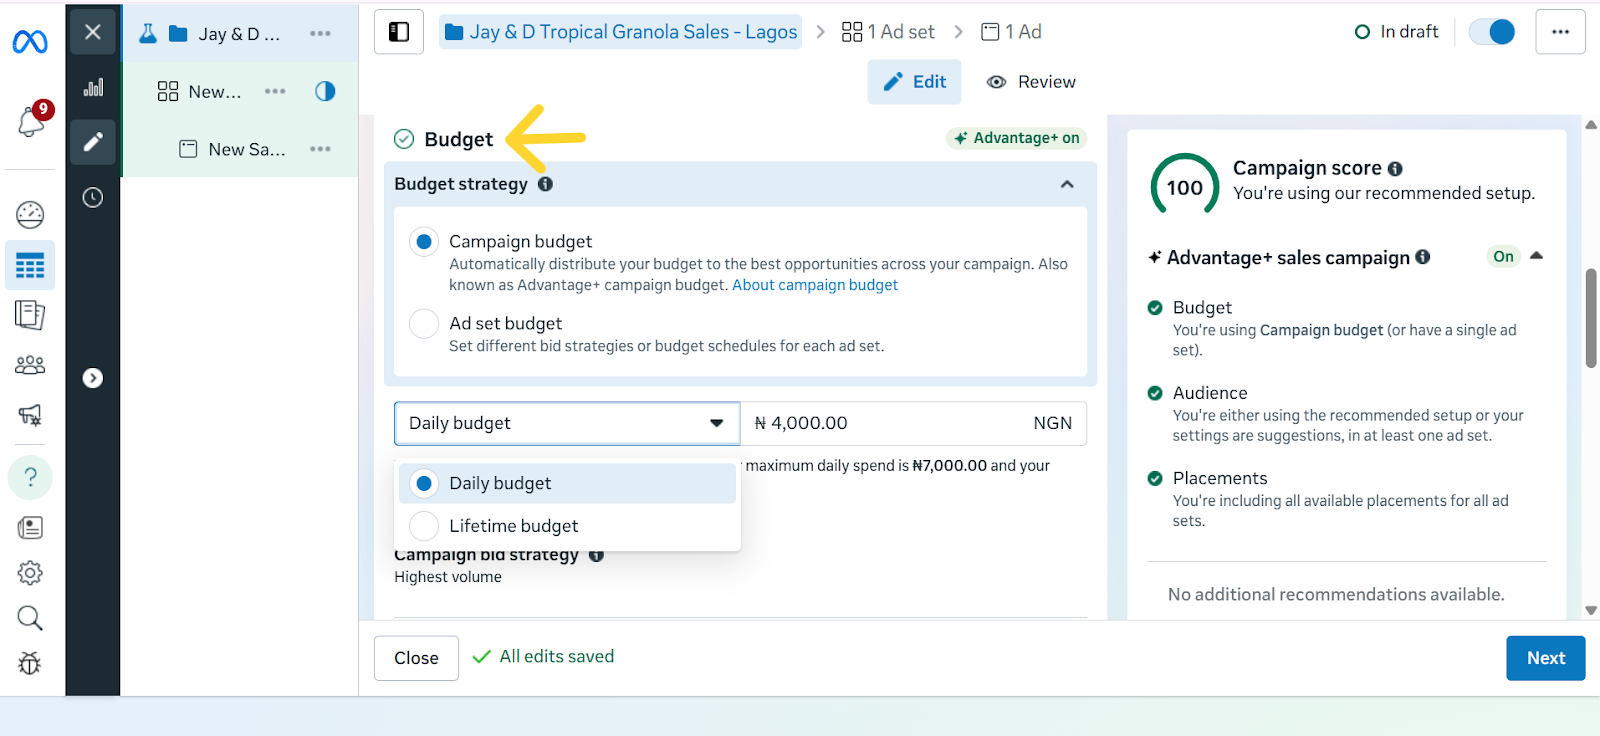
Your budget decides how much you want to spend on your ads, while your schedule controls when your ads run. In Meta Ads Manager, you’ll see two main types of budgets:
Pro-tips for Cost Control:
This way, Meta runs your ads but won’t go beyond the budget you’ve set for each result, helping you stay in control of your spending.
The caveat here, however, is that if your target cost is set unrealistically low, Meta may struggle to deliver your ads, or you may get fewer results. So it’s best used when you already have some data on what a “reasonable” cost per result looks like for your business.
Note: This works best if you’ve set up the Meta Pixel or Conversions API so Meta can track actual purchases.
Together, these options help you avoid overspending and make sure your money is going toward results that matter most to your business.
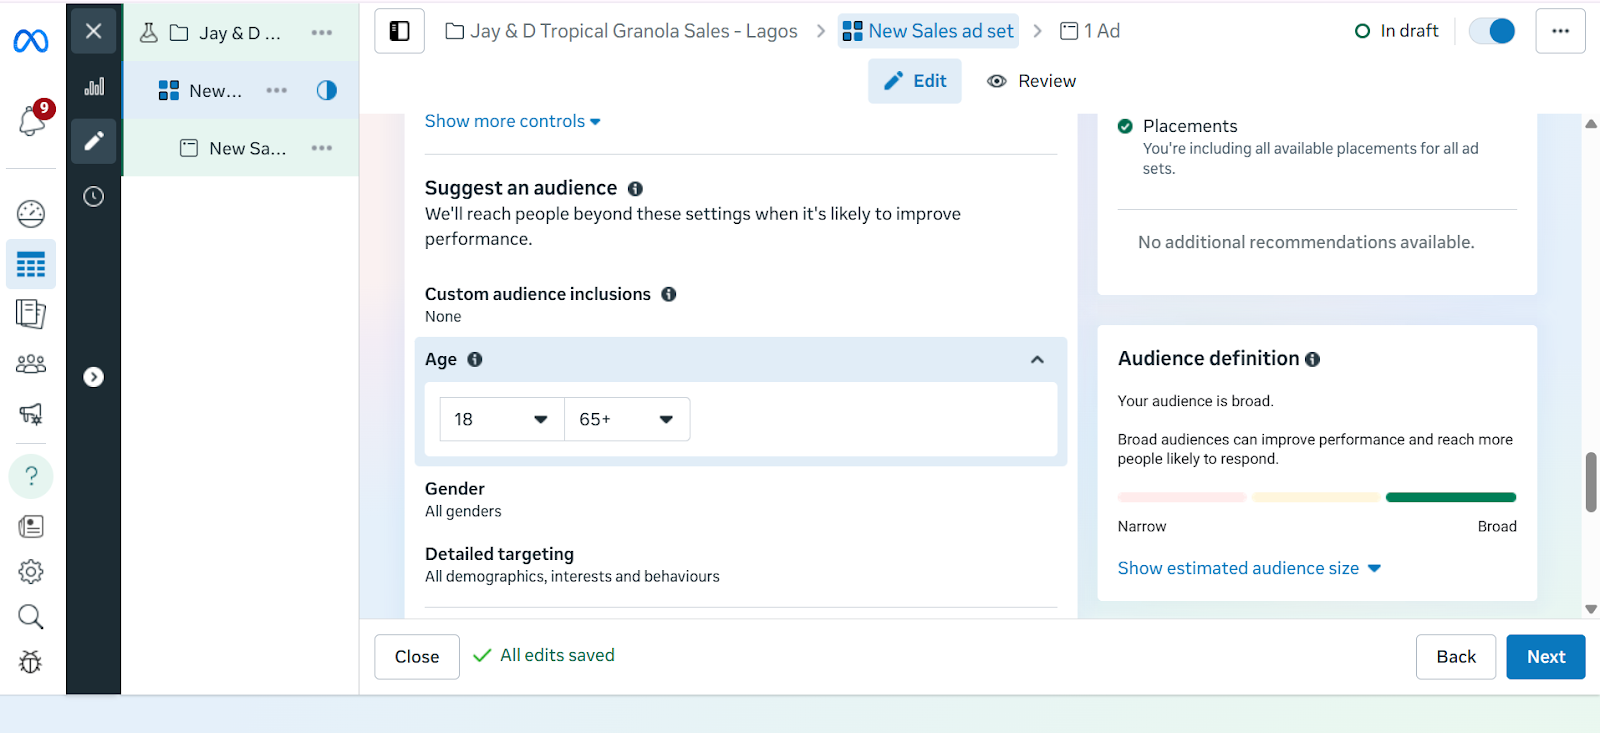
This is where you tell Meta exactly who should see your ads. Instead of showing your ad to everyone, you can narrow it down to people who are most likely to buy from you.
With Meta Ads Manager, you have three main options:
While targeting with Meta Ads Manager makes it easier to reach the right people, recent privacy changes, especially Apple’s iOS updates, have made it harder to track every action users take across apps and websites. This means targeting isn’t always perfect, but it still gives you a more direct connection to your audience. The key is to test different audience types and focus on the ones that deliver the best results for your business.
Placements are the different spots where your ad can show up across Meta’s platforms. This could be in the Facebook News Feed, Instagram Stories, Reels, Messenger, or even inside partner apps and websites. By default, Meta recommends Advantage+ Placements, which automatically shows your ad in multiple places and then prioritises the ones that perform best.
For beginners, this is often the easiest option because Meta does the testing for you. However, if you want more control, you can manually choose placements, for example, focusing only on Instagram Reels if your audience skews younger, or Messenger if you want a more personal approach.
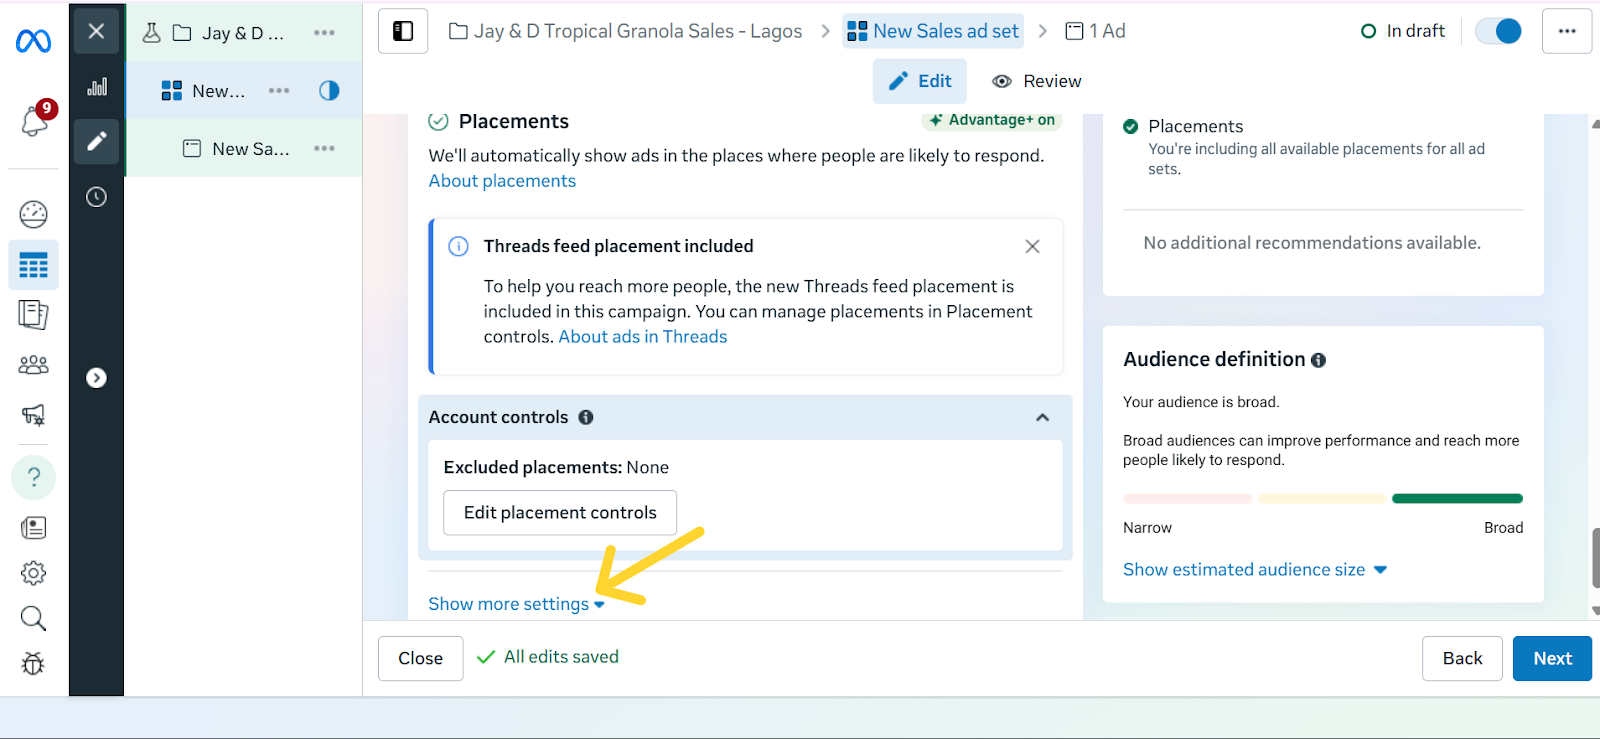
Each placement has its strengths:
The real advantage of placements is flexibility: you can either let Meta spread your ad widely and optimise for results, or zero in on the exact spots where your audience is most active.
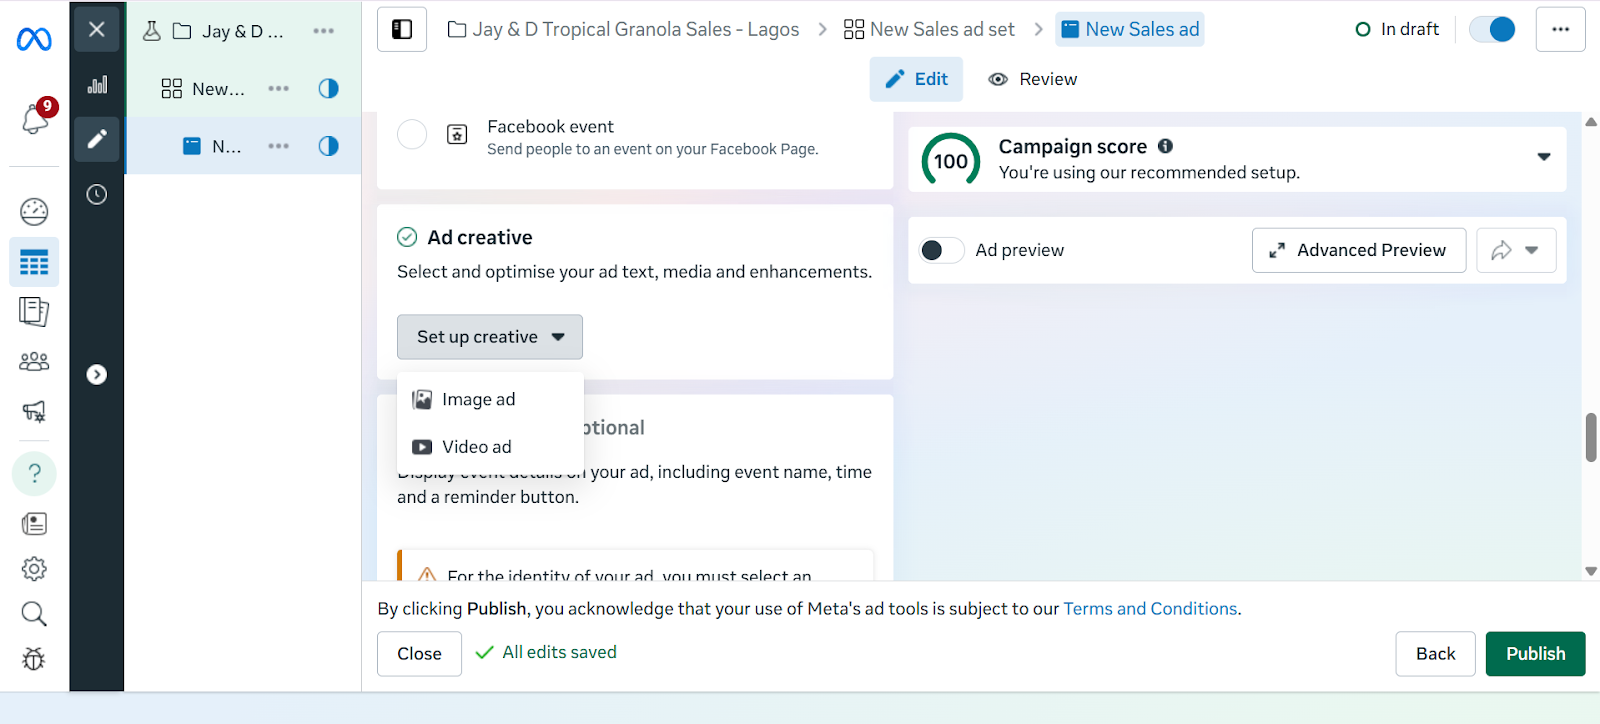
An ad creative, simply put, is the actual content of your ad. That is, the picture, video, headline, and caption people will see when your ad shows up on their Facebook or Instagram feed. A strong creative can be the difference between someone scrolling past or stopping to pay attention.
To make yours effective, let’s break it down into the key parts so you know exactly what to focus on.
Select Ad Format
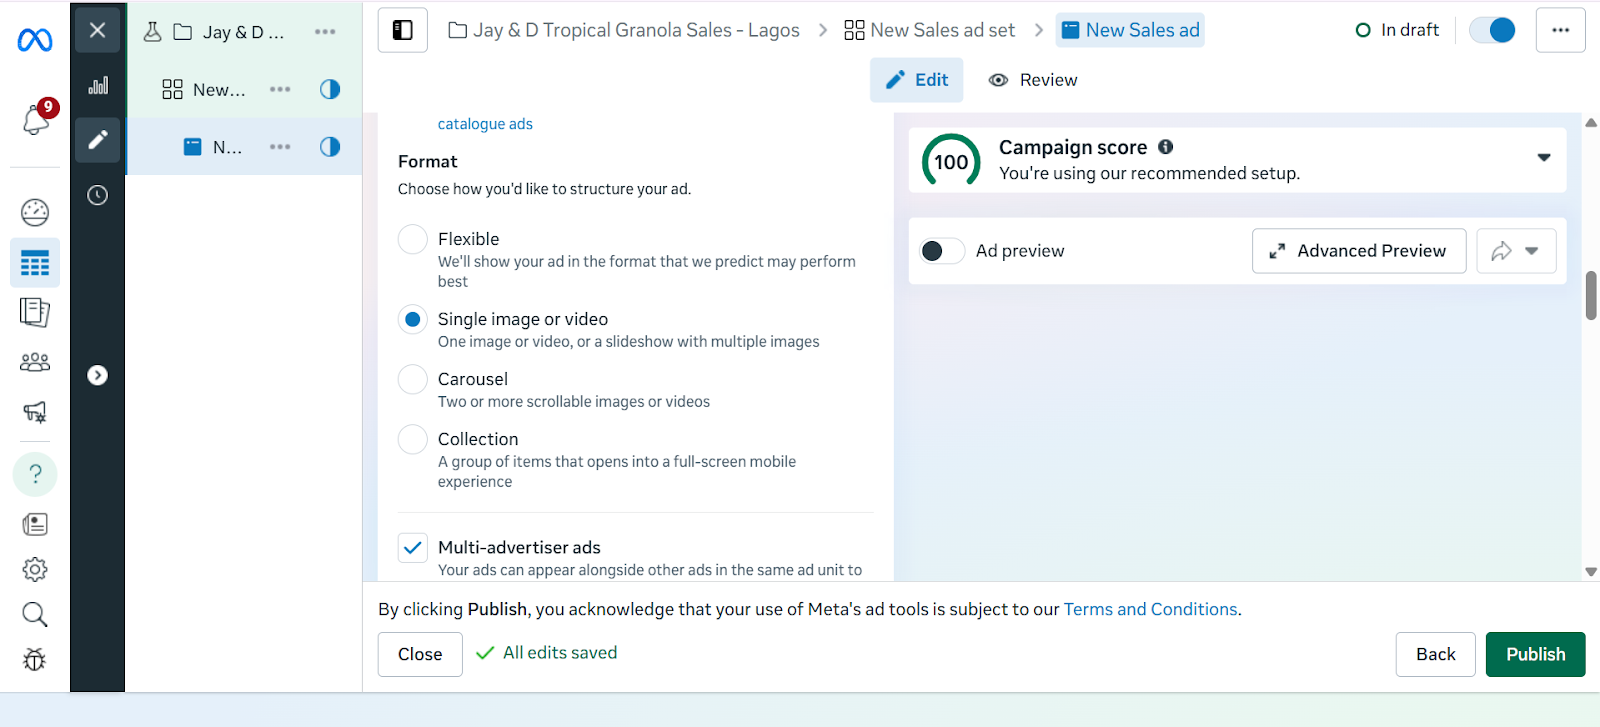
Visuals
Copywriting Tips
Call-to-Action (CTA)
Before you hit “Publish,” it’s important to double-check your ad. Meta has strict ad policies, and if your ad doesn’t follow the rules, it can be rejected or even get your account flagged.
Things to check before publishing:
Common reasons ads get rejected:
Once everything looks good, click Publish. Meta will then review your ad, which usually takes a few minutes to 24 hours. If approved, your ad will go live and start delivering to your chosen audience.
In Ads Manager, track key metrics to understand how your campaigns are performing:
Optimize Ads
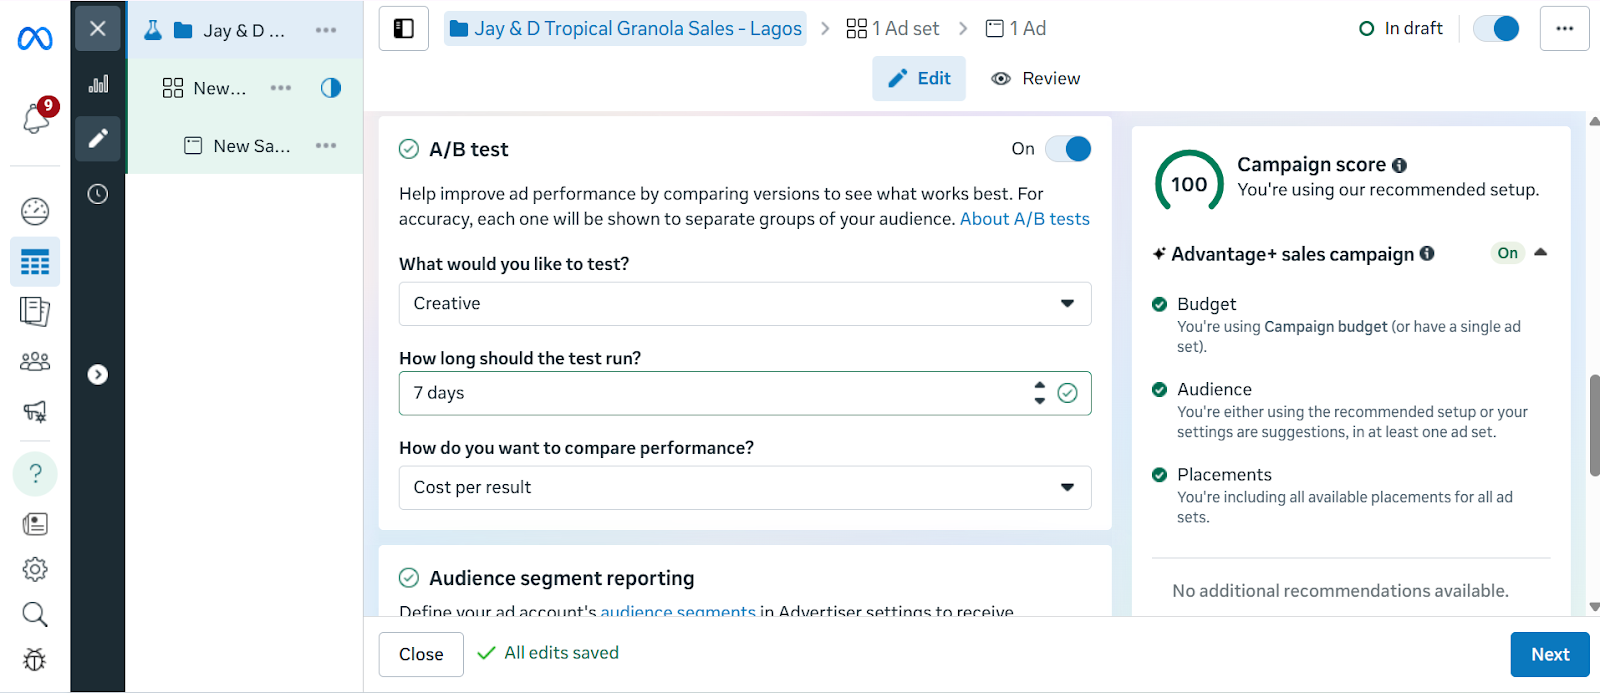
Running Facebook ads in 2025 is only part of the journey. Turning clicks into sales or meaningful engagement requires the right destination for your audience. With Mainstack, you can create tailored landing pages or online storefronts that act as the perfect extension of your ad campaigns. Every click from your Facebook ad can lead to pages specifically designed to showcase your products, collect leads, or drive purchases directly.
By pairing the precise targeting of Facebook Ads with Mainstack’s easy-to-use tools, you create a system where ads, pages, and customer actions work together, making it easier to track results, optimise campaigns, and grow your business efficiently.
Start building pages that connect directly to your ads today and see how a well-designed destination can turn impressions into measurable growth.
At this point, you’ve learned how to set up, target, and create effective Facebook ads and how to ensure every click leads to a page that converts impressions to sales. But, to make it even easier, we’ve put together a step-by-step checklist you can follow every time you run a campaign.
Step 1: Set Up Meta Business & Ads Manager
Step 2: Create Your Campaign in Ads Manager
Step 3: Choose Your Objective
Step 4: Name Your Campaign
Step 5: Set Your Budget & Schedule
Step 6: Choose Your Target Audience
Step 7: Select Ad Placements
Step 8: Design Your Facebook Ad Creative
Step 9: Review and Publish
Step 10: Monitor & Optimise Performance
.jpg)


Every day, thousands of people wake up to find their digital identity hijacked. It could be a hacker guessing a weak password, a fake social media account impersonating you, or a scammer using your email to trick your friends. Identity theft has moved from just stolen credit cards to stolen reputations, fake profiles, and access to your most private data.
Criminals scrape photos, posts, and personal details from the internet to build convincing profiles, then use them to open new accounts, drain funds, or blackmail victims. The more we live online, the larger the digital footprint we leave behind and the more attractive we are to cybercriminals. Online safety is now a core part of everyday survival. In this guide, you’ll discover proven ways to secure your accounts, limit your exposure, and outsmart identity thieves before they strike.
Online identity theft happens when cybercriminals steal personal information such as names, addresses, phone numbers, credit card details, or Social Security numbers to impersonate victims or commit fraud. Unlike traditional identity theft which might involve stolen wallets or intercepted mail, the digital version exploits the vast amounts of personal data we store and share online.

Attackers use a range of tactics, including:
Your personal data is valuable on the dark web. Stolen information can be used to:
Identity theft can drain both time and money, forcing victims to spend weeks or even months disputing charges, closing accounts, and repairing credit. Beyond direct financial losses, you may also face costs for legal help, credit monitoring, and lost productivity while resolving the damage.

What once felt like a distant risk is now an everyday reality. Criminals are sophisticated, patient, and often invisible until the damage is done. Fortunately, you can build strong walls around your digital life with just a few consistent habits. By strengthening your passwords, enabling multi-factor authentication, locking down your devices, being skeptical of unsolicited requests, and resisting the urge to click every link you see, you significantly reduce your risk. Monitoring your financial accounts, limiting what you share online, and cleaning up your digital footprint give you extra layers of protection. Think of these steps as digital hygiene: small, regular actions that keep you safe and in control.
.jpg)


Instagram Reels have quickly become one of the best tools for creators, entrepreneurs, and brands to get discovered. This is largely because the platform’s algorithm prioritizes short-form video content. As a result of this, utilizing video content is no longer optional, but essential.
It doesn’t matter if your goal is building a personal brand, promoting digital products, or simply trying to grow your community, understanding how to create Reels that grab attention can improve your content’s reach.
Reels aren’t just another content format; they are Instagram’s answer to TikTok and a major driver of content visibility and engagement. Studies show that Reels generate more engagement than traditional posts, largely because Instagram actively promotes them to new audiences. For small businesses, freelancers, or creators, this means your content has a higher chance of being discovered beyond your immediate followers. A well-made Reel can work like free advertising by expanding your reach and establishing your brand voice in ways static posts rarely can.

If you’re new to Instagram and don’t exactly know what reels are, they simply are short, vertical videos that can be up to 90 seconds long. You can record clips directly on the app or upload pre-edited content.
Reels come with creative tools like audio tracks, filters, text, and transitions that let you produce engaging videos without needing advanced editing skills. While it may seem intimidating at first, the best Reels often use simple ideas executed clearly.
The hardest part of creating Reels is often knowing what to post. Instead of overthinking, start with formats that already resonate with multiple audiences: tutorials, before-and-after transformations, behind-the-scenes moments, relatable skits, or quick tips related to your niche.
For example, if you’re an interior designer, you might film a room transformation in stages in under 60 seconds. The goal is to create visual, relatable videos while giving your audience a glimpse of what you offer.

With Reels, videos are short, but attention spans are shorter. That’s why the first three seconds of your reel are everything so be sure to incorporate bold text overlays, intriguing statements, or visually striking shots to capture attention immediately.
For example, instead of starting with “Hi everyone, I’m here to talk about…” try opening with a problem your audience faces: “Struggling with skincare on skin that just doesn’t seem to care? Here are three quick fixes you can try today.”
This kind of hook grabs attention because it promises immediate value, giving viewers a reason to keep watching.
Instagram offers built-in editing tools that make your Reels more engaging and accessible, and one of the most effective ways to achieve this is adding captions to your reels.
This ensures your content is easy to follow along for people who are hard of hearing and it also caters to the many users who scroll with the sound off. Utilize text overlays to emphasize key points, and sync your cuts to trending audio.
Transitions, such as quick outfit changes or scene shifts, also improve the quality of your reels without the need for advanced editing. The goal is not to overcomplicate but to make your Reel engaging and easy to follow.
Trends drive discoverability, but originality builds lasting connections which are crucial when growing an online community. Jumping on trending audios or challenges can boost visibility, but it is of utmost importance to ensure that these trends are adapted to fit your niche. The key is to participate in trends while adding your unique perspective so you aren’t simply blending in with everyone else.
Creativity alone is not enough to sustain any content form, reels included. They also need optimization.
To do this, make use of relevant hashtags, engaging captions, and eye-catching cover images that align with your brand.
Posting consistently also signals to the algorithm that you’re an active creator worth promoting.
Pro Tip: Cross-promote your Reels on your Stories and grid, and encourage viewers to engage by asking simple questions in your captions.
Not every Reel will go viral, and that’s okay. What matters is tracking performance and adjusting accordingly. Pay attention to your Instagram Insights to see which Reels got the most views, saves, or shares. These metrics reveal what resonates with your audience and help guide your future content. Over time, you’ll develop a playbook of what works best for your niche and audience.
For entrepreneurs and creators selling digital products, Reels can double as tools for visibility and a direct driver for sales. By utilizing reels to showcase your product in action, sharing customer testimonials, or educating your audience about the problems your product solves, you position yourself as both a trusted resource and a solution provider.
Instagram Reels are one of the best ways to grow your online presence in today’s digital world. Clarity, consistency, and creativity are the three ingredients that help beginners create Reels that actually get noticed.
The best Reels aren’t always the most polished; they’re the ones that resonate with audiences, deliver value, and make your people want to come back for more.
.jpg)


Facebook Messenger offers businesses a powerful way to reach and engage customers in real time. With high open rates and strong interaction, Messenger campaigns can outperform bother forms of media reach with immediacy and personal connection. To succeed, you need more than just messages; you need a strategy. Messenger marketing done well builds trust, delivers value, and boosts loyalty. Wrongly done, it can annoy users, cause opt-outs, or even violate policy. The goal is to be helpful, relevant, and respectful.
In this article, you will learn about core Messenger marketing practices: how to get permission, personalize messages, use chatbots wisely, design engaging content, segment your audience, follow policies, and maintain good frequency. If you follow these practices, your Messenger campaigns will feel less like pushy promos and more like friendly conversations that deliver results.
People should explicitly agree to receive messages from your business via Messenger. Use opt-in requests that clearly state what kinds of messages users will receive. Let them know frequency, content type, and how they can opt out. Setting expectations reduces surprise and improves trust. Meta’s Messenger documentation insists on clearly describing the type of Marketing Messages users should expect when they opt in.
Companies must follow Facebook Messenger policies, including rules on message frequency, content type, and negative feedback. For example, marketing messages have requirements to avoid spam, duplicate opt-in requests, or sending messages too often. Respecting these rules helps maintain good standing and deliverability.

Messenger is a conversational channel. Messages that read like automated or impersonal blasts tend to be ignored or blocked. Use active voice, friendly language, address users as “you” and maintain consistency with your brand’s personality. Keep messages simple, avoid jargon, and make responses feel human. Meta guidelines recommend preserving your brand voice rather than creating a disjointed style.
Start conversations with helpful or engaging content. Provide useful information, resources, answers to common questions, or early access. Promotional messages lose effectiveness when they appear too often or as first contact. If you show value early users feel rewarded. For example using Messenger to send order updates, product tips, or helpful reminders enhances trust before you send offers.
One size does not fit all. Use data like purchase history, past interactions, location, or user preferences to tailor messages. Segmentation helps you send content that resonates and avoids “one-message-fits-all” mistakes. Personalization increases open rates, click-throughs, and user satisfaction. For example, sending cart abandonment reminders or browse abandonment messages to users who left without purchasing.

Chatbots help scale conversations: instant replies, handling FAQs, guiding users, and scheduling. But they must feel helpful, not robotic. Scripts and flows should anticipate common questions. Provide a fallback to human agents when needed. Automate useful touchpoints like welcome messages, but avoid flooding users with automated content. Automation saves time if used thoughtfully.
Messenger allows images, videos, buttons, and quick replies. Use them. Rich content performs better than plain text. Interactive content like polls, quizzes, or surveys helps boost engagement and feedback. Use visuals to break up long text and make messages more appealing. But optimize media so that load times are fast and message size is not burdensome.
Too many messages annoy users. Too few missed chances to stay top of mind. Monitor negative feedback, opt-outs, or unreads to gauge if you are overdoing it. Use user preferences if possible: let them choose frequency. Meta rules limit sending certain Marketing Messages to users depending on opt-in frequency and user action.
One advantage of Messenger is immediacy. Users expect quick replies when they initiate contact. Slow responses damage trust. If your team cannot always respond fast, use automated acknowledgments and let users know when they will hear back. Always provide useful information or escalate when needed. Customer service combined with marketing builds loyalty.
Pay attention to open rates, click-through rates, engagement, response time and opt-outs. Messenger often delivers high open rates—70-80% or more within the first hour, which is much higher than email. Monitor what messages perform best: subject lines, content type, timing. Use A/B testing for variations of message copy, visuals, or CTA. Then use the data to iterate and improve.
Be clear about what data you collect and how you use it. If using cookies, metadata, or tracking, disclose it. Make sure users know how to opt-out and that they can stop marketing messages. Respect user feedback; if many users block or report you, adjust your strategy.
Click-to-Messenger ads allow users to start a chat directly from your ad. Sponsored Messages let you re-engage people who have already shown interest. Use these ad types for targeted offers or updates rather than cold promotions. Integrate them with conversational flows to continue engagement.
Mobile users dominate Messenger usage. Ensure that any content, images, buttons you send are optimized for mobile view. Rich media should be compressed appropriately. Quick replies and buttons should be clearly tappable. If content takes too long to load or images are heavy, users drop off.
Ensure messages look clean. Use formatting: paragraphs, line breaks, spacing. Use buttons, quick replies instead of expecting typed answers when possible. Make your Call-to-action clear. Don’t overload a message with multiple directions. Use welcome messages that clarify next steps. Provide feedback prompts (like “type 1 to speak to support”) or menu of options if your bot flows allow.
Using Facebook Messenger for marketing offers a unique opportunity to connect with users personally, immediately, and meaningfully. Following best practices, getting clear opt-in, respecting Messenger policies, using conversational tone, personalizing messages, and delivering useful content, turns your Messenger strategy from annoying to appreciated. Automation and chatbots can scale your efforts while good design, rich media, and timely follow-ups keep users engaged. Testing different copy, content types, and send frequencies ensures you stay responsive and relevant. Remember transparency, privacy, and respect are not optional, they strengthen your brand and reduce complaints. When you build for conversation rather than broadcast you create trust, loyalty, and better outcomes. Messenger becomes less a channel for promotion and more a tool for meaningful relationships.
For more tips on how you can sell digital products on Facebook, check out this comprehensive guide.
.jpg)


Upgrading to an iPhone 17 is more than just buying the latest gadget;, it can be viewed as an investment in your creator career. With every new iteration, Apple packs in camera upgrades, faster chips, and software tools that help content look more polished and get noticed. But that new-phone price tag is real, and creators need to be sure they can earn more than they spend.
If your current device like an iPhone 15 or 16 still delivers on quality, there may be no rush to upgrade. Still, if you leverage iPhone 17’s new features smartly, you can monetize its power and recoup the cost through creation, sales, or partnerships.
Let’s explore how.
The iPhone 17 introduces a larger main sensor, improved optical image stabilization, better low-light performance, and sharper zoom. These upgrades mean creators can shoot cleaner, more professional video especially in dim settings like events or home studios. Cinematic mode and ProRes video give creators tools to distinguish their content from standard mobile footage.
With the newer A-series chip, more RAM, and faster write speeds, editing video and photos directly on the phone becomes smoother. Faster rendering, better multitasking, and quicker previews reduce time wasted. The improved storage options (higher capacity) also let creators keep more raw footage and assets without external backups.
A brighter, more color-accurate display helps when editing in sunlight or when checking color grading. Higher refresh rates make the experience feel smooth, especially in editing apps or scrolling through timelines. Improved battery life means longer shooting sessions, fewer mid-shoot shutdowns, and less downtime charging.
Faster 5G, enhanced WiFi bands, and better Bluetooth connectivity improve uploading speed and live streaming quality. Supporting accessories such as external mics, gimbals or lenses matter more when the base hardware can support high bit-rate video or external-device input without lag.
Apple continues building tools and software features like photo and video editing apps, filters, live streaming tools, and seamless iCloud sync. Features like seamless backup, sharing, and cloud workflows mean less time lost managing files and more time creating.
Video Content
Post high-quality Reels, Shorts, TikToks, YouTube content. With iPhone 17’s improved camera, your content can look more professional, helping attract larger audiences and monetize via ad revenue or brand partnerships.

Photography & Stock
Thanks to the upgraded sensor and image clarity, you can shoot stock photos for marketplaces like Shutterstock or Adobe Stock. Also shoot paid commissioned photography; social media photos, portraits, or product shots.
Live Streaming & Virtual Events
Use the front and rear cameras to host live workshops, Q&A sessions, or streaming classes. The iPhone 17’s faster connectivity helps reduce lag and maintain quality during livestreams.
Vlogging / Podcasting with Video
If you vlog or do podcasts with video, the iPhone 17 lets you capture high-quality video with good audio (especially if paired with external mic). You can also record video “bites” for content repurposing, e.g., social clips, teasers.
Selling Digital Products
Use your iPhone 17 to create presets, LUTs, photo filters, templates, or motion graphics. Sell them on marketplaces or your own site. Since you already own the hardware, profit margins are high.
Sponsored Content & Brand Deals
Higher-quality visuals make your content more attractive to brands. When you can show photos or videos that look sharp, clean, and professional, you are in a stronger position to pitch for sponsorships or paid collaborations.
Cost vs Expected Revenue
Calculate device cost + accessories + any subscriptions vs projected earnings. For example, if you can make $20-$50/month more with better video or photo quality, you may recover costs in 6-12 months.
Leveraging Micro-services
Offer small gigs: social media clips, editing or retouching, stock photos. These help recoup cost bit by bit.
If you already own iPhone 15 or 16 and your video, camera, and editing needs are met, waiting might make sense. Upgrading only becomes essential when image quality, speed, or battery life begins to limit your growth or deliverables.
A break-even analysis helps you figure out how long it will take to earn back the cost of your iPhone 17 through the extra income it brings you.
Here’s how to do it in plain steps:
If the extra income is less than the phone’s cost, it might be better to wait or save up before upgrading.
Investing in the iPhone 17 can be a smart move if you’re a creator serious about stepping up your content quality, speed, and professionalism. The camera upgrades, better performance, improved battery, and software tools are not just luxury, they are instruments that can help you earn back what you spend through video, photo, sponsorships, and product sales.
That being said, if your iPhone 15 or 16 still meets your needs and does not limit your creativity, there is no urgent need to upgrade. Your time, skills, and consistency often matter more than the hardware alone. Before buying, plan out how you will monetize its features. Monetizing your iPhone 17 turns it from an expense into an investment, one that pays off when used with purpose.
.jpg)


Keeping children safe online and managing screen time are top priorities for many families. Modern devices include built-in parental controls that let caregivers limit app use, filter content, schedule downtime, and approve downloads. Apple’s Screen Time is compatible with iPhone, iPad, and Mac. Google’s Family Link, combined with Google Play parental controls, allows parents to supervise Android devices and Chrome OS. Each tool handles slightly different features, so the choice depends on the device and how hands-on the parent wants to be.
This guide explains exactly how to set up Screen Time on Apple devices and Family Link and Play Store parental controls on Android. It also covers App Limits, Downtime, Always Allowed apps, Content and Privacy Restrictions, passcode protection, and tips for troubleshooting and best practices.
Screen Time lets parents schedule Downtime, set App Limits, allow certain apps during limits, block explicit content, control purchases, and manage communication limits. You can set these locally on the child’s device or manage them remotely with Family Sharing.
Step-by-Step: How To Set up Screen Time For a Child On Their Device
Set Downtime
Choose Always Allowed apps
Set App Limits
Content & Privacy Restrictions
Communication Limits
Protect your settings with a Screen Time passcode
If Family Sharing is used, the family organizer can manage or reset passcodes from their device.

Google Family Link lets parents create a supervised Google Account for children, set device bedtime, set app limits, approve or block app installs, monitor screen time, and track location on supported devices. Features and availability vary by Android version and region.
Step-by-step: Set up Family Link
Controls available in Family Link
Google Play Parental Controls
If Screen Time passcode is forgotten
If Family Link cannot supervise a device
Some Android devices or versions do not support all Family Link features. Make sure the child’s device meets Android version requirements and follow the Family Link compatibility guidance. If issues persist, reinstall the Family Link apps and repeat the setup steps.
Parental controls are about creating balance, safety, and healthy habits for children. Whether you use Apple Screen Time or Google Family Link, these tools help you manage what your kids can see, use and do online. Combine these settings with clear conversations about online safety so your child understands why limits exist. Review and update settings regularly as your child grows, and secure everything with a passcode only you know. With the right mix of technology and guidance, you can make your family’s devices safe and positive spaces for learning, play and connection.
.png)


You may have heard from a friend or acquaintance that someone’s social media had been hacked, probably a celebrity, and you might think it’s something that doesn’t happen so often. But according to Station X over 1.4 billion social media accounts are hacked monthly, and since more accounts are being opened every year, the number will continue to rise.
Nobody is perfect, and anyone can fall victim to this attack, which is why when it happens, you need to take quick, decisive steps to ensure you can recover your information and data on your social media account. This article guides you step-by-step through the fastest recovery path, from identifying common hacking practices, verifying unexpected changes, locking out intruders and fortifying your account to prevent future incidents.
There are common practices hackers use to gain access to your social media accounts. These are:
Notice suspicious activity such as unfamiliar posts, DMs sent without your knowledge, or changes to your login details. Some platforms alert you when account information, such as your email or passwords, has been changed. Recognising these early signs lets you act before permanent damage happens.
The next step to take is to look for emails from your social media account that alert you to changes. Anytime a login is made on another device, an e-mail will be sent to verify if it was you logging in to that account. If it wasn't, you can always click "secure your account" to revert those changes.
If the login fails, select the "Forgot password?" or “Get help logging in” option, then request a login link or security code to your registered contact method. If that doesn’t work, tap "Need more help?" and follow identity verification via email, phone, or selfie video. Some social media platforms may ask for visual confirmation to confirm ownership.
If the procedure taken to recover your social media account was not enough, submitting a recovery request accelerates the process. Send an email to the social media account team in question and make sure to provide all relevant details, such as your username, linked email, phone, or recovery code. Always be ready to answer questions about how you accessed the account originally or the devices used.
Instagram has introduced recovery platforms—accessible without signing in—that verify identity using trusted contacts or uploaded documents. Facebook may prompt you for a video selfie for identity confirmation, designed to speed up the recovery process.
Once access is restored:
Hacking often starts with phishing or weak password practices. Stop phishing attacks by avoiding suspicious links and verifying senders. Use a password manager to reduce reuse and simplify strong password creation. Prioritise recovery tools in advance (e.g., backup codes) as preparation for a rapid response if hacking happens again.
Regaining control of a hacked social media account requires urgency. You would need to spot the breach, lock it down, restore access, and then strengthen your defences. Whether you use recovery links, codes, identity verification, or photo ID, acting quickly makes all the difference. Once restored, remember to update your security with a strong password, two-factor authentication, and a review of active sessions and apps. Your recovery experience also makes you better prepared. A few smart safeguards today ensure your social media presence and information are secure for tomorrow.


Knowledge is more valuable than ever in this digital age, and this is evident when you consider the skills that once sat quietly on résumés now becoming digital products that generate real income. Whether you’re a designer, marketer, lawyer, or hobbyist with niche knowledge, you can mold what you know into a digital product that creates value for others and generates income for you.
Digital products are items you create and share online that don’t exist in a physical form. Instead of shipping a book or mailing a CD, you deliver your knowledge, skills, or creativity as a file or online resource that people can download or access instantly.
Digital products come in many forms, e.g., e-books, guides, video lessons, templates, or even photography presets. Because they live online, you don’t have to worry about printing, packaging, or delivery. Once the product is ready, you can sell it to as many people as want it without having to reproduce products after each sale.
The beauty of digital products is that they scale. Unlike one-on-one services where your earning potential is tied to hours worked or production capabilities, a digital product lets you share your expertise repeatedly without starting from scratch each time.
Digital products are one of the easiest ways to step into entrepreneurship, and that’s because they don’t require much start-up capital, they can reach people anywhere in the world, and once created, they serve as a recurring stream of income without extra effort.
More importantly, they create impact by helping people. When you share your knowledge as a digital product, you pass on tools that help others solve problems, save time, or learn valuable skills that make a real difference in their personal or professional lives.
Recognizing the value of digital products is only the first step. The real work lies in turning your expertise into something tangible and useful for others. This doesn’t mean reinventing yourself or mastering complicated tech tools; it simply means breaking down pre-acquired knowledge into a form people can access, learn from, and apply. The process is straightforward once you understand the steps, and it allows you to move from having a skill to owning a product that works for you even when you’re not actively working.
Step 1: Identify the Skill to Monetize
The first step is identifying what skill you can turn into a product. The skill in question doesn’t necessarily have to be the most advanced thing you know; in fact, the skills that feel like second nature to you are often a source of struggle for others.
Think about the questions people regularly come to you with, the problems you can solve quickly that others find time-consuming, or the results you’ve already helped friends, colleagues, or clients achieve.
To make sure there’s genuine demand, take time to validate your idea by observing online communities like Reddit, Quora, or Facebook groups. If you notice the same pain points coming up repeatedly in your area of expertise, that’s a strong sign you’re onto something worth developing into a digital product.
Step 2: Choose the Right Format for Your Digital Product
Once you’ve identified the skill you want to build on, the next step is deciding the format your digital product should take. This choice depends on two things:
For example, if your skill requires clear, step-by-step explanations, an e-book or guide might be the best fit. If it involves processes people need to repeat, such as drafting contracts, designing, or analyzing data, then templates and toolkits will deliver more value. On the other hand, if your expertise requires more in-depth teaching or demonstration, an online course or workshop allows you to walk people through concepts with clarity.
Step 3: Create Value with Your Content
At the heart of every successful digital product is its ability to solve a problem. This is because people aren’t simply buying information; they’re paying for clarity, direction, and results. Simply put, your content should be designed to guide your audience from where they are now to where they want to be.
Instead of overwhelming them with everything you know, focus on breaking your knowledge into clear, actionable, easy-to-follow steps, and use real-life examples or case studies to make your lessons feel practical and relatable. By keeping the focus on outcomes, you not only provide value but also create a product that feels worth investing in.
Step 4: Set Up Your Sales System
Creating your digital product is only half the work; the next step is making sure people can actually buy and access it. A good sales system should let you upload your product, handle payments securely, and deliver the content instantly once someone makes a purchase. It should also give you insights into how your product is performing, so you can adjust and improve over time.
Platforms like Mainstack make this process much simpler by bringing everything into one place: you can upload your e-book, course, or template, accept payments from anywhere in the world, and keep track of your sales and analytics without jumping between multiple apps. Having a streamlined setup is extremely important because it saves you time and creates a smoother experience for your buyers.
Step 5: Price Your Digital Product

Deciding how much to charge for your digital product can feel like a challenge, but the key is to strike a balance between fairness, value, and market expectations.
Start by considering the time, effort, and resources you invested in creating it, this gives you a baseline. From there, think about the value your product delivers. If your e-book helps freelancers save hours of trial and error, or your templates simplify a process that usually takes days, that outcome should reflect in your price.
It’s also worth researching what others in your niche are charging so you can position yourself competitively without undervaluing your work.
Alternatively, you can experiment with tiered pricing, offering a standard product at an accessible price point and a premium bundle with extras like templates, bonus videos, or private Q&A sessions at a higher rate. This way, you make your product accessible to a wider audience while also giving those who want more depth or tools the option to invest further.
Step 6: Market and Launch Your Product
After creating a digital product, it is important to ensure people know of its existence; this is why launch plans are essential to the success of your digital product.
Content marketing is one of the most effective ways to draw people in, and this can be achieved by sharing blog posts, LinkedIn articles, or even short-form threads that speak directly to your niche. Establishing yourself as a helpful resource naturally guides readers toward your product.
Collecting emails early to nurture potential buyers directly by rewarding them with early-bird discounts or exclusive bonuses is another great place to start.
Additionally, collaborating with fellow creators is also a good way to expose your product to new audiences who already trust the person recommending you.
Step 7: Refine, Improve, and Scale
Your first digital product doesn’t need to be flawless; what matters most is getting it into the hands of real people. Once you launch, pay close attention to the feedback you receive. This will highlight what’s working, what needs refining, and where new opportunities might lie.
Over time, you can build on your initial success by introducing additional products that address related needs, or by bundling existing ones into higher-value offers. The aim is to create an ecosystem around your skill, one where your products complement each other and your audience has multiple entry points to learn from you.
At its core, creating a digital product is about taking what you know and molding it into something that genuinely helps others. It doesn’t have to be complicated or perfect from the start; what matters most is putting your work out there, learning from the response, and building on it. Each attempt gives you clarity and the chance to create something that grows in both value and impact over time.
.jpg)


Selling digital products online is more competitive than ever, and Facebook remains one of the most effective platforms to reach your audience. With billions of active users and advanced targeting options, Facebook ads enable creators, entrepreneurs, and businesses to showcase digital products like eBooks, online courses, software, or templates directly to the people most likely to buy. Creating a successful Facebook ad requires more than just boosting a post, it takes strategy, proper setup, and ongoing optimization.
Facebook makes it easy for anyone to set up ads using its tools like Meta Business Manager and Ads Manager. Whether you want to drive traffic, increase sales, or collect leads, you can design a campaign tailored to your goals.
This guide will walk you step by step through the process of creating digital product ads on Facebook, from setup to monitoring, so you can launch campaigns that convert.
Before you can create digital product ads, you need the right setup.
1. Create a Meta Business Manager Account
2. Create a Facebook Page
Ads cannot be run from personal profiles. You’ll need a business page.
3. Add Payment Information
Once your foundation is ready, it’s time to build your campaign.
1. Go to Ads Manager
2. Click “+ Create”
3. Choose Your Objective
Facebook gives you six objectives, but for digital products, the most common are:
4. Name Your Campaign
Use a naming system to keep things organized, e.g., Ebook_Sales_January2025.
5. Set Your Budget
Decide between:
The strength of Facebook ads lies in targeting.

Target Your Audience
You can filter by:
Custom Audiences
Upload email lists or retarget visitors from your website using the Meta Pixel.
Lookalike Audiences
Create new audiences similar to your best customers to scale your reach.
Placements
Choose where ads appear:
Your ad’s creative is what captures attention and drives clicks.
Select Ad Format
Visuals
Copywriting Tips
Call-to-Action (CTA)
Submit for Review
Once you hit publish, Facebook will review your ad to ensure it complies with policies.
In Ads Manager, track key metrics to understand how your campaigns are performing:
Optimize Ads
Example: Selling an Online Course with Facebook Ads
Let’s say you’ve created a course on “How to Build a Freelance Business.”
This structured approach ensures higher conversions and sustainable results.
Creating digital product ads on Facebook may seem overwhelming at first, but the process becomes simple once you follow a structured approach. By setting up a Meta Business Manager account, choosing the right campaign objective, targeting your audience precisely, and designing compelling creatives, you can build ads that drive real results.
The key is not just launching the ad, but monitoring and optimizing it over time. Test different formats, experiment with audiences, and scale what works best. With the right strategy, Facebook ads can help you reach thousands of potential buyers and turn digital products into steady revenue streams.
Start small, learn from the data, and refine your campaigns for maximum impact.


You’ve probably used white label digital products without knowing it.
Have you ever used a banking app, a ride-hailing app, or an online booking system that looked different but worked the same as another that you’ve tried? Or maybe your favorite blogger offers an “exclusive” online course platform that feels just like the ones you’ve seen elsewhere. That’s the world of white label digital products; software or services built by one company but branded and sold by another.
Think of it as renting a fully built apartment and decorating it however you like. The building (product) is already there; you just add your name, style, and branding before inviting people in.
Agencies, freelancers, and entrepreneurs use white label digital products every day: website builders, SEO dashboards, email marketing platforms, e-commerce stores, online booking tools, and more. In this guide, we’ll break down how to market these digital products so your brand stands out, attracts customers, and grows your revenue.
White label digital products are pre-built online tools or services developed by one company and rebranded by another. Popular examples include:
These digital products let businesses skip development costs, focus on their strengths, and scale faster. You’re essentially offering your customers a fully developed digital solution under your own trusted brand.
It’s tempting to think of white label digital products as similar to franchises, but they’re quite different:
This flexibility makes white labeling attractive for digital entrepreneurs and agencies. You’re essentially getting a ready-made software solution while maintaining control over your branding, pricing, and marketing strategy, something a franchise doesn’t offer.

In a world where speed and flexibility are everything, white label digital products give businesses a powerful edge. But to reap the full benefits, you must market them strategically.
Let’s show you how.
Step 1: Understand Your Target Market
By deeply understanding your audience, you’ll maximize your marketing spend, and every dollar you invest will work harder and push your business forward.
Step 2: Build a Strong Brand Around the Product
Your brand is the only identity customers see. So, make it count.
Turn a generic white label product into a recognizable service customers trust through consistent branding.
Step 3: Develop a Professional Online Presence
Your website or landing page is your digital storefront. Make it clear, attractive, and conversion-focused.
A strong online presence reflects the quality of your products and builds trust with prospective customers.
Step 4: Leverage Content Marketing
Content marketing positions you as an authority in your niche.
Publish blog posts, video tutorials, and webinars that address your audience’s pain points. For example, if you’re selling white label reputation management, create a guide on “Boost Your Online Reviews in 30 Days.”
Optimize your content for relevant keywords to drive organic traffic. Offer lead magnets like checklists or mini-courses to collect email addresses. This educational approach builds trust and makes customers more likely to buy from you when they’re ready.
Step 5: Run Paid Advertising Campaigns
Paid ads can bring instant visibility to your white label services. Platforms like Facebook, Instagram, LinkedIn, and Google Ads let you target specific demographics, industries, or job titles.
Use ad copy that speaks directly to your audience’s pain points: “Expand Your Services Without Hiring More Staff” or “Launch New Digital Services Instantly.” Run retargeting campaigns to re-engage site visitors who didn’t convert.
Test different ad creatives and landing pages to continually improve your conversion rates. Paid ads are especially effective for B2B white label services where decision-makers are actively searching for solutions.
Step 6: Use Email Marketing to Nurture Leads
Here’s how to use email marketing:
Use email marketing to nurture leads and convert first-time customers into long-term clients.
Step 7: Leverage Influencers and Affiliates
Expand your reach by partnering with influencers and affiliates. Micro-influencers in your niche often have highly engaged B2B audiences. Provide them with free access or custom demos so they can authentically promote your services.
Launch an affiliate program to incentivize others to sell your products in exchange for a commission. Supply affiliates with marketing materials such as banners, email templates, and sales scripts to make promotion effortless. This approach scales your marketing without increasing your ad spend.
Step 8: Offer Value-Added Bonuses or Upsells
Stand out by bundling complementary services. For example, pair your white label website hosting with SEO audits or reputation management. Offer bonuses like premium customer support, onboarding consultations, or custom reporting dashboards.
Upselling existing customers is more cost-effective than acquiring new ones, so create tiers or packages that grow with your clients. By providing a full ecosystem of services under your brand, you strengthen customer loyalty and boost lifetime value.
Step 9: Analyze & Optimize Your Marketing Strategy
Success with white label marketing requires constant refinement. Use analytics tools like Google Analytics, Meta Business Suite, or your CRM to track performance metrics; click-through rates, conversions, and customer lifetime value.
Conduct A/B testing on landing pages, headlines, and email subject lines to learn what works best. Collect client feedback to identify gaps and opportunities. By continuously optimizing, you ensure your marketing remains effective as your business and market evolve.
White label digital products are everywhere, even if we don’t always notice them. They offer businesses the ability to expand services, scale quickly, and boost revenue without reinventing the wheel. But their success depends on one critical factor: your marketing.
By deeply understanding your target audience, building a recognizable brand, investing in a professional online presence, and combining content marketing with paid campaigns, you can transform a generic white label product into a thriving business under your own name. Start small, track your results, and double down on what works. With the right marketing strategy, white label digital products can become the growth engine your business has been waiting for.
.jpg)


Facebook is no longer just a space for keeping up with friends and family. It has become one of the largest marketplaces in the world. With over 3 billion monthly active users, the platform offers unmatched reach and built-in trust, giving creators, entrepreneurs, and small business owners a direct path to customers. If you’re looking to sell digital products on Facebook, the key lies in combining smart setup with consistent marketing and the right tools to streamline the process.
The rise of social commerce has transformed Facebook into a marketplace where people not only discover but also buy products directly. In fact, recent data shows that 66% of consumers have made purchases through Facebook, highlighting its strength as a social commerce platform. With people already browsing, engaging with content, and following creators they trust, making purchases comes naturally.
For digital products such as e-books, templates, courses, or stock photography, Facebook offers a built-in audience and distribution engine. Instead of competing on crowded marketplaces, you can sell directly to your community, where engagement and familiarity work in your favor.
The most successful digital products are those that solve a problem or provide instant value. Ebooks that answer a niche question, design templates that save time, or mini-courses that teach a specific skill tend to perform better than others.
To succeed, the first step is understanding what works within Facebook’s ecosystem, what your audience is struggling with, and how your product can help. Market validation plays a big role here: spend time observing Facebook groups, trending hashtags, or competitor pages to see what people are asking for. If you notice recurring pain points, that’s a strong signal your digital product could fill the gap.
Before jumping into Facebook’s selling tools, it’s important to set up a strong foundation. Many beginners make the mistake of diving straight into listing products without preparing the essentials, but these early steps can save you frustration later on.
Be crystal clear about what you’re selling. Is it an ebook, a course, a set of design templates, or stock photos? The more specific you are, the easier it will be to market and explain the value of your product to potential buyers.
Facebook doesn’t allow digital files to be delivered directly on its platform. This means you’ll need an external system to handle payments and instant delivery. Third-party platforms like Mainstack, Gumroad, or Payhip make this seamless by providing a storefront where customers can pay and automatically receive your product.
Even though your product is digital, presentation matters. Design a professional cover image for your ebook, create mockups for your templates, or record a short preview of your course. Clear visuals build trust and make your product look more valuable.
Ask yourself how you want to connect with buyers:
Your answer will determine which Facebook tool you prioritize.

No matter which pathway you choose, creating a Facebook Business Page is a must. It gives your brand credibility, provides a central hub for your products, and unlocks access to valuable tools like Facebook Ads and Page Insights.
With these foundations in place, you can now explore the different selling options Facebook offers—Shops, Marketplace, Groups, and Ads.
Once you’ve set up your product, delivery system, and Business Page, the next step is deciding how you’ll actually sell on Facebook. The platform gives you several different pathways to sell digital products, and the approach you choose can shape how customers experience your brand.
Best for: Sellers with multiple products who want a professional-looking storefront.
This allows you to set up a digital storefront where you can showcase products, set prices, and, in some regions, even process payments directly through Meta Pay. However, this “checkout on Facebook” feature is being phased out, and as of mid-2025, most Shops are transitioning to a website checkout experience where purchases are completed on the seller’s own site.
Best for: Beginners who want fast exposure with minimal setup.
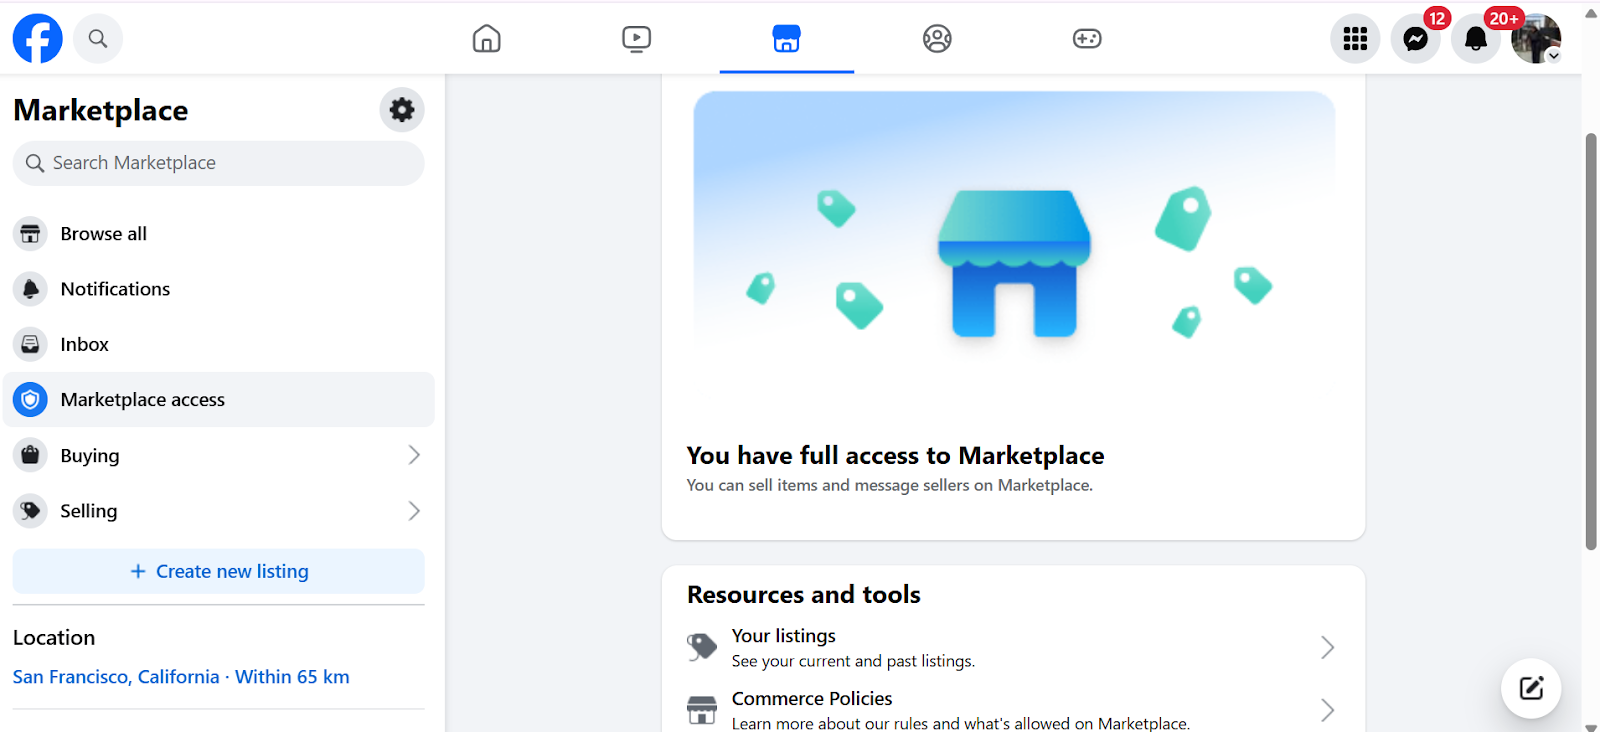
While originally designed for physical goods, Facebook Marketplace has become a space where digital sellers thrive, but mostly in terms of product promotion. Many digital product sellers list their products with clear instructions for delivery, such as sending the files via email after purchase, due to Facebook’s policies that explicitly prohibit the direct delivery of digital files on Marketplace.
Most sellers work around this by using third-party platforms like Etsy or Gumroad to handle transactions and delivery. Another seamless third-party platform option is Mainstack, which allows you to create a branded storefront, manage payments, and deliver digital products instantly, without having to wrestle with Facebook’s restrictions. This way, you maintain efficiency while using Facebook as the main traffic driver.
Best for: Creators and entrepreneurs who want to build trust before selling.
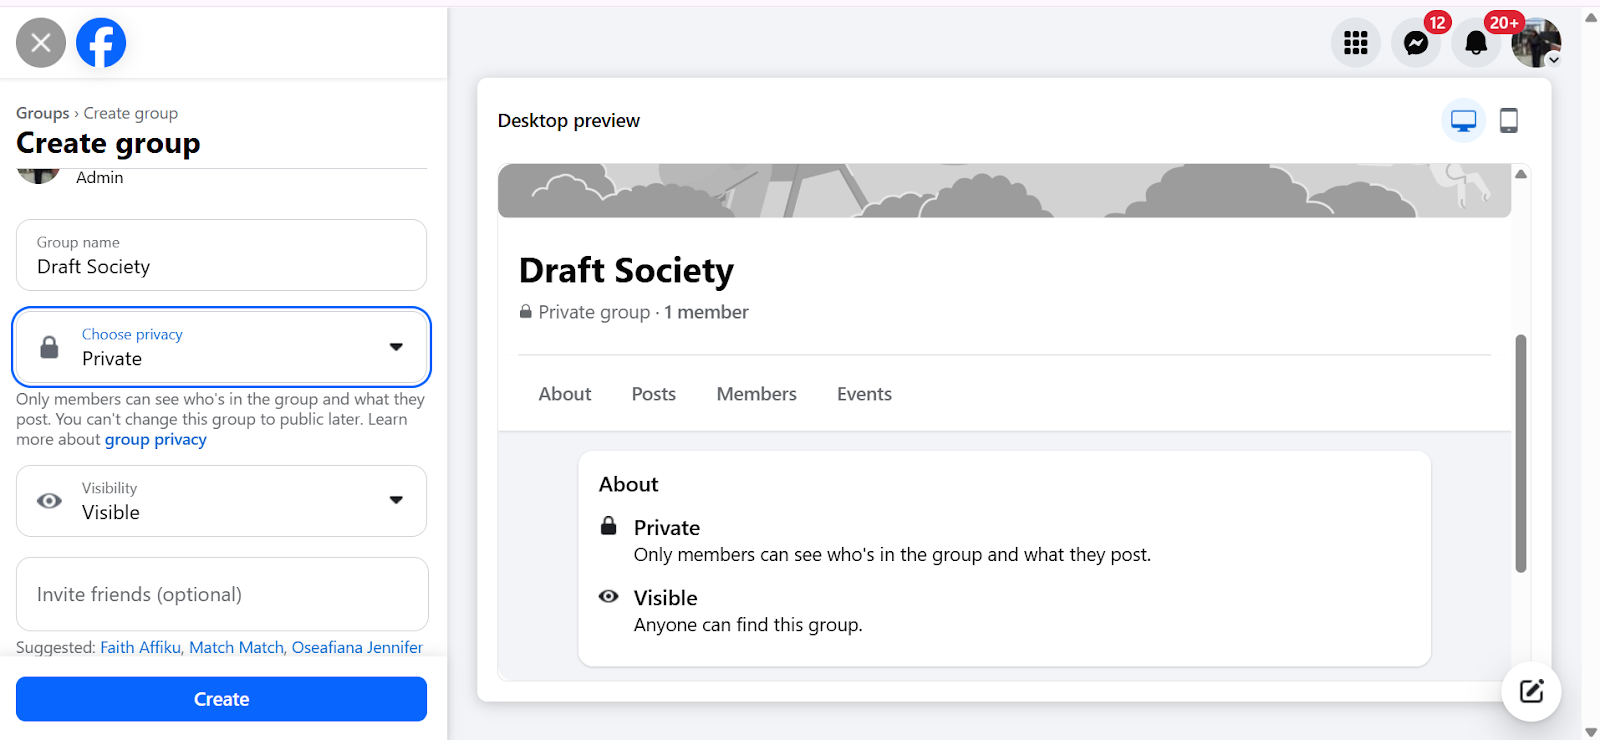
Facebook Groups are great for digital products because they enable you build a community around your expertise. For those who prefer a community-driven model, Facebook Groups offer a practical way to build trust and engagement.
Creators often use niche groups to connect with their audience before introducing paid products. For example, if you’re selling a course on social media marketing, you could start a group where you share free tips, answer questions, and then introduce your paid product once members know and trust you.
Alternatively, some creators run private, paid groups where digital resources are tied to membership, and access to the group itself is the digital product. This model works especially well for groups that produce ongoing value like coaching or resource sharing.
Best for: Every seller, regardless of product type.
Your Business Page acts as your central hub where you can showcase your product, post updates, and share content that builds credibility. It also unlocks tools like Facebook Ads and Insights, which help you reach a larger audience and track your progress.
Visibility is everything. So it’s important to start by building organic momentum through regular posts that highlight the value of your product, or take advantage of Facebook Live sessions to demonstrate product value.
Best for: Sellers eager to invest in growth beyond their immediate network.
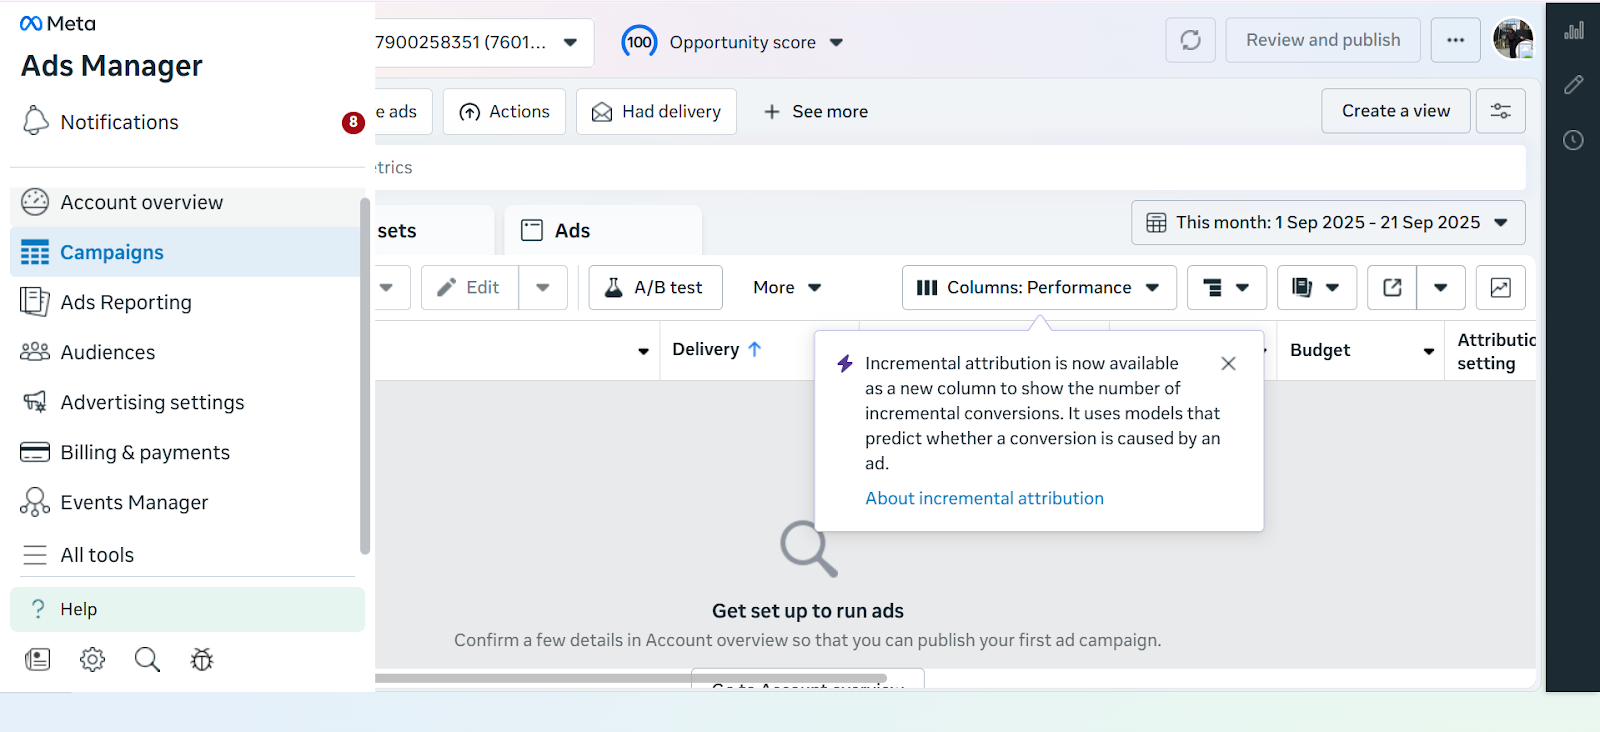
Facebook Ads allow you to target the exact audience most likely to buy your product based on age, interests, location, and behavior. They’re especially useful for retargeting people who’ve already engaged with your content but haven’t purchased yet.
For digital products, ads work best when they tell a story. So, instead of leading with a sale-focused strategy, demonstrate how your product solves a problem or makes life easier for your target audience. Start small with your budget, test different ad creatives, and invest the ones that perform best.

Once your product is live, data should drive your next steps. Facebook Page Insights and Ad Manager offer detailed metrics on reach, engagement, and conversions, and you can use these insights to identify which posts or ads are generating the best responses.
Digital products are intangible, which means trust is everything. Potential buyers want reassurance before they click purchase. Showcase reviews, testimonials, or even user-generated content to create social proof.
Another important factor is providing a seamless checkout experience. If the buying process feels smooth, secure, and professional, it reinforces credibility and makes customers more likely to complete their purchase.
Before launching, it’s essential to make sure your business aligns with Facebook’s commerce policies. While you can promote and sell digital products on the platform, Facebook restricts the direct delivery of digital files, meaning you’ll need to rely on external checkout or delivery systems to fulfill orders.
Beyond policy adherence, there are a few best practices worth following.
Selling digital products on Facebook requires more than posting a link; it’s about combining visibility, trust, and a seamless buying experience.
With billions of people ready to engage, the opportunity is endless, and with the right systems in place, selling on Facebook becomes not just possible but scalable.
.jpg)


Taking notes has always been part of learning, planning, and staying organized. Traditionally, people carried notebooks and sticky notes everywhere, but times have changed. Today, digital note-taking apps make it easier to capture, store, and organize information on your phone, tablet, or computer. These apps are not just about typing words. They allow you to add images, voice recordings, checklists, and even collaborate with others in real time.
The ability to organize content ideas, track meetings, or simply remember daily tasks, is where note-taking apps can significantly help your work. The best part is that they sync across devices, so your notes follow you wherever you go. In this guide, we will explain what digital note-taking apps are, what they are used for, the best ones to try, and how to use them effectively for maximum productivity in content creation.
Digital note-taking apps are software tools that allow you to create and store notes electronically instead of on paper. They work on smartphones, tablets, and computers, making it easy to capture information anywhere. Unlike physical notebooks, these apps provide features such as:
These apps can store plain text, images, voice notes, checklists, and even documents. For many, they replace paper notebooks while offering extra features like sharing and collaboration.
Note-taking apps have grown popular because they fit the needs of many different users. Students rely on them to keep class notes organized, highlight important points, and manage assignments in one central place. Professionals often use them during meetings to capture action points, track tasks, and collaborate with colleagues. For writers and creators, these apps are perfect for brainstorming, drafting outlines, and storing references. Even everyday users benefit, whether it’s for grocery lists, reminders, or keeping a personal journal.
People use note-taking apps for several key reasons:
Unlike scattered sticky notes or messy paper notebooks, digital apps give everything structure. You can search notes instantly, group them by topic, and never worry about losing important information.
Note-taking apps can feel overwhelming at first. With so many features like folders, tags, voice notes, and cloud syncing, it’s easy to just dump information and never look at it again. But when used well, these apps become more than just digital notebooks, they turn into powerful tools that boost productivity, reduce stress, and keep your thoughts organized across all your devices.

The secret to maximizing note-taking apps is having a simple and consistent system. By learning how to capture ideas quickly, organize them logically, and review them regularly, you can make your note-taking app work for you instead of against you. The goal isn’t to add complexity to your content creation but to make storing, finding, and using information effortless.
Enable cloud sync so your notes are always backed up. Apps like Google Keep and Evernote automatically save to the cloud, while Notion and OneNote give you seamless cross-device syncing. This ensures you never lose notes even if you switch devices.
Digital note-taking is not limited to text. You can:
This makes your notes richer and more practical than traditional notebooks.
The hardest part of digital note-taking is consistency. To build a routine:
Many apps double as task managers. For instance, Notion allows you to add checklists and deadlines, while Evernote integrates with calendars. This makes your note app not just a memory bank, but also a productivity tool.
Digital note-taking apps are more than just electronic notebooks; they are powerful tools for staying organized, productive, and creative.
The key to success lies in building a consistent habit. Start small with one use case, learn the app’s features, and gradually expand your system. Use folders, tags, templates, and cloud storage to keep your notes organized and safe. Explore multimedia options like images and voice memos to make your notes richer and more engaging.
With apps like Evernote, Notion, Google Keep, OneNote, and Apple Notes, there is a solution for everyone. Find the one that fits your lifestyle, stick with it, and watch how your productivity and organization improve.
.jpg)


We’ve all been there: a small charge you can’t explain shows up on your bank statement, and after hours of rigorous thinking and self-interrogation, you suddenly realize you’re still paying for a subscription you barely use or one you even forgot you signed up for. From streaming platforms to free trials that turned into monthly bills, these hidden subscriptions quietly eat away at your money.
Luckily, the great thing about subscriptions is, you get to back out at any time. You just have to find them first.
The most reliable way to uncover forgotten subscriptions is by reviewing your bank and credit card statements. Go back at least three to six months, or even a full year if possible, and carefully scan through the transactions. Look for recurring charges, whether monthly or annual, and pay special attention to smaller amounts that can easily slip under the radar. These are often app subscriptions or trials that quietly renewed.
As you go through each charge, cross-check it against the apps and services you actively use. If a payment doesn’t immediately make sense, add it to a list of items to investigate further. Sometimes, subscription charges don’t appear under the company’s actual name but instead show up as Apple, Google, PayPal, or Stripe, which can make them tricky to identify. In such cases, you may need to search the merchant name online or check your app store accounts to match the charge to a specific service.
Keeping a simple tracker whether in a spreadsheet or notes app, can help you stay organized. Record the name of the merchant, the amount, how often it’s billed, and the next renewal date. This way, you’ll have a clear picture of what you’re currently paying for and can make informed decisions about which subscriptions to keep and which to cancel.
Many forgotten subscriptions are tied directly to your phone rather than a bank card, which makes them easy to overlook. For iPhone and iPad users, the best place to start is within your device settings. Simply open Settings, tap on your Apple ID, and then select Subscriptions. This will display every active subscription linked to your Apple account, including app trials that may have quietly renewed after the free period ended.
On Android, the process is just as straightforward. Open the Google Play Store, go to Payments & Subscriptions, and then tap on Subscriptions. From here, you’ll see a complete list of all the services you’re currently paying for through Google Play.
This step is especially important because many people sign up for free trials on their phones and forget about them. Since these charges are routed through Apple or Google rather than the individual app, they can slip past even the most careful review of bank statements. Checking your device settings ensures you capture these hidden subscriptions before they continue draining your account.
If you’d rather not sift through bank statements or device settings manually, subscription tracking apps can do the grunt work for you. Services like Rocket Money (formerly Truebill), or Bobby connect securely to your bank and card accounts to automatically scan for recurring charges. Once linked, they’ll highlight subscriptions you might have forgotten about and show you how much they’re costing each month.
These tools are even greater life-savers if you have multiple accounts or cards because they make tracking everything in one place possible and save you hours of effort. Many of these apps also go a step further by helping you cancel subscriptions directly within the platform, so you don’t have to hunt down cancellation links or customer service numbers.
It’s easy to assume every subscription runs through your bank card, but many services are tied to alternative payment platforms instead. If you’ve ever paid with PayPal, Venmo, or any other mobile money app, there’s a good chance a subscription could still be drawing funds from there quietly. These platforms often allow merchants to set up automatic recurring charges, and because they don’t always show up on your main bank statement, they’re easier to overlook.
Take a few minutes to log in and review your active authorizations. In PayPal, for example, you can check under “Payments” to see which businesses have permission to bill you automatically. Doing this with any mobile money app can reveal subscriptions you might have signed up for and forgotten about.
Not every subscription is neatly listed in your phone settings or app store. Some services manage billing through their own platforms, which makes them easier to miss. A quick way to catch these is by searching your email inbox for keywords like “subscription,” “renewal,” or “receipt.” This can surface confirmation emails or invoices that never appeared in your bank alerts.
If you come across an unfamiliar charge or a service you no longer use, the next step is simple: contact the provider directly. Most companies offer a cancellation option through your account settings, but if it isn’t obvious, reaching out to customer support will usually get it sorted.
Finding and canceling forgotten subscriptions is half the battle, but staying ahead of new ones help you save the most money. A simple strategy to employ is setting up bank transaction alerts so you’re immediately notified when recurring charges go through.
Another smart move is to add calendar reminders for the free trials you sign up for. That way, you’ll get a reminder to cancel before your free trials turn into paid subscriptions.
For an extra layer of protection, consider using virtual cards (many banks and fintech apps offer them) specifically for trial offers. Once the card expires or you disable it, the subscription can’t auto-renew without your permission.
Canceling old subscriptions is important, but keeping them under control long-term matters even more. Make it a habit to audit your subscriptions every 3–6 months, you’ll likely find at least one service you no longer use.
Try to consolidate when possible. For example, instead of paying for multiple streaming platforms, keep only the ones you watch regularly.
Finally, consider using budgeting apps to track recurring expenses. Seeing them in one place helps you stay intentional about where your money goes and prevents unnecessary charges from piling up again.
Forgotten subscriptions might seem small at first, but over time, they quietly drain your finances. The good news is, with these few intentional steps, you can take back control of your money and free up room in your budget for things that truly add value to your life.


Your phone or laptop password is like the key to your home. Once it is stolen or compromised, intruders gain access to your private spaces; your money, identity, photos, and even your work. That is why strong passwords are no longer optional; they are essential. Humans are not computers. We cannot remember dozens of complicated strings of characters, and reusing the same weak password across accounts only makes things worse.
A strong password should be long, unique, and include a mix of upper and lowercase letters, numbers, and symbols. But memorizing random combinations can be frustrating. Thus, there are smarter ways to create passwords you can remember and tools to help you manage them safely. In this guide, we will explore practical strategies for creating strong passwords, how to manage them with tools like 1Password, and how to stay secure online.
Passwords are the first line of defense against hackers. According to Verizon’s 2024 Data Breach Investigations Report, stolen credentials were involved in 77% of Basic Web Application Attacks. Cybercriminals use automated tools to guess millions of combinations in seconds, so a simple password like ‘password123’ or ‘qwerty offers virtually no protection against a determined attack. These common choices are often the first targets for brute-force attacks, where algorithms systematically try every possible combination of characters until the correct one is found. These tools work so fast and efficiently that it shows why strong passwords are essential and why simple, easy-to-guess ones are no longer safe.
Weak or reused passwords expose you to risks like:
The stronger and more unique your passwords, the harder it is for attackers to break in.
A secure password should follow these rules:
For example:
Weak: john123
Strong: dS^EK+ThfAw2@jk
But how do you create something strong and memorable?
Instead of random combinations that are hard to recall, try these techniques:
These methods let you create complex but personal passwords.
Even strong passwords can be compromised in data breaches. Regularly updating your passwords reduces the window of opportunity for hackers. Security experts recommend updating passwords every 3 to 6 months and immediately after any suspected breach.
.jpg)
If the answer is no, it is time for an update.
The average person has over 100 online accounts. Remembering long, unique passwords for each is nearly impossible without help. This is where password managers come in.
What Are Password Managers?
A password manager is a tool that securely stores all your passwords in an encrypted vault. You only need to remember one master password, and the manager will generate, store, and autofill the rest.
Benefits include:
1Password is one of the most trusted password managers worldwide. Here is how it works:
If 1Password is not for you, there are alternatives:
Each of these tools can help you manage and protect your digital life.
Strong passwords are essential, but they are not the only defense. Add these layers:
Your password is more than a login detail. It is the lock that protects your identity, finances, and privacy. Weak or reused passwords leave the door wide open for hackers, while strong, unique passwords create barriers that are difficult to break.
Creating strong passwords does not have to be overwhelming. By using techniques like passphrases, acronyms, or personal catchphrases, you can design secure logins that you will actually remember. For those with dozens of accounts, password managers like 1Password, Dashlane, or Bitwarden simplify the process, keeping all your credentials safe in one place while helping you generate new ones.
The real key is consistency. Update your passwords regularly, avoid reusing them, and layer your security with two-factor authentication. Think of your password strategy as digital self-defense. With smart practices and the right tools, you can enjoy the convenience of technology without sacrificing your safety.
.jpg)


Copy and paste is something we all use daily, but unfortunately, a lot of us haven’t been making the most of what this simple feature has to offer. Not because we don't want to, but because we don’t know how to.
If you’ve ever copied something only to lose it the moment you copied something else, you know how frustrating the basic clipboard can be. Clipboard managers solve this problem by keeping a history of everything you copy, making it easy to reuse text, links, images, or files without having to go back and forth.
A clipboard manager is a tool (which could be built-in or require a third-party plug-in) that enhances a device’s built-in clipboard by saving a history of copied items, such as text, images, and files, allowing users to access and re-use them later.
Using a clipboard manager helps you work smarter and faster by ensuring you don’t lose a copied item the moment you move on to something else. It keeps your copied items saved so you can always go back and grab them when needed. This saves you the trouble of retyping or hunting down the same information over and over again.
They also help you stay organized by letting you pin your most-used items, like an email address, a signature, or a code snippet, so they’re always just a click away.
Pro tip: If you really want to boost productivity, advanced managers go even further with features like keyword search, shortcuts, and even syncing across your devices.
Getting started with a clipboard manager is simple. Once installed, it usually runs quietly in the background, automatically saving everything you copy. When you need something, just open the manager with a shortcut (like windows+v) and scroll through your history to grab what you want. To set up a clipboard manager, follow these quick, easy steps.
After your setup is complete, your text, images, or links are automatically saved each time you copy them. To reuse something, simply open your clipboard history with the shortcut (like Windows + V) and select the item you want to paste.
To save time, pin or mark the items you use often as favorites for ease of access. Things like email templates, signatures, or links. Some managers even let you create folders or categories. Managers like Ditto allow you to group snippets into custom collections, and ClipClip supports organizing copied items into folders for easy access. This way, you know exactly where to find whatever you need.
After using clipboard managers for a while, you may notice your list of copied items starts piling up. When that happens, you don’t need to waste time scrolling through your clippings to spot what you need. All you need to do is type in a keyword in the search bar, and the item you’re looking for pops up right away.
Clipboard managers might seem like a small upgrade, but they save you from the frustration that comes with losing copied items. As a bonus, they keep your essentials organized and make it effortless to pull up what you need. With features like favourite pinning, clipboard search, and device syncing, a good clipboard manager turns copy-paste into a real productivity tool, and once you start using one, you’ll wonder how you ever worked without it in the first place.
.jpg)


Your inbox isn’t supposed to be a dumping ground; it’s a workspace. But the problem is, between newsletters you never read, promotions you didn’t ask for, and the endless back-and-forth of daily communication, these emails pile up fast. Cluttered inboxes slow you down, make you miss what matters, and leave you stuck in an endless cycle of apologizing for late replies.
If that sounds familiar, you’re definitely not alone. Most people treat their inbox like a digital storage unit—everything goes in, but nothing gets sorted. Oftentimes, this results in missed opportunities, wasted time searching for old emails, and constant mental clutter that makes it harder to focus on actual work.
The good news is, organizing your inbox isn't complicated at all. With a few smart habits and the right tools, you can turn your inbox into a well-organized space that works for you, not against you.
The first step to a clean inbox is simple: stop the flood before it starts. If your inbox is constantly filling up with newsletters you never read, promo codes for apps/services you no longer use, or updates you didn’t sign up for, no amount of sorting will save you. These emails are digital noise, and the more of them you allow in, the harder it becomes to spot important emails.
Start by identifying what’s irrelevant. Scan through your recent emails and take note of patterns: do you tend to ignore certain brands, newsletters, or updates? If so, it’s time to cut them off. Most email platforms like Gmail and Outlook now have a one-click Unsubscribe button at the top of promotional emails, but if you want to save time, tools like Leave me alone or Sanebox can help you unsubscribe from dozens of lists in just a few minutes.
Once you’ve turned off the tap, deal with the backlog. Archive old emails you won’t need again, clear your spam folder, and delete duplicate emails. Think of it like cleaning out your closet; if it doesn’t serve a purpose, it shouldn’t take up space. By trimming down the noise, you’ll immediately notice how much easier it is to work in your inbox.
Decluttering your inbox doesn’t have to become a recurring cycle. After taking the time to clear things out, you can maintain order by training your email to do the heavy lifting for you. Instead of manually sorting through every message, you can utilize email filters to create rules that automatically move certain emails into specific folders. For example, newsletters into a “Promotions” folder, receipts into “Finance,” and team updates into “Work.”

Email providers like Gmail or Outlook let you set conditions such as sender, subject line, or keywords to trigger these actions. This way, you get to spend time on more important things while your email literally sorts itself out.
Not all emails are equally important, and your inbox should reflect that. Instead of letting everything sit in the same place, take advantage of the star, flag, and priority marker features to separate the urgent from the optional. Mark emails that need your immediate attention so they don’t get buried under newsletters or internal chatter.
You can also go a step further by creating rules for your most important contacts. For example, emails from your manager, clients, or project partners can automatically jump to the top of your inbox, while the rest can wait their turn.
Many email platforms also let you set up VIP lists so that these critical senders stand out instantly. That way, you’re always on top of what truly matters.
One of the biggest causes of email overwhelm is having to constantly check your emails. Instead of living in your inbox, you can set dedicated time blocks to deal with it. For most people, two or three check-ins a day (morning, midday, and before wrapping up) is more than enough to stay on top of communication.
During these blocks, commit to reading, responding, and sorting until you’ve cleared the day’s email load. The “Inbox Zero” approach works best here. Not because your inbox will always be empty, but because you’re building a system that ensures nothing lingers unattended. This way, your inbox serves you, not the other way around.
Keeping your inbox clean isn’t a one-time task; it’s a habit. So set aside time each week to review, delete, or archive emails you no longer need. Once a month, go a step further and audit your subscriptions: unsubscribe from newsletters or promotions you never open.
For a faster deep clean, use search operators like larger:10M in Gmail to track down space-hogging emails with big attachments and clear them out in bulk. Regular cleanups prevent buildup and keep your inbox running efficiently without overwhelming you later.
The truth is, an inbox will only stay as organized as you keep it. The best filters, folders, or flags won’t matter if you don’t stick to a routine. By unsubscribing from unused services, setting rules, and building simple habits, you can keep your inbox working efficiently. So start small, stay consistent, and watch how much easier it becomes to focus on the emails that truly matter.


Instagram has evolved from a photo app into a creative powerhouse with over two billion monthly active users. Hashtags help make your content discoverable, connecting you with audiences beyond your followers. But when your carefully crafted post vanishes from the hashtag feeds, it's confusing and frustrating.
Instagram posts can disappear from hashtag feeds for many reasons. Sometimes it’s as simple as having a private account, while other times it may be caused by banned hashtags, shadowbans, community guideline violations, or even temporary glitches in the app. When this happens, your post’s visibility drops, limiting your reach and engagement. Fortunately, most of these issues are easy to identify and fix. With the right steps, you can troubleshoot disappearing posts, avoid shadowbans, and prevent banned hashtags from hurting your reach. This guide explains why posts disappear and how to fix them.
Hashtags are one of the most powerful tools for Instagram growth. They work as a discovery engine, connecting your posts to new audiences searching for content. Popular hashtags like #travel, #foodie, and #fashion can boost visibility, drive likes and comments, and attract followers. For small businesses, influencers, and creators, a strong Instagram hashtag strategy is a free way to expand reach, promote products, and build community. However, using hashtags incorrectly can hurt visibility. Extremely popular tags are overcrowded, burying your content fast, while banned hashtags can make posts disappear. To grow on Instagram, you need smart hashtag usage and proven Instagram visibility tips.

1. Check for Banned Hashtags
Instagram bans or restricts certain hashtags due to spam, inappropriate use, or violations of community guidelines. Using even one banned hashtag can cause all the hashtags on your post to stop working. To check, search the hashtag directly on Instagram. If no posts appear under “Top” or “Recent,” it is likely banned. Always remove such hashtags from your posts.
2. Audit Your Hashtag Usage
Avoid using irrelevant hashtags or repeating the same set on every post, as this can trigger algorithmic suppression. Instead, mix broad, trending hashtags like #travel with niche-specific ones like #budgettraveltips. This approach improves your chances of visibility while keeping your account safe from shadowban risks.
3. Ensure Your Account is Public
Hashtags only work for public accounts. If your account is private, only your followers can see your content. Switch to public mode to ensure your posts reach hashtag feeds and attract non-followers.
4. Update or Restart the App
Sometimes, disappearing posts aren’t a result of shadowbans or guideline issues, but technical glitches. Using an outdated app can cause display errors. Regularly update Instagram from your app store, restart the app, or clear cache to refresh feeds and resolve performance bugs.
5. Follow Community Standards
Posts that violate Instagram’s Community Guidelines—such as content with nudity, hate speech, misinformation, or unauthorized copyrighted material—are likely to be hidden from hashtag feeds. Review and adhere to these rules to avoid suppression.
6. Address Shadowbans and Wait It Out
If you suspect a shadowban, stop using hashtags for a while, remove banned or repetitive tags, and take a short break from posting. This pause often resets your account visibility. Some creators also find engaging authentically with followers (likes, comments, and stories) helps signal trustworthiness back to the algorithm.
Understand that response times may vary, but reporting creates an official record of your case. If the issue persists, resubmit reports or send regular feedback to increase the likelihood of review.
Here are commonly banned or restricted Instagram hashtags as of 2025:
Always search and test hashtags before using them.
Disappearing Instagram posts can feel frustrating, especially when hashtags are essential for exposure. Most often, the cause is identifiable: banned tags, privacy settings, guideline violations, or algorithmic filters. The good news is you can resolve it. Start by removing problematic hashtags, switching to a public account, and auditing your content strategy.
To prevent future visibility issues, use a smart hashtag strategy that blends niche and broad terms, keep your content guideline-friendly, and engage authentically with your community. Utilize research tools to stay informed about banned tags and rotate your hashtags regularly. Instagram rewards creativity, relevance, and consistency. Hashtags enhance visibility, but storytelling, strong visuals, and user connection make content truly shine. With the right approach, your posts can stand out in the vast Instagram ecosystem.
.jpg)


We’ve all tried sitting down to concentrate on something important, only to have our focus shattered by the constant pings, dings, and alerts lighting up our phones. What starts as a small distraction quickly snowballs into frustration, pulling you away from the task at hand and making it harder to get back into the flow.
Of course, notifications aren’t inherently bad. In fact, they’re designed to be helpful, reminders for meetings, updates from your favorite apps, or alerts that actually matter. But when those notifications become too frequent, irrelevant, or downright overwhelming, they stop being useful and start becoming noise. And that noise has a real cost: your attention, your productivity, and even your peace of mind.
The good news is you don’t have to stay stuck in this cycle. Whether you’re using an Android or an iPhone, there are practical steps you can take to manage, filter, and silence unwanted notifications. This guide will walk you through the best strategies to reduce the pop-ups, minimize unnecessary distractions, and take back control of your phone, so you can finally focus on what truly matters without the constant interruptions.
Note: This guide covers the two common phone software, Android and iOS(Apple), while giving you the best measures to take for each software.
To disable notifications on your Android phone, there are many ways to go about it, such being:
To turn off the notifications from a particular application:
OR
The Do Not Disturb (DND) mode, when selected, allows the user to engage in any activity on their phone without disturbance from third parties. To access it:
Swipe down on your phone to access the toolbar and tap the DND icon., There, it’s all done.

These are the methods you can use to disable notifications on your iPhone:
The Focus Mode allows the user to turn off notifications for a set amount of time, which could be for an hour or a whole day, depending on the user’s choice. To select it:
Notifications may seem like a minor issue, but research shows they significantly increase stress and disrupt focus. Silencing them, especially during deep work or rest, can seriously improve your well-being. Even going offline for just one day helps people to maintain better focus. Now you know what to do when you either need to study, lock-in, or just shut out the noise.
.jpg)


Voice assistants like Google Assistant, Siri, and Alexa have become everyday companions. They set reminders, answer quick questions, play music, and even control smart home devices with just a voice command. But have you ever casually mentioned wanting a new pair of shoes, only to find shoe ads following you across social media? It feels like these assistants are not just helpful listeners but also eavesdroppers. What is happening behind the scenes is often tied to ad targeting, where data from your interactions can be used to serve you personalized ads.
While the goal is to make life easier by anticipating your needs, the constant listening can start to feel like a privacy invasion. The reality is that voice assistants bring incredible convenience, but the trade-off is clear. The more they listen, the more data they collect. The good news is you can still use them without giving up your privacy.
Voice assistants are brilliant tools. With a quick “Hey Google,” “Hey Siri,” or “Alexa,” you can send messages, set alarms, shop online, or even dim the lights without lifting a finger. They’re especially helpful for multitasking, accessibility, and managing smart devices.
However, like all powerful tools, they come with trade-offs. To understand how to use them without compromising privacy, let’s look at the pros and cons.

The key is balance. You can still use Google, Siri, or Alexa without letting them listen to everything. Here’s how:
The goal is not to abandon voice assistants altogether, but to use them consciously. Disabling “always listening” doesn’t mean you can’t use them, it simply means you activate them when you want.
You can still enjoy:
This way, the assistant works for you, not the other way around.
Voice assistants like Alexa, Google, and Siri are incredibly useful, but convenience should not come at the cost of your privacy. The good news is you do not have to choose one over the other. By taking a few smart steps, you can enjoy the benefits while staying in control of your data. Make it a habit to review and delete your voice recordings regularly so unnecessary data does not sit on company servers. Keep microphones muted when not in use to stop unintentional listening. Be intentional about the information you share and limit how much personal data these assistants can access. Strengthen your security with tools like multi-factor authentication, PINs, and frequent software updates.
Finally, stay informed about how your device provider handles your data. Privacy is no longer optional in today’s digital world, and with the right precautions, you can have both safety and convenience in one.
.jpg)


When it comes to course creation, one of the most pivotal decisions you'll make as a digital creator or entrepreneur is selecting the right topic. The intersection of passion and knowledge not only fuels your motivation but also ensures that your enthusiasm shines through, making your course both engaging and valuable to learners.
Here's an extensive guide on how to pinpoint that perfect topic that aligns with your interests and expertise:
Expertise ensures credibility:
Your passion needs an audience:

Passion translates into engagement:
Narrow down to what's uniquely you:
Choosing a course topic is more than just picking something you know; it's about selecting something you love, something you can teach with fervor, and something that meets a market need. For digital creators and entrepreneurs, this alignment not only makes the course creation process enjoyable but also positions you as an authentic and passionate educator. Remember, your enthusiasm is infectious; let it guide you to a topic that not only fulfills you but also inspires your learners to explore, learn, and grow.


Sometimes you might wonder how successful creators, coaches, or small business owners turn casual followers into paying customers, and how people who stumbled onto their page became loyal customers. Well, the answer lies in the sales funnel. A sales funnel is simply a marketing strategy used to guide people from discovering your brand to becoming patronizing consumers. Instead of constantly posting on social media with no clear strategy, a sales funnel gives your business structure and clarity..
Now you might be worried thinking it might be too technical or advanced for you to learn, but it’s actually easy to learn, and the plus side is that building your first sales funnel does not require any advanced tech skills or expensive tools. So whether you’re a content creator, podcast host, career coach, author or aspiring entrepreneur, you can create one that attracts and retains customers.
Before you build any sales funnel, you need to understand the stages of a sales funnel and how your target audience moves through it. The sales funnel goes through:
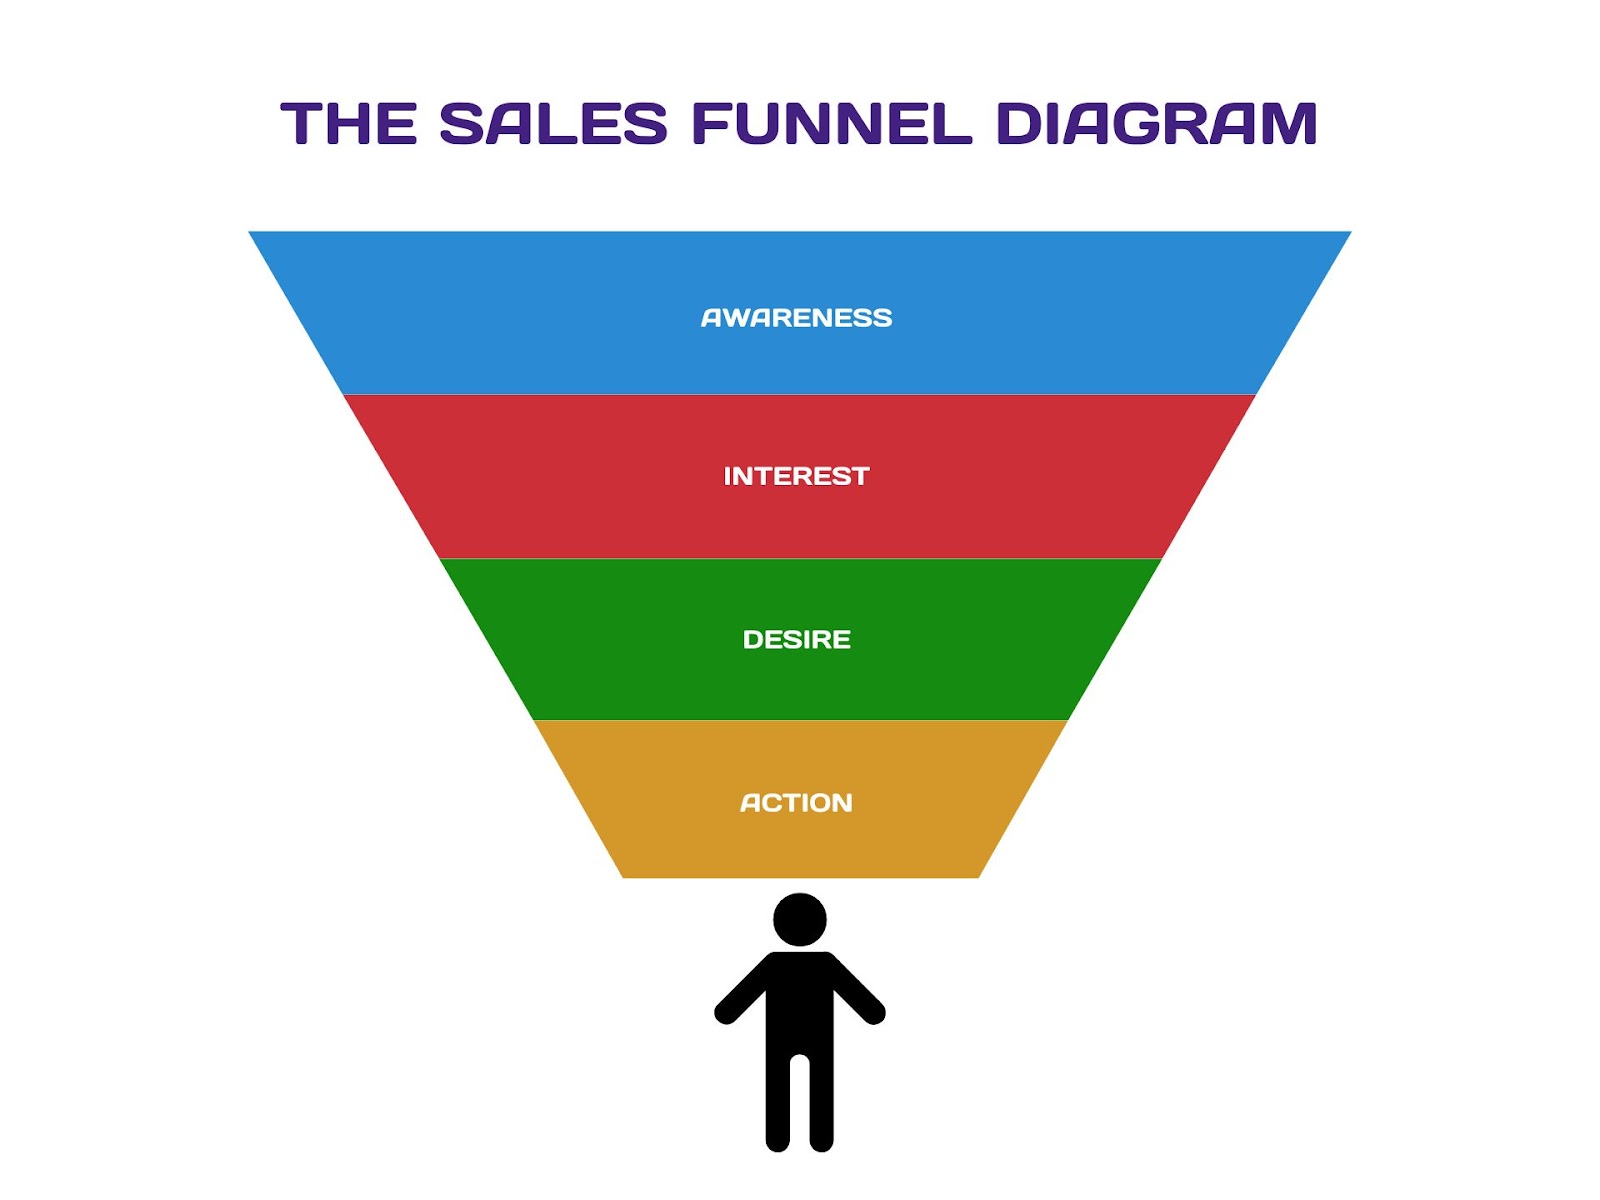
Now, after taking you through the stages of the sales funnel for better understanding, here is the step-by-step guide to creating your first sales funnel:
Before anything else, you must realize that every sales funnel starts with clarity. Who are you trying to reach? What problem do they need solved?
How to do this effectively:
By being specific, you should pick “productivity coaching for freelance designers” rather than just “productivity coach”. By doing this, you can craft a funnel that speaks directly to the people most likely to engage with your product.
A lead magnet is simply the bridge between attention and trust. It’s something free you offer in exchange for your audience’s email or contact information. It serves as the hook that helps to reel in your audience to your products and services. emphasizes that strong funnels always include a compelling opt-in incentive.
Examples:
Your lead magnet should be able to solve a small but real problem and tie directly into your paid offer. For instance, if you sell an online course on video editing with Capcut, your lead magnet could be a “Knowledge guide to using Capcut” e-book.
A landing page is a dedicated page that aims to convert visitors into clients or customers. It is also where people claim your lead magnet. According to AddPlugin, a strong landing page has three essentials:
Pro tip: Use a tool like Mainstack to easily design landing pages and integrate sign-up forms without feeling overwhelmed. They have assistants that can help you customize your pages with zero stress.
Once the visitor signs up with their email, the relationship begins. It is important to note that emails tend to convert far better than social media because they allow consistent, direct communication.
How to nurture effectively:
Doing this not only builds trust but also primes your audience to see you as the go-to solution.
Don’t overcomplicate your first sale. It is recommended that you start with a “mini offer”, something affordable, actionable, and quick to deliver. Examples include:
This builds momentum, generates revenue, and validates your idea before you invest in bigger products.
Even the best funnel won’t work if no one sees it. LYFE Marketing explains that a multi-channel approach works best:
Start with one or two channels, test, then scale what works.
Funnels aren’t “set it and forget it.” Yesware advises tracking conversion rates at each stage: landing page opt-ins, email open/click-throughs, and sales.
Tools you can use:
Your first funnel doesn’t end with the first sale. It is important to note that your most profitable customers are repeat customers.
Retention strategies:
By nurturing existing buyers, you reduce acquisition costs and turn your funnel into a growth engine.
Building your first sales funnel may feel overwhelming at first, but when you break it down into steps, it becomes manageable and incredibly rewarding. From defining your audience and creating a lead magnet to nurturing through email and offering simple products, each step builds momentum. And remember: funnels are not static, they’re living systems that grow and evolve as your business does. So don’t be afraid to switch things up as you evolve.
The key takeaway is this; don’t wait to perfect everything. As Funnel Teacher suggests, start small, test, and adjust. Each iteration will sharpen your process and improve results.
By focusing on value-driven communication, and optimizing your content regularly, you can create a funnel that not only generates revenue but also builds lasting relationships with your audience.
Remember, your first funnel is more than just a sales tool. It is the foundation for turning your work into a thriving business.


Building a personal brand is no longer optional; it is the foundation upon which creators, entrepreneurs, and professionals are perceived and remembered. A strong brand sets one person apart, making it easier for audiences to connect, trust, and invest in what is being offered. The encouraging part is that building a brand does not require a large budget.
Social media has leveled the playing field, giving anyone the chance to gain visibility and establish authority. Often, the only cost is a data plan, yet the returns can be transformational.
Research shows that professionals with active personal brands are 3.5 times more likely to attract new clients, and 60% of consumers have purchased from a brand because of its reputation. With clarity, consistency, and resourcefulness, anyone can build authority, grow visibility, and position themselves for lasting opportunities, all without breaking the bank.
There are countless reasons to build a personal brand, but if the goal is to earn and thrive in the digital space, these are some of the most impactful:
Clearly defining what makes you unique allows you to rise above competitors offering similar products or services. Without a distinct personal brand, even the most talented individuals risk fading into the background.

An authentic and consistent personal brand builds credibility. Audiences are far more likely to trust and engage when you appear knowledgeable, reliable, and aligned with your values.
Strong branding helps position you as a go-to expert in your niche. For example, executives with stronger personal brands receive up to five times more engagement on LinkedIn compared to peers.
A recognizable personal brand enhances visibility, making you more likely to attract partnerships, sponsorships, collaborations, or even speaking engagements.
A strong personal brand increases your perceived value. Creators and professionals with well-defined brands can charge higher rates because clients are willing to pay more for expertise, credibility, and authenticity.
A personal brand isn’t tied to just one platform or moment. It’s a versatile asset that grows over time, spans multiple channels, and becomes a foundation for long-term stability and recognition.

Positioning is the foundation of every personal brand. Without clarity, even the best content will blend into the noise. To strengthen positioning:
A simple positioning statement can be:
“Helping [specific audience] achieve [specific result] through [unique method or expertise].”
Facts inform, but stories connect. People are drawn to real experiences that feel relatable. Share the challenges, the turning points, and the reasons behind the work being done. A fitness coach, for example, might share the struggle of being overwhelmed in the gym and how that led to creating simple, beginner-friendly workouts. These stories make a brand feel human and memorable.
Social media is the most accessible way to build a brand, but trying to show up everywhere at once often weakens your impact.. The key is to choose where the target audience spends time:
Action steps:
Every strong brand needs a central hub, a single place where people can learn more about you, see your work, and take action. This doesn’t have to be an expensive website. Tools like Mainstack’s link-in-bio feature allows you create a professional hub that showcases your offers, content, and social links in one clean, customizable page. It’s affordable, easy to set up, and built with creators in mind, so you can focus on growing your brand instead of worrying about tech or design.
A scattered brand is easily forgotten. Instead of offering too many things, lead with a single clear offer. Examples include:
This creates a strong first impression and builds trust. Additional offers can be added as credibility grows.
A strong visual identity does not require expensive designers. Free tools can keep branding consistent:
Consistency in visuals reinforces recognition across platforms.
Content can be stretched into multiple formats to save time and increase visibility. For example:
Repurposing ensures that one idea is leveraged across multiple platforms, increasing reach without incurring additional costs.
Consistency is the secret ingredient behind every recognizable brand. It is not about posting endlessly; it is about showing up regularly that your audience knows they can rely on you. Over time, this builds trust, familiarity, and authority.
Here’s how to stay consistent without burning out:
Audiences are drawn to brands that show up steadily. Consistency does more than grow visibility; it turns attention into loyalty, and loyalty into real opportunities.

Networking accelerates growth and does not require money, only intention and effort. Building the right relationships can create opportunities that no paid campaign could match.
Practical ways to get started:
When relationships are built on authenticity and trust, they often lead to unexpected opportunities, from referrals to collaborations that multiply reach and influence.
A personal brand is not static, it grows and evolves along with the creator. Regular check-ins ensure that the brand remains aligned with new goals, skills, and audience expectations.
Practical steps to refine your brand include:
Professionals with strong and consistently refined personal brands experience higher employability, greater career satisfaction, and more long-term opportunities.
Building a personal brand does not require a massive budget. What truly matters is clarity, consistency, and connection. Every story shared, every piece of content posted, and every interaction adds a brick to the foundation of a brand that stands out. The most successful creators focus on showing up consistently, telling authentic stories, and offering value to a specific audience. Over time, these efforts attract visibility, trust, and opportunities that translate into income.


Today’s global economy offers African entrepreneurs, freelancers, and businesses a chance to earn in dollars, euros, and other major currencies by serving international clients. But getting paid isn’t always easy.
The rise of digital platforms, remote work, and e-commerce has made it possible for a Nigerian graphic designer, a Ghanaian consultant, a South African developer, or a Kenyan tutor to tap into international markets. However, one persistent hurdle stands in the way: getting paid. For many African professionals, creators, and business owners, accepting international payments remains a complex and costly process due to limited access to global payment platforms, high fees for currency conversions, restrictive banking regulations, and delays that disrupt cash flow.
This guide zeroes in on four key African markets; Nigeria, Ghana, South Africa, and Kenya, exploring the specific obstacles they face in 2025 and offering practical, country-tailored solutions to help businesses and individuals earn easily in dollars. With Africa’s digital economy projected to contribute $180 billion to GDP before the last quarter of 2025, the demand for effective payment solutions has never been higher.
Let’s break down the latest challenges and how to overcome them.
Nigeria’s fintech scene is flourishing like never before. Transaction values in digital payments are expected to hit $137.20 billion in 2025, yet earning in dollars remains a struggle for many entrepreneurs and freelancers. The country’s massive population and creative talent pool make it a hotspot for global opportunities, but payment barriers hold it back.
Latest Challenges Nigerian Businesses Face in 2025:
Solutions for Nigerians to Receive International Payments:
For a Nigerian content creator selling digital courses to U.S. clients, this means no more begging friends abroad for account favors, just direct dollar earnings with fast, affordable withdrawals.
Ghana’s digital economy is thriving, with mobile money transactions hitting 82% of GDP in recent years. Yet, for all its progress, earning in dollars from international clients remains elusive for many Ghanaians.
Latest Challenges Ghanaian Businesses Face in 2025:
Solutions for Ghanaians to Receive International Payments:
A Ghanaian graphic designer can now invoice a Canadian client in USD, all without wrestling with bank bureaucracy.
South Africa boasts Africa’s largest e-payments market, projected at $5 billion before the end of 2025, but its businesses still face hurdles when earning dollars from abroad despite its advanced infrastructure.
Latest Challenges South African Businesses Face in 2025:
Solutions for South Africans to Receive International Payments:
A South African app developer can now charge a U.S. client in dollars, convert at a fair rate, and avoid the SARB’s red tape, all in a day’s work.
Kenya’s M-Pesa is a global mobile money icon, with 34 million users, but its local dominance doesn’t fully translate to earning dollars internationally.
Latest Challenges Kenyan Businesses Face in 2025:
Solutions for Kenyans to Receive International Payments:
A Kenyan online tutor can now earn dollars from U.S. students and get paid in M-Pesa instantly, dodging the old fee traps.
These challenges aren’t just inconveniences, they’re costing African entrepreneurs millions in lost revenue and wasted time.
Mainstack offers a unified solution tailored to these realities. It empowers businesses in Nigeria, Ghana, South Africa, and Kenya to accept international payments without jumping through hoops like foreign account setups or complex registrations.
With support for 135+ currencies, competitive exchange rates, and withdrawals to local banks or mobile wallets, it cuts costs and speeds up cash flow. Plus, its integration with tools for invoicing, storefronts, and bookings makes it a one-stop shop for global expansion.
Africa’s digital payments market is set to soar as Statista projects $611.20 billion by 2029, with remittances hitting $96 billion in 2023. Yet, without the right tools, businesses in Nigeria, Ghana, South Africa, and Kenya risk missing out. The AfCFTA is boosting intra-African trade by 52% by 2030, but global earnings are the next frontier. Platforms like Mainstack remove the old barriers, letting you control your financial future.
Sign up today for free and enjoy the benefits of earning internationally that cuts across borders, country restrictions, and high fees.


Your digital storefront is more than just a webpage, it's your gateway to turning skills, knowledge, and services into sustainable income streams. Whether you're selling digital products, offering coaching services, or monetizing your expertise, creating a high-converting product page is essential for maximizing your online earning potential.
In today's competitive digital landscape, creators and entrepreneurs need every advantage to stand out and convert visitors into paying customers. Your product or service page serves as your 24/7 salesperson, working to showcase your offerings and persuade potential customers to take action, even while you sleep.
Your product page is essentially your digital storefront, the place where potential customers decide whether to invest in what you're offering. According to recent research by Baymard Institute, the average website conversion rate across industries is just 2.17%, meaning there's significant room for improvement for most businesses.
The key to building a high-converting page lies in understanding that visitors arrive with specific problems they need solved. Your job is to clearly demonstrate how your product or service provides that solution while removing any barriers to purchase.
Instead of simply listing what your product includes, focus on the transformation it provides. If you're selling an online course, don't just mention "10 video lessons and downloadable templates." Instead, highlight outcomes like "Master the skills to earn $5,000+ monthly from freelancing in 90 days."
This approach aligns with how successful creators think about monetization—focusing on the value delivered rather than just the deliverables. Use customer success stories and specific results to make your benefits tangible and credible.
Your webpage design should reflect professionalism while remaining approachable. Use high-quality images, clean layouts, and consistent branding throughout. Video content is particularly powerful; HubSpot reports that including video on landing pages can increase conversion rates by up to 80%.

Consider showcasing your product in action, featuring customer testimonials on video, or providing a behind-the-scenes look at your process. This visual storytelling helps build the trust necessary for online transactions.
Your CTAs should be impossible to miss and irresistible to click. Use action-oriented language that creates urgency while addressing common objections. Instead of generic "Buy Now" buttons, try specific phrases like:
Position your primary CTA above the fold and repeat it strategically throughout the page. Research by WordStream shows that pages with a single, focused CTA can increase conversions by up to 371%.
Anticipate and address the concerns that might prevent someone from purchasing. Common objections include:
Use testimonials, guarantees, FAQ sections, and detailed product descriptions to overcome these barriers. Social proof is particularly powerful, display customer count, testimonials, and success stories prominently.
Modern customers expect pricing flexibility. Consider offering:
Research by ProfitWell indicates that offering multiple pricing options can increase conversion rates by up to 20% by accommodating different customer preferences and budgets.
If you're selling globally, consider currency localization and cultural preferences. Displaying prices in local currencies can significantly impact conversion rates, studies show that 92% of online shoppers prefer to see prices in their local currency.
Additionally, ensure your page loads quickly across different regions and devices. Google reports that 53% of mobile users abandon sites that take longer than 3 seconds to load.
Implement analytics to track key metrics like:
Use A/B testing to experiment with different headlines, images, pricing displays, and CTA placements. Even small improvements can compound into significant revenue increases over time.
With mobile commerce accounting for over 50% of online sales, your product page must provide an excellent mobile experience. Ensure:
Genuine scarcity and urgency can significantly boost conversions when used ethically. Consider:
Avoid fake countdown timers or manufactured scarcity, as these tactics can damage trust and brand reputation.
Remove friction from your checkout process by:
Research by Baymard Institute shows that 70% of online shopping carts are abandoned, often due to complicated checkout processes or unexpected costs.
Creating a high-converting product or service webpage is both an art and a science. It requires understanding your audience, clearly communicating value, and continuously optimizing based on real performance data.
The most successful online entrepreneurs understand that their webpage is never "finished", it's a living asset that evolves with their business and customer feedback. By implementing these strategies and maintaining a focus on customer value, you can create a digital storefront that not only showcases your offerings but consistently converts visitors into satisfied customers.
Remember, every element of your page should serve the goal of helping potential customers understand how your product or service will improve their lives or solve their problems. When you focus on delivering genuine value and removing barriers to purchase, conversions naturally follow.
Build your high-converting storefront today. Whether you're selling digital products, offering services, or monetizing your expertise, the right tools and strategies can help you turn your knowledge into sustainable income streams. Start building your professional webpage today and join thousands of creators who are successfully monetizing their skills online.


Online learning is removing geographic barriers to knowledge acquisition and expanding the global education market. From education businesses in Africa operated by individual course creators to established training institutions, this presents an extraordinary opportunity to reach students worldwide. However, many African education providers struggle with one critical challenge: how to accept payments from international students efficiently and affordably.
Traditional solutions often involve establishing separate business entities in different countries, navigating complex financial regulations, and managing multiple payment processors. This approach creates significant barriers to global expansion, especially for smaller education businesses and independent educators.
This guide explores how education businesses can accept payments from international students without the traditional complexities, allowing them to focus on what matters most; delivering quality education.
The global education landscape offers tremendous potential:

Modern payment infrastructure can help African education businesses tap into these international markets by removing payment barriers.
Effective payment orchestration platforms are meant to address several distinct challenges when accepting payments from international students such as:
Instead of establishing separate business entities in each target market, African education businesses can use a unified platform that:
This approach dramatically reduces the barrier to entry for international markets, allowing education businesses in Africa to accept students from virtually anywhere without additional legal structures.
Advanced payment platforms offer:
This creates clarity for both students and education providers, eliminating surprise costs and ensuring predictable revenue.
Comprehensive payment solutions accommodate regional preferences by supporting:
The result is increased conversion rates as students can pay using their preferred methods, regardless of location.
Modern payment systems handle:
This eliminates the need for education businesses to become experts in international financial regulations or hire specialized compliance staff.
The most effective solutions for education businesses offer specialized tools:
This integration creates a seamless experience for both students and administrators while eliminating the need for multiple disconnected systems.
The transition to global payment acceptance is simpler than most education businesses realize. Here's how to implement a global payment strategy with Mainstack:
Utilize Mainstack's data insights to optimize your global operations:
As African education businesses continue to produce world-class content and training, the artificial barriers of payment restrictions should not limit their global impact. The technology now exists to accept payments from anywhere without the traditional overhead of multiple incorporations or fragmented systems.
Mainstack's payment orchestration tool represents a fundamental shift in global education delivery. Education businesses of all sizes can now:
The world's students are searching for the knowledge you offer. With Mainstack's approach to international payments, you can reach them without the complexity that has traditionally limited global education.
Get started for free HERE and accept payments from international students without restrictions.


Platforms like Fiverr have created opportunities for Nigerian creatives, digital marketers, developers, and virtual assistants to showcase their talents globally. While landing clients in New York or London from Lagos, Abuja, or Port Harcourt feels empowering, steep commission structures gradually diminish international earnings, transforming these platforms from enablers to obstacles.
This guide explores how Nigerian freelancers can build independent income streams and establish more profitable business models.
Fiverr provides accessible entry to the global marketplace with its ready-made client base and trust infrastructure. A Nigerian graphic designer can secure a $100 logo project from an American startup without leaving home. However, Fiverr's 20% commission significantly reduces earnings.
The withdrawal process compounds these losses for Nigerians:
The Real Cost: On a $500 monthly income through Fiverr, a Nigerian freelancer might only receive ₦620,000 - ₦656,000 after all fees and conversions, instead of the ₦820,000 they could get with direct billing solutions. That's a ₦120,000 - ₦164,000 monthly loss.
Building independence doesn't mean abandoning Fiverr overnight. Instead, focus on creating multiple income streams and establishing your own monetization channels:
Instead of just offering services, Nigerian freelancers can diversify their income by:
Move beyond competing on price to competing on value:
As a Nigerian freelancer, you need tools that work globally without the typical barriers:
Modern creator platforms like Mainstack enable Nigerian freelancers to:
Understanding how creator platforms compare to traditional freelance marketplaces:
The going rate for freelance marketplace fees across the board is around 20%, making independent creator platforms significantly more profitable for Nigerian freelancers.
Nigerian freelancers have unique advantages in the global creator economy:
Fiverr helped you start your global freelance journey; now it's time to build something bigger. By creating multiple income streams and establishing your own monetization channels, you can increase your earnings by 50-100% while building a sustainable creative business from Nigeria.
The creator economy is about turning your skills, knowledge, and expertise into sustainable income streams. With the right platform and strategy, Nigerian freelancers can build thriving businesses that work for them, not against them.