The Best Methods To Stop Unwanted App Notifications
Mainstack Editorial Team
September 2, 2025
10 min read
We’ve all tried sitting down to concentrate on something important, only to have our focus shattered by the constant pings, dings, and alerts lighting up our phones. What starts as a small distraction quickly snowballs into frustration, pulling you away from the task at hand and making it harder to get back into the flow.
Of course, notifications aren’t inherently bad. In fact, they’re designed to be helpful, reminders for meetings, updates from your favorite apps, or alerts that actually matter. But when those notifications become too frequent, irrelevant, or downright overwhelming, they stop being useful and start becoming noise. And that noise has a real cost: your attention, your productivity, and even your peace of mind.
The good news is you don’t have to stay stuck in this cycle. Whether you’re using an Android or an iPhone, there are practical steps you can take to manage, filter, and silence unwanted notifications. This guide will walk you through the best strategies to reduce the pop-ups, minimize unnecessary distractions, and take back control of your phone, so you can finally focus on what truly matters without the constant interruptions.
Note: This guide covers the two common phone software, Android and iOS(Apple), while giving you the best measures to take for each software.
Go to Settings(Find the Gear/Machine icon and tap it)
Then click on the Apps(Applications)
Then select the notifications option
Finally, toggle off “Allow notifications” to cut off all alerts completely
2. Disabling All Notifications from a Particular App
To turn off the notifications from a particular application:
Long-press the app.
Tap on the notification section
Then toggle off allow notifications
OR
You can access the settings faster by long-pressing the notification itself and disabling it directly.
3. Use Do Not Disturb Mode
The Do Not Disturb (DND) mode, when selected, allows the user to engage in any activity on their phone without disturbance from third parties. To access it:
Swipe down on your phone to access the toolbar and tap the DND icon., There, it’s all done.
1. Disabling All Notifications from a Particular App
Open the Settings app
Scroll down and tap Notifications
Tap the application you want to turn off
Then toggle Allow Notifications to turn it off
2. Use Focus Mode to Silence Notifications
The Focus Mode allows the user to turn off notifications for a set amount of time, which could be for an hour or a whole day, depending on the user’s choice. To select it:
Open Settings > Focus
Choose Do Not Disturb or tap the + to create a new mode (like “Work” or “Reading”)
Decide which people and apps can still reach you
Schedule it for specific times or enable it manually
Notifications may seem like a minor issue, but research shows they significantly increase stress and disrupt focus. Silencing them, especially during deep work or rest, can seriously improve your well-being. Even going offline for just one day helps people to maintain better focus. Now you know what to do when you either need to study, lock-in, or just shut out the noise.
Not every sale needs an ad budget. Many successful affiliate marketers are proving this by growing through community engagement and genuine recommendations instead of paid campaigns.
Currently, Affiliates are doubling their commissions by focusing on community-led marketing, creating organic content, and automating emails that build real relationships, and not just clicks.
This guide will show you how to do the same: turn your affiliate hustle into a steady, scalable system that brings consistent results — no ad spend required.
What Is Affiliate Marketing?
Affiliate marketing is a performance-based model where you earn a commission for every sale or action made through your unique link.
In the past, affiliates relied on paid ads to get quick results. But today, many are shifting to community-driven and content-focused strategies as a more sustainable way to grow and sell.
Why Some Affiliates Are Succeeding Without Ads
A bigger ad budget doesn’t always mean better results. Real growth comes from genuine engagement and consistent value.
Lasting success in affiliate marketing usually comes down to three things:
Community trust: People buy from those they trust. That trust builds over time through honesty, transparency, and consistent value. When your audience believes in you, they’ll listen to your recommendations.
Authentic storytelling: Real stories sell better than generic pitches. Sharing your own experiences helps your audience see how a product fits into their lives, creating stronger emotional connections that traditional ads can’t match.
Smart systems: Tools like email lists, landing pages, and tracking dashboards help you stay organized and keep your audience engaged at every stage. When these systems work together, they create a smooth, predictable path from discovery to purchase.
How to Double Affiliate Sales Without Running Ads (The Playbook)
The best affiliate marketers mix organic strategies with paid ads. That balance helps to boost engagements, as well as conversion rates.
That said, here are some proven ways to double sales without running ads:
Communities consistently outperform cold ads because it’s built on a foundation of trust which drives conversions better than exposure.
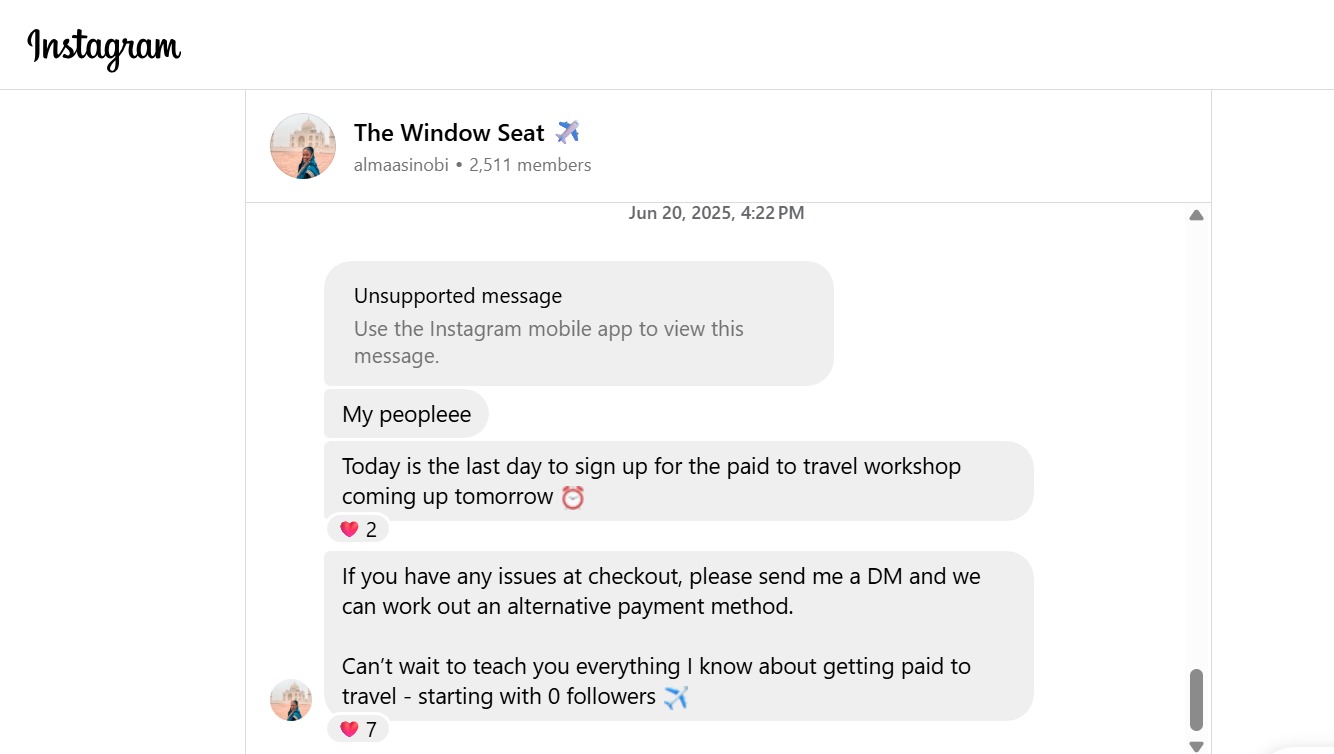
When people connect around shared interests, product recommendations feel natural. That’s why platforms like Facebook Groups, WhatsApp Channels, Telegram, Instagram, and Discord are goldmines for affiliates.
You can create or join communities, share helpful insights, and subtly weave in product mentions without sounding salesy. Instead of hard selling, focus on adding value. Post useful tips, explain how products work, and spark conversations.
Over time, your community starts doing the marketing for you. Members share your recommendations with friends or on social media, expanding your reach without a single naira spent on ads.
These kinds of interactions position affiliates as trusted voices in their niche and ultimately drive consistent sales.
2.) Sell Through Value-Driven Content Marketing
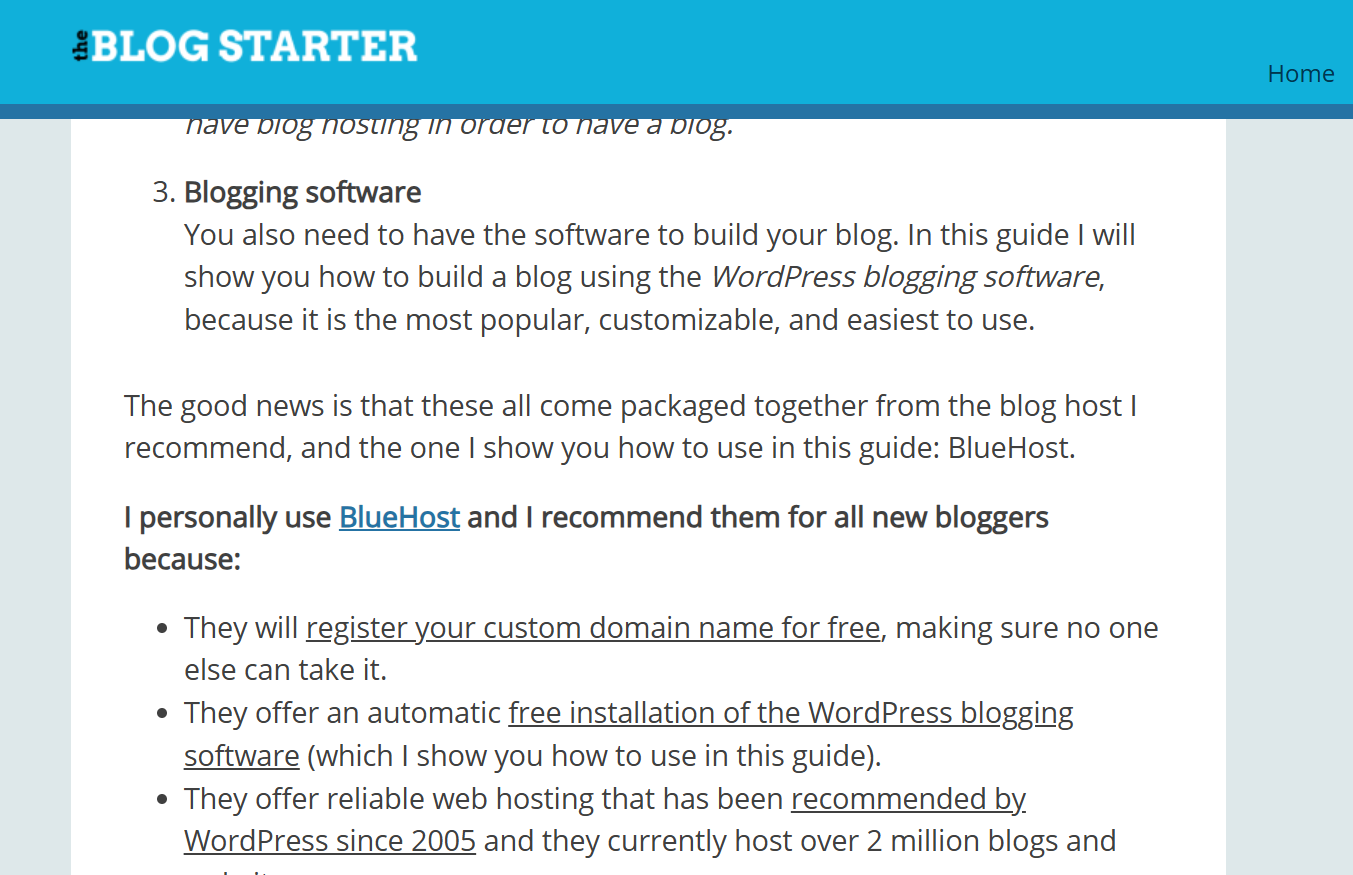
Content marketing is still one of the most dependable ways to drive traffic and sales in affiliate marketing. Writing long-form guides, tutorials, or product comparisons attracts people actively looking for solutions.
Good content naturally positions products as part of the answer. Done well, it brings long-term ROI and passive income without paid promotion.
Many bloggers do this successfully by ranking SEO-optimised articles for niche keywords. For example, The Blog Starter promotes hosting platforms like Bluehost through detailed “how to start a blog” guides that rank well on Google.
Social media is a must for affiliates looking to build trust and visibility without ads. Platforms like Instagram, TikTok, and LinkedIn favour authentic, value-first content.
Many affiliates use short videos, tutorials, and user stories to highlight product benefits. The best content focuses on transformation: “How I solved X problem” or “This tool saved me hours.” The goal is to lead with a relatable story before mentioning the product.
For consistent growth, post 3–4 times per week using formats like:
Quick tutorials or “how I use this tool” videos.
Before-and-after clips showing results.
Mini case studies or walkthroughs tied to personal experiences.
Each post can subtly promote affiliate links while aligning with proven tips and examples that build authority over time.
4.) Use Email Marketing & Build Email Funnels
Email marketing is a reliable, algorithm-proof way to drive affiliate traffic. It’s personal, trackable, and helps affiliates build direct relationships with their audience.
A simple email funnel works like this:
You create an offer, which is a lead magnet (free guide or checklist) to grow your list.
Once they subscribe, send value-driven emails to build trust.
Gradually introduce relevant product recommendations as subscribers begin to rely on your insights and trust your affiliate suggestions.
Following these steps positions you as a helpful resource, not just another promoter. For example, Affiliates like Pat Flynn of Smart Passive Income use storytelling emails to share tips, case studies, and examples where he recommends products.
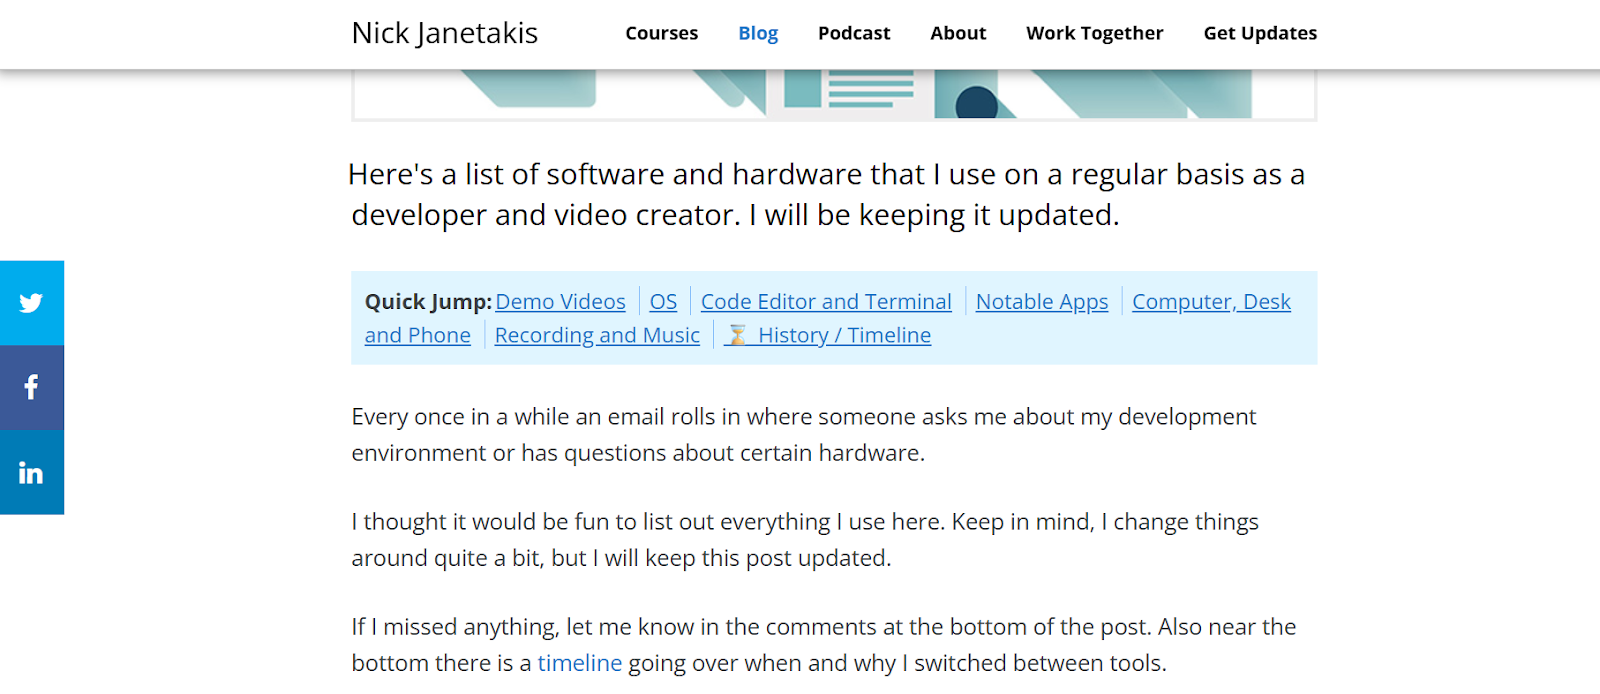
To boost results, segment your list, automate follow-ups, and use storytelling to make recommendations personal. Sections like “tools I use” or “recommended software” help convert cold subscribers.
Creators using Mainstack can add affiliate links to link-in-bio pages or email footers to track clicks and conversions easily.
5.) Webinars, Workshops, and Training Sessions
Hosting live sessions — webinars, mini-workshops, or training — lets affiliates show real value before promoting products. These sessions highlight your expertise and position products as solutions to audience problems.
Because attendees are engaged and actively seeking answers, conversions are often higher than with ads. Boost results by adding affiliate links in slides, follow-up emails, or post-event resources.
6.) Product Reviews, Case Studies & Tutorials with Personal Experience
Sharing first-hand experience through product reviews, case studies, or tutorials is another way to build trust and drive organic conversions. In this approach, affiliates demonstrate how a product works in real life, highlighting before-and-after results and explaining why it’s effective.
They work well because they combine transparency with value. Embedding affiliate links lets audiences see the product in action, boosting engagement and conversions.
Such content doubles as both education and persuasion, making it a key part of any affiliate marketing strategy.
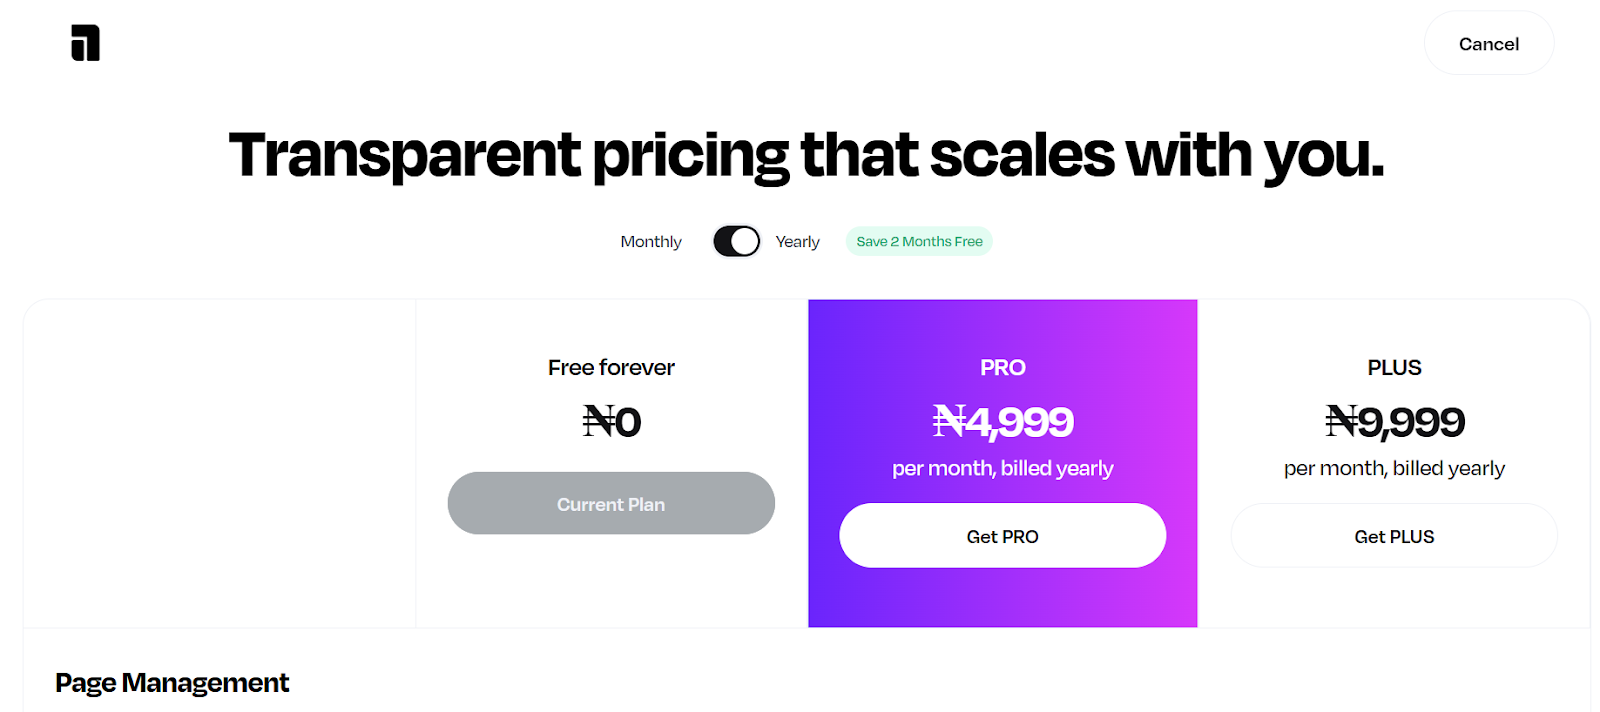
7.) Upsell & Cross-Sell Within Your Own Products or Content
Upselling encourages customers to buy a premium or upgraded version of what they already want, while cross-selling suggests complementary products that add value. Both work best when they feel like a natural next step.
For example, if someone buys your “Beginner’s Guide to Freelancing,” you could upsell them a “Pro Freelancer Toolkit” with templates and pitch decks. Or, if you teach personal finance, offer customizable budget or investment templates as an upsell.
Adding these offers at the end of a lesson or during checkout not only boosts revenue. It helps your audience take the next step in their journey with you.
8.) Use In-Content Affiliate Links Smartly
Affiliate links work best when they appear naturally within valuable content, as opposed to being crammed into sidebars or footers. Place them inside paragraphs that discuss related topics, tools, or strategies..
You can also boost conversions by updating old posts. For example, add a quick note like, “Updated for 2025 — here are my go-to tools for creators this year,” and include your affiliate links.
This way, you earn from content you’ve already written while keeping it fresh and useful for readers.
9.) Build Partnerships and Guest Post on Relevant Platforms
Guest posting is a great way to reach new audiences without paid ads.
Writing for established blogs in your niche lets you showcase your expertise and subtly promote affiliate products. This could either be through direct links or by linking back to your own content with affiliate recommendations.
10.) Leverage Established Platforms (e.g. YouTube, Medium)
Publishing content on platforms like YouTube and Medium is one of the best ways to grow your reach without ads. Tutorials, case studies, and in-depth articles with affiliate links attract high-intent audiences actively looking for solutions. Video proof also boosts credibility and conversions since people can see real results.
Listing affiliate products on general marketplaces like Facebook Marketplace isn’t ideal; it can violate their affiliate program policies. Instead, showcase your offers on your own landing page or link-in-bio setup.
Platforms like Mainstack make this easy by letting you organise products, track clicks, and automate promotions while staying compliant. This keeps your setup transparent, policy-safe, and professional — all in one place
11.) Convert “Free” Users Into Buyers Via Freemium or Lead Magnet
A sustainable affiliate strategy starts with offering something free that leads naturally to a paid upgrade. This could be a freemium tool, a limited-access mini course, or a downloadable template with advanced versions behind a paywall.
When the free version delivers enough value, people are more likely to explore the premium option, and if that upgrade includes affiliate products or tools, conversions happen organically.
This works because the audience has already seen value before being asked to buy. It’s a low-pressure way to build trust, nurture interest, and gradually convert free users into paying customers.
Common Mistakes That Hurt Organic Affiliate Sales
Many affiliates hold themselves back with habits that hurt trust and credibility. The goal isn’t simply to “promote” a product; to show genuine value and earn attention. When that balance is off, sales drop. Here are common mistakes
Being overly salesy in posts: Constantly pitching products without context makes people tune out. Focus on storytelling, show results, and weave recommendations naturally into valuable content.
Not building an email list: Relying only on social media means you’re at the mercy of algorithms. Build a mailing list so you can reach your audience directly and share affiliate content consistently
Neglecting community engagement: Dropping links without joining conversations makes you look disconnected. Engage, answer questions, and offer help as it builds trust and credibility
Ignoring analytics and audience feedback: Analytics show what drives clicks and conversions. Ignoring that means you’re guessing instead of improving.
Promoting too many random products: Recommending unrelated items confuses your audience and weakens your authority. Stick to products that align with your niche so your audience sees you as a trusted source, not just another promoter.
Conclusion
Affiliate marketing works best when it’s grounded in strategy, authenticity, and consistent effort. By applying the methods outlined in this affiliate marketing playbook, you can turn your promotions into steady income streams.
If you want to get started with affiliate marketing, you can sign up on Mainstack at zero cost to launch and manage your offers easily.
If you’ve ever downloaded a free guide, checklist, or e-book from a business, you’ve experienced a digital product used as a lead magnet. A digital product is any non-physical resource like templates, courses, or toolkits, that can be created once and shared endlessly online.
In marketing, a digital product can be used as a lead magnet and offered to potential customers to turn them into leads. By giving away something valuable, you draw people to your business, build trust, and position yourself as an authority in your field.
In this article, we’ll cover proven strategies, tools, and examples to help you create digital products that generate leads and grow your audience.
Digital products work great for lead generation because they help to build trust with the audience. When you give them something that’s helpful for free, they are bound to always come back for more, especially if your resources were beneficial to them.
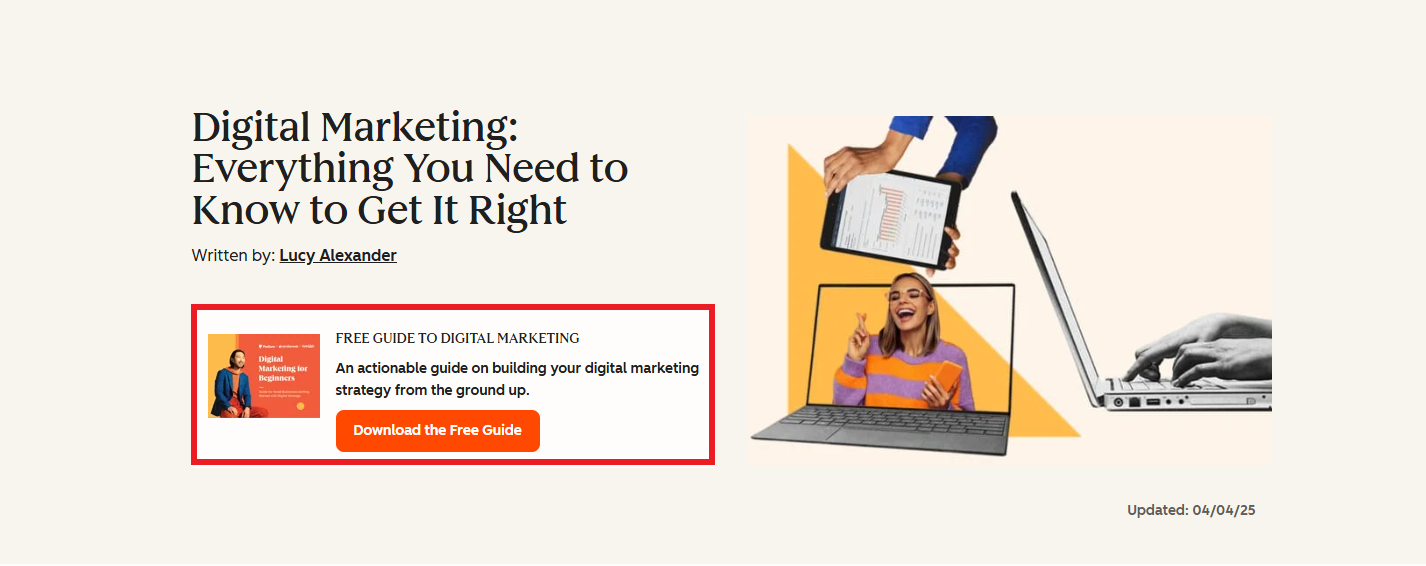
Ebooks and guides give your audience an in-depth look at topics they care about while building your credibility. For example, a cookbook of easy recipes for single men delivers practical value while positioning you as an authority.
Brands like Hubspot use Ebooks as a lead magnet to capture email addresses, build its subscriber base, and nurture potential customers as they move through the sales funnel.
Source: Hubspot
Checklists, Templates, and Toolkits
These are practical tools potential customers can use immediately. They tend to convert well because they offer immediate value and convert well .For example, a design template for graphic designers offers instant utility.
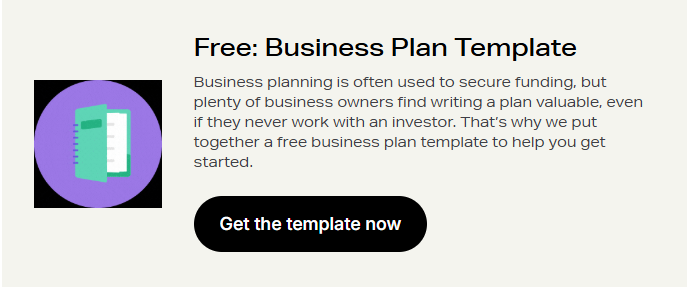
Shopify offers a free Business Plan Template to help new entrepreneurs get started. The value is clear: solve a common problem and, in return, they capture leads through sign-ups.
Source: Shopify
Webinars and Virtual Events
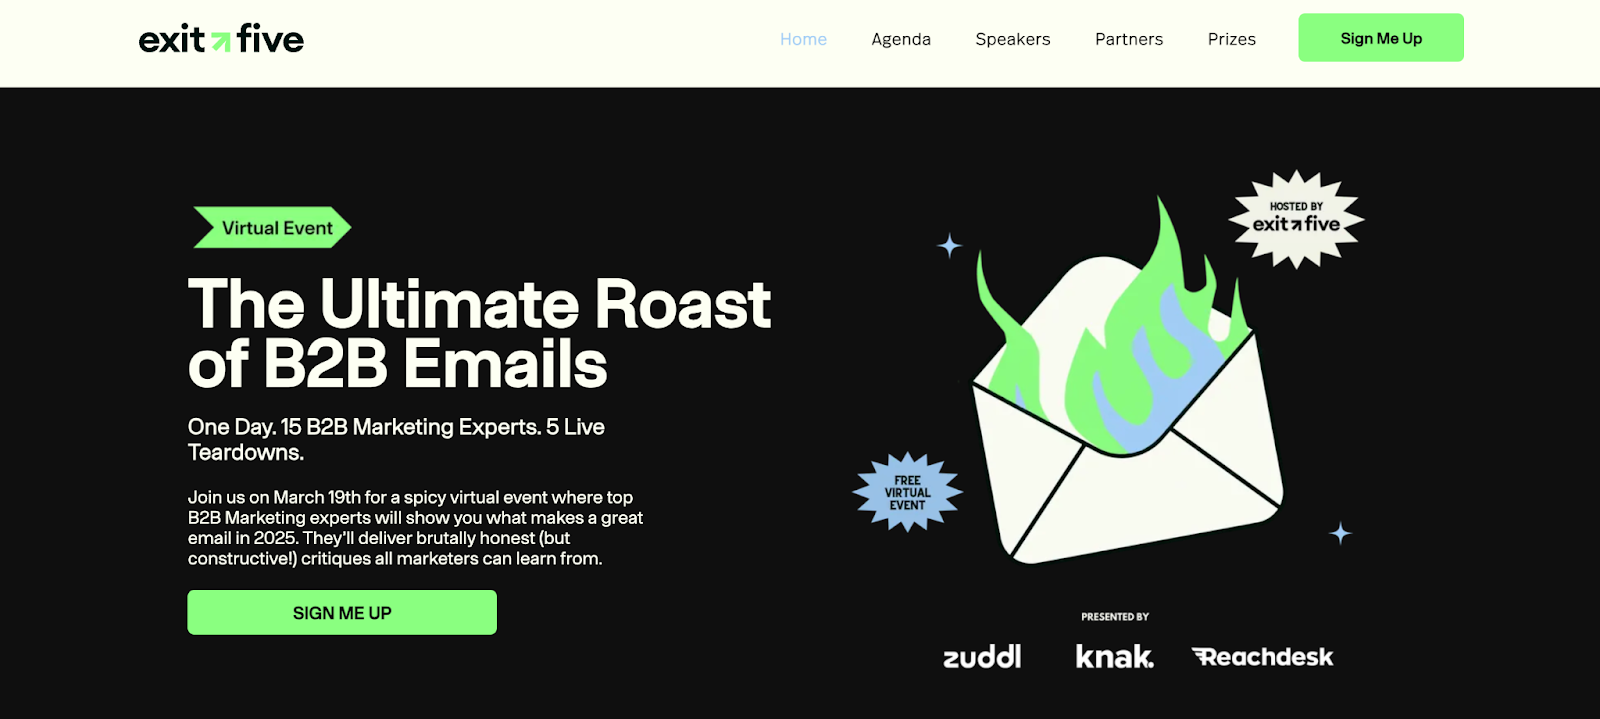
These are live or recorded sessions you can hold to share your knowledge on what you know. By doing this, you are setting yourself as an expert in your field and signaling to your potential customers you have more knowledge to share.
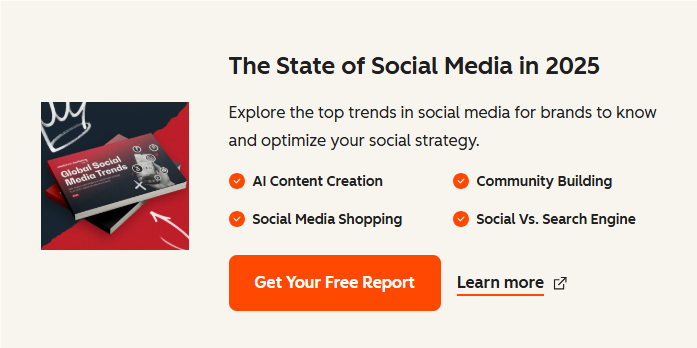
Exit Five, for example, uses virtual events as lead magnets for potential customers. They deliver clear value and use urgency to encourage sign-ups. This results in more leads captured and stronger authority with their audience.
Mini-Courses
Short courses delivered via email or video help people solve a problem in several steps.
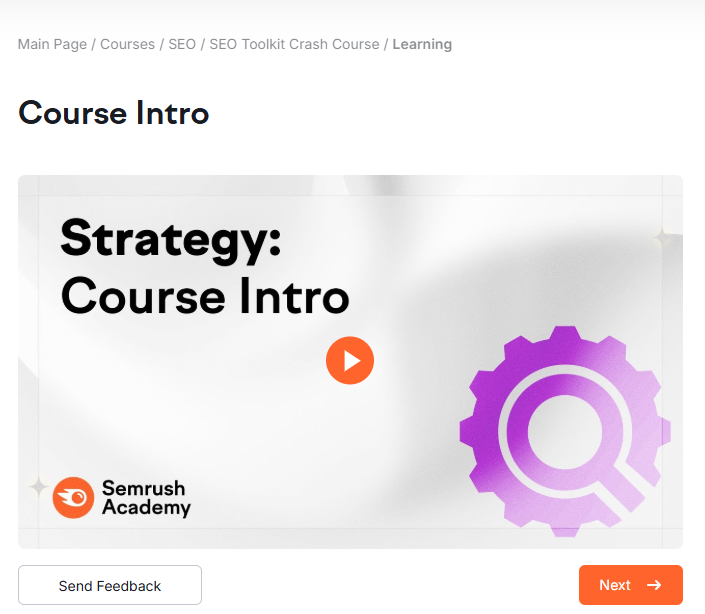
Semrush offers free mini-courses like its SEO Toolkit Crash Course to attract and educate marketers. These short lessons provide quick wins, build trust, and introduce users to Semrush’s tools, which makes them an effective lead magnet
Free Trials or Samples
If you have a software product, a trial gives people direct experience. If you don’t, sample lessons (for courses) or partial templates work.
Also note that each type of digital product serves different parts of the lead generation funnel. For example, checklists or templates are great for bringing awareness while webinars or mini courses are stronger for consideration and nurturing.
Step-by-Step Method: How to Create Your Digital Product for Lead Generation
Take these following steps in creating your digital product for lead generation
Step 1: Identify Your Audience and Their Pain Points
The first step to creating a digital product is defining your target audience. Ask yourself: Who are they? What do they need? What problems are they finding difficult and how can you help them to solve those problems?
In order to execute this, you need to research your audience to find out what it is they are looking for. To make your work more efficient, there are a number of tools you can use to research on your target audience and their problems:
Google Analytics: This is a free tool that offers more insights into ongoing trends and searches based on website traffic, user behaviour and demographics
AnswerThePublic: This tool helps you to find out questions people often ask concerning a topic. This can be used when looking for content ideas to create to draw your target audience to your product.
BuzzSumo: BuzzSumo's research and analysis tool offers advanced content insights, trending topic identification, social mention monitoring, and content engagement measurement.
After identifying those problems, research their challenges and needs. For example: If your audience are beginners in graphic design, their pain point would probably be trying to understand the ”Basics of Graphic Design”
Consideration stage → In-depth resources (ebooks, webinars, case studies)
Decision stage → Hands-on value (free trials, mini-courses, templates)
Step 3: Define the Core Value Proposition
Define what value your product has to offer to your audience. By now, you understand your audience and their painpoint. Next step is defining how you want your product to stand out. Answer the question:“What problem does this solve?” Keep it specific and actionable so it’s not too broad or vague to confuse your audience. An example would be naming your design guide” Principles of Graphic design” instead of “A Beginner’s Guide to Graphic design”
Step 4: Create and Design the Product
Once your value prop is defined, the next step is to create a copy for the digital product. Start with an outline to understand what you’re writing. Ensure the copy written is helpful, insightful and easy to understand.
Remember to use a compelling title and a clear call-to-action (CTA). Make titlesbenefit-driven (e.g., “The Ultimate Checklist to Double Your Leads in 30 Days”) and a strong CTA on landing page and promotions (e.g., “Get Instant Access,” “Download Free Today”)
Once the writing is complete, design around the copy. Keep content visually appealing, since strong design helps convert customers. Use tools like Canva, Figma, or Google Docs to create polished assets.
Step 5: Place and Promote Your Digital Product
Once your digital product is complete, the next step is promoting what you have. From your research, you should have an idea of where your audience hangs out and how to reach them.
Like Hubspot, you could place the digital product on your blog page or Homepage to collect emails from leads organically. Or you could also run paid ads on social media to drive more attention and reach a bigger audience.
Source: Hubspot
To place and store your products digitally, you can make use of all-in-one tools such as Mainstack. It allows its users to create storefronts to sell digital products to their customers, a link-in-bio feature that allows intrigued customers to find all links in one place and an email marketing tool to automate delivery to clients who request for their products.
Step 6: Nurture and Convert Leads
Attracting a new lead is just the beginning of the relationship. To turn that interest into revenue, you need to nurture and guide prospects toward a purchase. The most effective way to do this is through automated follow-up email sequences.
For example, if someone downloads a Social media growth guide, they should receive a tailored series of emails with tips, case studies, and free insights on social media growth before being introduced to a paid service or course.
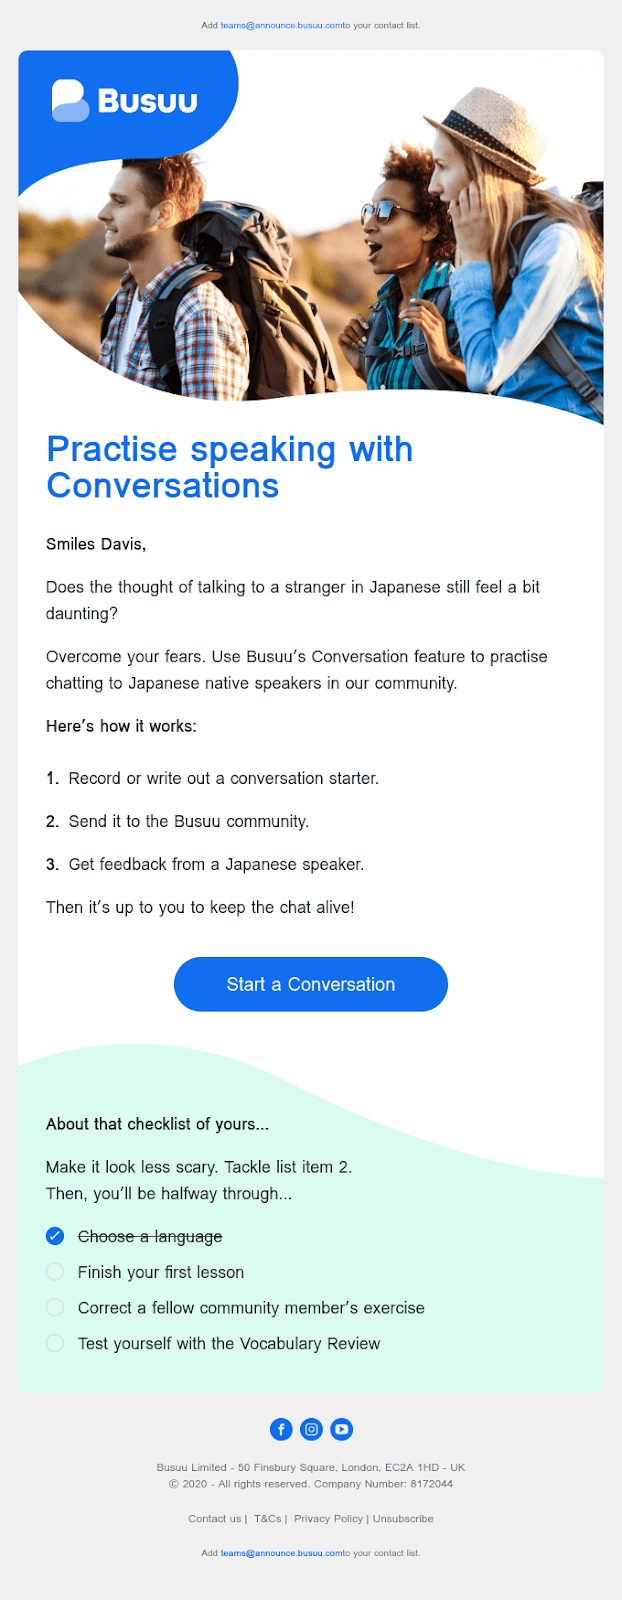
Use lead nurturing emails to share testimonials, educate prospects or announce new products or features. Here's an example of an educational lead nurturing email from Busuu.
Best Practices for Quality Lead Generation
Creating your digital product is one part of the equation, but you also need to ensure they drive high-quality leads and that requires a strategy. Here are some proven best practices:
Optimize landing pages: Keep them clean, with one clear call-to-action (CTA), compelling copy, and minimal form listings to avoid chasing your potential customers.
Segment and tag your leads properly: Use your email platform to tag your leads based on what they opted in for (e.g., “downloaded guide,” “signed up for webinar”). This allows for more relevant follow-up campaigns.
Automate nurturing: Use email sequences to educate, engage, and warm up leads before introducing a paid product. Consistency is what builds trust.
Track key metrics: Monitor opt-in rates, conversion rates, and engagement. If leads are downloading but not engaging, revisit your product value or follow-up sequence.
Common Mistakes to Avoid
Even with the best intentions, creators often stumble when building lead generation funnels. To stay on the right track, you need to avoid:
Offering low-value freebies that don’t solve a real problem
Asking for too much information on the signup form too early
Confusing offers with the audience’s actual pain points
Creating vague, generic, or unfocused digital products
Using overly long or complicated forms
Skipping essential follow-up sequences after the opt-in
To get results, identify your target audience, match them with the right product, design it well, promote it, and follow up consistently. This is how you attract quality leads. You need to also remember to be patient with the process, not everyone will convert immediately and that’s okay. By staying consistent and providing real value, you build trust, and your audience becomes far more likely to invest in your premium products. Follow this guide to know how to price your digital products.
Selling products online is more competitive than ever, and Facebook remains one of the most effective platforms to reach your audience. With billions of active users and advanced targeting options, Facebook ads enable creators, entrepreneurs, and businesses to showcase their business offerings directly to the people most likely to buy.
While scrolling through Facebook or Instagram, you’ve probably noticed ads popping up between posts, Stories, or Reels. But those aren’t random; they’re targeted campaigns businesses use to reach people just like you. And the reason they’re everywhere is simple: Facebook ads improve reach.
Facebook, through the Meta Ads Manager, gives businesses of all sizes the ability to target the right audience with precision. Whether you aim to drive traffic, boost sales, or generate leads, you can create a campaign tailored to your specific goals.
This step-by-step guide will walk you through exactly how to run Facebook ads in 2025, from setup to monitoring, so you can launch campaigns that convert.
What Are Facebook Ads?
Facebook ads are paid promotions that businesses create to reach specific audiences across Facebook, Instagram, Messenger, and the Audience Network— Meta’s group of partner apps and websites. This means your ads aren’t limited to Meta platforms alone; they can also appear in mobile apps or news sites outside of Facebook that are part of Meta’s advertising network.
Unlike regular posts, which only reach your followers (and maybe a few friends through shares), ads are designed to target people based on their demographics, interests, and behavior, giving you a much wider and more precise reach.
Boosted Posts vs. Facebook Ad Campaigns
It’s important to understand the difference between a boosted post and a full Facebook ad campaign, because while they may look similar, they serve very different purposes:
Boosted Post
This is achieved when you take an existing post from your page and pay Meta to show it to a larger audience. It’s a quick and simple way to increase visibility, but it offers limited control over who sees the post, where it appears, and what specific outcome you’re optimizing for.
Facebook Ad Campaign (via Ads Manager)
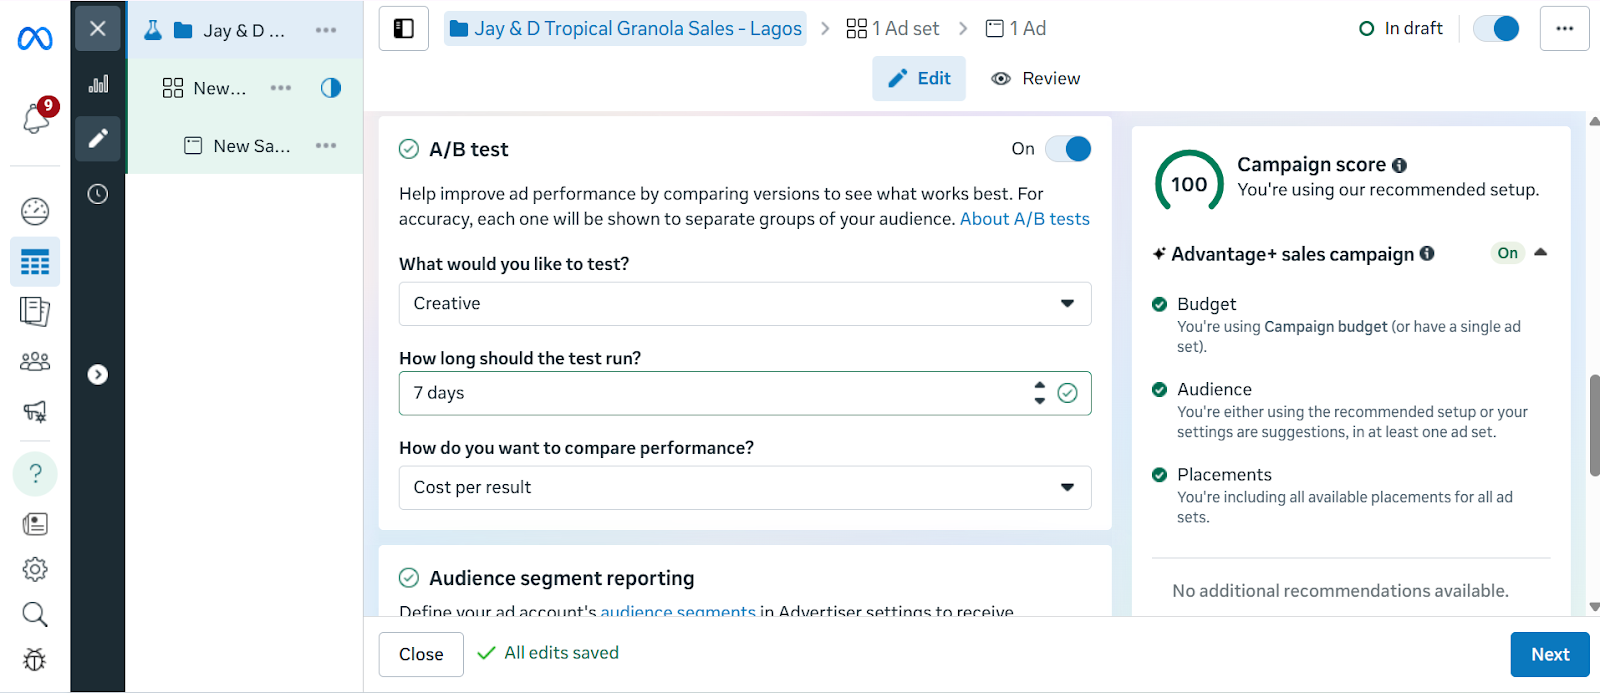
This gives you full control over your advertising strategy. With a Facebook ad campaign, you can choose exactly what you want to achieve (like driving sales, getting leads, or boosting website traffic), define your audience in detail, set your budget and schedule, decide where your ads will appear, and even test multiple versions of the same ad to see which performs best. This flexibility makes Ads Manager the recommended option for running serious, goal-driven campaigns.
Ultimately, whether you’re running a single ad or a full campaign, everything is managed through Meta Ads Manager, the centralized hub where all ads are created, managed, and optimized. It’s also a tool you’ll need to master to get consistent results. Now that you know what Facebook ads are, it’s important to understand why they are powerful tools for growing your business.
Benefits of Advertising Your Business on Facebook
Advertising on Facebook offers clear advantages for businesses of any size, and three of the most important are:
Precise targeting: Meta’s ad tools let you reach people based on age, location, interests, behaviors, or even custom lists. This makes it easier to connect with the right audience instead of wasting spend on those unlikely to care about your offer.
Flexible budgets with measurable results. You can start with a small daily budget, test different ads to see which ones perform better, and then increase your budget on the ads that bring the best results. Ads Manager also makes tracking your Facebook ads budgetsimple by showing exactly what you’re spending and what you’re getting in return in real time.
Multiple ad formats to match your goals. Facebook ads can appear as videos, single images, or carousels. You can also run ads that include a simple form, where people quickly share their name or email without leaving Facebook. This way, you get different tools to either grab attention, showcase products, or collect customer details depending on what matters most for your business.
How to Run Ads on Facebook Ads (Step-by-step)
Getting started with Facebook ads might feel overwhelming at first, but Meta Ads Manager makes the process a lot more structured. By following a step-by-step approach, you can go from setting up your account to launching your first ad without missing anything important. Here’s a simple breakdown of how to run ads on Facebook.
Step 1: Set Up Meta Business & Ads Manager
Before you can create digital product ads, you need the right setup.
Sign in with your Facebook account and set up a free Meta Business Manager account.
This gives you professional tools to manage ads, pages, and assets in one place.
2. Create a Facebook Business Page Ads cannot be run from personal profiles. You’ll need a business page.
Go to your Facebook homepage, click Pages, and create one if you don’t have one already.
Choose a business name, category (e.g., “Education” for digital courses), and complete your page details.
3. Add Payment Information
In Business Manager, navigate to Business Settings > Payments.
Add your credit card, PayPal, or other payment method.
Step 2: Create Your Campaign in Ads Manager
Once your foundation is ready, it’s time to build your campaign.
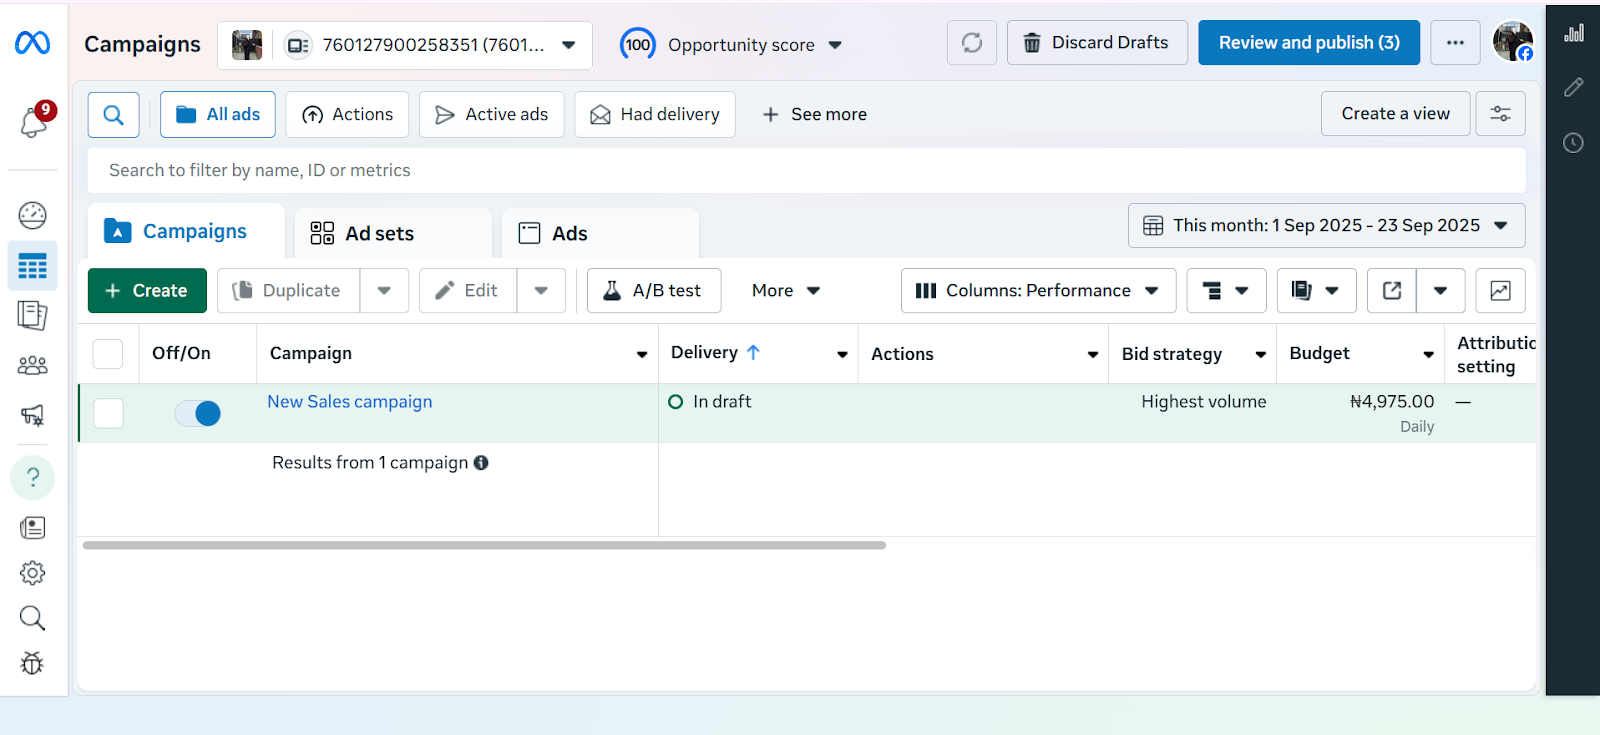
1. Go to Ads Manager
Inside Business Manager, click All Tools > Ads Manager.
This is the hub for creating, managing, and monitoring ads.
2. Click “+ Create”
Hit the green + Create button to start a new campaign.
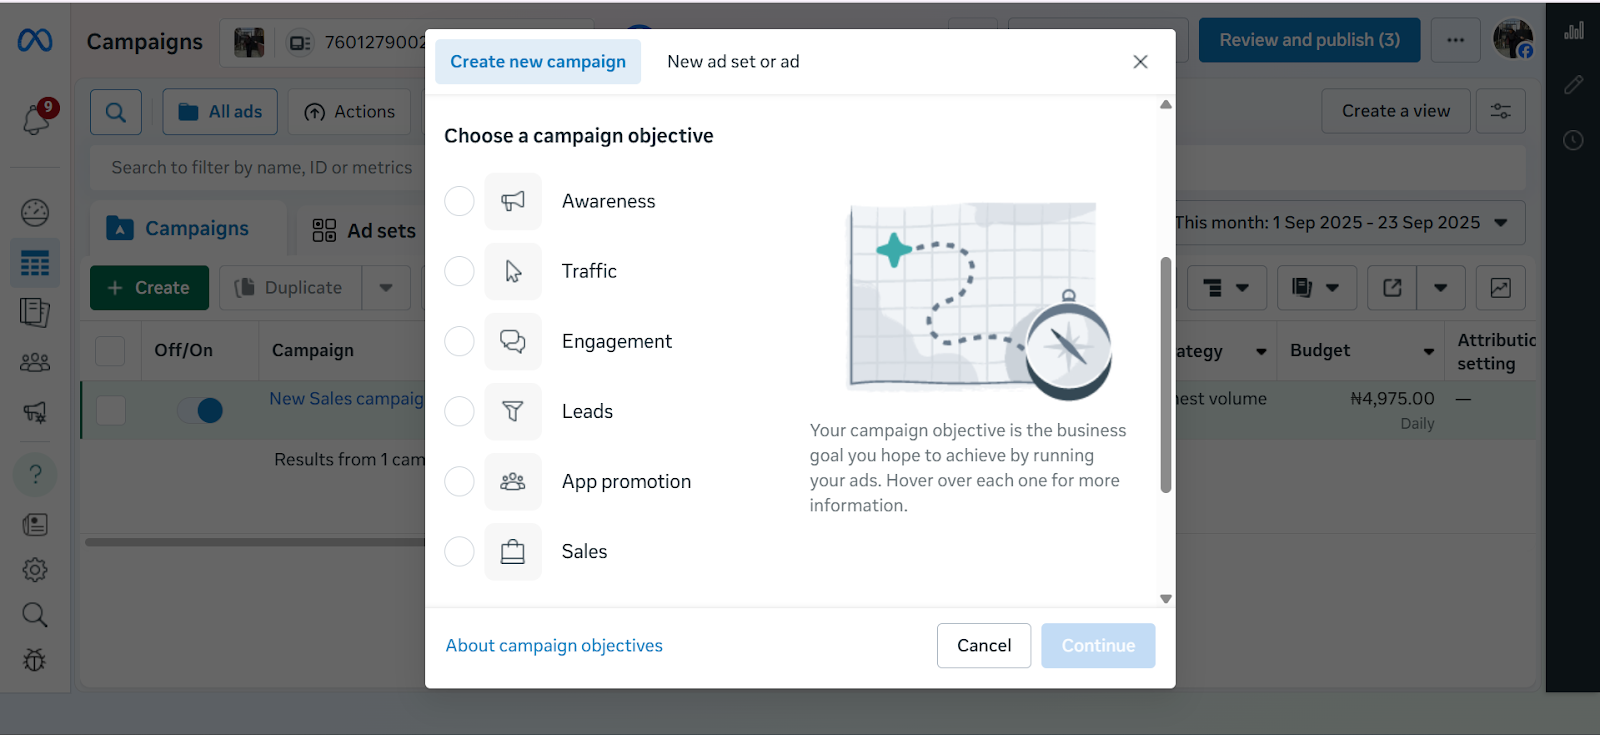
Step 3: Choose Your Objective
When creating a campaign in Meta Ads Manager, the first step is choosing your advertising objective which is the main thing you want your ad to achieve. Meta currently offers six objectives:
Awareness – Best for getting your brand in front of as many people as possible. Useful if you’re just starting out or launching something new.
Traffic – Drives people to a website, landing page, or app. Helpful if you want more visits to your online store or product page.
Engagement – Encourages actions like likes, comments, shares, or event responses, making it easier to build a community around your brand.
Leads – Collects contact details (like emails or phone numbers) directly through Facebook forms or your own landing page.
App Promotion – Helps you get more people to download or use your mobile app.
Sales – Optimises your ads to drive actual purchases, either on your website, in your app, or directly through Facebook and Instagram Shops. Meta does this by showing your ads to people most likely to buy based on their past activity, e.g., clicking “add to cart” or completing a purchase. You can also connect your product catalogue so your ads automatically display items in stock, making it easier for customers to shop directly.
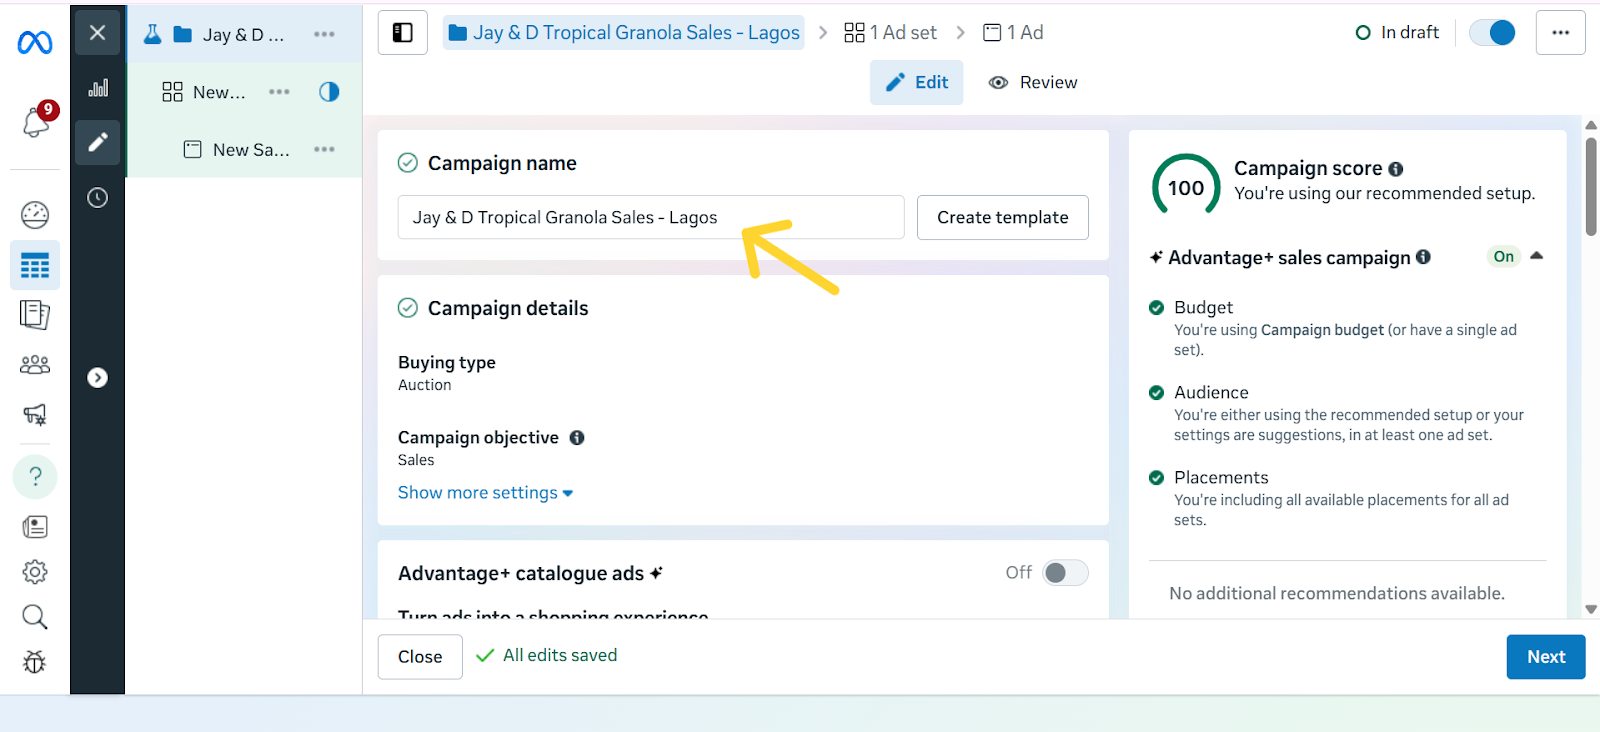
Step 4: Name Your Campaign
Give your campaign a clear, descriptive name so you can easily identify it later. A good rule of thumb is to include the product, audience, and goal in the name. For example: “Tropical Granola – Abuja – Traffic” or “Ebook Launch – US – Sales.” This makes it easier to stay organised, especially once you start running multiple campaigns at the same time.
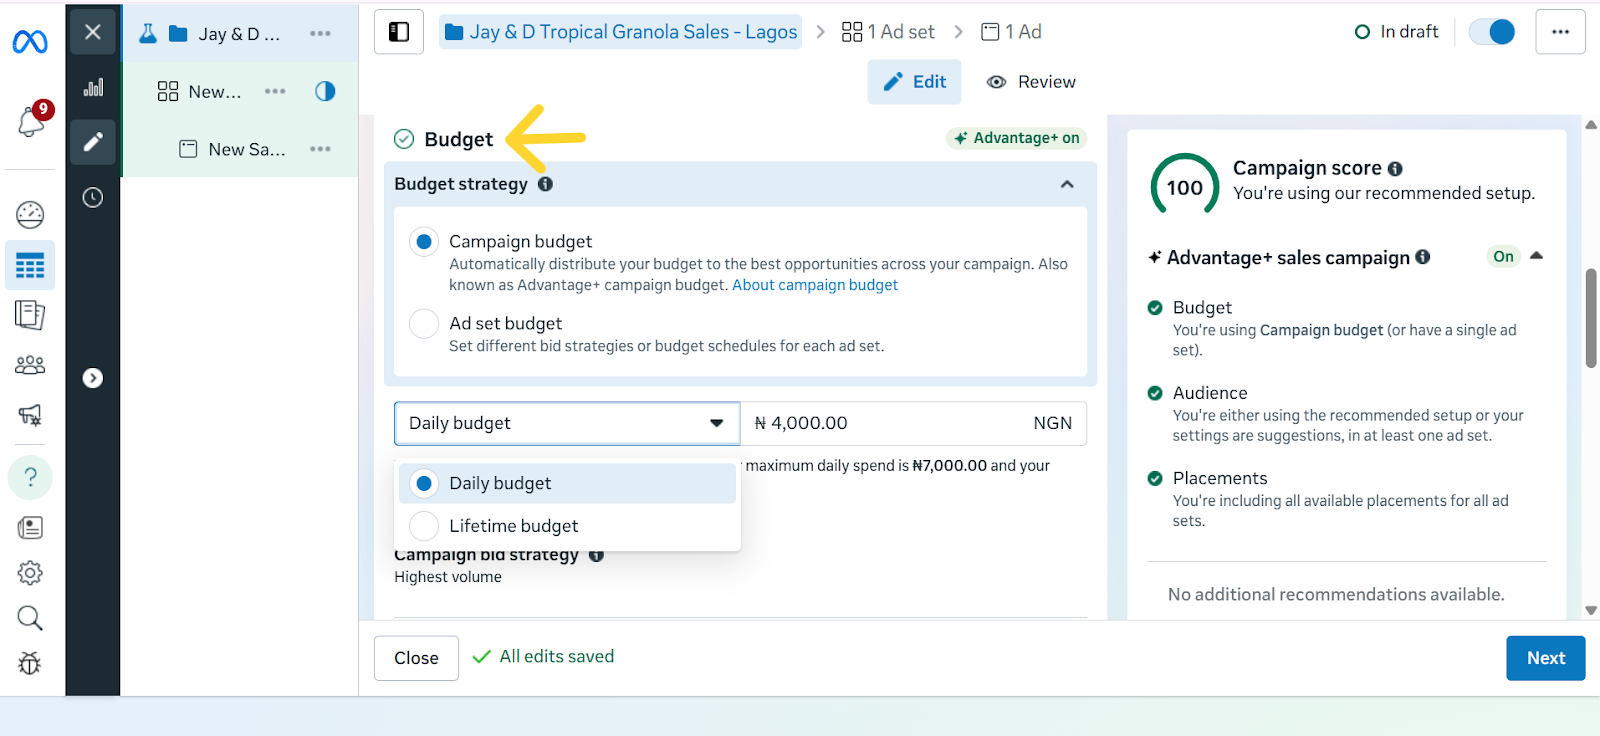
Step 5: Set Your Budget & Schedule
Your budget decides how much you want to spend on your ads, while your schedule controls when your ads run. In Meta Ads Manager, you’ll see two main types of budgets:
Daily budget – This is how much you want to spend per day. For example, setting ₦2,500/day for 7 days means Meta will try to spend around ₦2,500 each day while getting you the best results possible.
Lifetime budget – This is the total amount you want to spend over the entire campaign. For example, if you set a lifetime budget of ₦15,000 for 7 days, Meta will spread that amount across the week, sometimes spending more on one day and less on another, depending on performance.
Pro-tips for Cost Control:
Set a bid cap – A bid cap lets you tell Meta the maximum amount you’re willing to pay for a result (like a click or a lead). This ensures you don’t waste money on overly expensive results.
Start small, then increase – Begin with a modest daily spend and raise it only if the ad is performing well.
Use a clear schedule – Don’t run ads endlessly. Set start and end dates so your budget doesn’t drain without you noticing.
Take Advantage of the Cost per Result Goal Setting - This setting tells Meta the maximum you’re willing to pay for the outcome you want. For example, if your goal is sales, you could set a limit like “Don’t spend more than ₦1,000 to get one purchase.” If your goal is awareness, you might say, “Keep the cost of reaching 1,000 people under ₦500.”
This way, Meta runs your ads but won’t go beyond the budget you’ve set for each result, helping you stay in control of your spending.
The caveat here, however, is that if your target cost is set unrealistically low, Meta may struggle to deliver your ads, or you may get fewer results. So it’s best used when you already have some data on what a “reasonable” cost per result looks like for your business.
ROAS Goal (Return on Ad Spend) – This is a more advanced option. Instead of focusing on cost per action, you’re asking Meta to prioritise sales that give you a specific return. For example, if you set a ROAS goal of 3.0, you’re telling Meta, “Only spend my budget on people who are likely to generate at least ₦3,000 in sales for every ₦1,000 I spend.”
Together, these options help you avoid overspending and make sure your money is going toward results that matter most to your business.
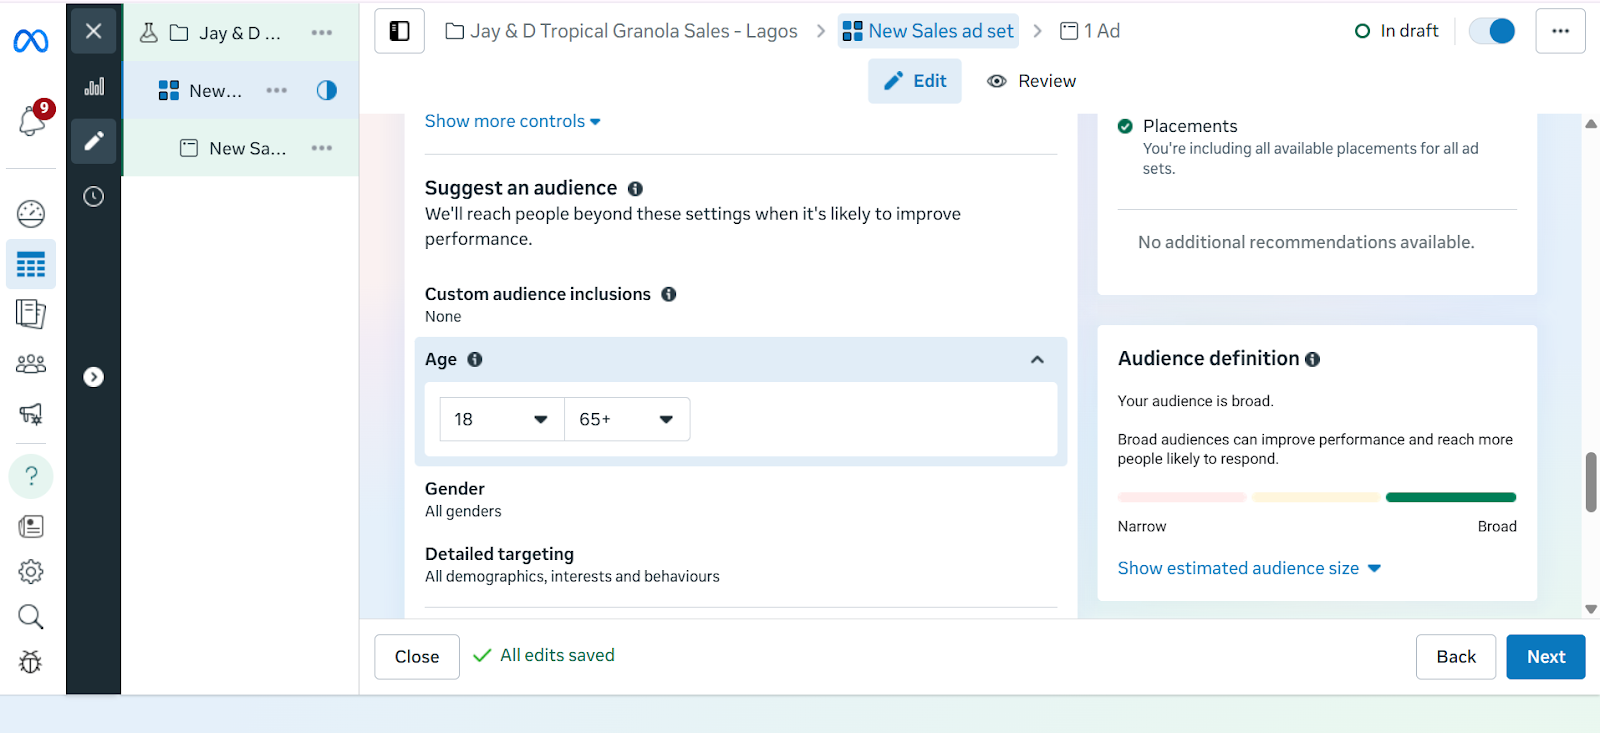
Step 6: Choose Your Target Audience
This is where you tell Meta exactly who should see your ads. Instead of showing your ad to everyone, you can narrow it down to people who are most likely to buy from you.
With Meta Ads Manager, you have three main options:
Core Audiences – With core audiences, you set the filters yourself. This means you tell Meta exactly the kind of people you want your ad to reach. Instead of showing your ad to just anyone, you narrow it down based on details such as age, gender, location, language, or interests.
Custom Audiences – Custom audiences let you reach people who already have a connection with your business. This could be past customers whose emails you upload into Meta Ads Manager, visitors who came to your website but didn’t complete a purchase, or even people who interacted with your Instagram or Facebook content. Instead of starting fresh with strangers, you’re reminding people who already know your brand to come back and take the next step, which usually makes them easier to convert.
Lookalike Audiences – Once you have a Custom Audience, Meta can find new people who share similar traits. For example, if your best customers are young professionals in Lagos, Meta can look for more people just like them in Nigeria.
While targeting with Meta Ads Manager makes it easier to reach the right people, recent privacy changes, especially Apple’s iOS updates, have made it harder to track every action users take across apps and websites. This means targeting isn’t always perfect, but it still gives you a more direct connection to your audience. The key is to test different audience types and focus on the ones that deliver the best results for your business.
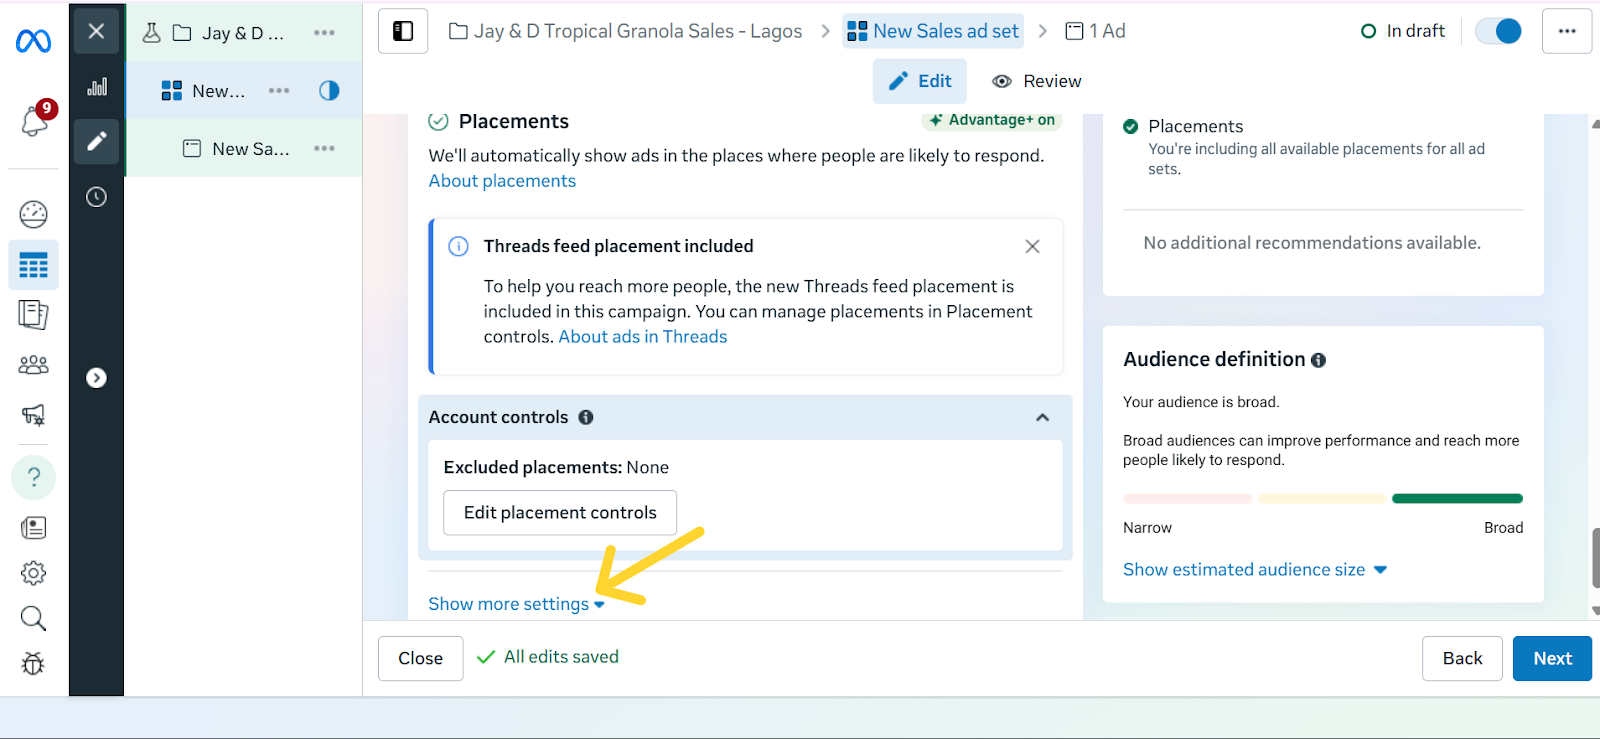
Step 7: Select Ad Placements
Placements are the different spots where your ad can show up across Meta’s platforms. This could be in the Facebook News Feed, Instagram Stories, Reels, Messenger, or even inside partner apps and websites. By default, Meta recommends Advantage+ Placements, which automatically shows your ad in multiple places and then prioritises the ones that perform best.
For beginners, this is often the easiest option because Meta does the testing for you. However, if you want more control, you can manually choose placements, for example, focusing only on Instagram Reels if your audience skews younger, or Messenger if you want a more personal approach.
Each placement has its strengths:
Feed: Ads appear in the main scrolling section of Facebook or Instagram and are great for longer captions, links, and detailed storytelling.
Stories: These are full-screen, vertical ads that stay up for 24 hours. They work best for quick, eye-catching visuals because they blend naturally into how people already swipe through Stories.
Reels: These ads appear as short-form video content when people scroll from one Reel to the next on Instagram or Facebook. They look and feel like regular Reels, except they’re sponsored, so they blend naturally into the viewing experience. This makes them a good way to reach people while they’re actively browsing short videos and open to discovering something new.
Messenger: Ads placed in the Messenger app, where conversations happen. Best suited for businesses that want a more personal approach or direct engagement.
The real advantage of placements is flexibility: you can either let Meta spread your ad widely and optimise for results, or zero in on the exact spots where your audience is most active.
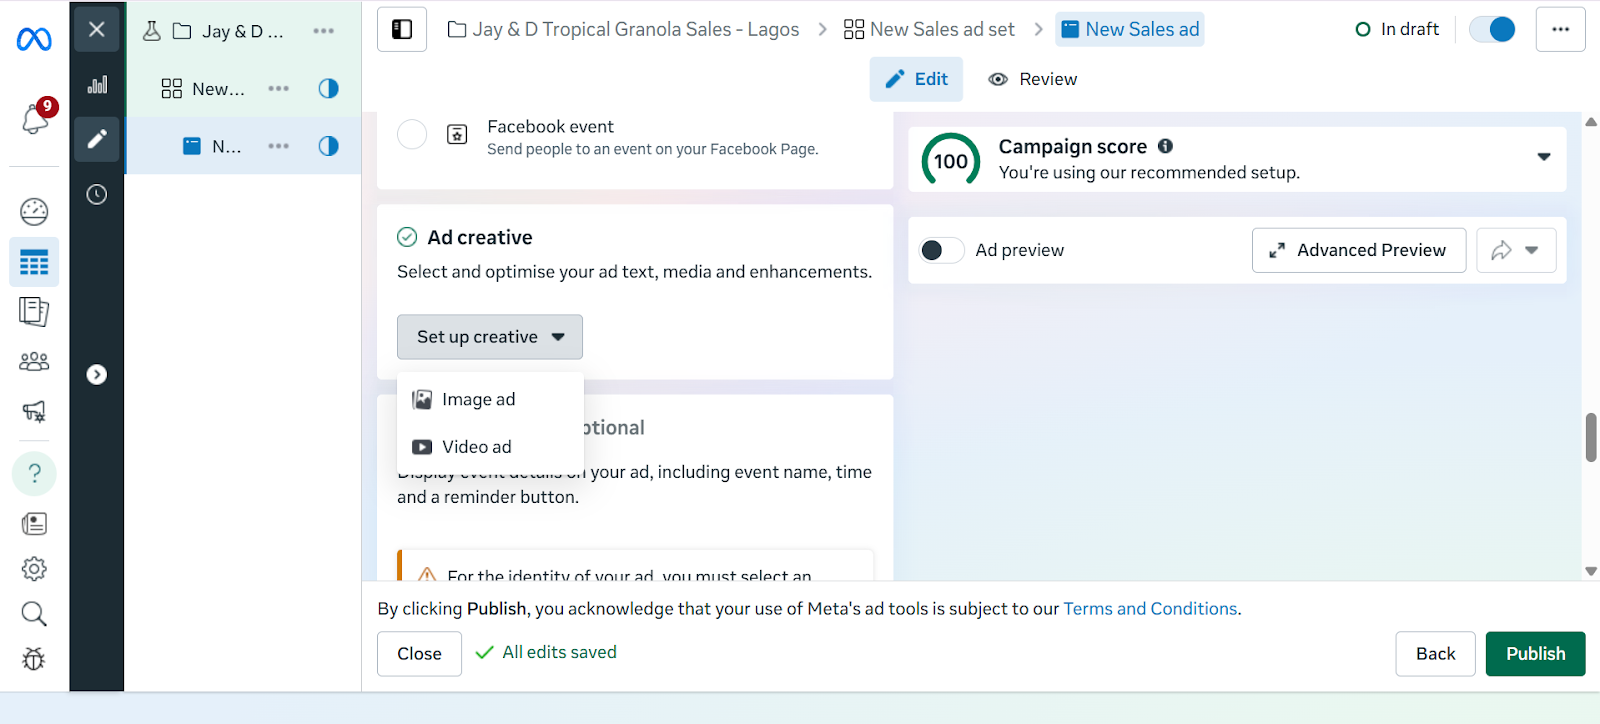
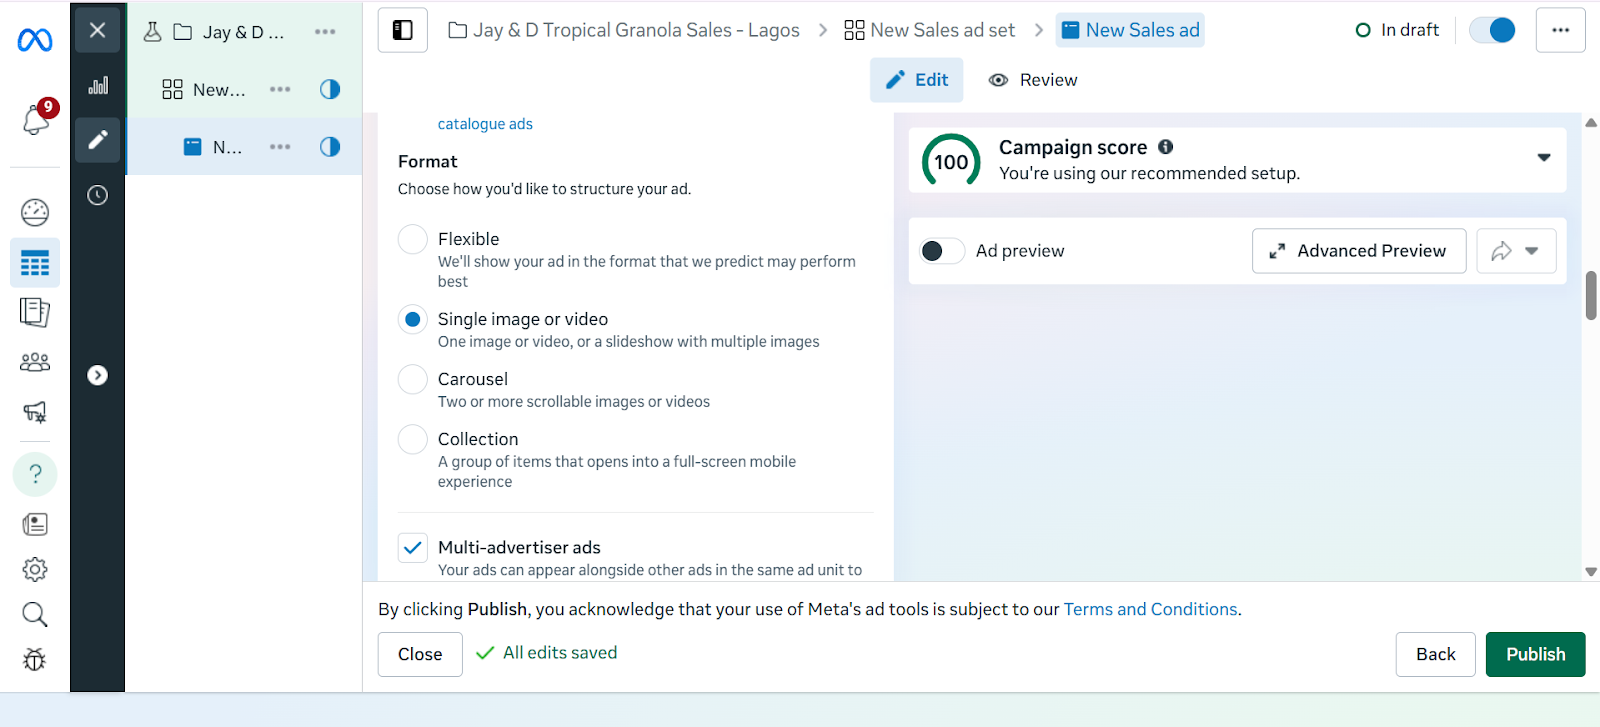
Step 8: Design Your Facebook Ad Creative
An ad creative, simply put, is the actual content of your ad. That is, the picture, video, headline, and caption people will see when your ad shows up on their Facebook or Instagram feed. A strong creative can be the difference between someone scrolling past or stopping to pay attention.
To make yours effective, let’s break it down into the key parts so you know exactly what to focus on.
Always link directly to your product page or sales funnel.
Best Practices for High-Performing Facebook Ad Creatives
Use bold visuals: Bright colours, high contrast, and eye-catching images or videos grab attention quickly.
Keep it short: Captions should be concise and to the point. Aim for one clear message.
Add a clear CTA (Call-to-Action): Examples include “Shop Now,” “Sign Up,” “Learn More.” Don’t assume people will know what to do.
Follow the 20% text rule: Facebook performs best when text on your image is minimal — less than 20% of the total space.
Match creative to your goal: If you’re selling, show the product in use. If you’re building awareness, focus on brand storytelling.
Step 9: Review and Publish
Before you hit “Publish,” it’s important to double-check your ad. Meta has strict ad policies, and if your ad doesn’t follow the rules, it can be rejected or even get your account flagged.
Things to check before publishing:
Ad content: Avoid misleading claims, exaggerated promises, or offensive language.
Images and videos: Don’t use shocking visuals or content that suggests unrealistic results.
Targeting: Make sure your audience choices don’t discriminate based on personal traits like race, religion, or health conditions.
Links: Test that your link works and takes people exactly where you promise in the ad.
Common reasons ads get rejected:
Promoting restricted or illegal items
Adult content
Poor landing pages
Once everything looks good, click Publish. Meta will then review your ad, which usually takes a few minutes to 24 hours. If approved, your ad will go live and start delivering to your chosen audience.
Step 10: Monitor & Optimise Performance
In Ads Manager, track key metrics to understand how your campaigns are performing:
Click Through Rate (CTR): This measures the percentage of people who saw your ad and actually clicked on it. A higher CTR usually means your ad copy, creative, or targeting is resonating with your audience.
Cost Per Click (CPC): This tells you how much you are paying on average for each click on your ad. Lower CPC means you are driving traffic more cost-effectively.
Conversions and Sales: This tracks how many people took a desired action after clicking your ad, such as signing up, purchasing, or downloading. It shows the real business impact of your campaigns.
Return on Ad Spend (ROAS): Compares how much money you made from your ads versus how much you spent. If you spent ₦10,000 and earned ₦40,000 in sales, your ROAS is 4x.
Optimize Ads
Test different versions of your ad (A/B testing): Try running two or more versions of the same ad with slight differences. For example, a different image, headline, or CTA. This helps you figure out what your audience responds to best.
Adjust your audience if results are weak.
Increase budget on winning ads, pause underperforming ones.
Running Facebook ads in 2025 is only part of the journey. Turning clicks into sales or meaningful engagement requires the right destination for your audience. With Mainstack, you can create tailored landing pages or online storefronts that act as the perfect extension of your ad campaigns. Every click from your Facebook ad can lead to pages specifically designed to showcase your products, collect leads, or drive purchases directly.
By pairing the precise targeting of Facebook Ads with Mainstack’s easy-to-use tools, you create a system where ads, pages, and customer actions work together, making it easier to track results, optimise campaigns, and grow your business efficiently.
Start building pages that connect directly to your ads today and see how a well-designed destination can turn impressions into measurable growth.
Facebook Ads Campaign Checklist
At this point, you’ve learned how to set up, target, and create effective Facebook ads and how to ensure every click leads to a page that converts impressions to sales. But, to make it even easier, we’ve put together a step-by-step checklist you can follow every time you run a campaign.
Step 1: Set Up Meta Business & Ads Manager
Step 2: Create Your Campaign in Ads Manager
Step 3: Choose Your Objective
Step 4: Name Your Campaign
Step 5: Set Your Budget & Schedule
Step 6: Choose Your Target Audience
Step 7: Select Ad Placements
Step 8: Design Your Facebook Ad Creative
Step 9: Review and Publish
Step 10: Monitor & Optimise Performance
Be the first to get our free tools, templates, and growth hacks.
Get early access to resources and strategies that help you grow your customers and revenue.
Thank you! Your submission has been received!
Oops! Something went wrong while submitting the form.
.jpg)


.png)