-min.jpg)


The African creator economy has finally found its "Grammys."
On March 15, 2026, the Landmark Event Centre in Lagos was buzzing with the kind of energy you only feel when history is being made. The inaugural Moment Awards, hosted by Mainstack, officially closed out the Moment Conference 2026, marking a monumental milestone for digital creators across the continent.
With over 161,000 fan votes poured in from every corner of Africa, the night legitimized an industry that has long been the heartbeat of African culture.
The vision behind the awards was clear. As Mainstack CEO Ayobami Oyaleke put it during his keynote: "We built it because the creator economy in Nigeria deserves infrastructure for recognition the same way the Oscars gave film a ceiling to climb toward. We are planting that flag. Tonight is where it starts."
That flag is now firmly planted. By partnering with industry giants like Meta, Spotify, Sony Music West Africa, BellaNaija, and WeTalkSound, the awards ensured that winners were judged not just on popularity, but on creative excellence, innovation, and real-world impact.
The list of winners represents the diverse, vibrant, and tech-savvy spirit of modern Africa. From comedy and music to policy and social impact, these 16 creators are the blueprint for the future.
The Heavy Hitters:
The Creative Powerhouses:
Innovators & Entrepreneurs:
The Impact Makers:
The Moment Awards is more than just a gala; it is a community. Winners now join an elite network of Africa’s most influential digital voices, opening doors for global partnerships and media coverage that will take African storytelling to the world stage.
If 2026 was the "start," the future looks incredibly bright. The inaugural event proved that when we celebrate our creators, we aren't just liking a post—we are building an economy.
Missed out on the action this year? Don’t worry. The Moment Awards 2027 is already in the works. Expect more categories, a broader reach across the continent, and even more opportunities to spotlight the creators you love.
Stay ahead of the curve and be the first to know when 2027 nominations open by visiting moment.mainstack.com.
To the creators, the fans, and the innovators—this is your moment.
.png)
Important Note on Your Product and Link-in-Bio URLs.
Your product URLs and link-in-bio links have changed. But nothing has happened to your products themselves. You simply need to update your URLs. To update your product URL, log into your dashboard, click on “Products” in the sidebar. From your list of products, click “Share” on any product you want to share and you’ll get a new link you can copy and update across your pages. To update your LIB URL, log into your dashboard, head to your link-in-bio page in your dashboard and click “Share”. There, you’ll get the new link and you can go ahead to update it across your socials. Get your new URLs here→
There is a version of the creator economy that looks somewhat perfect from the outside.
A digital marketing coach in Nairobi sells ad tutorials through a hosted course platform. A fashion creator in Accra builds a storefront and moves units. A community-led creator in Lagos puts a GC together on an instant messaging app and manages their community through the same.
The tools exist and the transactions technically happen. But ask any of these creators what it actually takes to run their business end-to-end and a different picture pops up.
The storefront is one platform. The community lives somewhere else, managed through an unsustainable patchwork of group chats and third-party apps. Brand partnership conversations (at least try to) happen in ignored DMs and everything ungracefully falls apart at scale.
For all its growth, the creator economy has largely been built in pieces. Mainstack V4 was conceptualized and built to solve that problem.
Mainstack V4 is the permanent home for your entire creative business.
It’s infrastructure designed and built from the ground up to help you do all you need to do as a creative in one place without having to juggle multiple tools.
In practice, that looks like:
And several other capabilities built directly into one dashboard.
Above all else, Mainstack V4 is the manifestation of an idea we’ve held for a long time — that creative businesses should be able to run and grow efficiently in one place.
In V4, we reimaged Mainstack in its entirety from the moment you first sign on to when you make your first sale up until your ten thousandth. What emerged was a total revamp of Mainstack from onboarding to marketing.
Here are five key changes we made to how Mainstack works.
Before V4, Mainstack’s sign up process happened in three key steps:
It was simple and straightforward, serving the purpose of getting you from discovery to purchase as quickly as possible. But, like many other tools in the creator economy that toe that path, it didn’t account for the peculiarities of you as a creator.
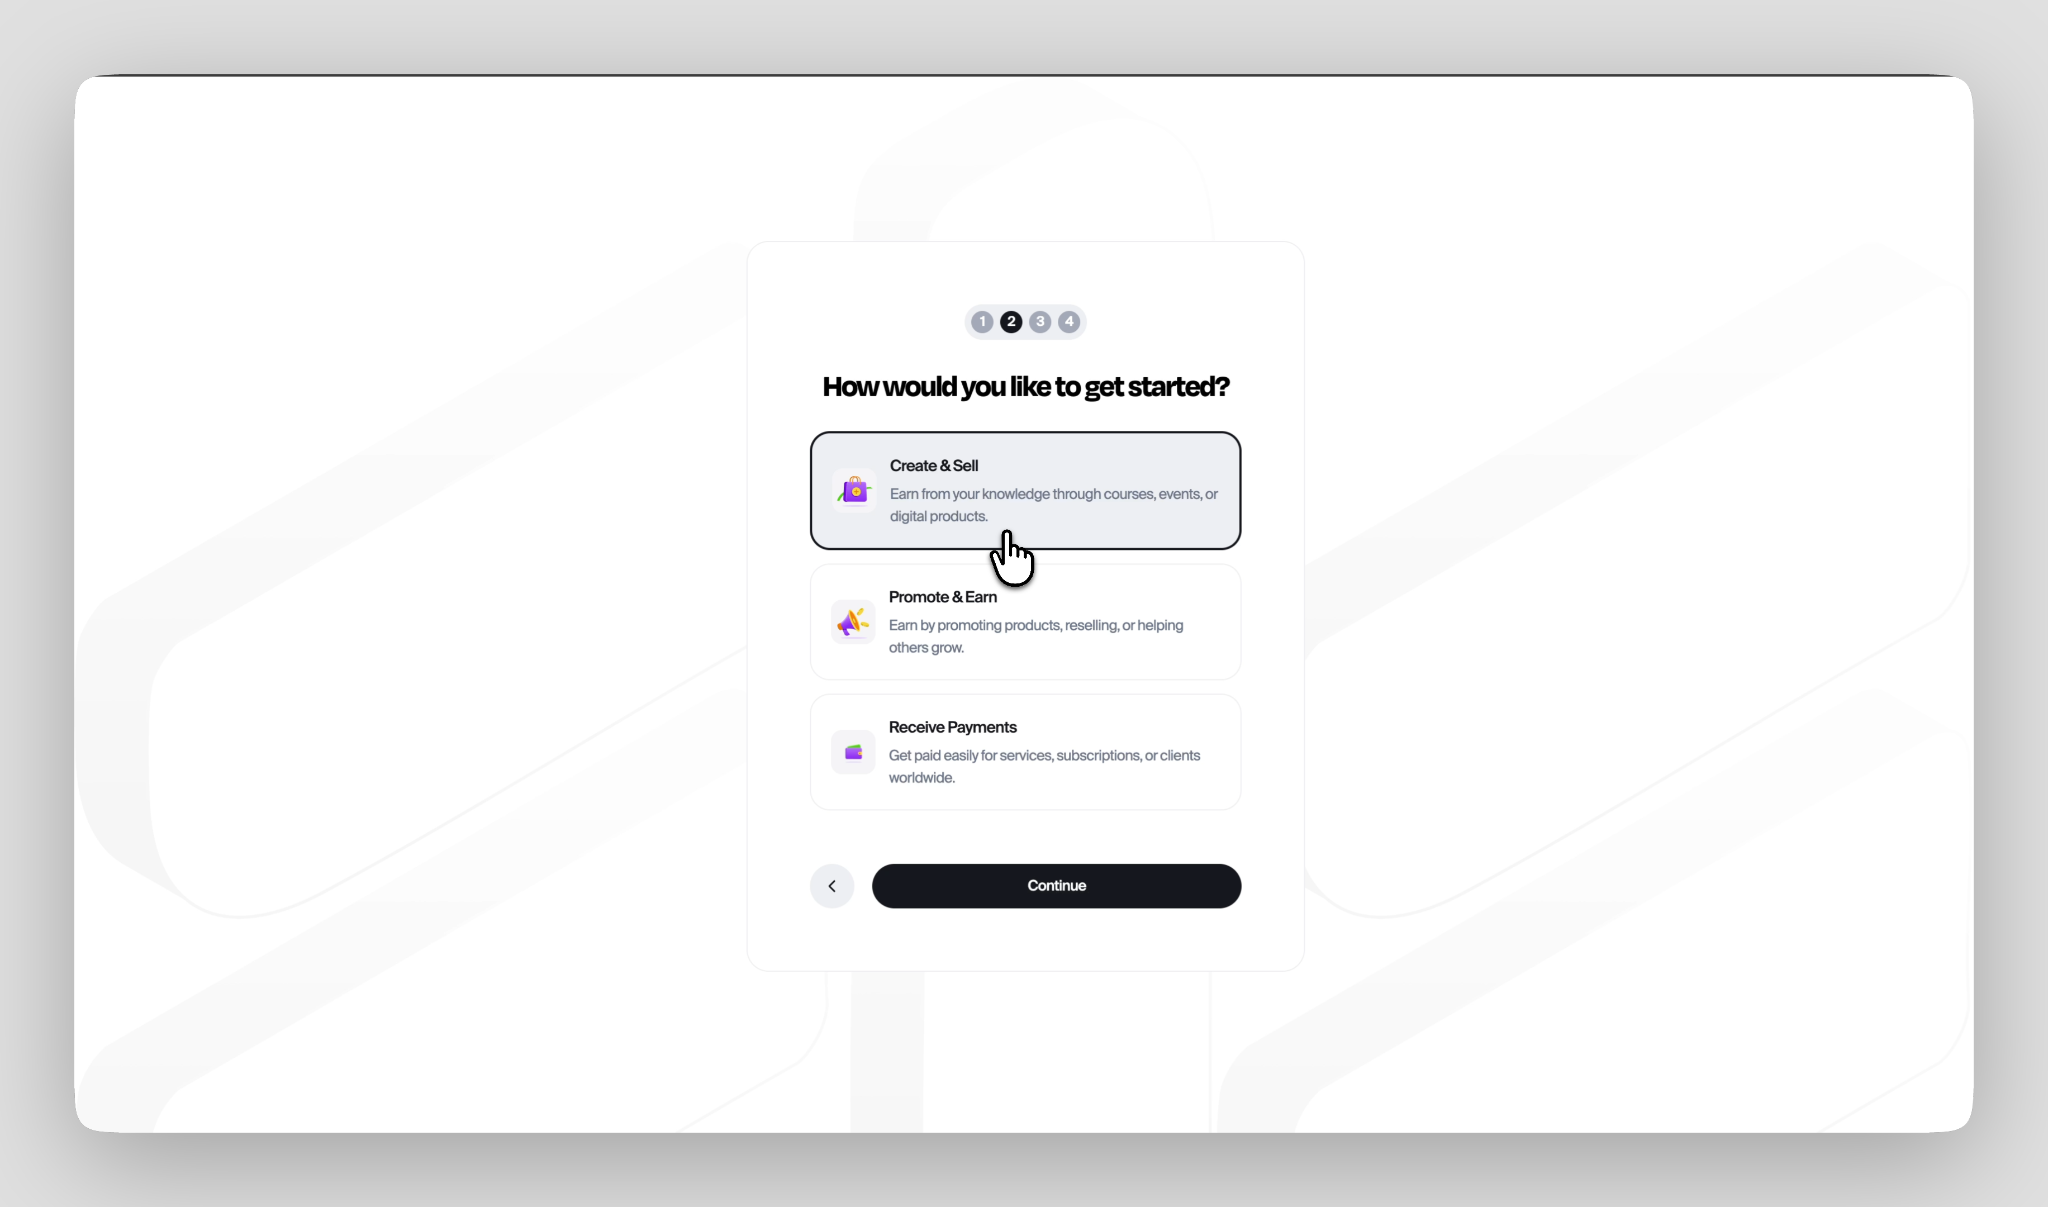
We changed that by asking one simple question at the start — “How would you like to get started?” Simple as it is, it leads you down one of three possible paths:
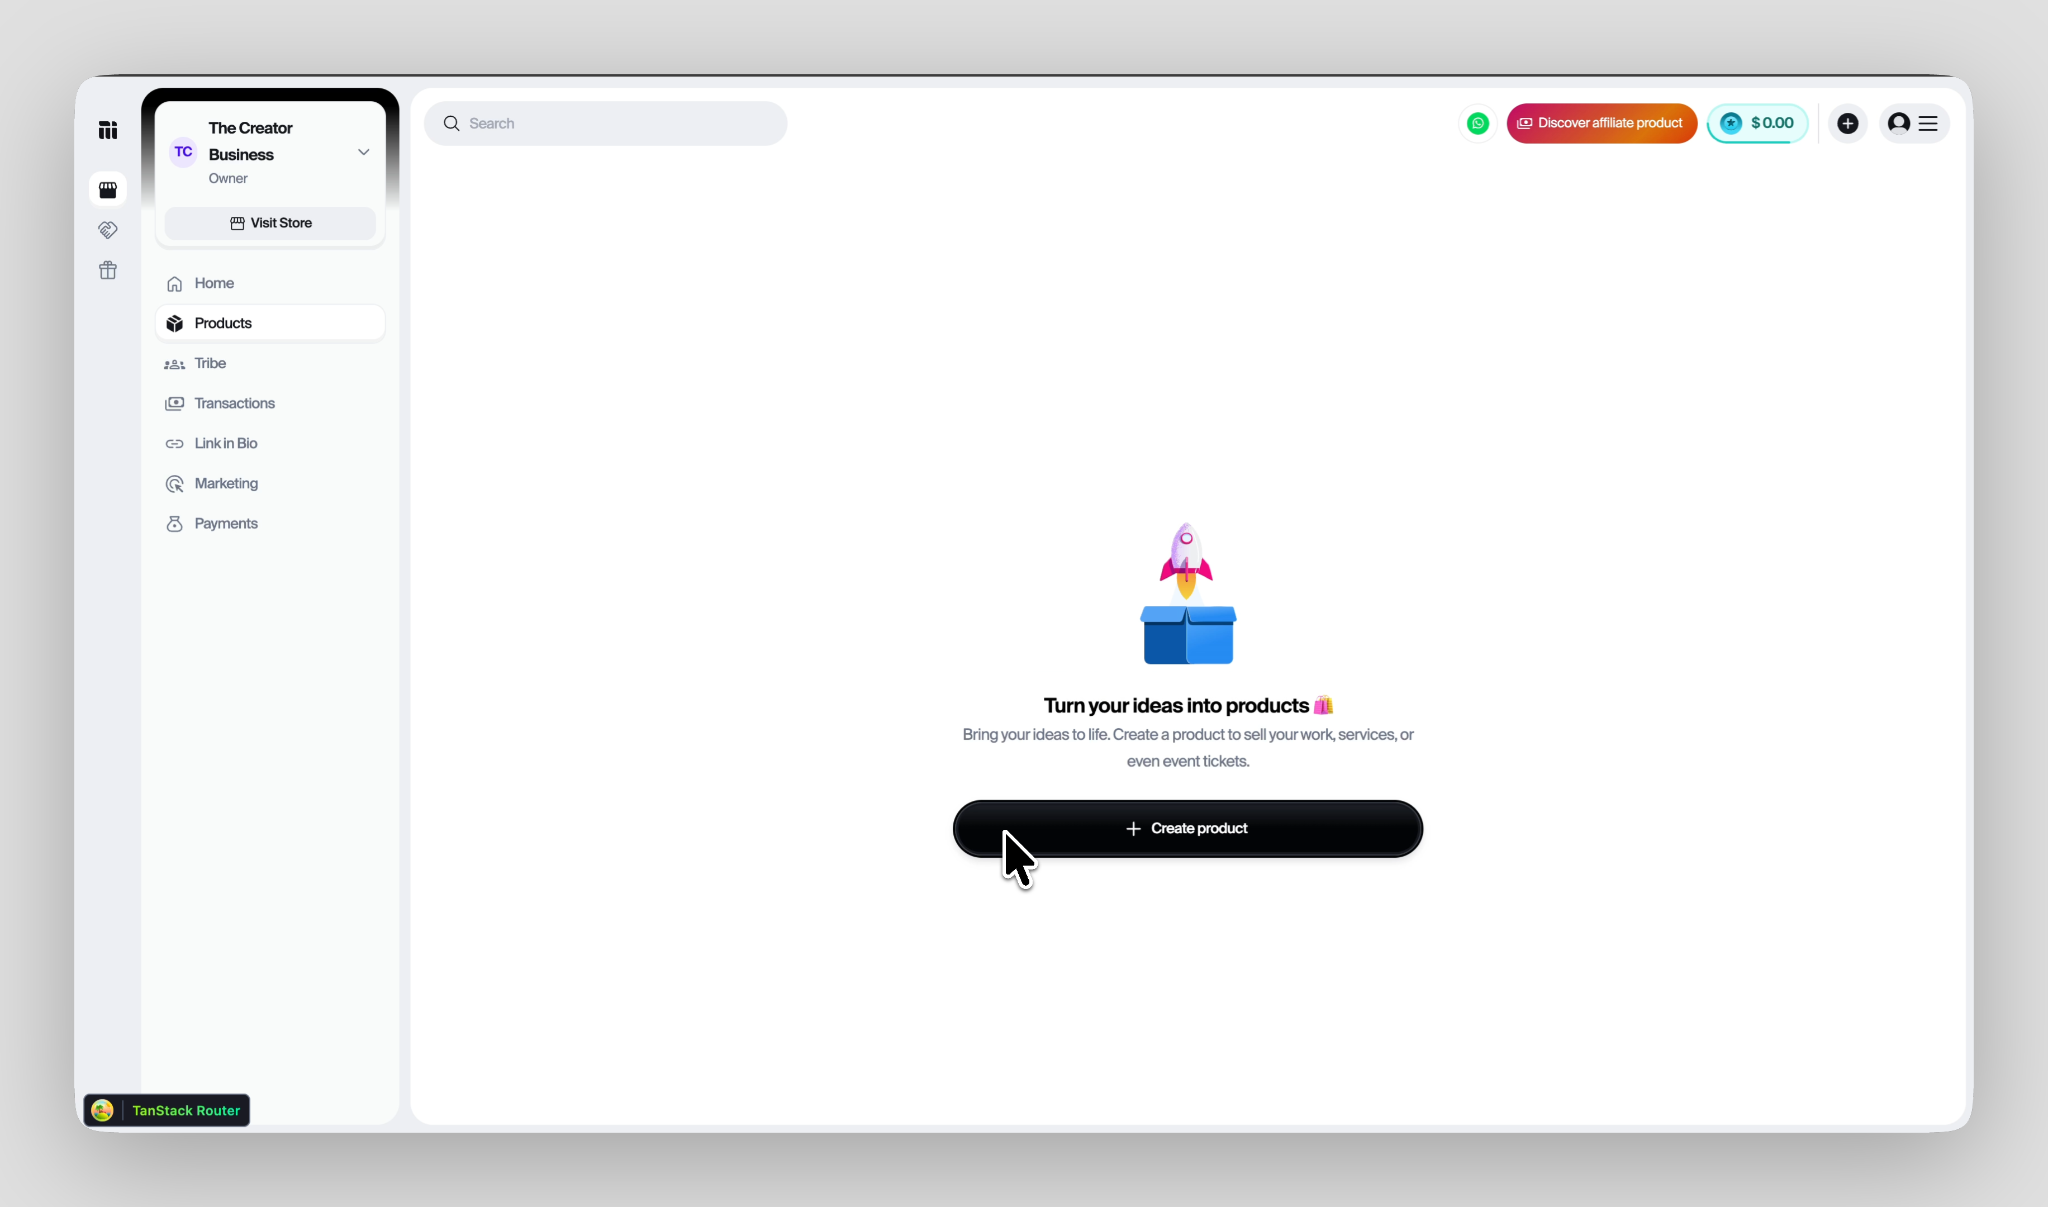
If you choose to create and sell, you’re recognized as a creator on the platform in the first few moments post sign up. This means you see a prompt to create your first product instead of trying to find your bearings on something that’s entirely new to you.
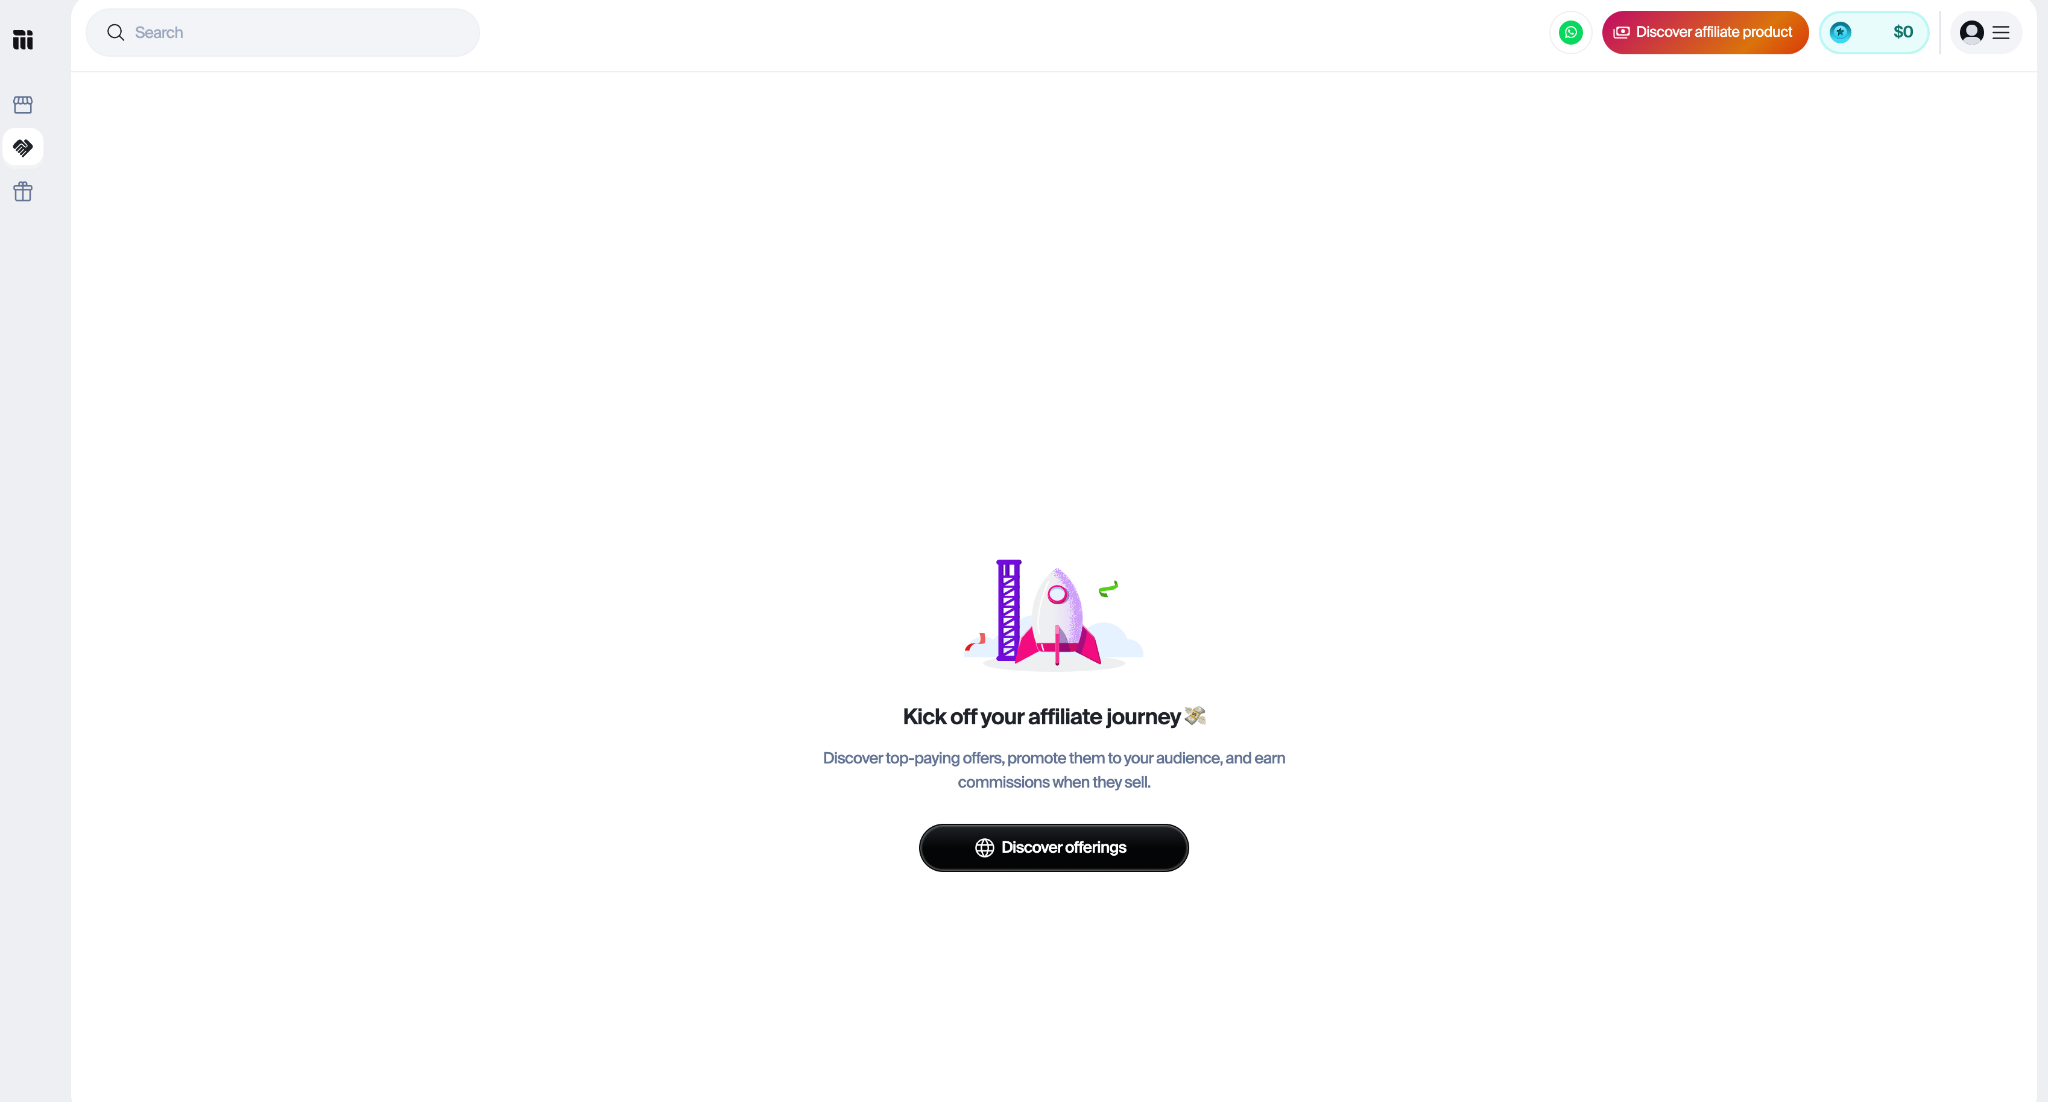
On the other hand, if you choose to promote and earn (as an affiliate), you’re immediately recognized as such and you’re taken to the promotions tab where you can discover available products and begin promoting them right away.
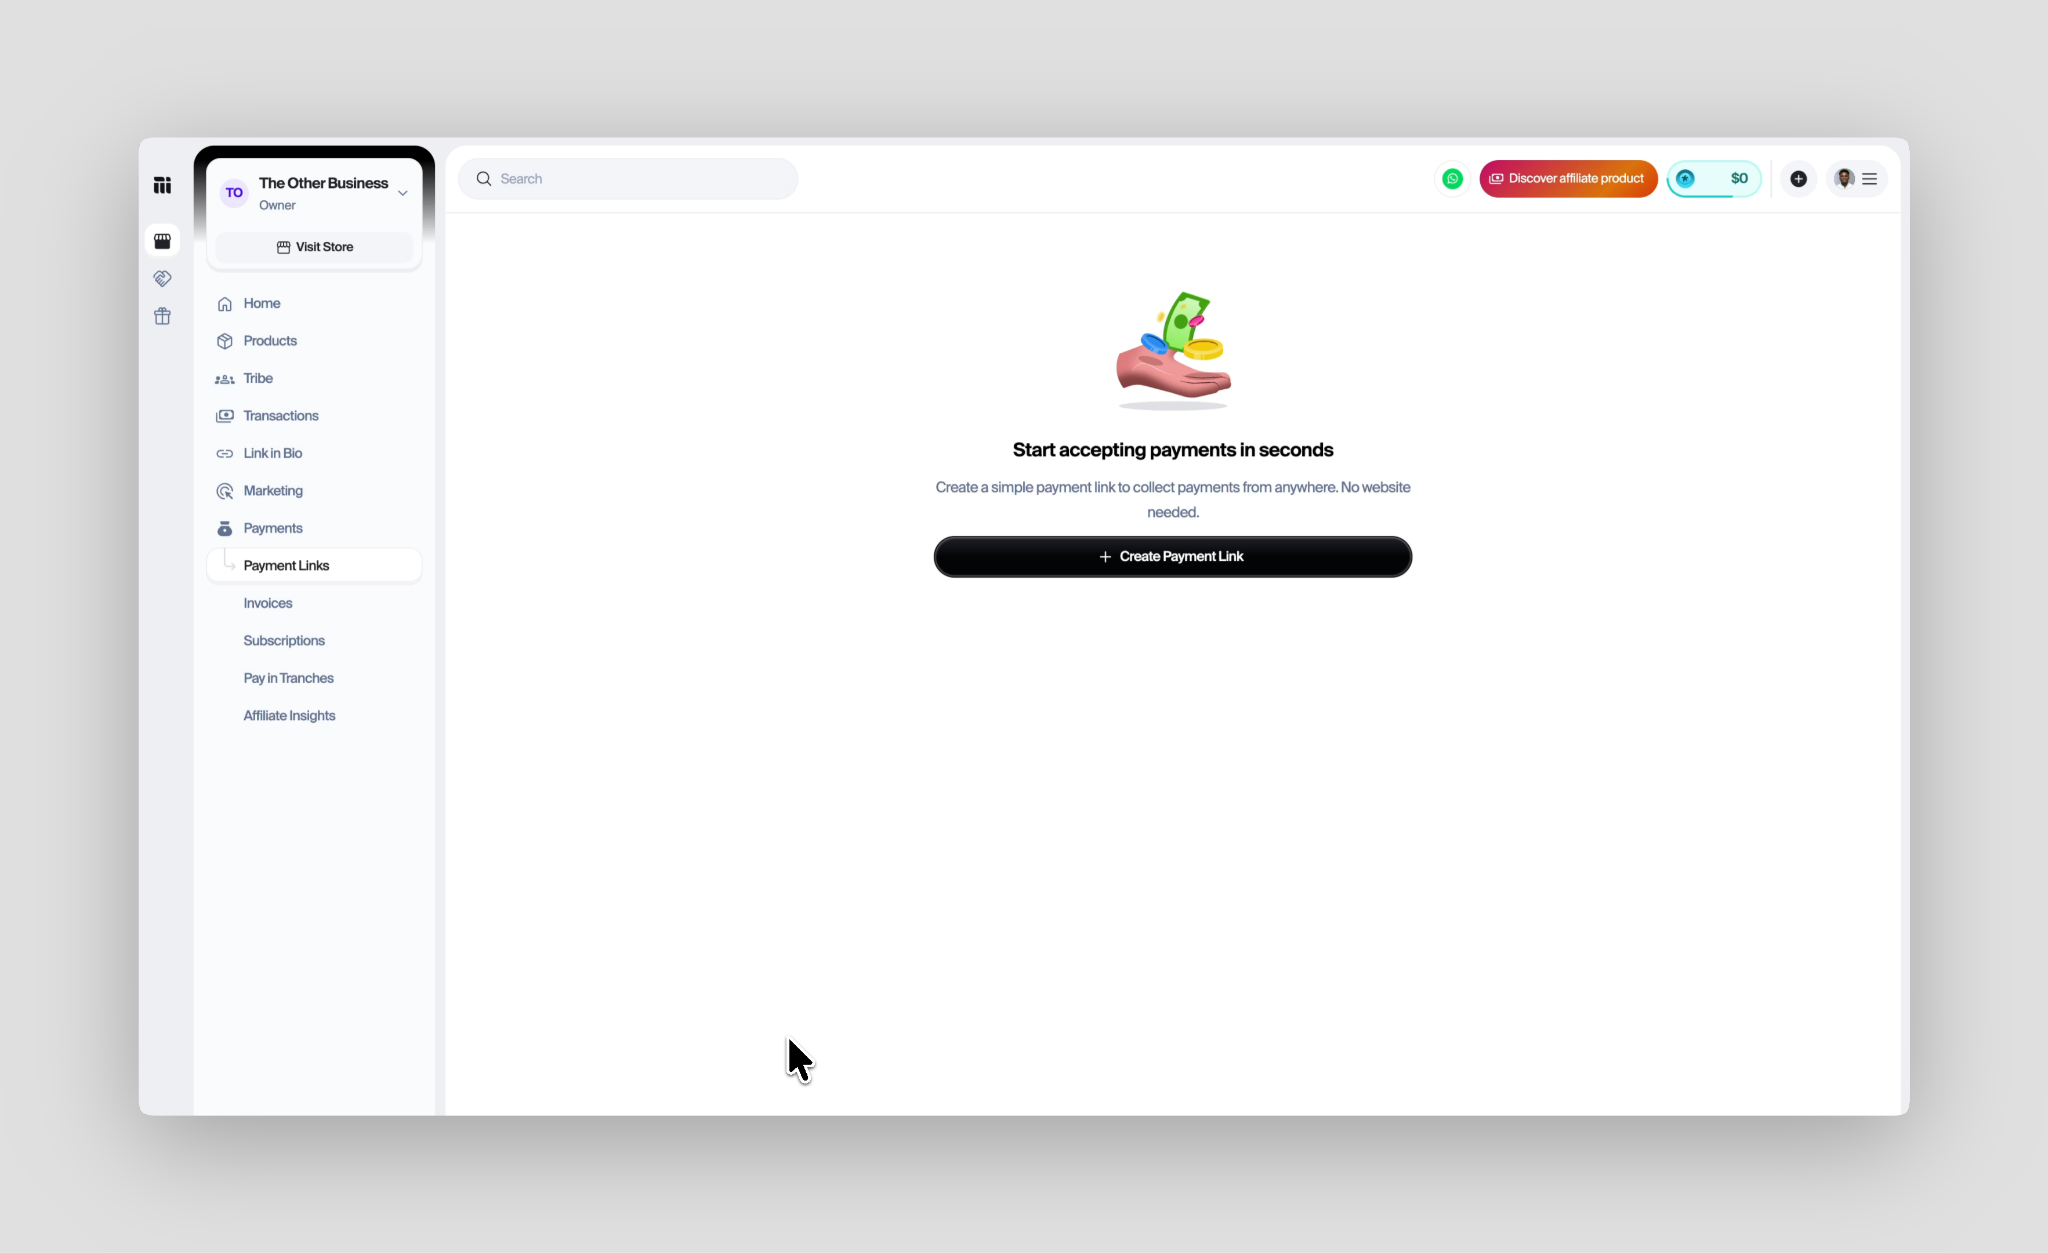
Finally, if you choose to receive payments, you’re recognized as a digital entrepreneur and you’re led to create a payment link to help you begin earning instantly from your clients.
No time wasted trying to figure things out. If you’ve never used Mainstack before, you’re not wasting a single second trying to figure out what to do or how things work. You go from sign up to first value in literal seconds without needing to worry about the logistics of anything.
Tailored experience. Also, with information about how you’d like to get started, you can have an experience that’s tailored precisely to you. The entire landing page itself morphs to suit your needs and guesswork about your preferences are entirely eliminated.
While money is the true lifeblood of every business, its continued presence is driven by decisions that data powers. It’s the reason nearly every app/tool you use as a creator surfaces insights about everything that could help you do your job more effectively.
The problem, however, is two-fold:
In Mainstack V4, we’ve done three interesting things with your data.
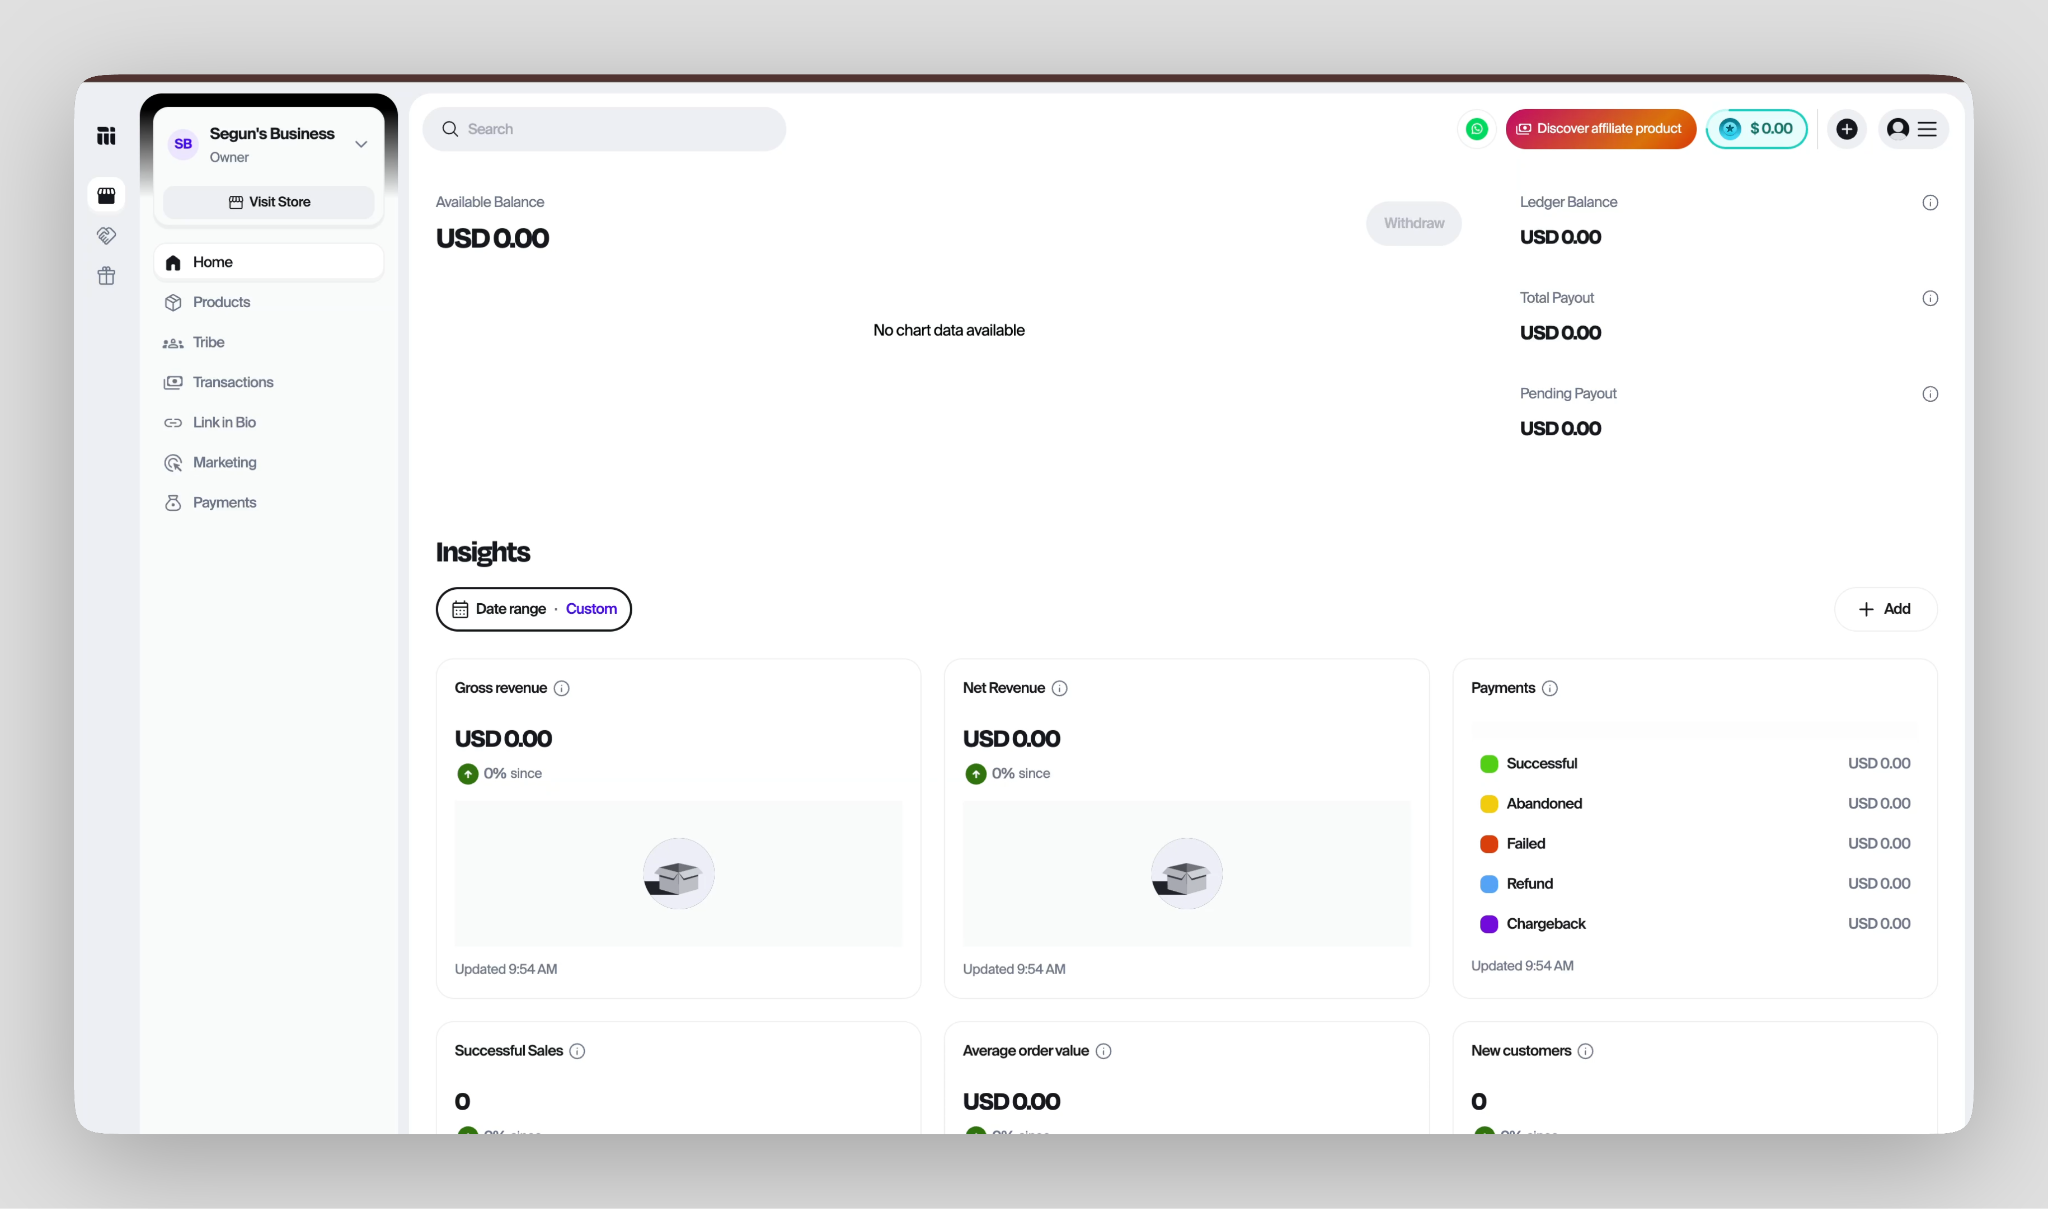
First, we’ve placed it right on the homepage. As soon as you log in, you see every detail that matters to you without needing to wade through an entire sandstorm of links.
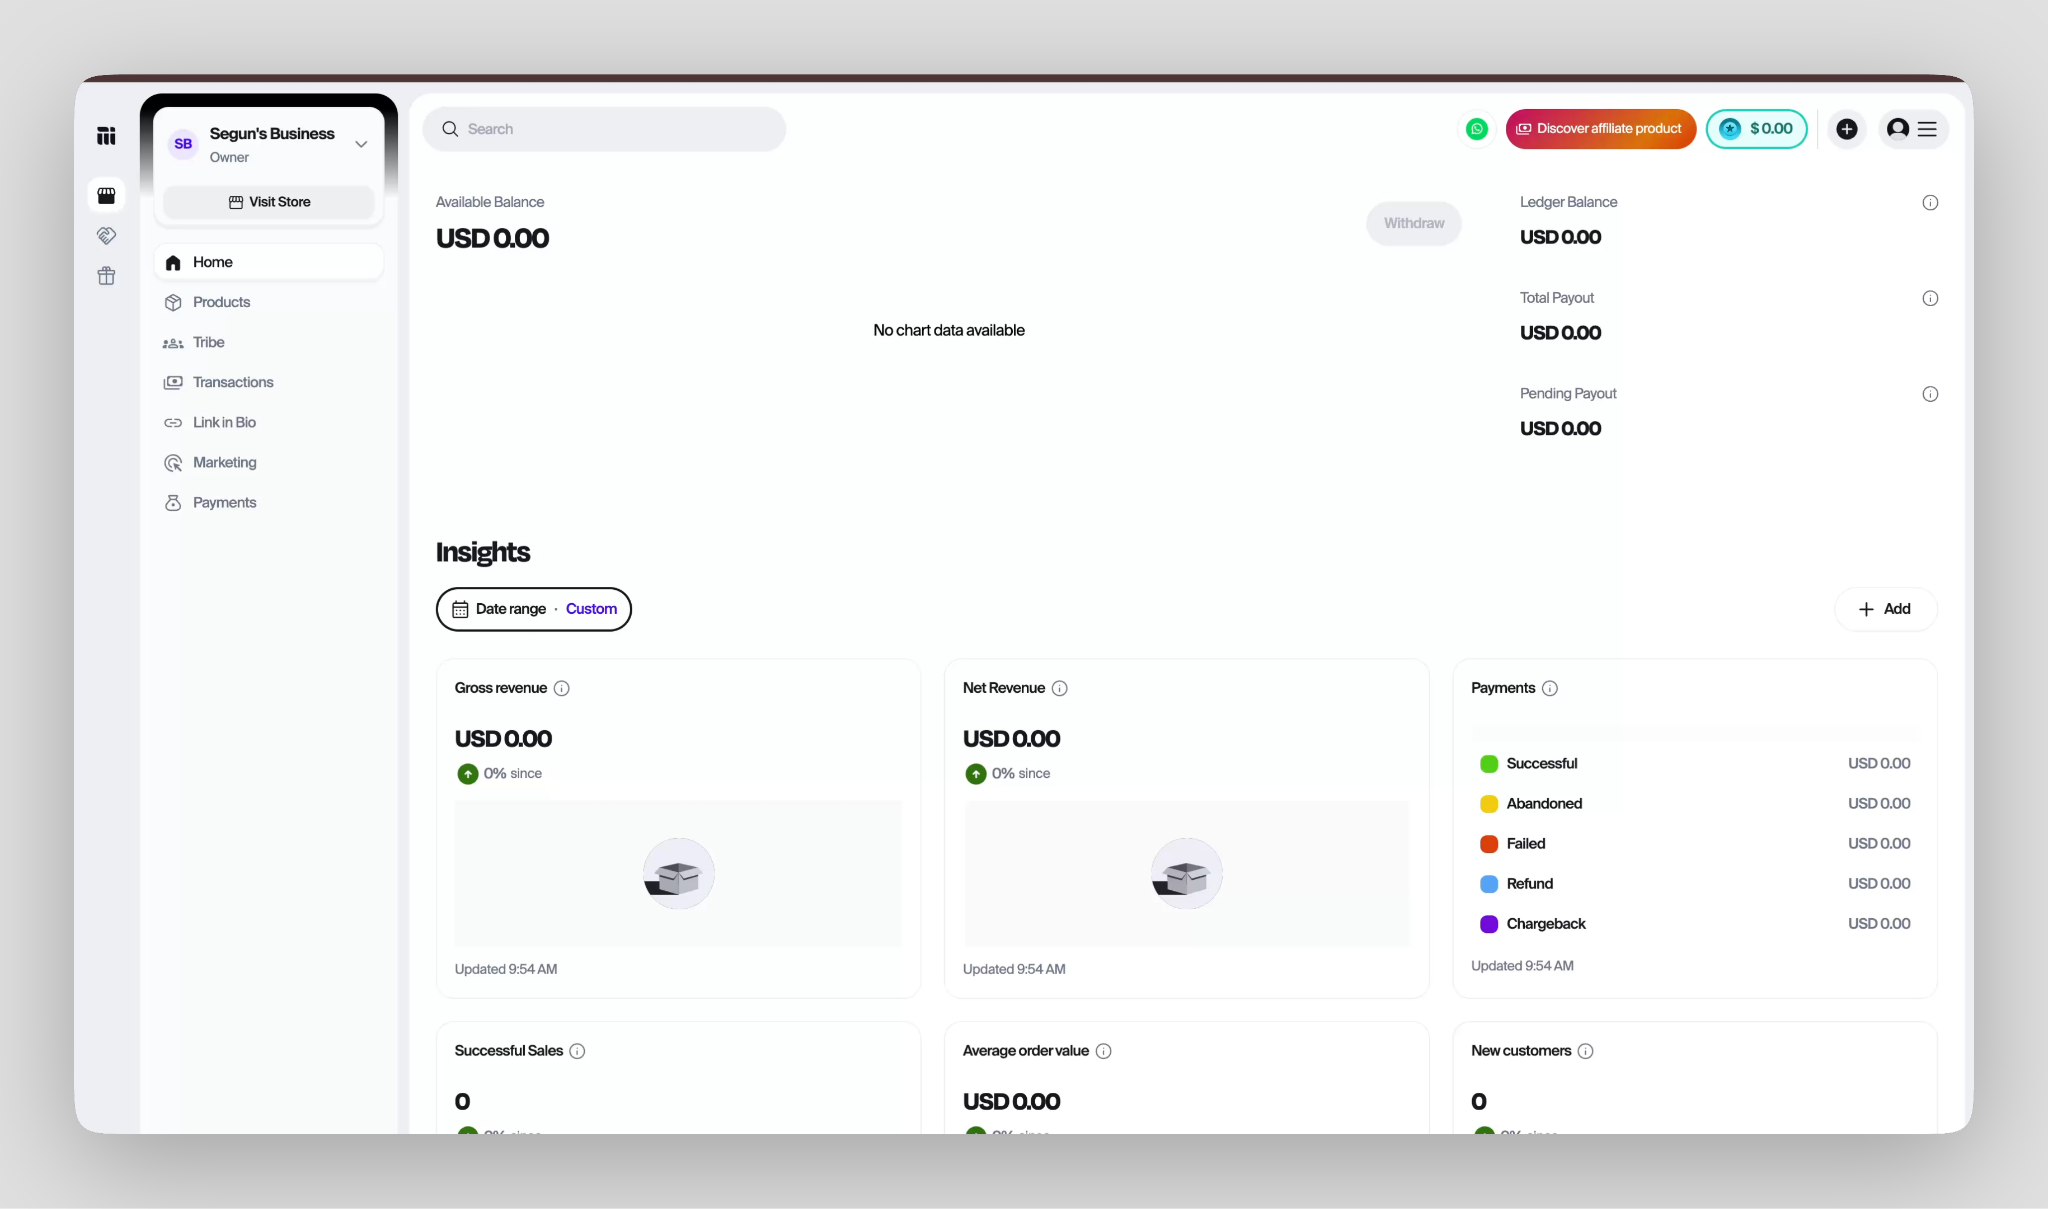
Second, we’ve gone the extra mile to ensure you have deep, accurate insights about practically every part of your creative business.
To put that in context, we provide the following data points:
Balance and Payouts
Revenue and Payments
Sales and Products
Customers
Marketing and Growth
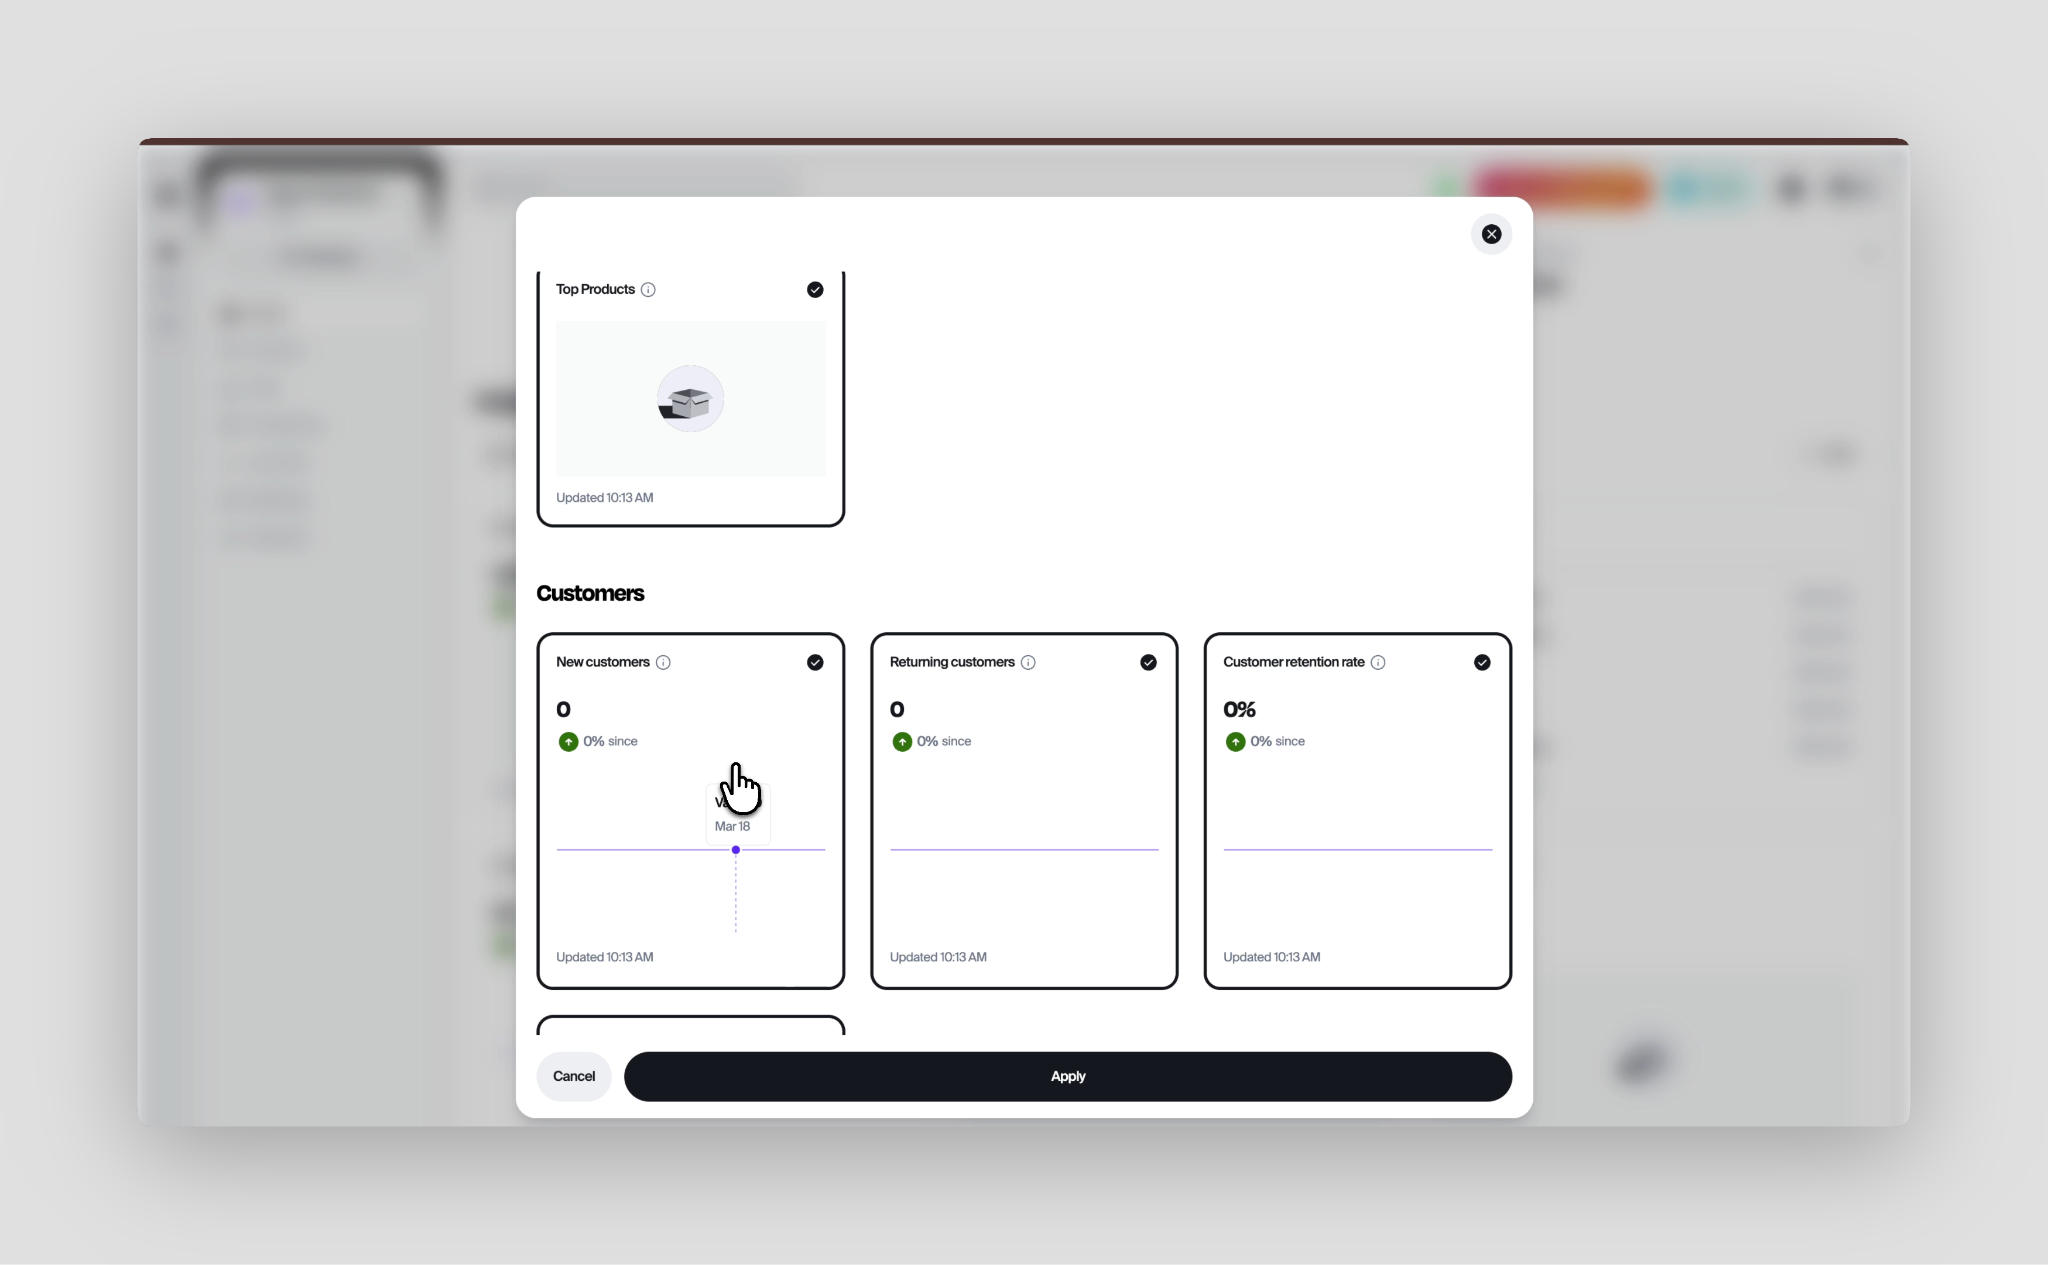
You can add or remove any of these insights to and from your homepage whenever you want and in as many combinations as you want.
First, everything is easy to find. You don’t have to dig through a haystack of pages trying to find relevant data. It’s right there on your homepage.
Second, there’s a lot of details you can use to inform your decisions. With the amount of stats we show you, you have precisely the insights you need to make informed decisions.
For instance, if you’ve got several shop visits but purchases are low, you know that there’s likely something wrong with your offer, the price point or another detail in your storefront.
Alternatively, if you’re getting far more new customers than returning ones, despite one product leading logically to the next, you can guess somewhat accurately that people might not be returning because they’re not getting enough value.
Coupled with our community feature, you can run a survey to figure out precisely what’s wrong and make a decision based on your findings.
Third, you’re never overwhelmed by the amount of information you have. The customizability of the page and data makes it such that you’re never overwhelmed. If you’d rather focus on just one or two data points, you can remove quite literally everything else. They’ll still run in the background, ready whenever you need them.
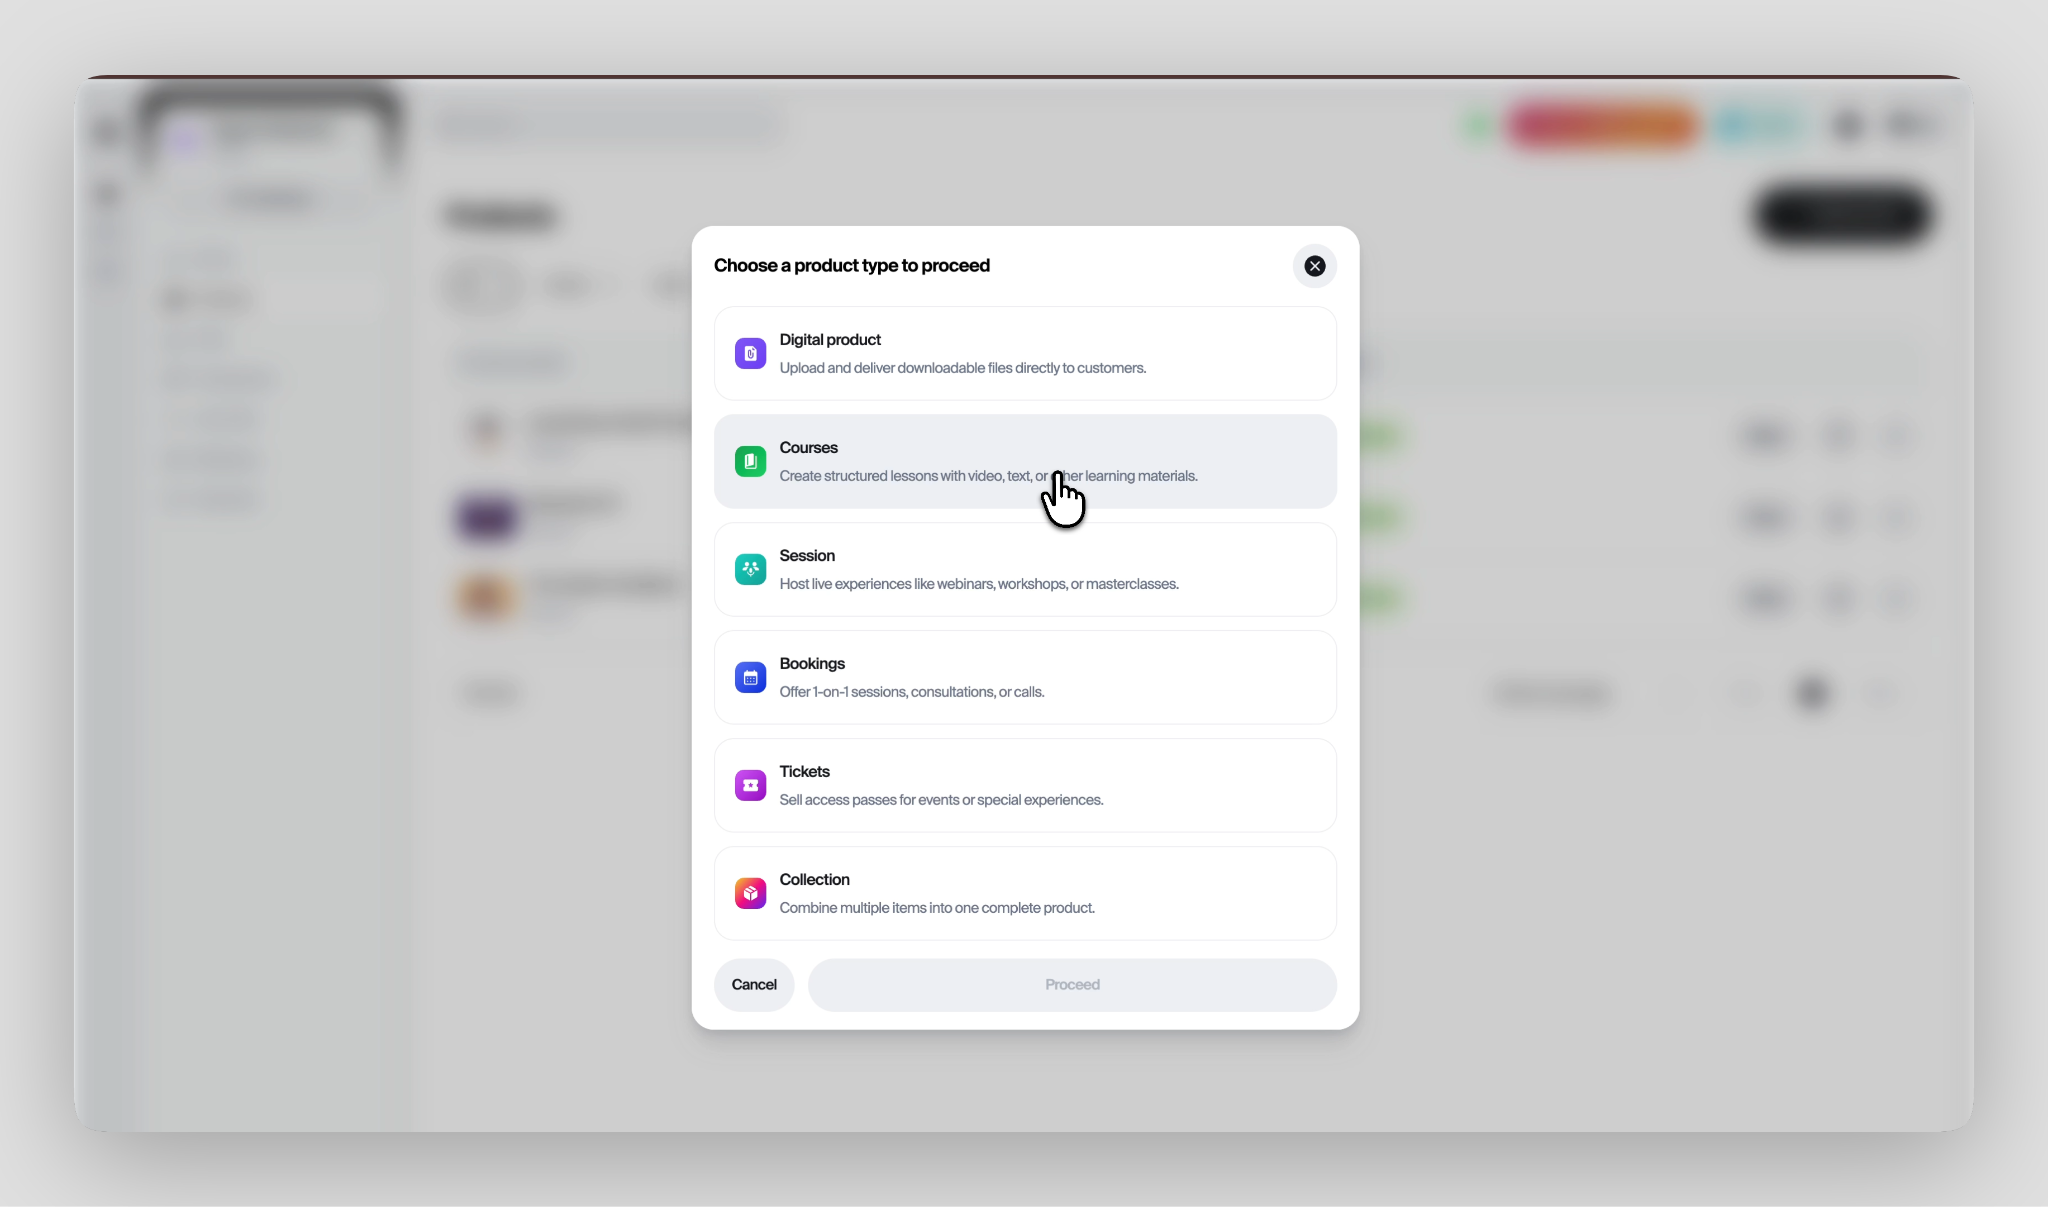
Like you, many creators aren't selling just one type of thing. There's a course, a handful of digital downloads, and maybe a few one-on-one calls on the side.
Before V4, most of these products lived on separate pages and what a customer saw depended entirely on which link they happened to click.
Someone who landed through your course link saw your course. If you also took bookings or sold a few digital products on the side, that customer had no way of finding out, unless you told them directly.
In V4, your entire storefront lives behind one link, organized into tabs that separate your products by type automatically.
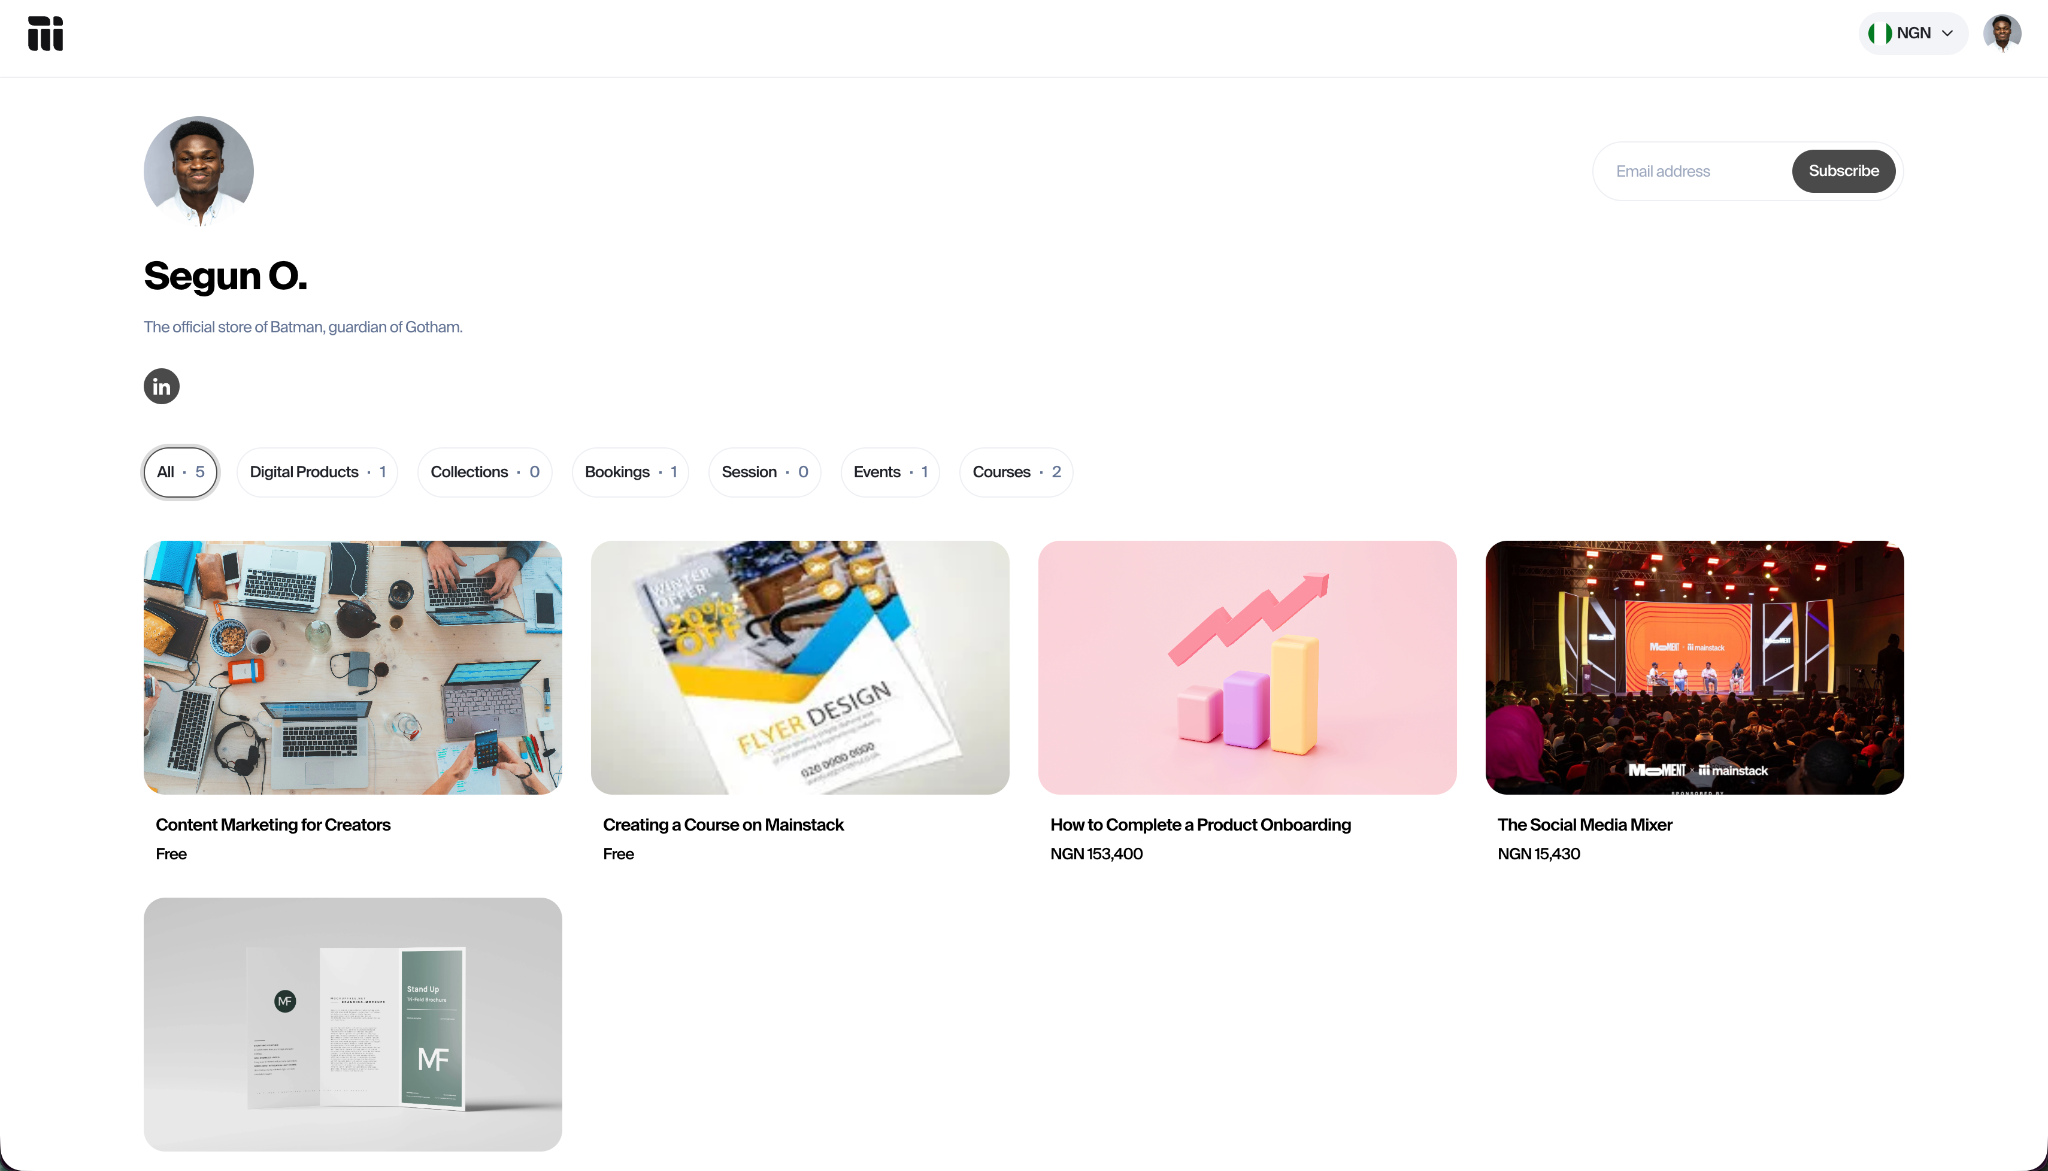
A customer lands once and can move between a tab for courses, a tab for digital products, a tab for bookings if you take them, and any other product type you sell, without getting lost or needing a second link to find the rest.
Better organization. The biggest shift is that you only ever need to share one link, everywhere. That means your Instagram bio, your email signature, your YouTube description, all of it points to the same place, and that place already knows how to organize itself.
A customer lands and sees clear tabs and moves through your storefront at their own pace, looking at exactly what they came for.
More potential sales through improved discoverability. But because everything else is still right there, one tab away, they can also come across things they weren't looking for. Someone who clicked through for a digital product might notice you also take bookings, or that a few of your products are available together as one offer, and decide to buy that instead, or in addition.
Every visit becomes a chance for more than one purchase decision, simply because there's more to see in the same place.
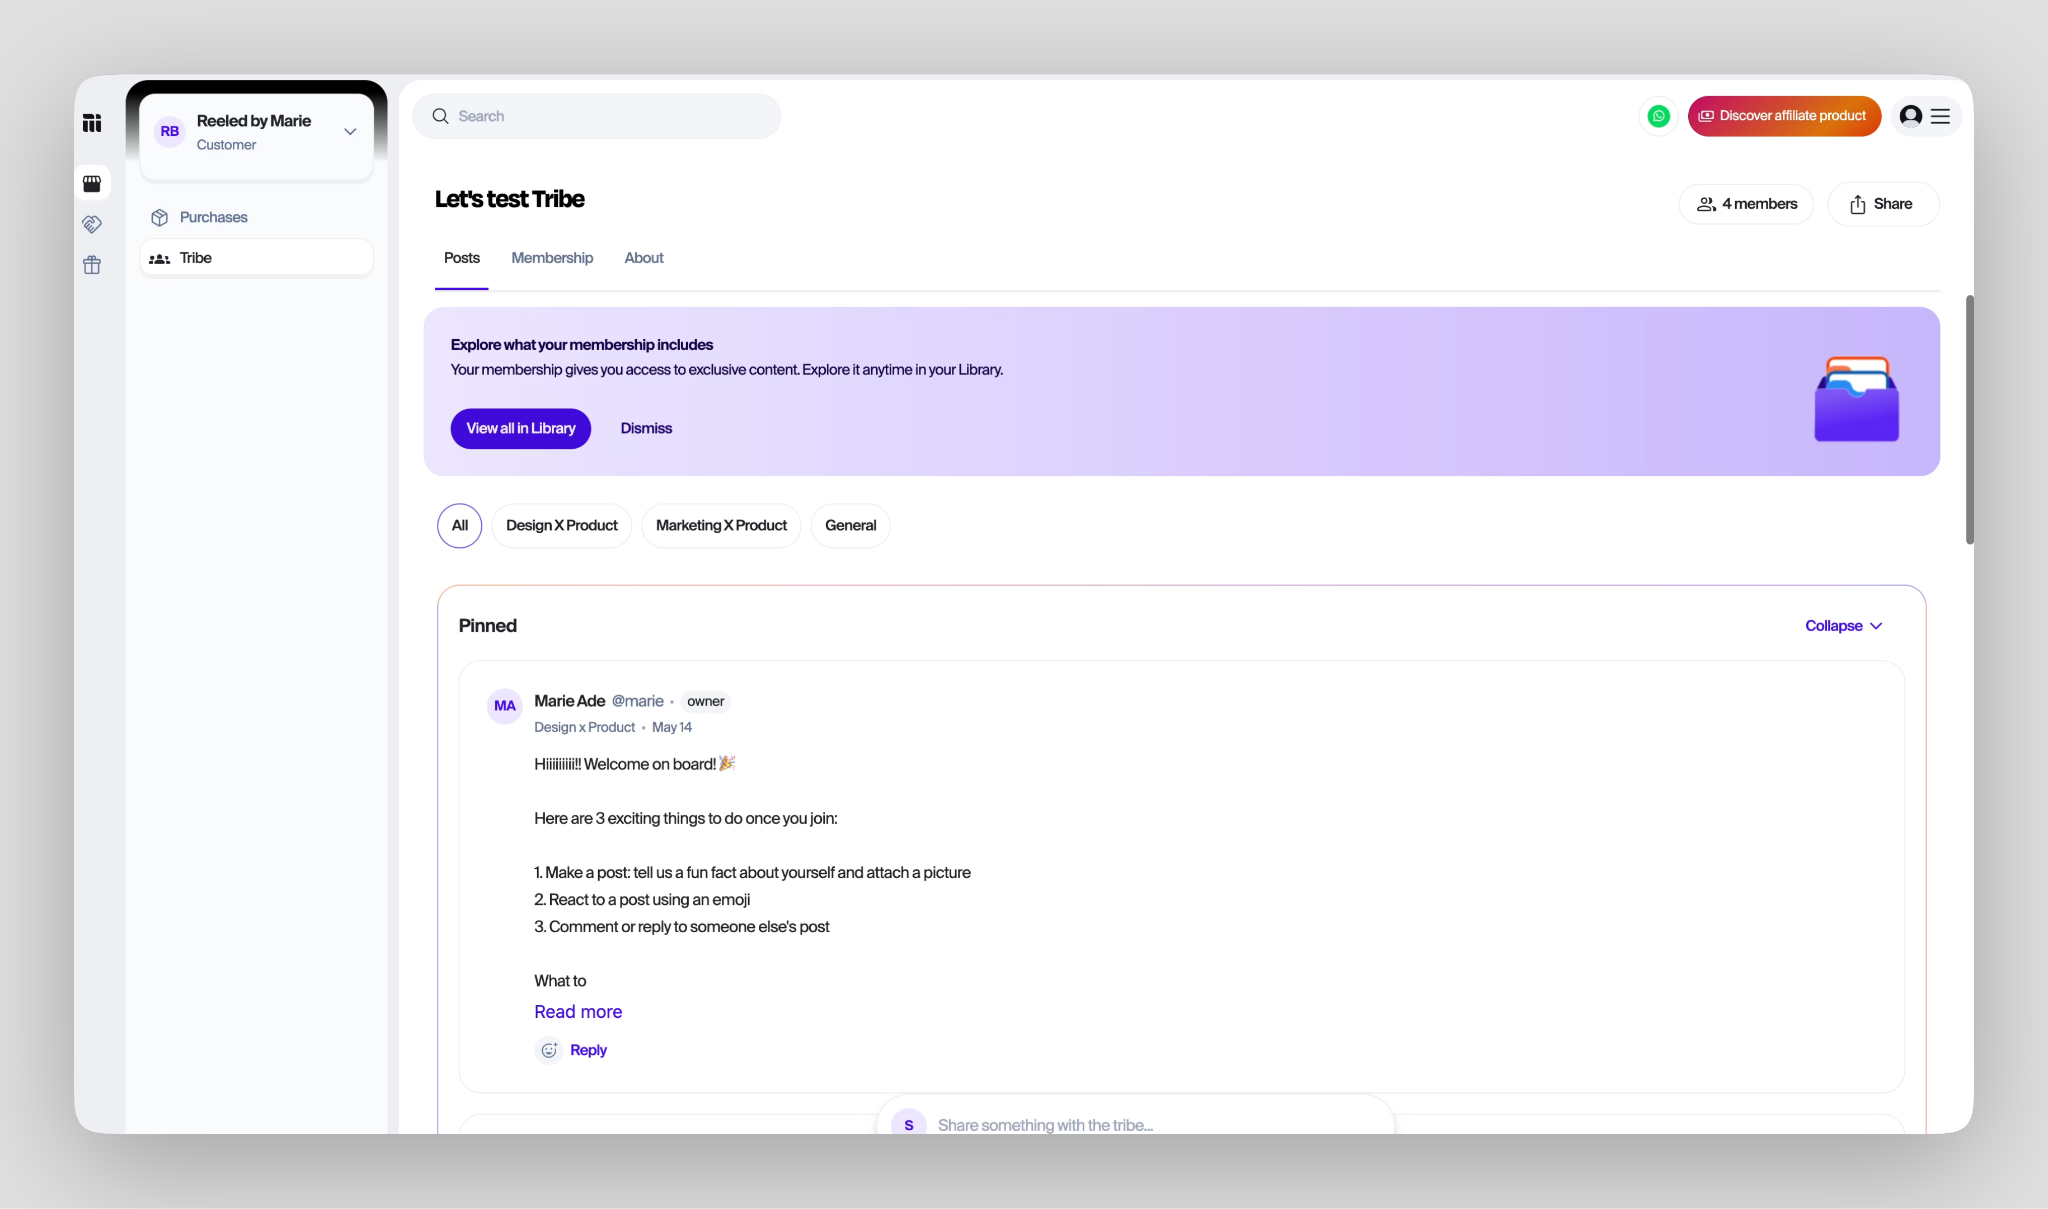
As a creator, chances are you already have a community of some kind. They’re the people who comment on every post, reply to every email, and show up when you launch something new. The problem, unfortunately, is finding the perfect place to hold that community.
So you’re forced to stitch tools together. A WhatsApp group for conversation, a Notion page for resources, a spreadsheet for tracking payments, etc. It all works find until it doesn't.
Tribes is our answer to that.

It's a permanent home for your community, built directly into Mainstack, where access, payments, and conversation work together instead of living in separate places.
You can create multiple membership tiers, from free communities to premium VIP experiences, and decide exactly what each tier unlocks. Within every Tribe, you can create up to five Spaces for different topics and conversations, so discussions stay organized instead of collapsing into a single noisy feed.
Access is handled automatically. When someone pays, they're let in instantly. When a subscription ends, they can be downgraded or removed based on the rules you've set. No spreadsheets, no manual tracking, and no chasing renewals.
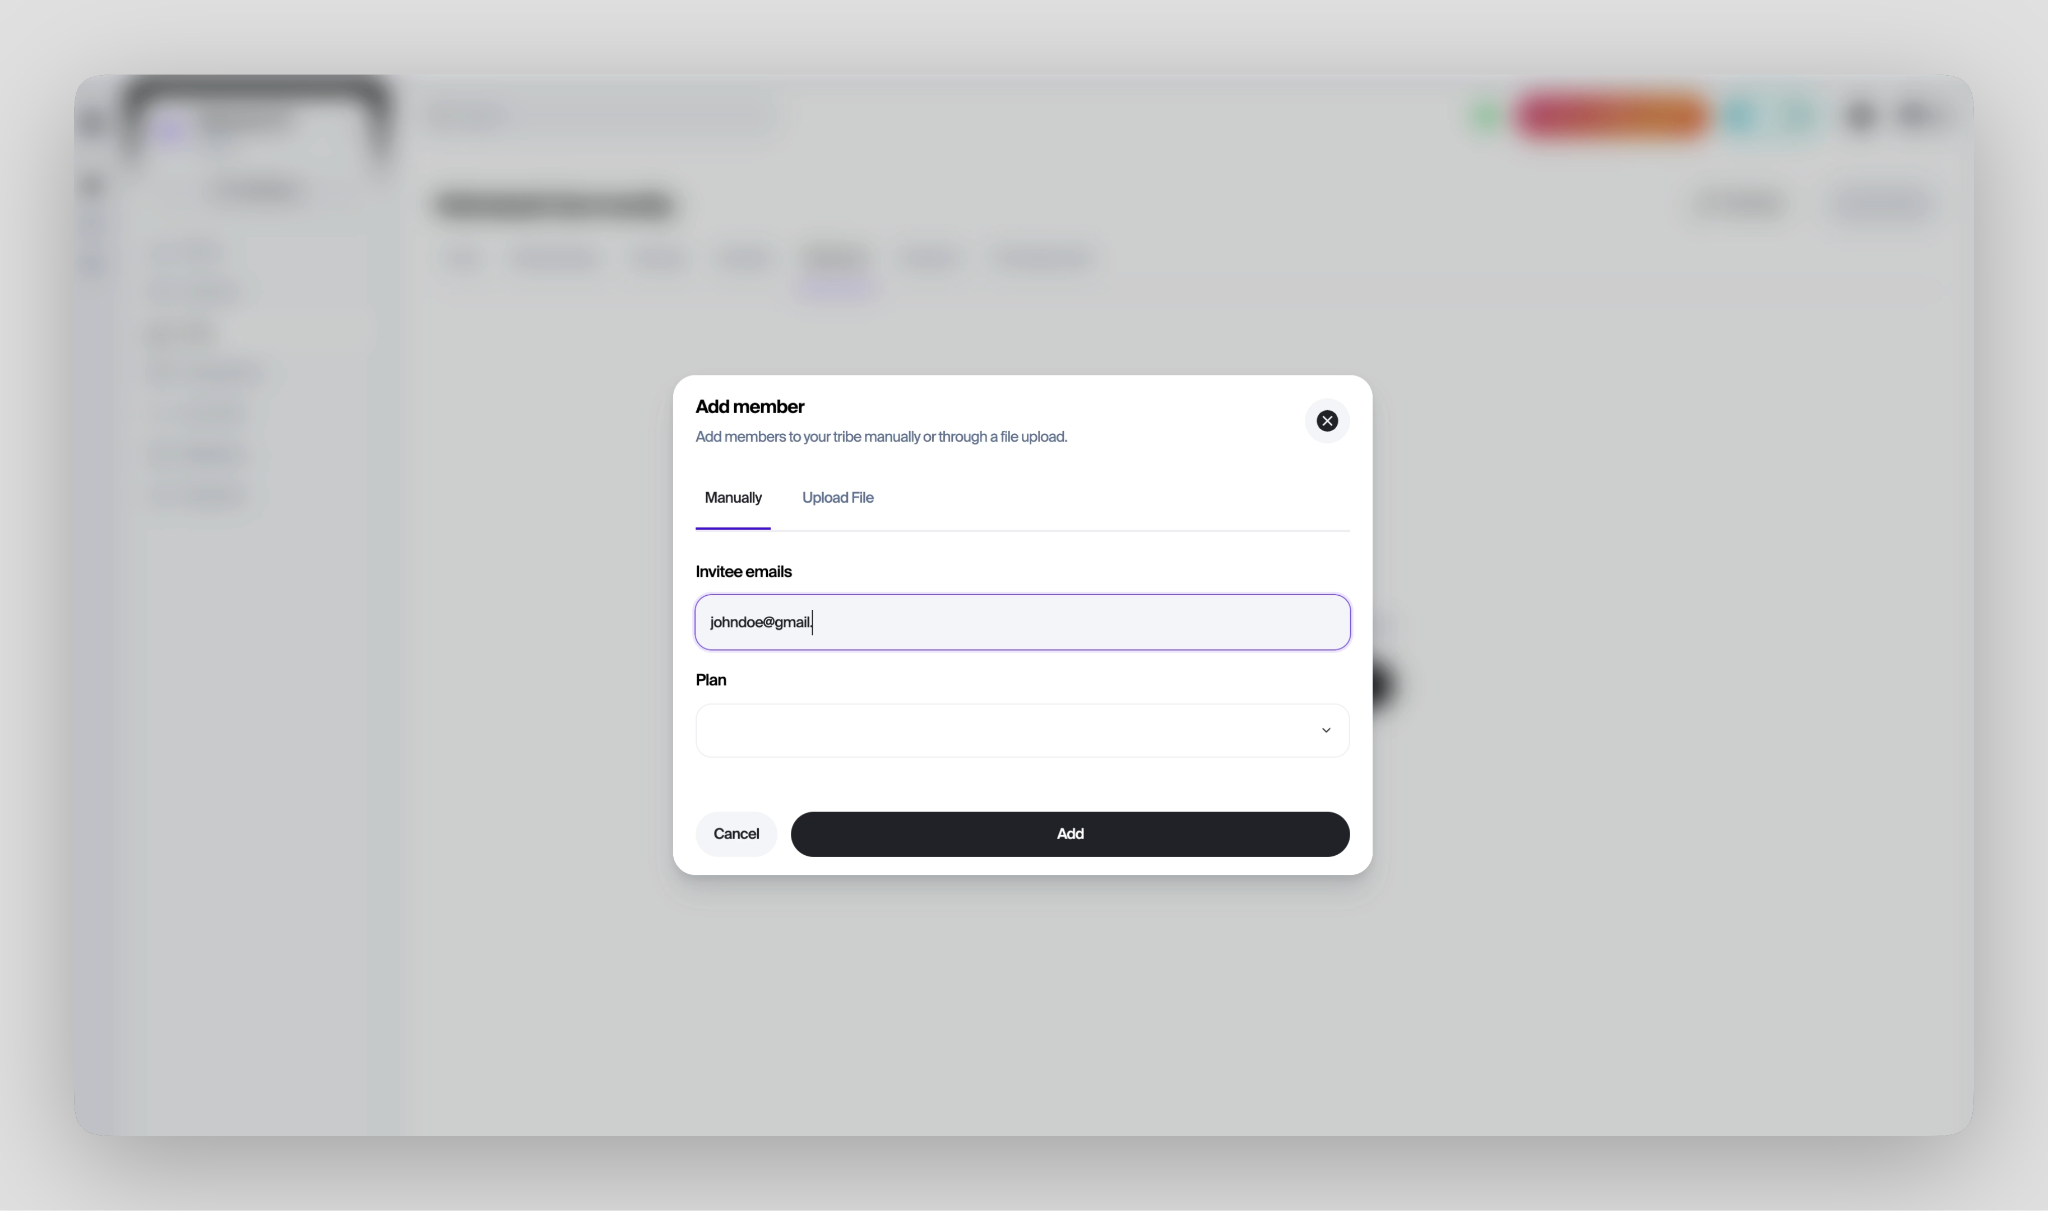
If you're moving an existing audience, you can import members with a CSV file or send secure one-time invite links to collaborators, early supporters, or anyone who should have access without paying.
Every member gets a profile with real context behind it, and features like reactions, @mentions, and @Space mentions make it easier for people to connect with each other, not just with you.
Courses, events, sessions, and other products you sell on Mainstack also remain visible and purchasable inside your Tribe, so community and commerce stay connected.
You actually own your community. For years, the people most invested in your work have lived somewhere you don't fully control. Tribes gives them a home that's actually yours, where membership isn't dependent on an algorithm, a platform policy, or someone else's priorities.
Everything you need to manage your community is streamlined. It also means you stop running your community on borrowed infrastructure. Instead of juggling separate tools for conversation, payments, and member management, everything works together in one place. That frees up the time you used to spend on admin so you can focus on what matters most: showing up for your people.
Recurring revenue built in. Instead of relying entirely on one-off product sales, sponsorships, or algorithms to reach your audience, you can create paid tiers that members subscribe to for ongoing access. Whether that's exclusive conversations, premium resources, direct access to you, or a more focused experience for your biggest supporters, Tribes gives you the structure to package that value and charge for it. And because payments, access, and membership all live in the same place, you don't have to manually manage who belongs where every month.
While we’ve spent a lot of time working on V4 and really thinking about the benefits it could have for you, we’re not done by any means. We’ve got several new features lined up for release later this year:
Auto DM turns Instagram engagement into automated conversations. Creators choose a trigger word, write the response they want sent, and attach a product link with built-in tracking. Whenever someone leaves a qualifying comment or interacts with a Story, Mainstack instantly delivers the DM. Instagram is the first platform supported, with TikTok, WhatsApp, and X planned next.
Brand Deals gives creators a centralized workspace for managing sponsorship opportunities. It includes a dynamic media kit generated from connected social accounts, a pipeline for tracking outreach and negotiations, and built-in messaging tools that keep brand conversations organized in one place.
Built on top of Brand Deals, the AI Agent automates the outreach process from start to finish. It identifies brands that align with a creator's audience, generates tailored pitches using real performance data from the creator's media kit, sends outreach, and monitors responses. The result is a system that handles the consistency required for brand partnerships without requiring creators to do the repetitive work themselves.
Email Sequencing expands Mainstack's email capabilities beyond one-off broadcasts. Creators can build automated flows of up to five emails triggered by actions such as purchases, abandoned carts, new subscriptions, or manual enrollment. Mainstack takes care of scheduling, delivery, and performance tracking, with up to 5,000 emails per month included.
Creators can now bring collaborators directly into a product and automate how earnings are shared. Product owners can invite up to five contributors, assign a percentage of revenue to each person, and have payouts distributed automatically whenever a sale happens. Each collaborator receives their portion instantly in their Mainstack balance.
Mainstack Capital gives eligible creators access to growth funding based on their sales history on the platform. Rather than filling out applications, creators receive offers directly inside their dashboard when they qualify. Repayments happen automatically as a percentage of future sales, increasing and decreasing alongside revenue instead of following a rigid payment schedule.
Sales Page Builder uses AI to generate a complete sales page from a creator's existing product information. The page is designed around proven conversion principles while remaining fully editable through a drag-and-drop editor. Once ready, creators can publish immediately.
Contract Templates brings essential legal documents directly into Mainstack. You get access to five professionally prepared agreements that can be signed by external parties without creating an account. The platform also recommends the appropriate contract when relevant, surfacing a Brand Deal Agreement after a sponsorship is accepted or a Collaboration Agreement when a new contributor joins a product.
For a long time, building a creator business has meant stitching together a collection of tools that were never really designed to work as one.
A platform for selling. Another for email. Another for community. Yet another for managing the business side of things. It works, but only up to a point. As your audience grows, so does the complexity.
Mainstack V4 is our attempt to solve that problem.
From onboarding and analytics to storefronts, email, communities, payments, and everything we're building next, the goal is simple: give creators a single place to run and grow their business without constantly jumping between tools.
We've made a lot of progress, but we're only getting started.
If you're ready to build a creative business that feels less fragmented and more sustainable, create your free Mainstack account today and see what's possible.
.png)
Picture this: you're deep in a YouTube rabbit hole watching someone talk about a niche you didn't even know existed, and halfway through you notice the comments are full of people asking where to buy their course.
And then it hits you: that person is getting paid for this. Not just a little. Sometimes life-changingly well. This, among other things, represents the opportunity being a digital creator presents. But, who exactly is a digital creator, and more importantly, could you be one?
Let’s find out.
A digital creator is someone who produces and distributes value-driven content or products in digital form (and builds a business around it). That could mean writing, stock photos/video, design assets, code, photography presets, or any asset that translates into something people want to consume, use, or learn from online.
A creator owns their asset while influencers often sell access to their audience.
An influencer's value is tied to their audience size and the attention they command. A brand pays them to post, the post goes up, the deal ends, and the influencer's income resets. There's nothing inherently wrong with that model, but it's fundamentally a transaction. The moment the follower count dips or a platform algorithm shifts, their leverage shifts with it.
A creator's value lives in what they've built — the ebook that keeps selling months after it was created, the course someone discovers a year after it launched, the newsletter list that nobody can take away from them. One model is built on visibility, the other is built on value.
It’s important to note that these two categories aren't mutually exclusive. A digital creator can have a huge following and work as an influencer for brands, in the same way that an influencer can build a digital product and start generating passive income.
This is why you don't need a massive following to be a successful digital creator. All you need is something worth buying and an audience that trusts you, even if that audience starts small.
"Digital creator" is a wide umbrella. Here's how to think about the main categories and where you might naturally fit.
These are the bloggers, YouTubers, podcasters, and newsletter writers whose primary output is content and whose audience grows around it. Think of a finance blogger who monetizes through sponsorships and a paid newsletter — or a tech podcaster earning through ads and an exclusive listener community. The content is the product, and everything else grows around that. The best example of this is probably Wisdom Kaye. He never sold digital products; all he did was show up on TikTok in incredibly styled outfits for long enough that the sponsorships and brand deals became inevitable.
These creators build and sell digital products — ebooks, templates, Lightroom presets, music beats, fonts, spreadsheets, UI kits. They create products once and sell them repeatedly, making this a business with low overhead, which is infinitely scalable, and completely owned by the person who made it.
These are the coaches, course creators, consultants, and community builders. They monetize expertise directly through online courses, paid workshops, one-on-one coaching, or membership communities. They are knowledge-based creators turning what they know into something people pay for. Alex Hormozi, for example, has built an empire around teaching people what it takes to establish a successful business.
One of the biggest advantages of being a digital creator is that your income doesn't have to come from a single source. Unlike a traditional job where your earnings are tied to one employer, creators can stack multiple revenue streams on top of each other, each one building on the last.
Here are the main ways digital creators make money.
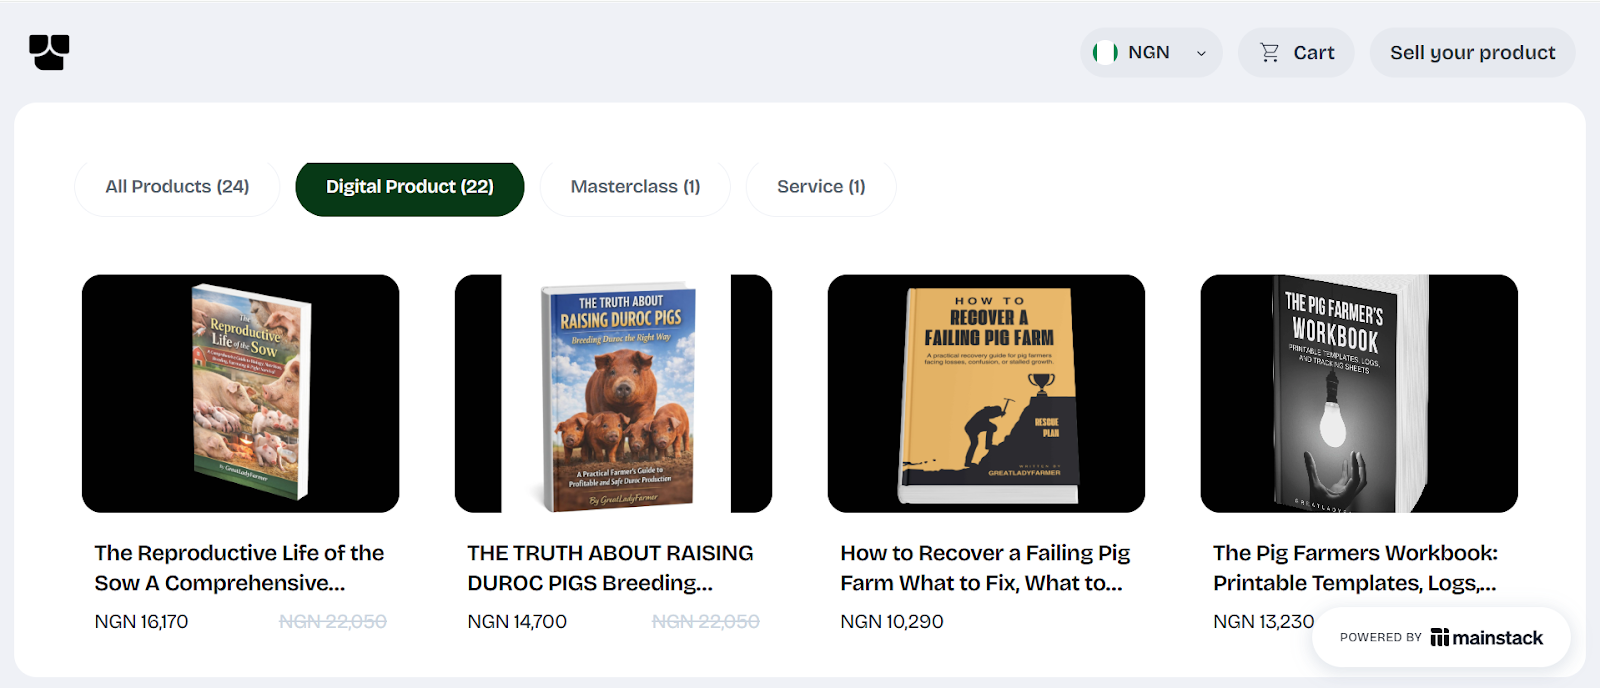
Ebooks, templates, presets, courses, music, digital art, software tools — products you create once and sell repeatedly. This is arguably the most scalable income stream available to creators because there's no inventory, no shipping, and no ceiling on how many units you can sell. A well-positioned digital product can generate income while you sleep, travel, or work on your next project, and with a platform like Mainstack, your digital product storefront can be live and selling in a matter of hours."
Brands pay creators to showcase their products to engaged, niche audiences — and the market for this is bigger than most people realize. You don't need millions of followers to access it either. Micro-creators with audiences between 10,000 and 100,000 followers are increasingly attractive to brands because of their higher engagement rates and specific audience demographics. If your audience trusts you, brands will pay to reach them.
This product model enables you build reliable monthly income by offering exclusive content, community access, or premium resources to paying members. Even a few hundred paying members at a modest monthly price can create life-changing income stability.
An email list is one of the most powerful monetization channels available to creators, and also one of the most underrated. Unlike social media, your email list is yours. No algorithm can throttle your reach, and no platform can suspend your access to your audience. A paid newsletter with even 500 dedicated subscribers at a modest monthly price can generate meaningful recurring revenue, which only compounds as your list grows.
Affiliate marketing is one of the quieter income streams in a creator's toolkit, but it's consistent. All you need to do is, sign up on affiliate platforms like Mainstack’s, browse the affiliate marketplace, recommend products you know your audience will find useful, and earn a commission every time someone makes a purchase through your link.
It's not a primary income stream for most creators, but a layer on top of everything else.
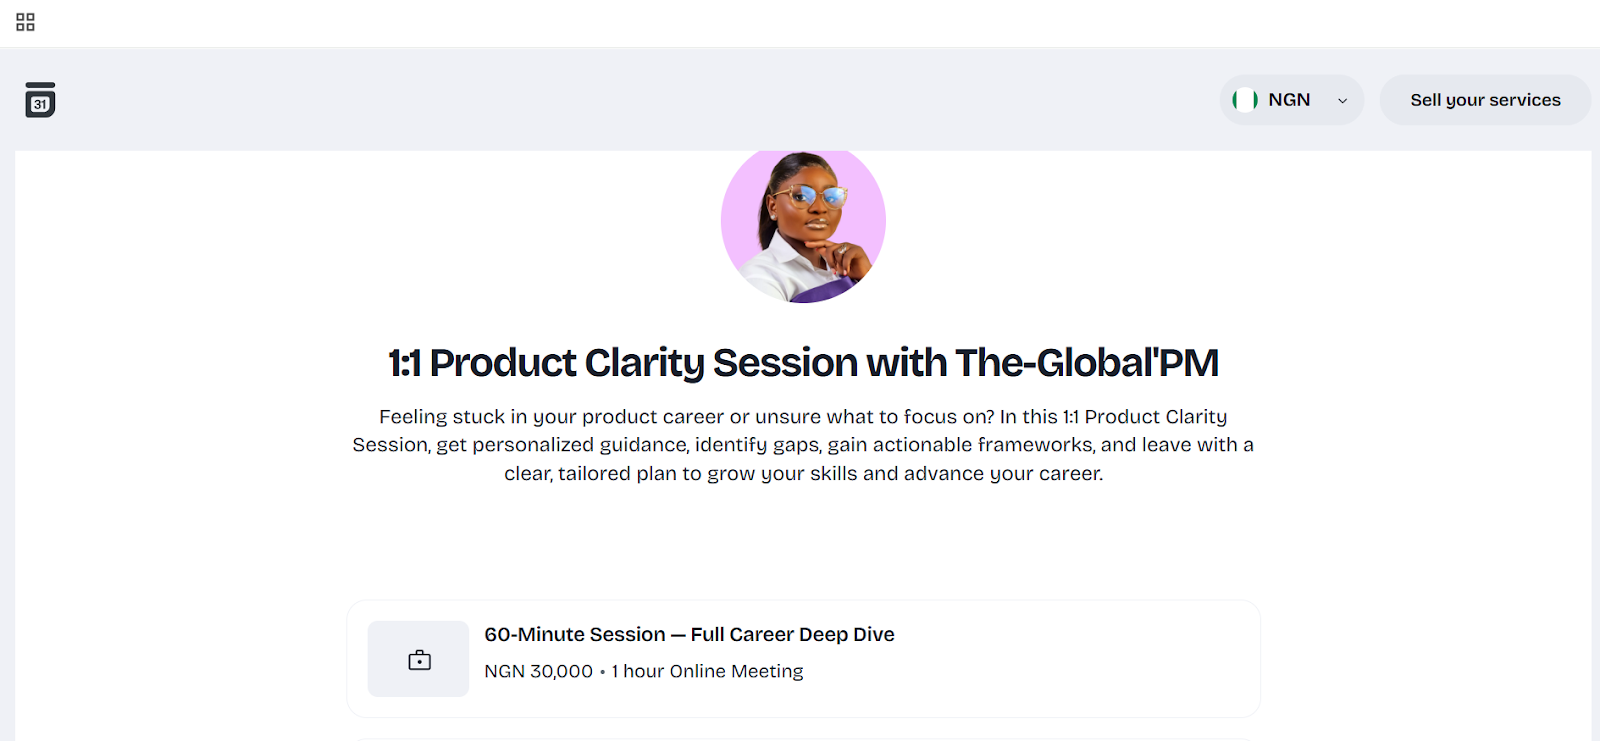
There's a growing market for expertise that doesn't fit into traditional education. People are willing to pay for direct access to knowledge. So, if you've developed genuine expertise in your niche, there are people out there willing to pay for direct access to it, and you can utilize Mainstack's hosted courses and bookings features to set up your first paid session or host a course without having to stitch five different tools together.
Pick a niche: Find the overlap between what you know, what you enjoy, and what people are actively searching for help with.
Choose a primary platform: Focus on one to two platforms to avoid spreading yourself too thin.
Define your content format: This is how you'll deliver every idea, lesson, or piece of content you put out, so choose a format that comes most naturally to you.
Build a system for consistency: Batch create your content, keep a content bank you can always turn to for ideas, and set a posting schedule you won’t find hard to maintain.
Set up your creator home base: Create a central hub to host your products/offers. Preferably on a platform like Mainstack, where your products are made accessible to your audience, and they can pay you directly.
Launch your first monetized offering: Start with one product, and build from there.
Track, Analyze, and Optimize Your Sales Strategy: Take note of the content pieces that drive the most engagement, your top-selling products, and the part of your sales funnel with the highest drop-off rate. These patterns show you the parts of your sales strategy that need to be reworked.
Becoming a creator is a viable career path in today’s digital economy. Whether through digital product creation, brand partnerships, or affiliate product sales, creators have countless opportunities to turn creativity into income.
The key lies in consistency, authenticity, and adaptability: a carefully chosen niche, consistently published content, and a simple offer tied to a real problem is enough to generate recurring revenue.
If you’re ready to share your voice with the world, the digital space offers endless possibilities to grow, connect, and thrive.
Ready to start earning as a digital creator? Set up your Mainstack storefront, launch your first offer, and start turning your skills into income today.


There is no one-size-fits-all answer to "How should I price my digital product?" If anyone tells you otherwise, they are probably trying to sell you an overpriced guide.
Pricing is not just math; it’s also pricing psychology, digital marketing strategy, and audience behavior rolled into one.
Whether you are selling an ebook, an online course, a template bundle, or the ultimate fitness meal-planning guide, your pricing needs to make sense to your audience. That means thinking about who is buying, why they are buying, and how your price influences their decision.
In this guide, we’ll explore practical digital product pricing strategies from entry-level tripwire offers to high-ticket packages, breaking down the pros and cons of common approaches.
Before you set a price for your digital download or online course, ask yourself: Who is my ideal buyer? Are they ready to buy now, or are they still browsing?
Your pricing will land differently depending on their situation:
High-ticket digital products (often $500 or more) communicate premium quality and deep transformation, such as a 12-week mentorship or business accelerator. Low-ticket products (under $50) are low-risk, impulse-friendly purchases like ebooks or mini-courses.
A tripwire offer is a low-priced product designed to turn someone into a paying customer quickly. This could be a $7 ebook, then a $49 workshop, then a $499 flagship program (your main, most valuable product).
Pro tip: It’s easier to start low and raise prices than to start high and drop them. Sudden price drops can upset early buyers.
Pricing is not just about covering costs. It influences how people perceive your product and your brand.
The sweet spot is where your price signals quality, fits your audience’s budget, and supports your business goals.
Set your price based on what similar products in your niche cost.
Work backward from your financial needs. Calculate what you must earn monthly, then determine how many sales you need at a specific price.
Charge based on the hours you invested in creating the product.
Add a markup to your total production cost.
Bundle products together for slightly less than buying them separately.
Set a price that matches the brand image you want to convey.
Charge based on the outcome your product delivers.
You do not have to stick with a single price point. Offer tiers to give people options:

Combos and bundles work well here too. Offer your main product with an additional bonus at a slight discount to create the feeling of winning a good deal.
You are not just selling locally. In a global marketplace, a $100 course might be affordable in London but expensive in Lagos. Some creators adjust prices by region or offer occasional global sales to keep products accessible without undercutting their value.
Your first price is not permanent. Launch with your best estimate, then track performance. Experiment with different price points, add bonuses, or tweak your sales copy.
Sometimes, a $29 price will outsell the $19 price because it feels more premium. Other times, a slightly lower price will dramatically boost conversions.
If you do not believe your product is worth the price, your buyers will sense it. Confidence comes from knowing your product solves a problem and delivers results.
Keep a folder of positive feedback, testimonials, and success stories. This is your reminder that your product makes a difference. And remember, you do not need everyone to buy from you. You only need the right audience who values what you offer.
Lowering your prices to beat the competition might win short-term sales, but it can damage your brand in the long run. Instead, focus on value creation and a strong digital product sales funnel.
As your audience grows, your skills improve, and your reputation builds, you can gradually increase your prices. Each adjustment reflects your growth and the increased value you provide.
Start by researching similar offers in your niche, then choose a price that’s competitive but leaves room for upselling.
It’s when you set a price based on the transformation your digital product delivers, not your costs.
It depends on your audience’s buying power and your product’s depth.
Every 3–6 months, or after major product improvements.
Yes, it’s common for global sellers to adjust prices by market
Pricing your digital product is equal parts strategy, mindset, and experimentation. There is no single magic number, but there are proven approaches that help you find the right fit for your audience and your goals.
Whether you choose a tripwire entry point, a tiered system, or a high-ticket transformation, your pricing should align with the value you deliver, the expectations of your buyers, and your own business needs. Start with clarity, experiment with confidence, and remember that you can always adjust as you learn more about what works.
Avoid undervaluing your work, keep refining your offer, and position your product so buyers see it as the obvious choice.
And when you are ready to host, showcase, and sell your digital products to a global audience, Mainstack is a powerful, creator-friendly platform that makes it simple to turn your hard work into steady income.

Picture this: you're deep in a YouTube rabbit hole watching someone talk about a niche you didn't even know existed, and halfway through you notice the comments are full of people asking where to buy their course.
And then it hits you: that person is getting paid for this. Not just a little. Sometimes life-changingly well. This, among other things, represents the opportunity being a digital creator presents. But, who exactly is a digital creator, and more importantly, could you be one?
Let’s find out.
A digital creator is someone who produces and distributes value-driven content or products in digital form (and builds a business around it). That could mean writing, stock photos/video, design assets, code, photography presets, or any asset that translates into something people want to consume, use, or learn from online.
A creator owns their asset while influencers often sell access to their audience.
An influencer's value is tied to their audience size and the attention they command. A brand pays them to post, the post goes up, the deal ends, and the influencer's income resets. There's nothing inherently wrong with that model, but it's fundamentally a transaction. The moment the follower count dips or a platform algorithm shifts, their leverage shifts with it.
A creator's value lives in what they've built — the ebook that keeps selling months after it was created, the course someone discovers a year after it launched, the newsletter list that nobody can take away from them. One model is built on visibility, the other is built on value.
It’s important to note that these two categories aren't mutually exclusive. A digital creator can have a huge following and work as an influencer for brands, in the same way that an influencer can build a digital product and start generating passive income.
This is why you don't need a massive following to be a successful digital creator. All you need is something worth buying and an audience that trusts you, even if that audience starts small.
"Digital creator" is a wide umbrella. Here's how to think about the main categories and where you might naturally fit.
These are the bloggers, YouTubers, podcasters, and newsletter writers whose primary output is content and whose audience grows around it. Think of a finance blogger who monetizes through sponsorships and a paid newsletter — or a tech podcaster earning through ads and an exclusive listener community. The content is the product, and everything else grows around that. The best example of this is probably Wisdom Kaye. He never sold digital products; all he did was show up on TikTok in incredibly styled outfits for long enough that the sponsorships and brand deals became inevitable.
These creators build and sell digital products — ebooks, templates, Lightroom presets, music beats, fonts, spreadsheets, UI kits. They create products once and sell them repeatedly, making this a business with low overhead, which is infinitely scalable, and completely owned by the person who made it.
These are the coaches, course creators, consultants, and community builders. They monetize expertise directly through online courses, paid workshops, one-on-one coaching, or membership communities. They are knowledge-based creators turning what they know into something people pay for. Alex Hormozi, for example, has built an empire around teaching people what it takes to establish a successful business.
One of the biggest advantages of being a digital creator is that your income doesn't have to come from a single source. Unlike a traditional job where your earnings are tied to one employer, creators can stack multiple revenue streams on top of each other, each one building on the last.
Here are the main ways digital creators make money.
Ebooks, templates, presets, courses, music, digital art, software tools — products you create once and sell repeatedly. This is arguably the most scalable income stream available to creators because there's no inventory, no shipping, and no ceiling on how many units you can sell. A well-positioned digital product can generate income while you sleep, travel, or work on your next project, and with a platform like Mainstack, your digital product storefront can be live and selling in a matter of hours."
Brands pay creators to showcase their products to engaged, niche audiences — and the market for this is bigger than most people realize. You don't need millions of followers to access it either. Micro-creators with audiences between 10,000 and 100,000 followers are increasingly attractive to brands because of their higher engagement rates and specific audience demographics. If your audience trusts you, brands will pay to reach them.
This product model enables you build reliable monthly income by offering exclusive content, community access, or premium resources to paying members. Even a few hundred paying members at a modest monthly price can create life-changing income stability.
An email list is one of the most powerful monetization channels available to creators, and also one of the most underrated. Unlike social media, your email list is yours. No algorithm can throttle your reach, and no platform can suspend your access to your audience. A paid newsletter with even 500 dedicated subscribers at a modest monthly price can generate meaningful recurring revenue, which only compounds as your list grows.
Affiliate marketing is one of the quieter income streams in a creator's toolkit, but it's consistent. All you need to do is, sign up on affiliate platforms like Mainstack’s, browse the affiliate marketplace, recommend products you know your audience will find useful, and earn a commission every time someone makes a purchase through your link.
It's not a primary income stream for most creators, but a layer on top of everything else.
There's a growing market for expertise that doesn't fit into traditional education. People are willing to pay for direct access to knowledge. So, if you've developed genuine expertise in your niche, there are people out there willing to pay for direct access to it, and you can utilize Mainstack's hosted courses and bookings features to set up your first paid session or host a course without having to stitch five different tools together.
Pick a niche: Find the overlap between what you know, what you enjoy, and what people are actively searching for help with.
Choose a primary platform: Focus on one to two platforms to avoid spreading yourself too thin.
Define your content format: This is how you'll deliver every idea, lesson, or piece of content you put out, so choose a format that comes most naturally to you.
Build a system for consistency: Batch create your content, keep a content bank you can always turn to for ideas, and set a posting schedule you won’t find hard to maintain.
Set up your creator home base: Create a central hub to host your products/offers. Preferably on a platform like Mainstack, where your products are made accessible to your audience, and they can pay you directly.
Launch your first monetized offering: Start with one product, and build from there.
Track, Analyze, and Optimize Your Sales Strategy: Take note of the content pieces that drive the most engagement, your top-selling products, and the part of your sales funnel with the highest drop-off rate. These patterns show you the parts of your sales strategy that need to be reworked.
Becoming a creator is a viable career path in today’s digital economy. Whether through digital product creation, brand partnerships, or affiliate product sales, creators have countless opportunities to turn creativity into income.
The key lies in consistency, authenticity, and adaptability: a carefully chosen niche, consistently published content, and a simple offer tied to a real problem is enough to generate recurring revenue.
If you’re ready to share your voice with the world, the digital space offers endless possibilities to grow, connect, and thrive.
Ready to start earning as a digital creator? Set up your Mainstack storefront, launch your first offer, and start turning your skills into income today.
Not every sale needs an ad budget. Many successful affiliate marketers are proving this by growing through community engagement and genuine recommendations instead of paid campaigns.
Currently, Affiliates are doubling their commissions by focusing on community-led marketing, creating organic content, and automating emails that build real relationships, and not just clicks.
This guide will show you how to do the same: turn your affiliate hustle into a steady, scalable system that brings consistent results — no ad spend required.
Affiliate marketing is a performance-based model where you earn a commission for every sale or action made through your unique link.
In the past, affiliates relied on paid ads to get quick results. But today, many are shifting to community-driven and content-focused strategies as a more sustainable way to grow and sell.
A bigger ad budget doesn’t always mean better results. Real growth comes from genuine engagement and consistent value.
Lasting success in affiliate marketing usually comes down to three things:
The best affiliate marketers mix organic strategies with paid ads. That balance helps to boost engagements, as well as conversion rates.
That said, here are some proven ways to double sales without running ads:
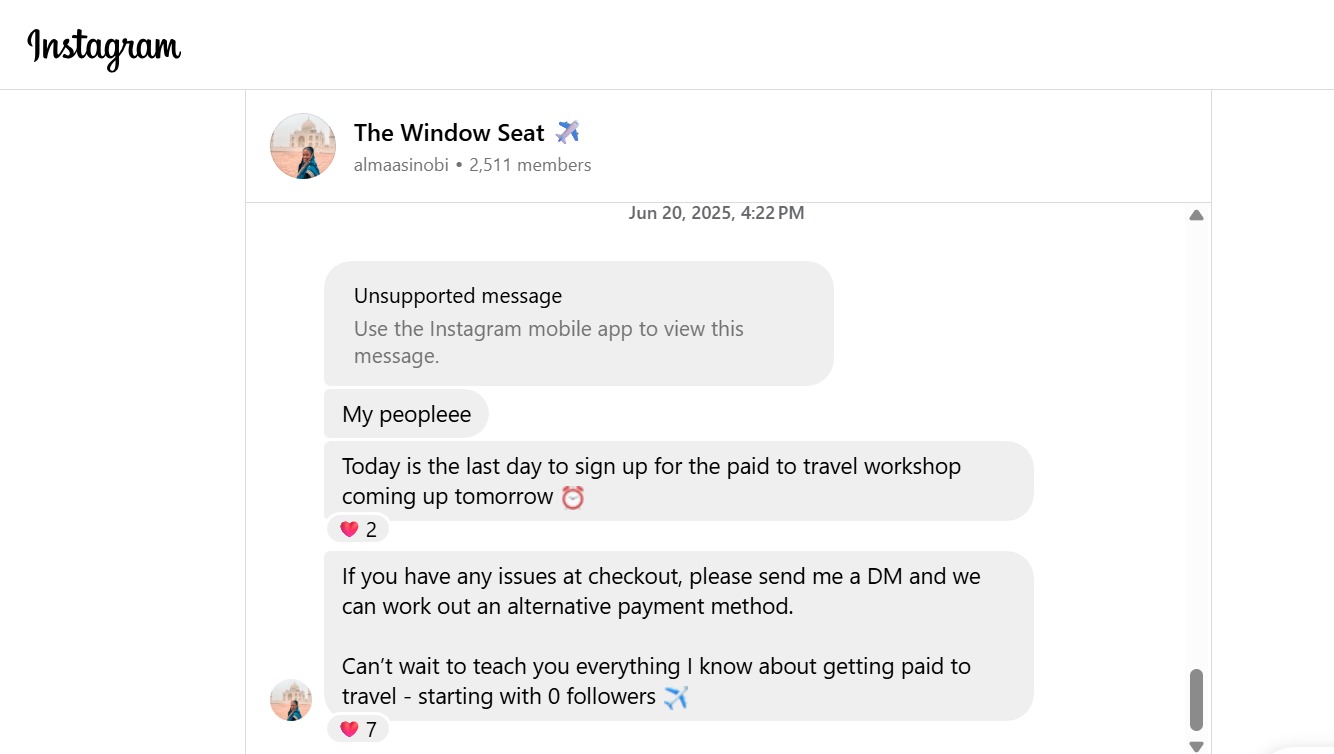
Communities consistently outperform cold ads because it’s built on a foundation of trust which drives conversions better than exposure.
When people connect around shared interests, product recommendations feel natural. That’s why platforms like Facebook Groups, WhatsApp Channels, Telegram, Instagram, and Discord are goldmines for affiliates.
You can create or join communities, share helpful insights, and subtly weave in product mentions without sounding salesy. Instead of hard selling, focus on adding value. Post useful tips, explain how products work, and spark conversations.
Over time, your community starts doing the marketing for you. Members share your recommendations with friends or on social media, expanding your reach without a single naira spent on ads.
These kinds of interactions position affiliates as trusted voices in their niche and ultimately drive consistent sales.
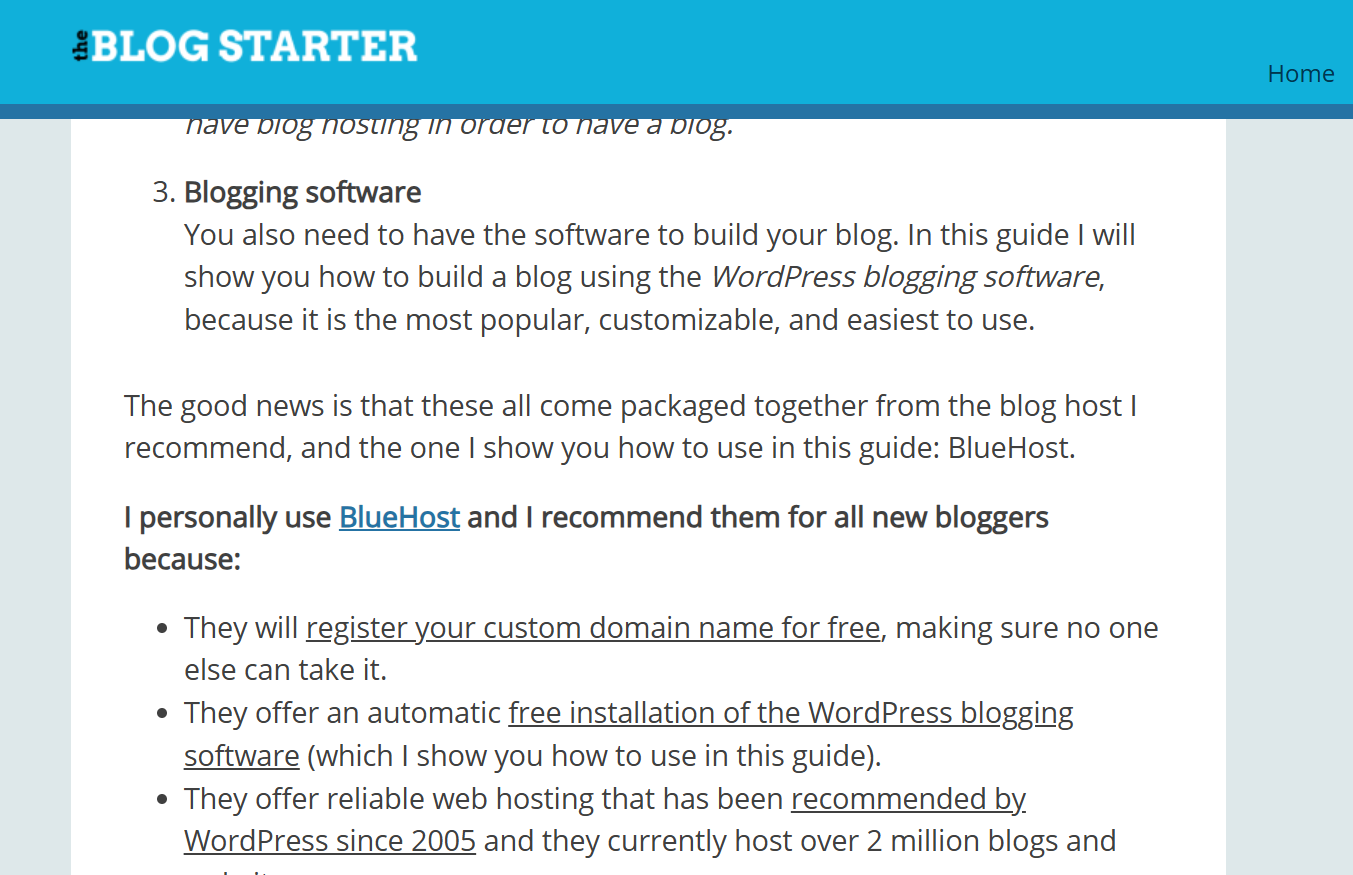
Content marketing is still one of the most dependable ways to drive traffic and sales in affiliate marketing. Writing long-form guides, tutorials, or product comparisons attracts people actively looking for solutions.
Good content naturally positions products as part of the answer. Done well, it brings long-term ROI and passive income without paid promotion.
Many bloggers do this successfully by ranking SEO-optimised articles for niche keywords. For example, The Blog Starter promotes hosting platforms like Bluehost through detailed “how to start a blog” guides that rank well on Google.
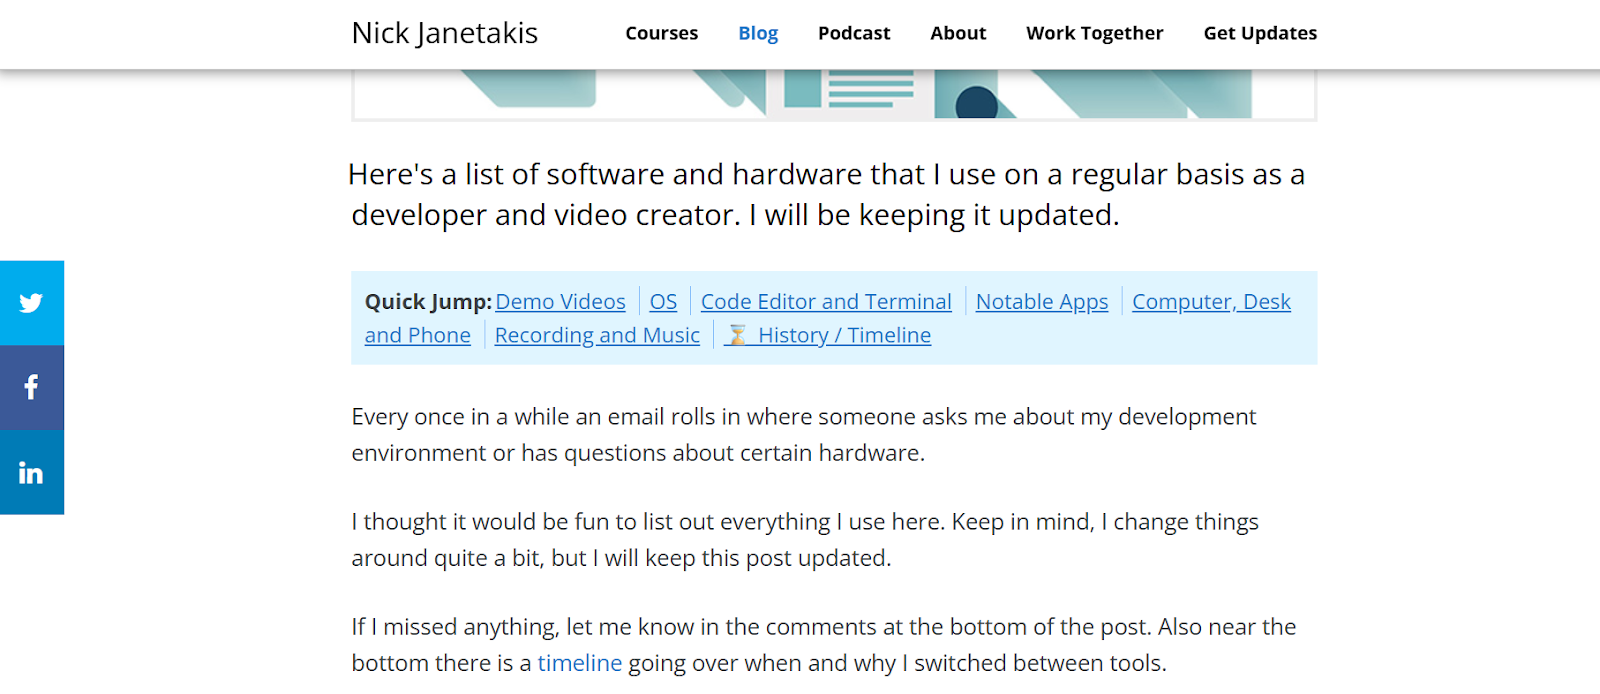
Social media is a must for affiliates looking to build trust and visibility without ads. Platforms like Instagram, TikTok, and LinkedIn favour authentic, value-first content.
Many affiliates use short videos, tutorials, and user stories to highlight product benefits. The best content focuses on transformation: “How I solved X problem” or “This tool saved me hours.” The goal is to lead with a relatable story before mentioning the product.
For consistent growth, post 3–4 times per week using formats like:
Each post can subtly promote affiliate links while aligning with proven tips and examples that build authority over time.
Email marketing is a reliable, algorithm-proof way to drive affiliate traffic. It’s personal, trackable, and helps affiliates build direct relationships with their audience.
A simple email funnel works like this:
Following these steps positions you as a helpful resource, not just another promoter. For example, Affiliates like Pat Flynn of Smart Passive Income use storytelling emails to share tips, case studies, and examples where he recommends products.
To boost results, segment your list, automate follow-ups, and use storytelling to make recommendations personal. Sections like “tools I use” or “recommended software” help convert cold subscribers.
Creators using Mainstack can add affiliate links to link-in-bio pages or email footers to track clicks and conversions easily.
Hosting live sessions — webinars, mini-workshops, or training — lets affiliates show real value before promoting products. These sessions highlight your expertise and position products as solutions to audience problems.
Because attendees are engaged and actively seeking answers, conversions are often higher than with ads. Boost results by adding affiliate links in slides, follow-up emails, or post-event resources.
Sharing first-hand experience through product reviews, case studies, or tutorials is another way to build trust and drive organic conversions. In this approach, affiliates demonstrate how a product works in real life, highlighting before-and-after results and explaining why it’s effective.
They work well because they combine transparency with value. Embedding affiliate links lets audiences see the product in action, boosting engagement and conversions.
For instance, Poll the People’s AI affiliate case study shows how data-driven storytelling builds credibility, while Growett’s Affiliate Marketing Case Study demonstrates how honest reviews and detailed walkthroughs drive profit.

Such content doubles as both education and persuasion, making it a key part of any affiliate marketing strategy.
Upselling encourages customers to buy a premium or upgraded version of what they already want, while cross-selling suggests complementary products that add value. Both work best when they feel like a natural next step.
For example, if someone buys your “Beginner’s Guide to Freelancing,” you could upsell them a “Pro Freelancer Toolkit” with templates and pitch decks. Or, if you teach personal finance, offer customizable budget or investment templates as an upsell.
Adding these offers at the end of a lesson or during checkout not only boosts revenue. It helps your audience take the next step in their journey with you.
Affiliate links work best when they appear naturally within valuable content, as opposed to being crammed into sidebars or footers. Place them inside paragraphs that discuss related topics, tools, or strategies..
You can also boost conversions by updating old posts. For example, add a quick note like, “Updated for 2025 — here are my go-to tools for creators this year,” and include your affiliate links.
This way, you earn from content you’ve already written while keeping it fresh and useful for readers.
Guest posting is a great way to reach new audiences without paid ads.
Writing for established blogs in your niche lets you showcase your expertise and subtly promote affiliate products. This could either be through direct links or by linking back to your own content with affiliate recommendations.
Publishing content on platforms like YouTube and Medium is one of the best ways to grow your reach without ads. Tutorials, case studies, and in-depth articles with affiliate links attract high-intent audiences actively looking for solutions. Video proof also boosts credibility and conversions since people can see real results.
Listing affiliate products on general marketplaces like Facebook Marketplace isn’t ideal; it can violate their affiliate program policies. Instead, showcase your offers on your own landing page or link-in-bio setup.
Platforms like Mainstack make this easy by letting you organise products, track clicks, and automate promotions while staying compliant. This keeps your setup transparent, policy-safe, and professional — all in one place
A sustainable affiliate strategy starts with offering something free that leads naturally to a paid upgrade. This could be a freemium tool, a limited-access mini course, or a downloadable template with advanced versions behind a paywall.
When the free version delivers enough value, people are more likely to explore the premium option, and if that upgrade includes affiliate products or tools, conversions happen organically.
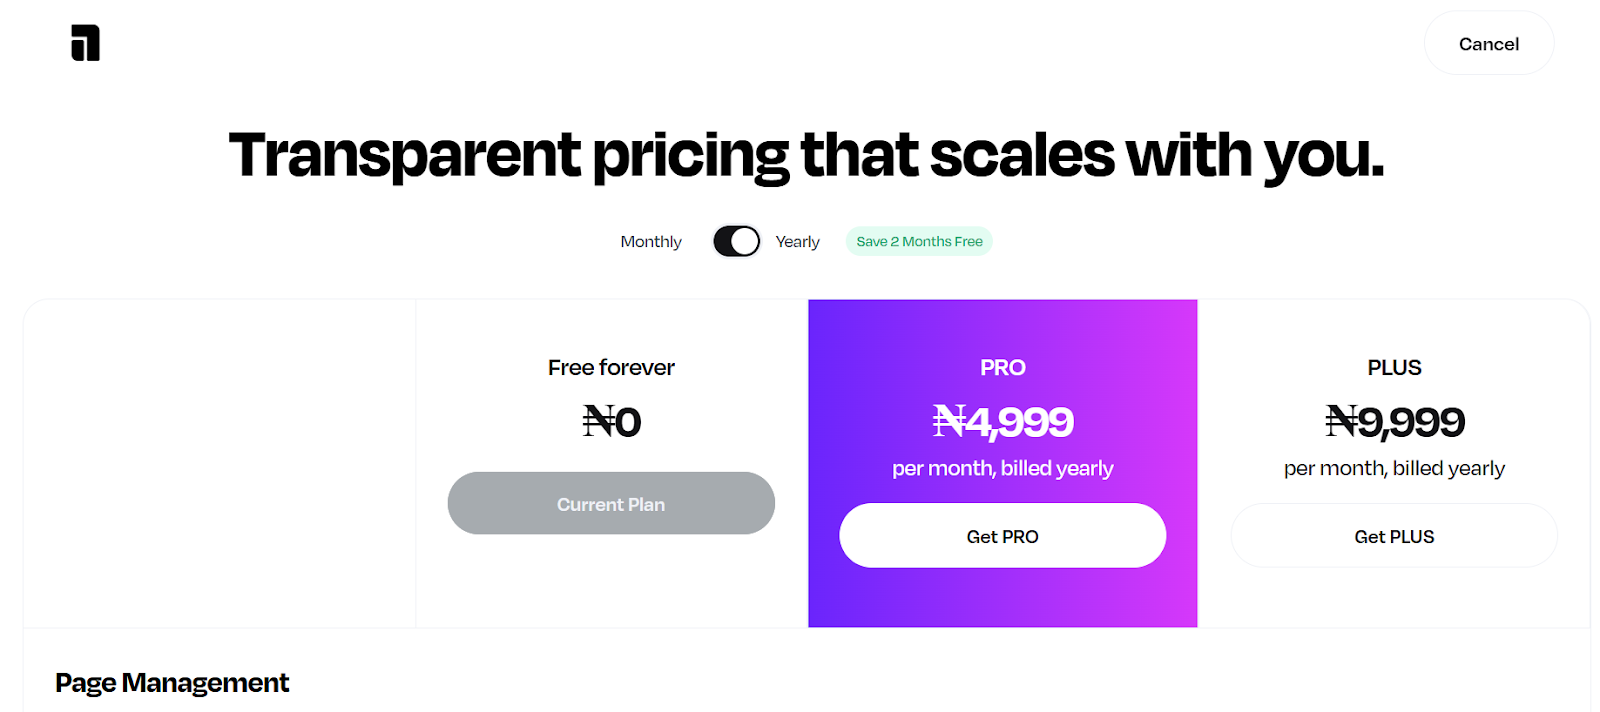
This works because the audience has already seen value before being asked to buy. It’s a low-pressure way to build trust, nurture interest, and gradually convert free users into paying customers.
Many affiliates hold themselves back with habits that hurt trust and credibility. The goal isn’t simply to “promote” a product; to show genuine value and earn attention. When that balance is off, sales drop. Here are common mistakes
Affiliate marketing works best when it’s grounded in strategy, authenticity, and consistent effort. By applying the methods outlined in this affiliate marketing playbook, you can turn your promotions into steady income streams.
If you want to get started with affiliate marketing, you can sign up on Mainstack at zero cost to launch and manage your offers easily.
.png)
Since affiliate marketing became popular, several Nigerians have adopted it as a way to make an income online. With so much opportunity in this industry, it’s no surprise that dozens of affiliate marketing platforms have popped up, with each promising several benefits.
But here’s the truth:
Choosing the right affiliate marketing platform in Nigeria is confusing. It’s also where most people get stuck. Some platforms exaggerate earnings. Others have poor product quality or delayed payment. And wasting time on testing the wrong affiliate platform can slow down your entire journey.
This article solves that problem. We reviewed and ranked the 9 best affiliate marketing platforms in Nigeria for 2025 based on trust, commission rates, product quality, payout speed, and ease of use.
Affiliate marketing is a performance-based business online where you earn a commission every time a customer buys a product (or service) through your link.
It’s as simple as, you find existing products (or service), promote it to an audience, and get paid for every successful sale you influence.
An affiliate platform is a marketplace that connects people (sometimes called merchants) with existing products (or service) and affiliates who can promote the product. The platform acts as a middle man and provides everything both sides need including unique affiliate links, tracking tools, dashboard to monitor everything and payout details.
To find the best affiliate platforms, it helps to know what to look for. A good affiliate program typically includes:
Affiliate programs work in a pretty simple way. You sign up on the website as an affiliate, and get access to a marketplace of products to promote. Take note that some platforms are free while others might require a small fee, but once you’re in, you get access to the dashboard.
Inside the dashboard, you’ll get access to a list of products, which are often grouped by categories. When you find a product that matches your niche and commission requirements, the platform generates a special tracking link for you to start promoting the product.
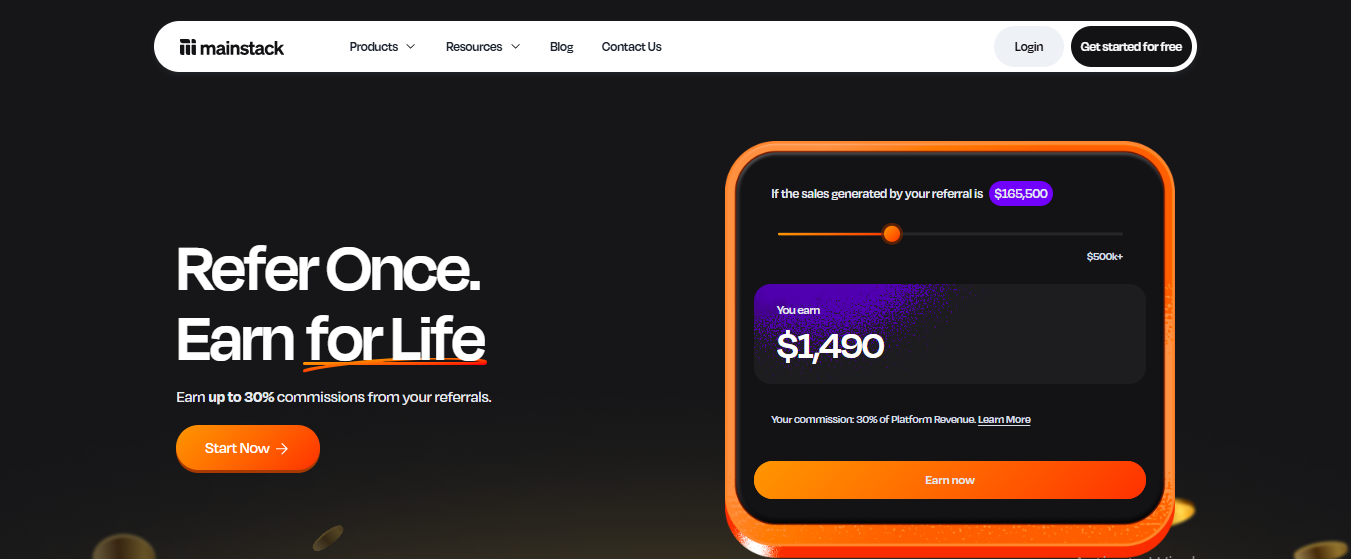
Mainstack’s affiliate marketplace is a popular affiliate marketing platform with thousands of affiliates and a wide range of digital products available for promotion. It’s built on Mainstack’s powerful e-commerce tools.
Mainstack is tailored to serve a global market. This means anyone, anywhere, can register on the platform without worrying about currency barriers or payout restrictions.
Creating a Mainstack account and joining the marketplace as an affiliate is completely free. There’s no restrictions, and you can set up your affiliate account in less than 10-minutes. Unlike traditional affiliate programs that only gives you links, Mainstack affiliates get full access to the entire Mainstack toolset, including analytics, product pages, checkout tools etc.
On the platform, you get access to primarily digital products in different niches, including courses, coaching programs, event tickets etc, in different niches. Commissions are set by the merchant (and not the platform) and affiliates can see commissions before choosing the product.
Affiliate platform features
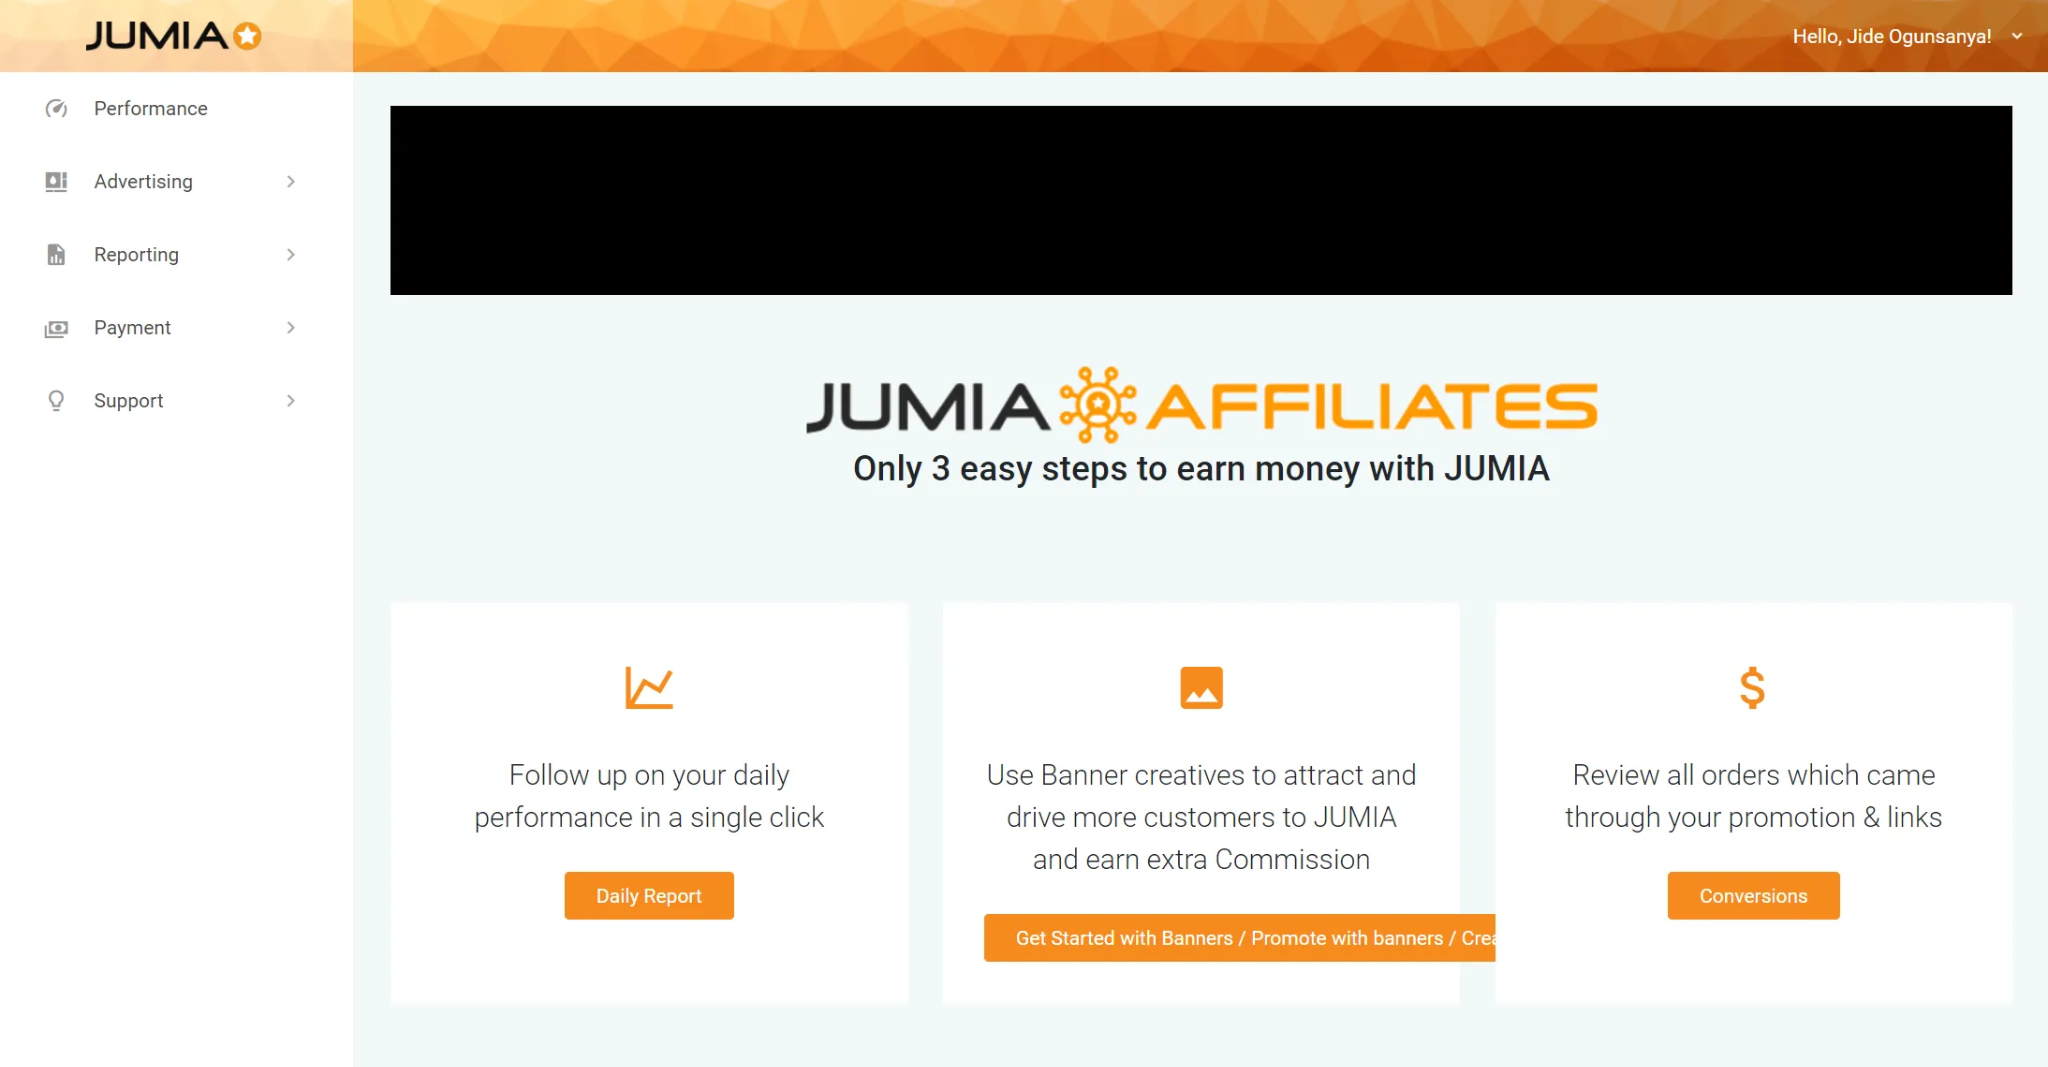
Jumia’s affiliate program gives you a chance to earn commissions by promoting e-commerce products. This ranges from electronics, fashion and even household items that can be found on Jumia.
The product variety and market is one of the best features of the Jumia affiliate market place. That, plus, there’s a wide audience across Africa, which means affiliates have little restrictions even when promoting physical products.
Signing up for the Jumia Affiliate Program is free. There is no entry fee, and registration can be done directly, usually via their affiliate/KOL registration portal. Once approved, you receive unique affiliate links and access to promotional materials (banners, text links, etc.) to start promoting your offer.
Payment commission on Jumia varies by category, by can be up to 11%. For example, electronics may have lower percentages, while fashion or other niches may offer higher.
Affiliate platform features
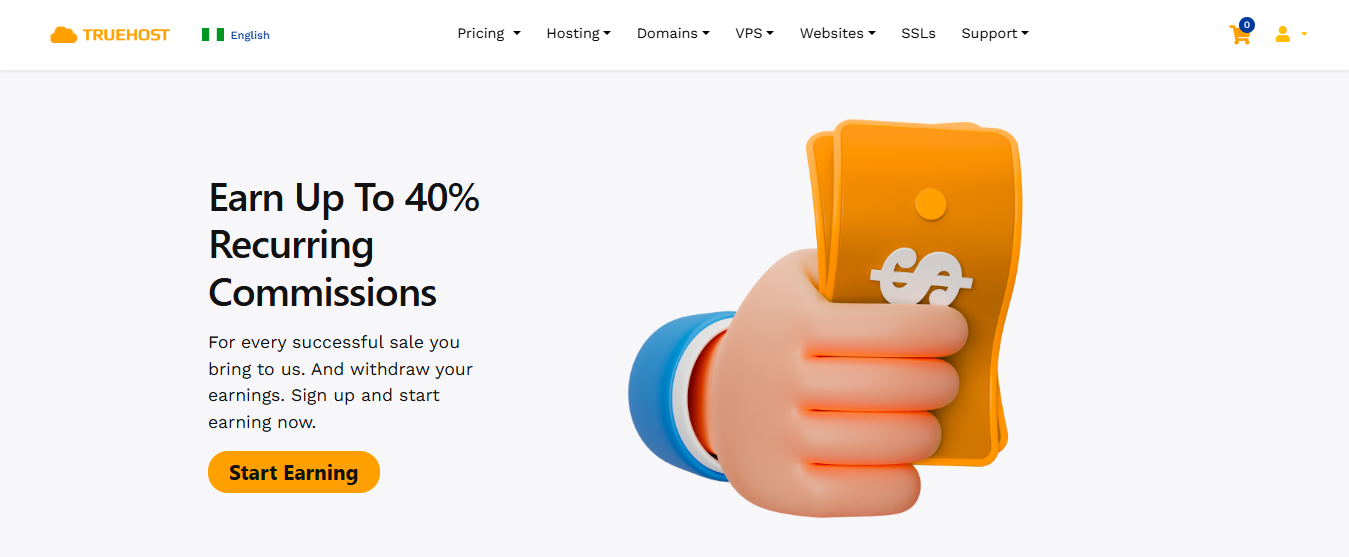
Truehost Cloud is a regional hosting provider that provides web hosting with dedicated servers to clients in Nigeria and Africa. The affiliate program allows you to earn commissions by promoting web hosting and domain registration services. This includes hosting packages, domain names, SSL certificates, and other web services offered on Truehost Cloud.
Signing up for the Truehost Cloud Affiliate Program is free. There is no entry fee, and once approved, affiliates receive unique referral links and access to promotional materials like banners, text links, and landing pages to start promoting immediately.
Commission rates on Truehost Cloud are competitive, usually ranging between 20% to 50% per sale, depending on the product and package sold. Affiliates earn on both one-time purchases and recurring hosting subscriptions, giving an opportunity for ongoing income.
Affiliate platform features
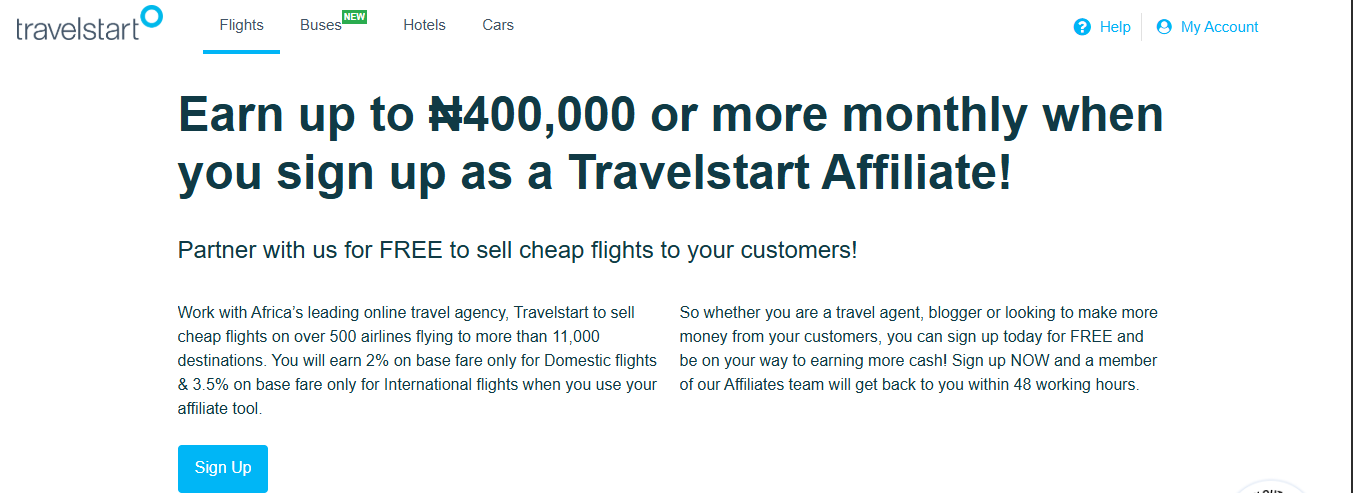
If you’re in the travel space, then Travelstart is a great way to earn extra income as an affiliate.
Travelstart’s affiliate program allows you to earn commissions by promoting flights, hotels, and travel packages across Africa and beyond. Affiliates can earn by referring customers who book flights, hotels, or complete travel deals through Travelstart’s platform. The product variety and market is one of the standout features of Travelstart’s affiliate program.
Signing up for the Travelstart Affiliate Program is free. There is no entry fee, and once approved, affiliates receive unique referral links and access to promotional tools such as banners, text links, and landing pages to help start promoting right away.
Commission rates on Travelstart vary depending on the service promoted. For example, flights may have different commission rates compared to hotel bookings. Rates are generally competitive within the travel affiliate space, allowing affiliates to earn recurring or one-time commissions depending on the customer’s booking behavior.
Affiliate platform features

Oraimo is a brand known for mobile accessories and smart electronics like power banks, earbuds, fast chargers, and smart accessories. In Nigeria and several other countries they run an affiliate system called the Commission Affiliate Program and also a Points Affiliate Program.
The commission affiliate program offers cash benefits to marketers who share their unique affiliate link online as well as recruit other affiliate marketers with cash rewards. The points affiliate program however, rewards the marketers with points that can be used to get discounts on purchases made via the Oraimo shop.
Affiliate platform features
Konga is another leading Nigerian marketplace and remains widely used. Their platform offers a wide range of products with a catalog that covers many categories.
The Konga affiliate program supports affiliates with product links, banners, and commission reports. In recent times, Konga has continued to refine its offering to be competitive with other retailers. Affiliates who already write product reviews, run comparison sites, or manage coupon communities will find this program useful. Strong local logistics and product choices. Works well for price comparison and product review sites.
Affiliate platform features
Shopify is one of the world’s most popular e-commerce platforms, trusted by millions of entrepreneurs, creators and businesses to build, manage and scale online stores. It provides an all-in-one system for selling products, managing inventory, processing payments and marketing to customers globally.
Affiliates earn commissions on the platform by referring new merchants to Shopify through unique referral links. The platform also equips affiliates to tracking dashboards, promotional materials, and dedicated affiliate support to help improve performance.
Affiliate Platform Features
Bet9ja is Nigeria’s major sports betting company that includes an affiliate program where you get a commission from referring players.
You will receive commission based on player activity (stakes, net revenue) via your affiliate/referral link.The commission rate can be up to 20% (depending on your referral activity / traffic). The platform offers the provision of marketing tools such as banners, tracking links, affiliate dashboard.
Affiliate platform features
Source: Expertnaire
Expertnaire is a marketplace for digital courses, bootcamps, and information products which are created by vendors and made available for sale through their platform.
Their affiliate program however comes with a catch, to sign up, a prospective affiliate marketer needs to pay a sum of #10,000 naira every year as a sign–up fee. But their commission rates are generous and can go as high up as 75% and their platform is optimized for local payments and conversions.
Affiliate platform features
The Affiliate marketing industry in Nigeria rewards focus and relevance which is why in order to get meaningful results, you need to be consistent. Keep up with the latest trends in the affiliate environment and choose a platform that fits your content style. Promote products you genuinely believe in, and track your performance to see what works. Every click and conversion comes easier when your recommendations feel authentic.
If you want to get started promoting Affiliate products, register on Mainstack's Affiliate marketplace to start promoting your product.
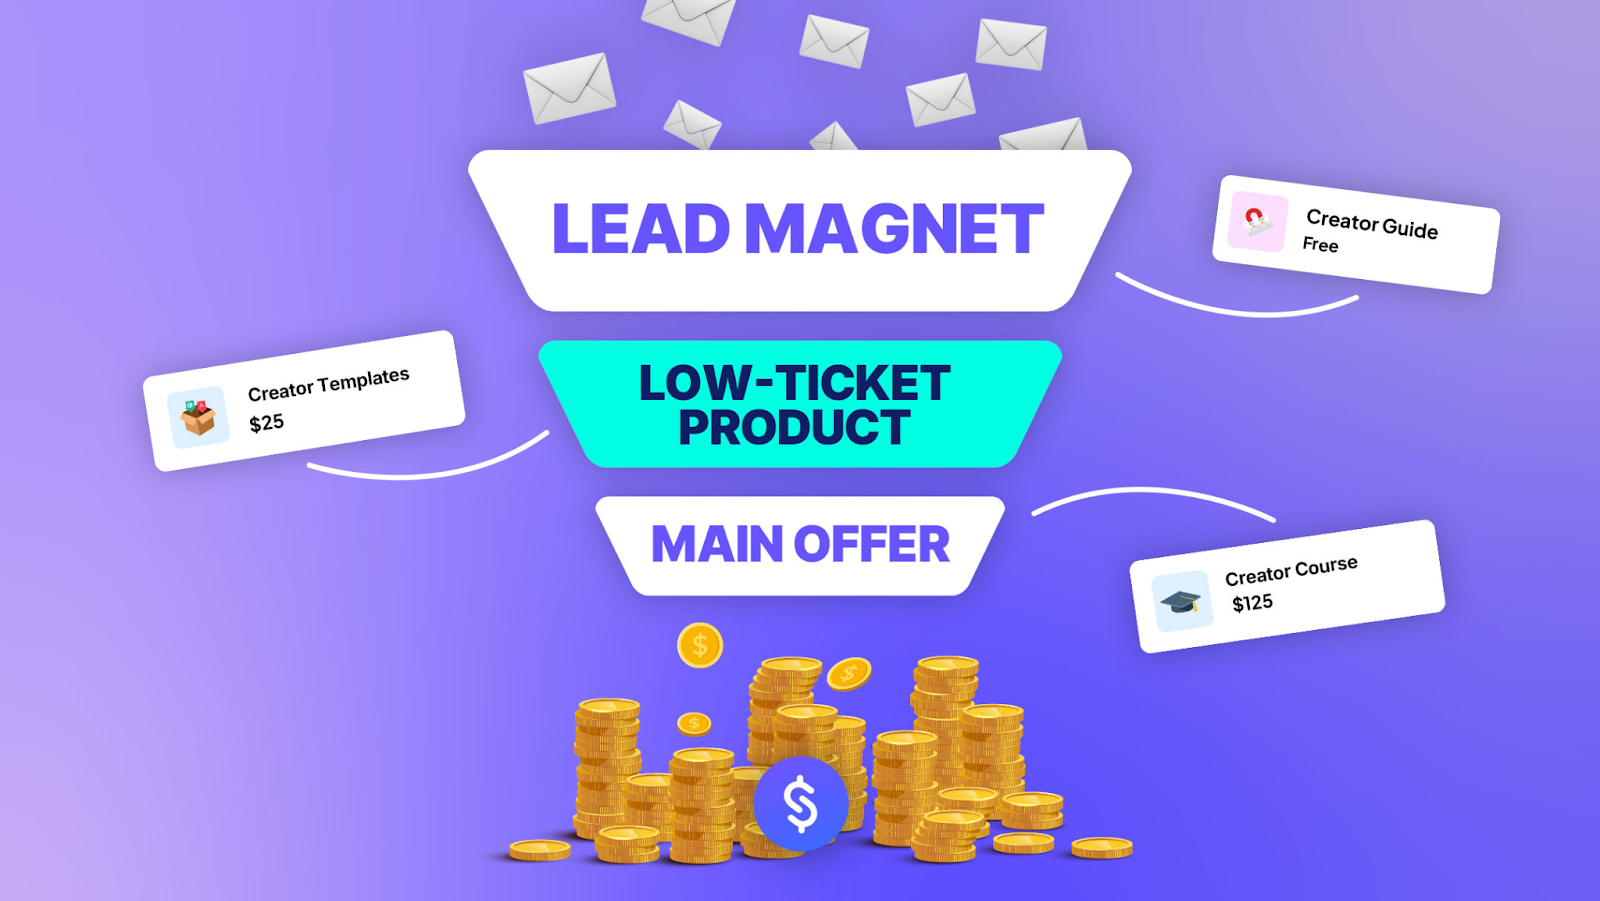
If you’ve ever downloaded a free guide, checklist, or e-book from a business, you’ve experienced a digital product used as a lead magnet. A digital product is any non-physical resource like templates, courses, or toolkits, that can be created once and shared endlessly online.
In marketing, a digital product can be used as a lead magnet and offered to potential customers to turn them into leads. By giving away something valuable, you draw people to your business, build trust, and position yourself as an authority in your field.
In this article, we’ll cover proven strategies, tools, and examples to help you create digital products that generate leads and grow your audience.
If you're wondering how to create a digital product, here's a guide on how to turn your own skills into a digital product.
Digital products work great for lead generation because they help to build trust with the audience. When you give them something that’s helpful for free, they are bound to always come back for more, especially if your resources were beneficial to them.
Here are digital products that you can use for lead generation:
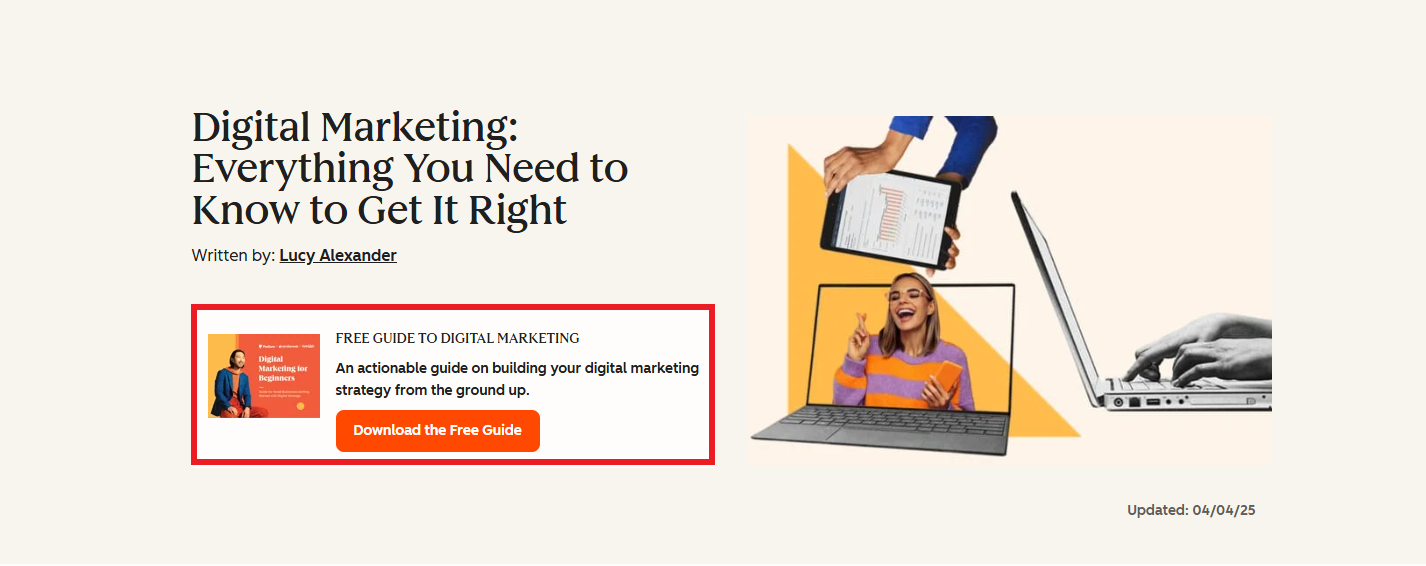
Ebooks and guides give your audience an in-depth look at topics they care about while building your credibility. For example, a cookbook of easy recipes for single men delivers practical value while positioning you as an authority.
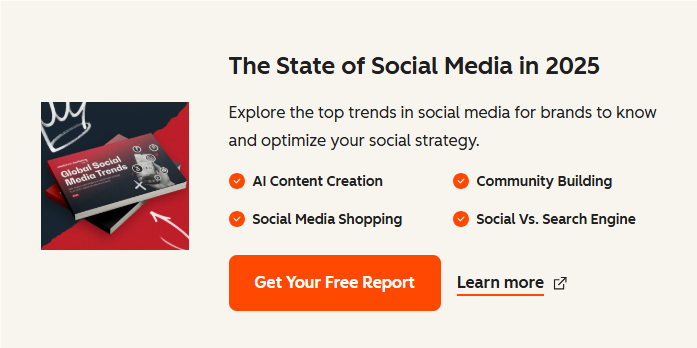
Brands like Hubspot use Ebooks as a lead magnet to capture email addresses, build its subscriber base, and nurture potential customers as they move through the sales funnel.
These are practical tools potential customers can use immediately. They tend to convert well because they offer immediate value and convert well .For example, a design template for graphic designers offers instant utility.
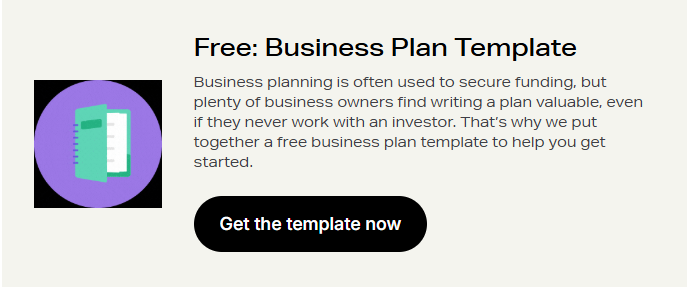
Shopify offers a free Business Plan Template to help new entrepreneurs get started. The value is clear: solve a common problem and, in return, they capture leads through sign-ups.
These are live or recorded sessions you can hold to share your knowledge on what you know. By doing this, you are setting yourself as an expert in your field and signaling to your potential customers you have more knowledge to share.
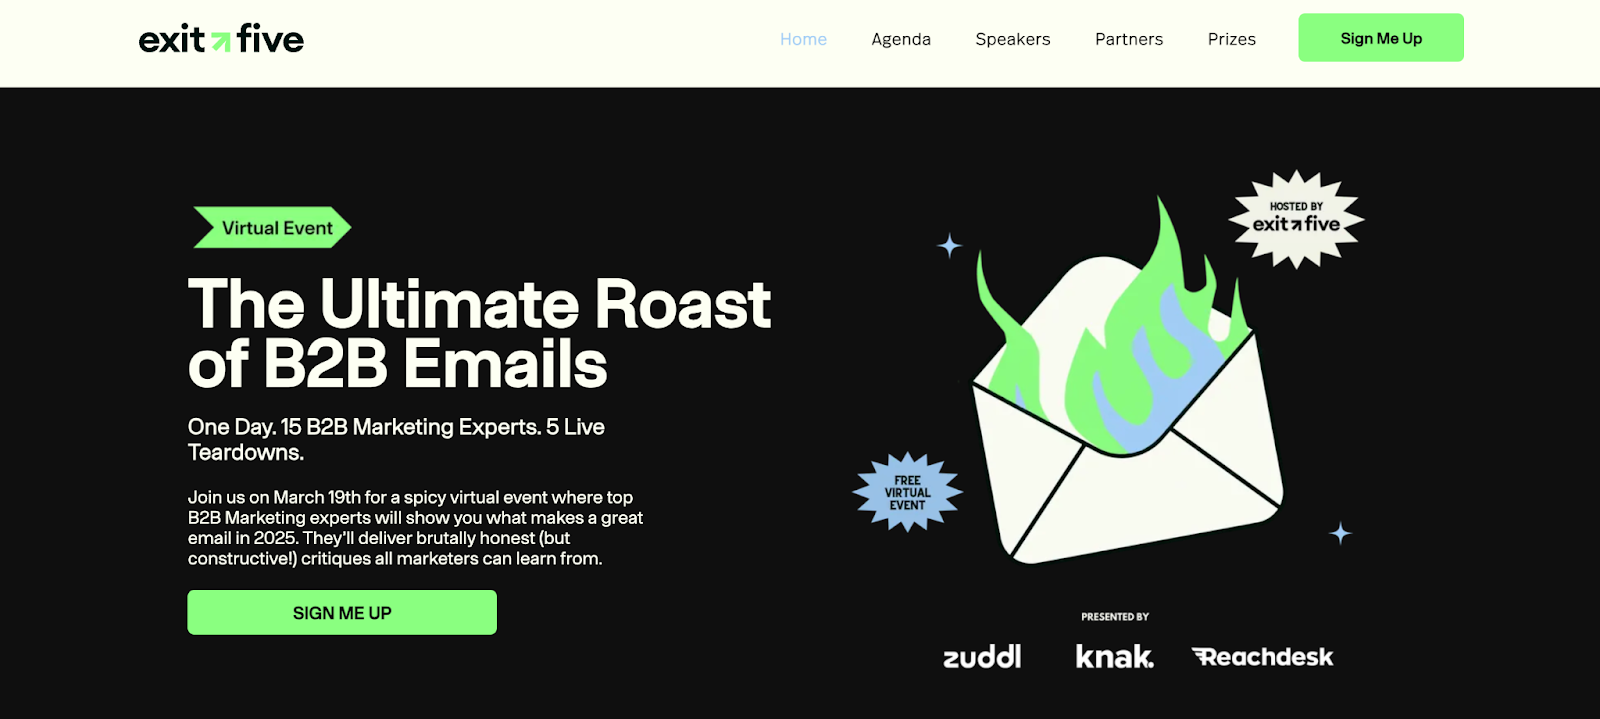
Exit Five, for example, uses virtual events as lead magnets for potential customers. They deliver clear value and use urgency to encourage sign-ups. This results in more leads captured and stronger authority with their audience.
Short courses delivered via email or video help people solve a problem in several steps.
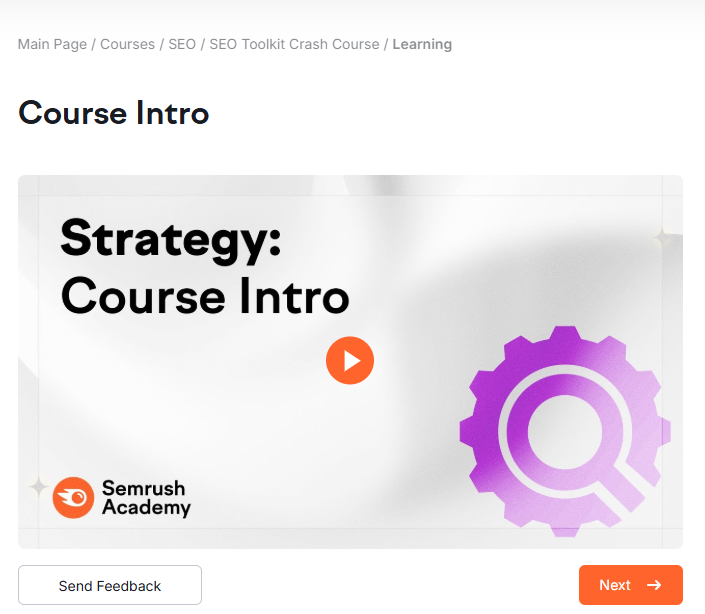
Semrush offers free mini-courses like its SEO Toolkit Crash Course to attract and educate marketers. These short lessons provide quick wins, build trust, and introduce users to Semrush’s tools, which makes them an effective lead magnet
If you have a software product, a trial gives people direct experience. If you don’t, sample lessons (for courses) or partial templates work.
Also note that each type of digital product serves different parts of the lead generation funnel. For example, checklists or templates are great for bringing awareness while webinars or mini courses are stronger for consideration and nurturing.
Take these following steps in creating your digital product for lead generation
The first step to creating a digital product is defining your target audience. Ask yourself: Who are they? What do they need? What problems are they finding difficult and how can you help them to solve those problems?
In order to execute this, you need to research your audience to find out what it is they are looking for. To make your work more efficient, there are a number of tools you can use to research on your target audience and their problems:
Google Analytics: This is a free tool that offers more insights into ongoing trends and searches based on website traffic, user behaviour and demographics
AnswerThePublic: This tool helps you to find out questions people often ask concerning a topic. This can be used when looking for content ideas to create to draw your target audience to your product.
BuzzSumo: BuzzSumo's research and analysis tool offers advanced content insights, trending topic identification, social mention monitoring, and content engagement measurement.
After identifying those problems, research their challenges and needs. For example: If your audience are beginners in graphic design, their pain point would probably be trying to understand the ”Basics of Graphic Design”
Next, match the product type to each stage in your customer’s journey:
Define what value your product has to offer to your audience. By now, you understand your audience and their painpoint. Next step is defining how you want your product to stand out. Answer the question: “What problem does this solve?” Keep it specific and actionable so it’s not too broad or vague to confuse your audience. An example would be naming your design guide” Principles of Graphic design” instead of “A Beginner’s Guide to Graphic design”
Once your value prop is defined, the next step is to create a copy for the digital product. Start with an outline to understand what you’re writing. Ensure the copy written is helpful, insightful and easy to understand.
Remember to use a compelling title and a clear call-to-action (CTA). Make titles benefit-driven (e.g., “The Ultimate Checklist to Double Your Leads in 30 Days”) and a strong CTA on landing page and promotions (e.g., “Get Instant Access,” “Download Free Today”)
Once the writing is complete, design around the copy. Keep content visually appealing, since strong design helps convert customers. Use tools like Canva, Figma, or Google Docs to create polished assets.
Once your digital product is complete, the next step is promoting what you have. From your research, you should have an idea of where your audience hangs out and how to reach them.
Like Hubspot, you could place the digital product on your blog page or Homepage to collect emails from leads organically. Or you could also run paid ads on social media to drive more attention and reach a bigger audience.
To place and store your products digitally, you can make use of all-in-one tools such as Mainstack. It allows its users to create storefronts to sell digital products to their customers, a link-in-bio feature that allows intrigued customers to find all links in one place and an email marketing tool to automate delivery to clients who request for their products.
Attracting a new lead is just the beginning of the relationship. To turn that interest into revenue, you need to nurture and guide prospects toward a purchase. The most effective way to do this is through automated follow-up email sequences.
For example, if someone downloads a Social media growth guide, they should receive a tailored series of emails with tips, case studies, and free insights on social media growth before being introduced to a paid service or course.
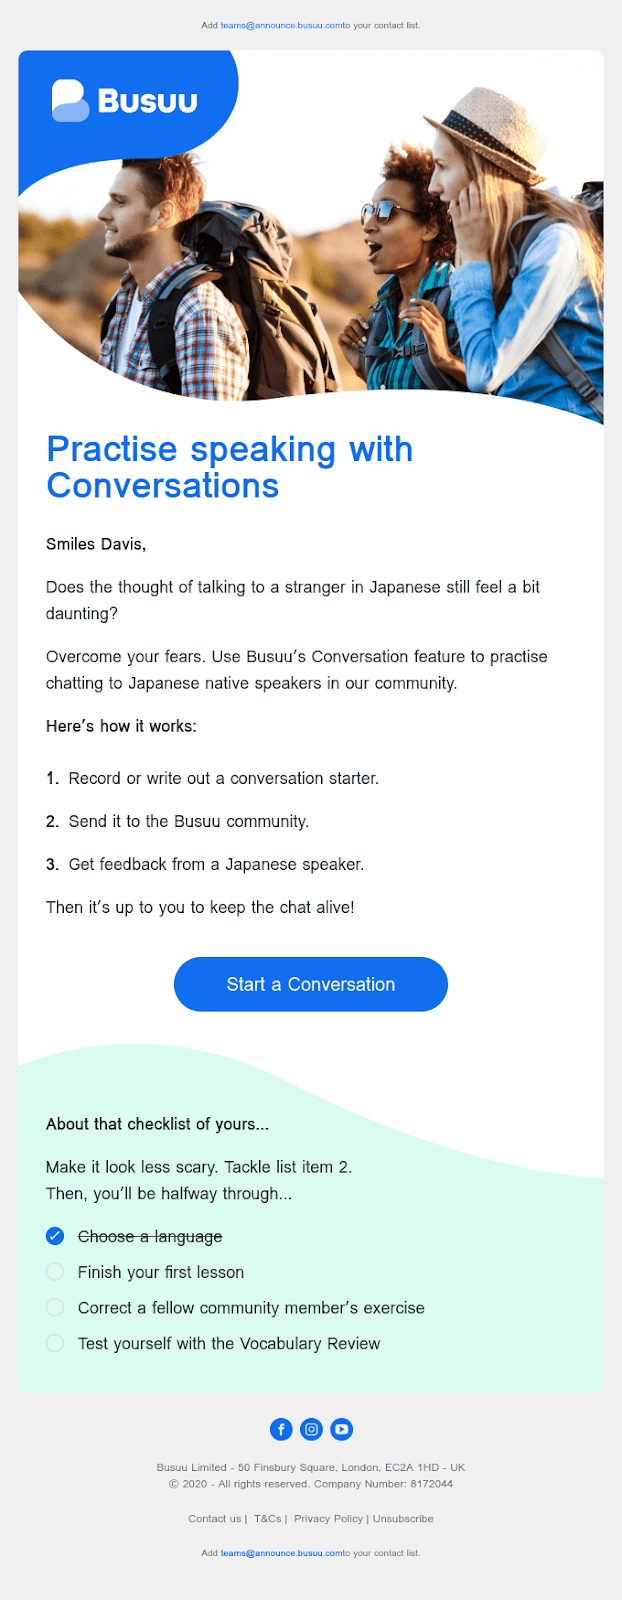
Use lead nurturing emails to share testimonials, educate prospects or announce new products or features. Here's an example of an educational lead nurturing email from Busuu.
Creating your digital product is one part of the equation, but you also need to ensure they drive high-quality leads and that requires a strategy. Here are some proven best practices:
Even with the best intentions, creators often stumble when building lead generation funnels. To stay on the right track, you need to avoid:
To get results, identify your target audience, match them with the right product, design it well, promote it, and follow up consistently. This is how you attract quality leads. You need to also remember to be patient with the process, not everyone will convert immediately and that’s okay. By staying consistent and providing real value, you build trust, and your audience becomes far more likely to invest in your premium products. Follow this guide to know how to price your digital products.
.png)
Selling products online is more competitive than ever, and Facebook remains one of the most effective platforms to reach your audience. With billions of active users and advanced targeting options, Facebook ads enable creators, entrepreneurs, and businesses to showcase their business offerings directly to the people most likely to buy.
While scrolling through Facebook or Instagram, you’ve probably noticed ads popping up between posts, Stories, or Reels. But those aren’t random; they’re targeted campaigns businesses use to reach people just like you. And the reason they’re everywhere is simple: Facebook ads improve reach.
Facebook, through the Meta Ads Manager, gives businesses of all sizes the ability to target the right audience with precision. Whether you aim to drive traffic, boost sales, or generate leads, you can create a campaign tailored to your specific goals.
This step-by-step guide will walk you through exactly how to run Facebook ads in 2025, from setup to monitoring, so you can launch campaigns that convert.
Facebook ads are paid promotions that businesses create to reach specific audiences across Facebook, Instagram, Messenger, and the Audience Network— Meta’s group of partner apps and websites. This means your ads aren’t limited to Meta platforms alone; they can also appear in mobile apps or news sites outside of Facebook that are part of Meta’s advertising network.
Unlike regular posts, which only reach your followers (and maybe a few friends through shares), ads are designed to target people based on their demographics, interests, and behavior, giving you a much wider and more precise reach.
It’s important to understand the difference between a boosted post and a full Facebook ad campaign, because while they may look similar, they serve very different purposes:
This is achieved when you take an existing post from your page and pay Meta to show it to a larger audience. It’s a quick and simple way to increase visibility, but it offers limited control over who sees the post, where it appears, and what specific outcome you’re optimizing for.
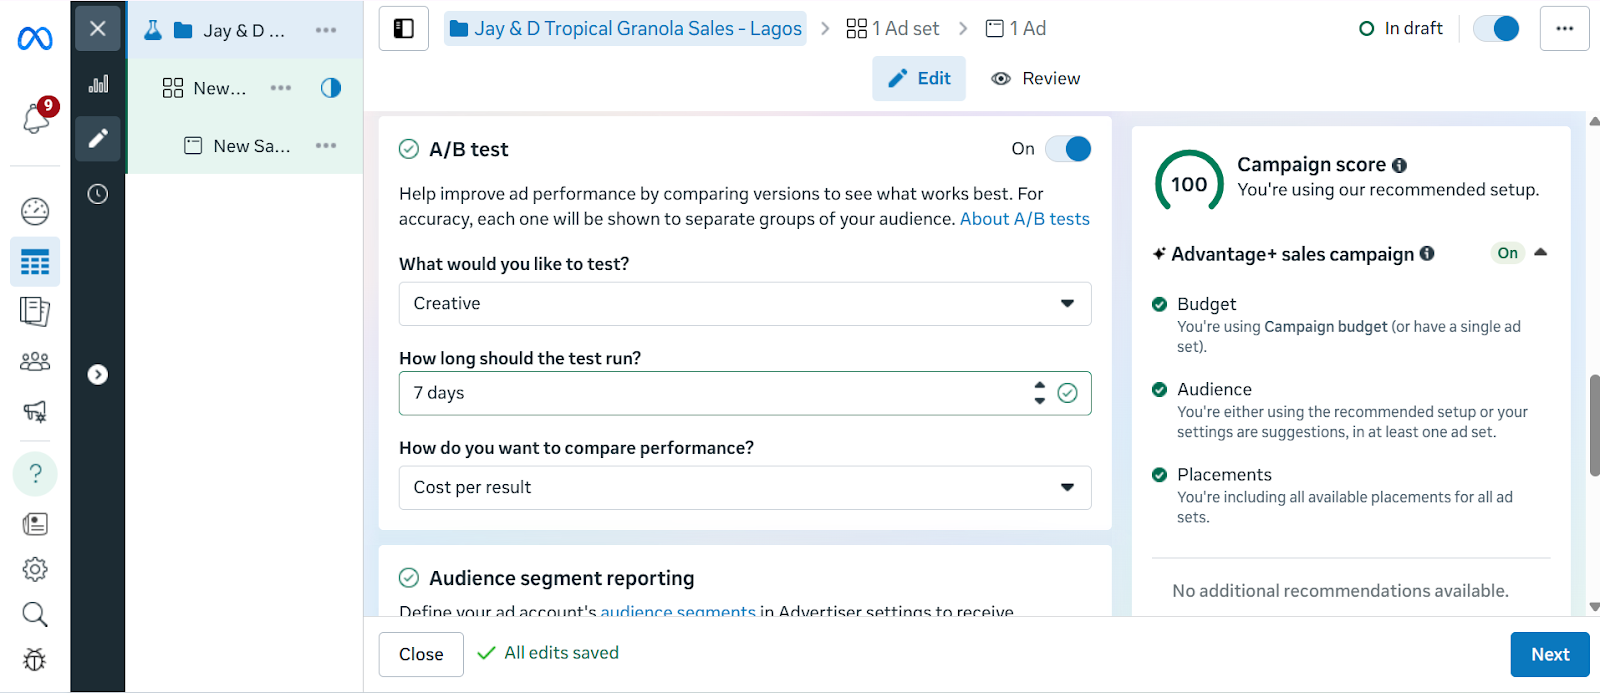
This gives you full control over your advertising strategy. With a Facebook ad campaign, you can choose exactly what you want to achieve (like driving sales, getting leads, or boosting website traffic), define your audience in detail, set your budget and schedule, decide where your ads will appear, and even test multiple versions of the same ad to see which performs best. This flexibility makes Ads Manager the recommended option for running serious, goal-driven campaigns.
Ultimately, whether you’re running a single ad or a full campaign, everything is managed through Meta Ads Manager, the centralized hub where all ads are created, managed, and optimized. It’s also a tool you’ll need to master to get consistent results. Now that you know what Facebook ads are, it’s important to understand why they are powerful tools for growing your business.
Advertising on Facebook offers clear advantages for businesses of any size, and three of the most important are:
Getting started with Facebook ads might feel overwhelming at first, but Meta Ads Manager makes the process a lot more structured. By following a step-by-step approach, you can go from setting up your account to launching your first ad without missing anything important. Here’s a simple breakdown of how to run ads on Facebook.
Before you can create digital product ads, you need the right setup.
1. Create a Meta Business Manager Account
2. Create a Facebook Business Page
Ads cannot be run from personal profiles. You’ll need a business page.
3. Add Payment Information
Once your foundation is ready, it’s time to build your campaign.
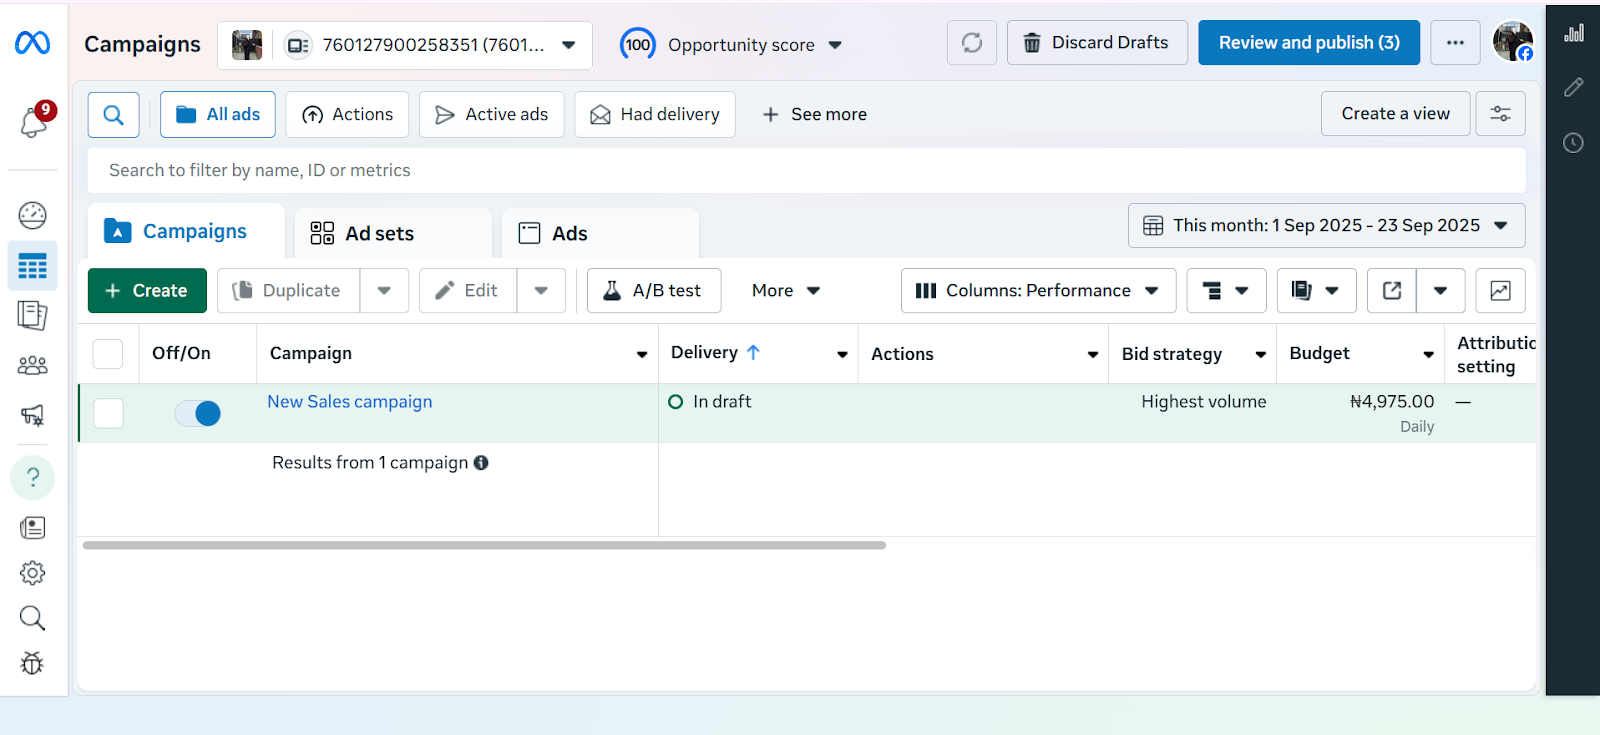
1. Go to Ads Manager
2. Click “+ Create”
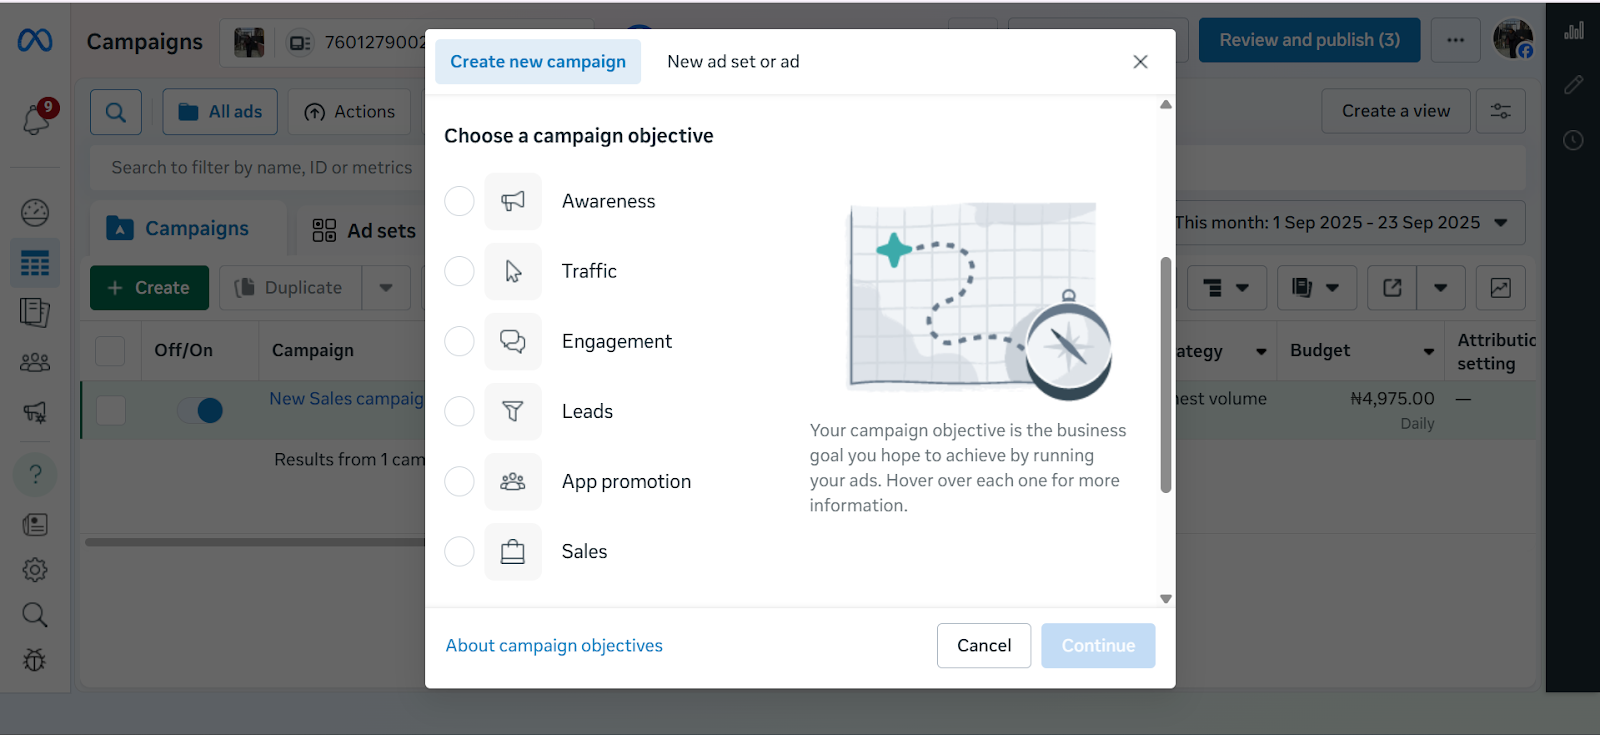
When creating a campaign in Meta Ads Manager, the first step is choosing your advertising objective which is the main thing you want your ad to achieve. Meta currently offers six objectives:
Awareness – Best for getting your brand in front of as many people as possible. Useful if you’re just starting out or launching something new.
Traffic – Drives people to a website, landing page, or app. Helpful if you want more visits to your online store or product page.
Engagement – Encourages actions like likes, comments, shares, or event responses, making it easier to build a community around your brand.
Leads – Collects contact details (like emails or phone numbers) directly through Facebook forms or your own landing page.
App Promotion – Helps you get more people to download or use your mobile app.
Sales – Optimises your ads to drive actual purchases, either on your website, in your app, or directly through Facebook and Instagram Shops. Meta does this by showing your ads to people most likely to buy based on their past activity, e.g., clicking “add to cart” or completing a purchase. You can also connect your product catalogue so your ads automatically display items in stock, making it easier for customers to shop directly.
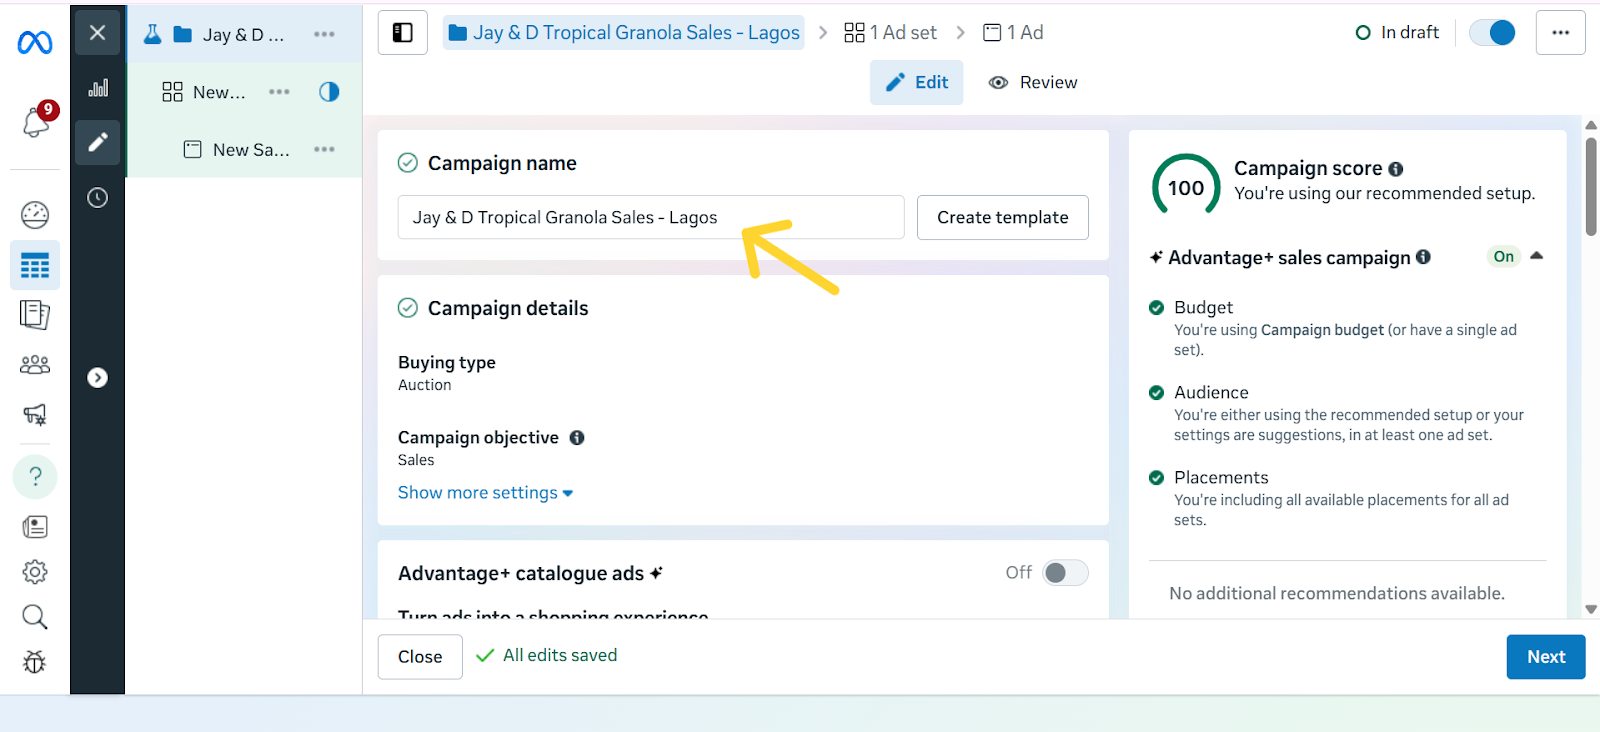
Give your campaign a clear, descriptive name so you can easily identify it later. A good rule of thumb is to include the product, audience, and goal in the name. For example: “Tropical Granola – Abuja – Traffic” or “Ebook Launch – US – Sales.” This makes it easier to stay organised, especially once you start running multiple campaigns at the same time.
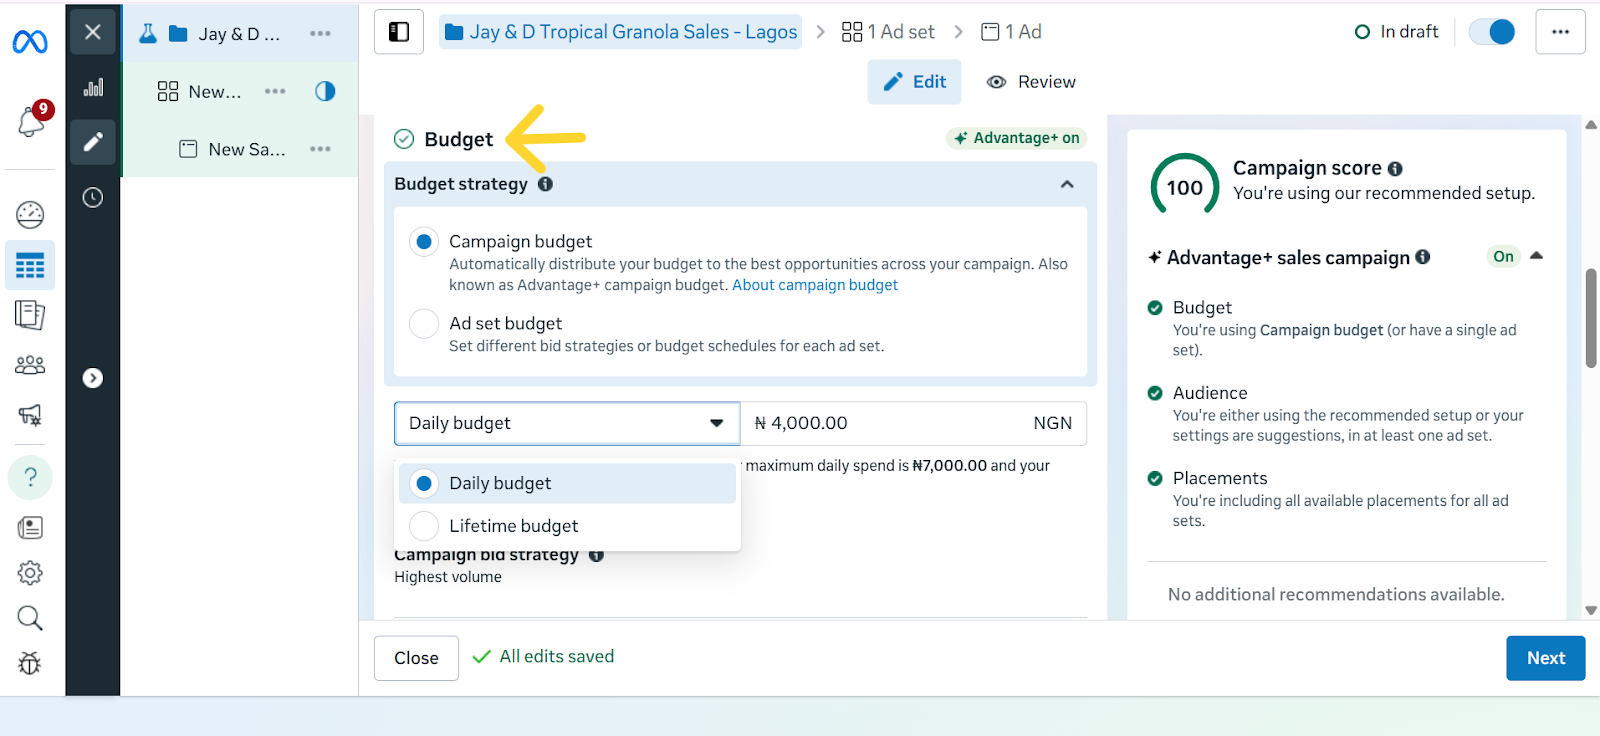
Your budget decides how much you want to spend on your ads, while your schedule controls when your ads run. In Meta Ads Manager, you’ll see two main types of budgets:
Pro-tips for Cost Control:
This way, Meta runs your ads but won’t go beyond the budget you’ve set for each result, helping you stay in control of your spending.
The caveat here, however, is that if your target cost is set unrealistically low, Meta may struggle to deliver your ads, or you may get fewer results. So it’s best used when you already have some data on what a “reasonable” cost per result looks like for your business.
Note: This works best if you’ve set up the Meta Pixel or Conversions API so Meta can track actual purchases.
Together, these options help you avoid overspending and make sure your money is going toward results that matter most to your business.
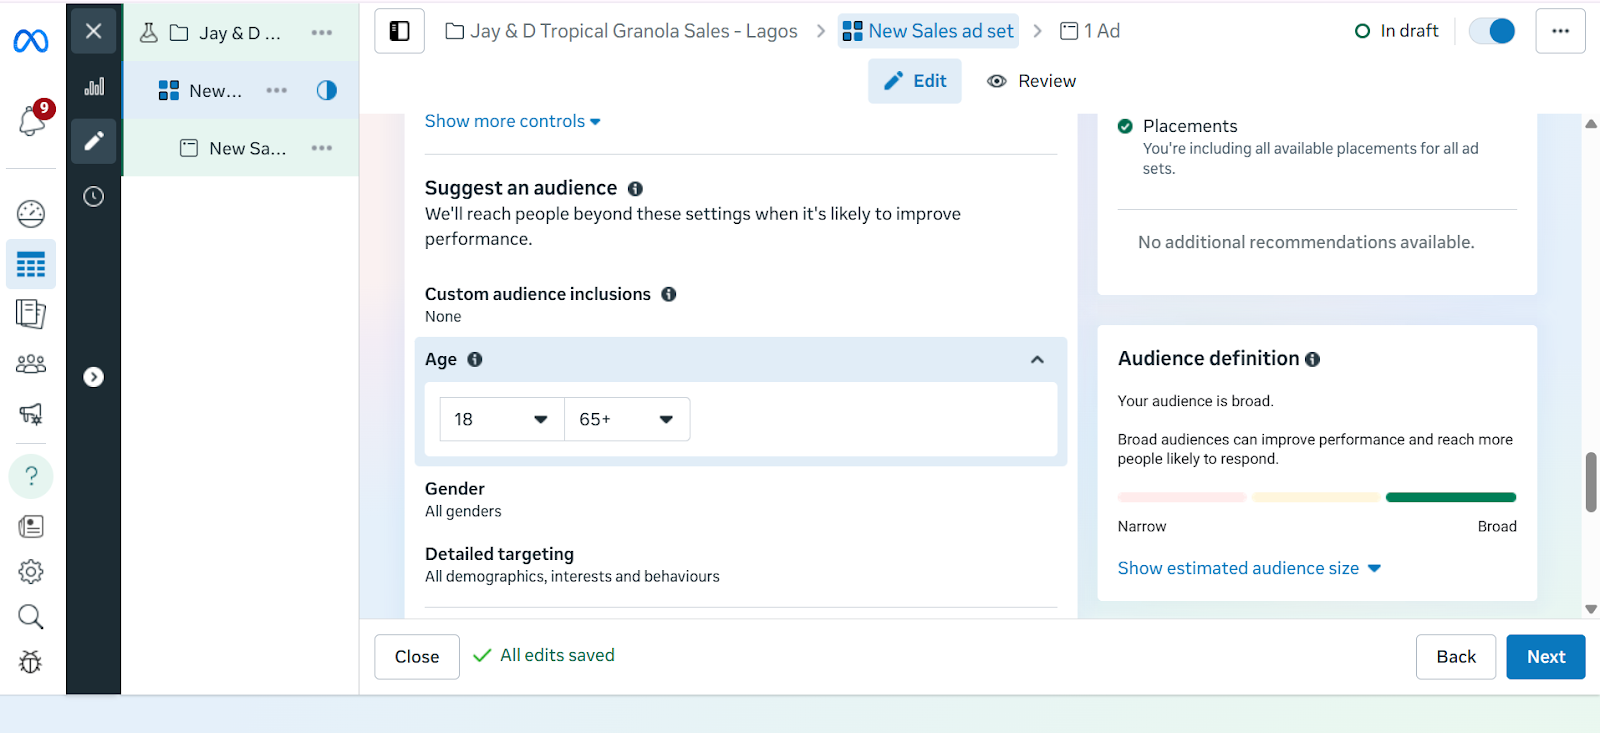
This is where you tell Meta exactly who should see your ads. Instead of showing your ad to everyone, you can narrow it down to people who are most likely to buy from you.
With Meta Ads Manager, you have three main options:
While targeting with Meta Ads Manager makes it easier to reach the right people, recent privacy changes, especially Apple’s iOS updates, have made it harder to track every action users take across apps and websites. This means targeting isn’t always perfect, but it still gives you a more direct connection to your audience. The key is to test different audience types and focus on the ones that deliver the best results for your business.
Placements are the different spots where your ad can show up across Meta’s platforms. This could be in the Facebook News Feed, Instagram Stories, Reels, Messenger, or even inside partner apps and websites. By default, Meta recommends Advantage+ Placements, which automatically shows your ad in multiple places and then prioritises the ones that perform best.
For beginners, this is often the easiest option because Meta does the testing for you. However, if you want more control, you can manually choose placements, for example, focusing only on Instagram Reels if your audience skews younger, or Messenger if you want a more personal approach.
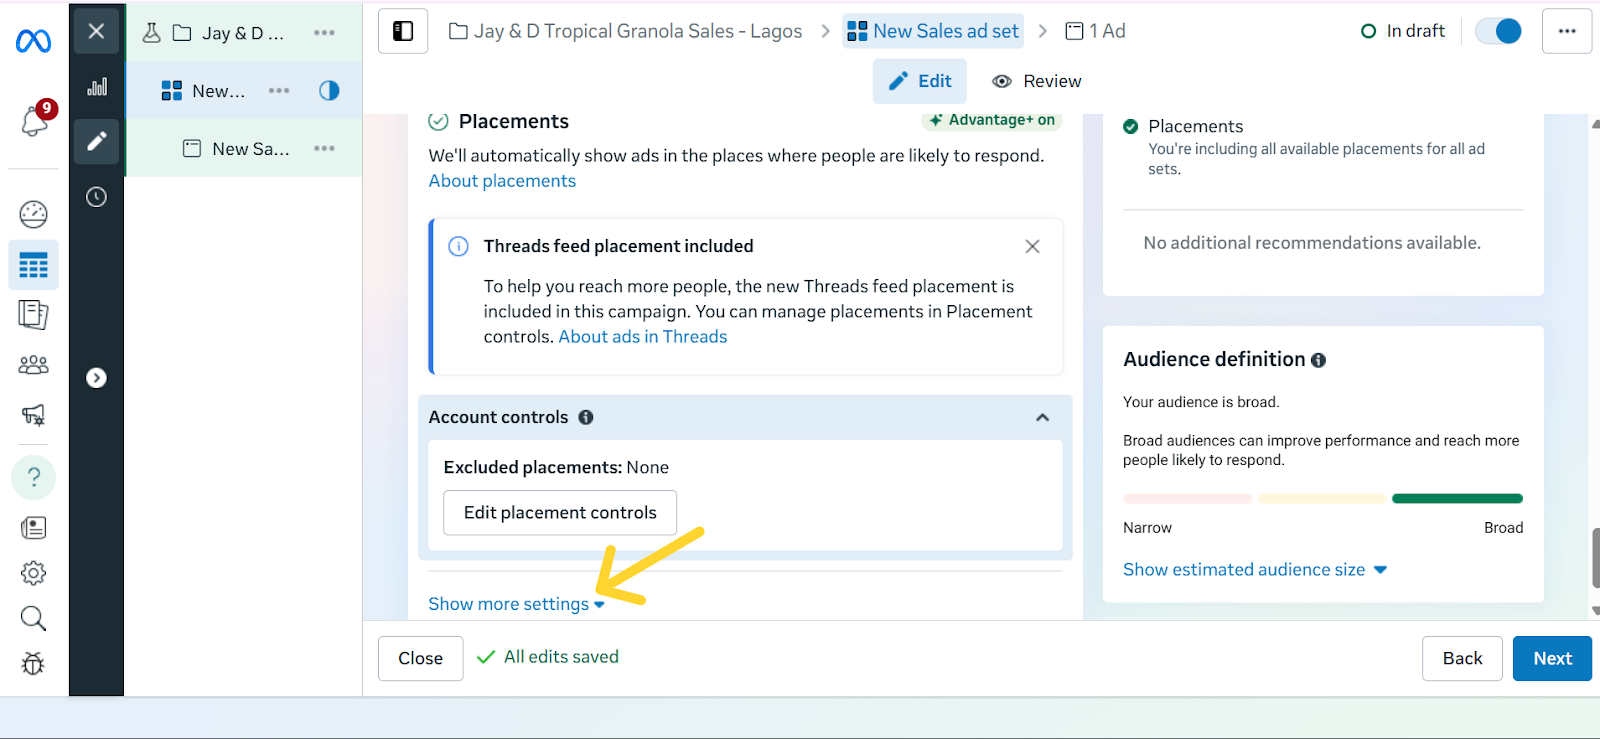
Each placement has its strengths:
The real advantage of placements is flexibility: you can either let Meta spread your ad widely and optimise for results, or zero in on the exact spots where your audience is most active.
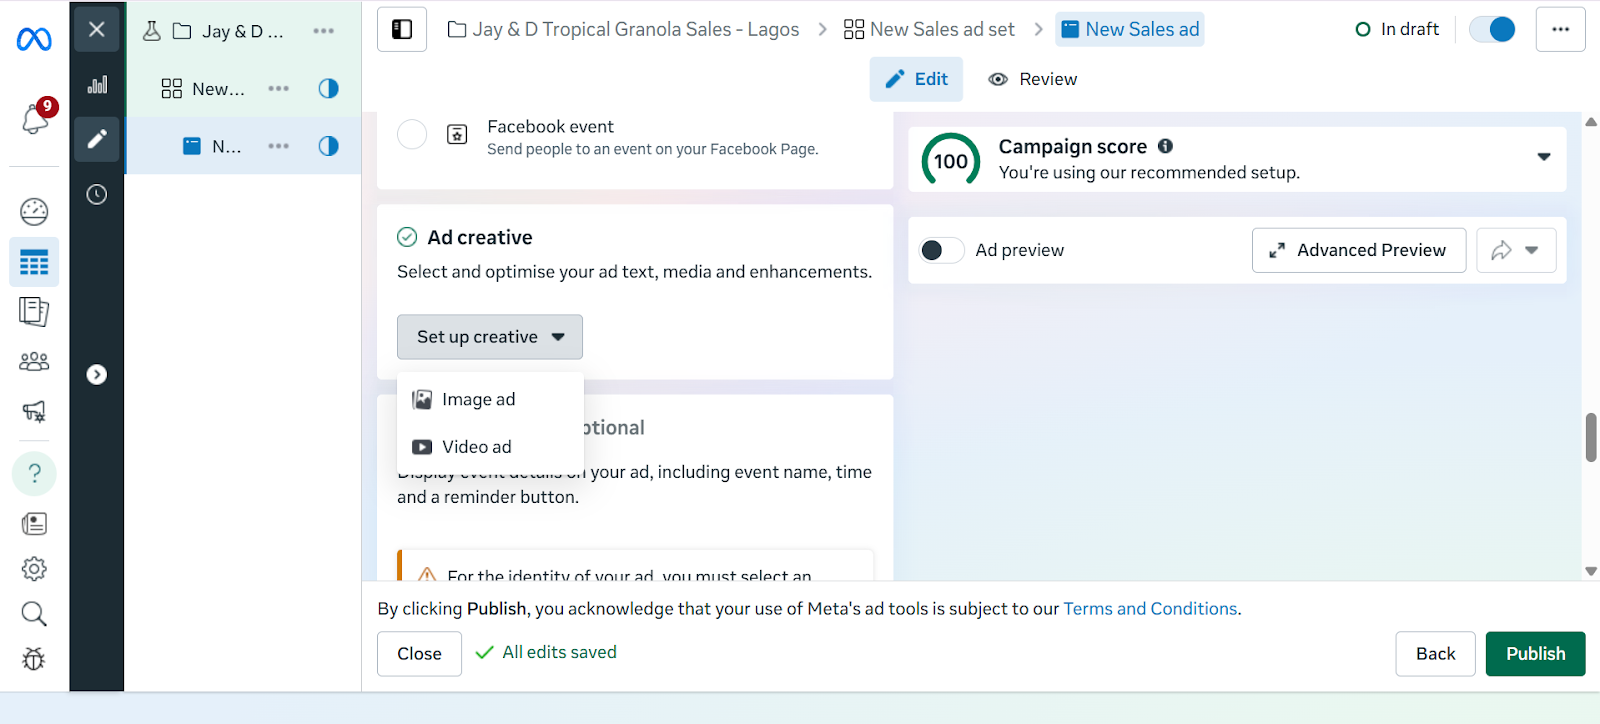
An ad creative, simply put, is the actual content of your ad. That is, the picture, video, headline, and caption people will see when your ad shows up on their Facebook or Instagram feed. A strong creative can be the difference between someone scrolling past or stopping to pay attention.
To make yours effective, let’s break it down into the key parts so you know exactly what to focus on.
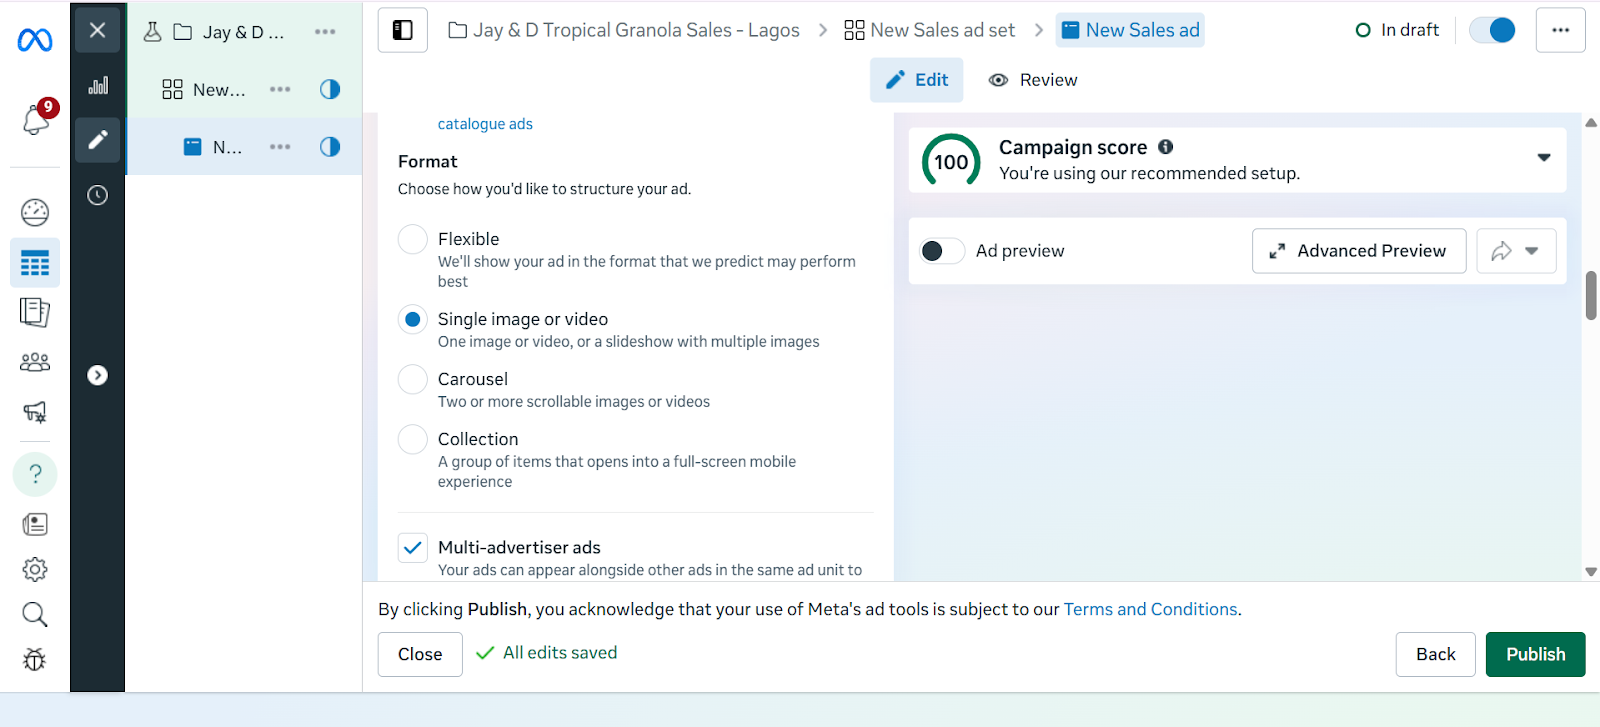
Select Ad Format
Visuals
Copywriting Tips
Call-to-Action (CTA)
Before you hit “Publish,” it’s important to double-check your ad. Meta has strict ad policies, and if your ad doesn’t follow the rules, it can be rejected or even get your account flagged.
Things to check before publishing:
Common reasons ads get rejected:
Once everything looks good, click Publish. Meta will then review your ad, which usually takes a few minutes to 24 hours. If approved, your ad will go live and start delivering to your chosen audience.
In Ads Manager, track key metrics to understand how your campaigns are performing:
Optimize Ads
Running Facebook ads in 2025 is only part of the journey. Turning clicks into sales or meaningful engagement requires the right destination for your audience. With Mainstack, you can create tailored landing pages or online storefronts that act as the perfect extension of your ad campaigns. Every click from your Facebook ad can lead to pages specifically designed to showcase your products, collect leads, or drive purchases directly.
By pairing the precise targeting of Facebook Ads with Mainstack’s easy-to-use tools, you create a system where ads, pages, and customer actions work together, making it easier to track results, optimise campaigns, and grow your business efficiently.
Start building pages that connect directly to your ads today and see how a well-designed destination can turn impressions into measurable growth.
At this point, you’ve learned how to set up, target, and create effective Facebook ads and how to ensure every click leads to a page that converts impressions to sales. But, to make it even easier, we’ve put together a step-by-step checklist you can follow every time you run a campaign.
Step 1: Set Up Meta Business & Ads Manager
Step 2: Create Your Campaign in Ads Manager
Step 3: Choose Your Objective
Step 4: Name Your Campaign
Step 5: Set Your Budget & Schedule
Step 6: Choose Your Target Audience
Step 7: Select Ad Placements
Step 8: Design Your Facebook Ad Creative
Step 9: Review and Publish
Step 10: Monitor & Optimise Performance
.jpg)
Instagram Reels have quickly become one of the best tools for creators, entrepreneurs, and brands to get discovered. This is largely because the platform’s algorithm prioritizes short-form video content. As a result of this, utilizing video content is no longer optional, but essential.
It doesn’t matter if your goal is building a personal brand, promoting digital products, or simply trying to grow your community, understanding how to create Reels that grab attention can improve your content’s reach.
Reels aren’t just another content format; they are Instagram’s answer to TikTok and a major driver of content visibility and engagement. Studies show that Reels generate more engagement than traditional posts, largely because Instagram actively promotes them to new audiences. For small businesses, freelancers, or creators, this means your content has a higher chance of being discovered beyond your immediate followers. A well-made Reel can work like free advertising by expanding your reach and establishing your brand voice in ways static posts rarely can.

If you’re new to Instagram and don’t exactly know what reels are, they simply are short, vertical videos that can be up to 90 seconds long. You can record clips directly on the app or upload pre-edited content.
Reels come with creative tools like audio tracks, filters, text, and transitions that let you produce engaging videos without needing advanced editing skills. While it may seem intimidating at first, the best Reels often use simple ideas executed clearly.
The hardest part of creating Reels is often knowing what to post. Instead of overthinking, start with formats that already resonate with multiple audiences: tutorials, before-and-after transformations, behind-the-scenes moments, relatable skits, or quick tips related to your niche.
For example, if you’re an interior designer, you might film a room transformation in stages in under 60 seconds. The goal is to create visual, relatable videos while giving your audience a glimpse of what you offer.

With Reels, videos are short, but attention spans are shorter. That’s why the first three seconds of your reel are everything so be sure to incorporate bold text overlays, intriguing statements, or visually striking shots to capture attention immediately.
For example, instead of starting with “Hi everyone, I’m here to talk about…” try opening with a problem your audience faces: “Struggling with skincare on skin that just doesn’t seem to care? Here are three quick fixes you can try today.”
This kind of hook grabs attention because it promises immediate value, giving viewers a reason to keep watching.
Instagram offers built-in editing tools that make your Reels more engaging and accessible, and one of the most effective ways to achieve this is adding captions to your reels.
This ensures your content is easy to follow along for people who are hard of hearing and it also caters to the many users who scroll with the sound off. Utilize text overlays to emphasize key points, and sync your cuts to trending audio.
Transitions, such as quick outfit changes or scene shifts, also improve the quality of your reels without the need for advanced editing. The goal is not to overcomplicate but to make your Reel engaging and easy to follow.
Trends drive discoverability, but originality builds lasting connections which are crucial when growing an online community. Jumping on trending audios or challenges can boost visibility, but it is of utmost importance to ensure that these trends are adapted to fit your niche. The key is to participate in trends while adding your unique perspective so you aren’t simply blending in with everyone else.
Creativity alone is not enough to sustain any content form, reels included. They also need optimization.
To do this, make use of relevant hashtags, engaging captions, and eye-catching cover images that align with your brand.
Posting consistently also signals to the algorithm that you’re an active creator worth promoting.
Pro Tip: Cross-promote your Reels on your Stories and grid, and encourage viewers to engage by asking simple questions in your captions.
Not every Reel will go viral, and that’s okay. What matters is tracking performance and adjusting accordingly. Pay attention to your Instagram Insights to see which Reels got the most views, saves, or shares. These metrics reveal what resonates with your audience and help guide your future content. Over time, you’ll develop a playbook of what works best for your niche and audience.
For entrepreneurs and creators selling digital products, Reels can double as tools for visibility and a direct driver for sales. By utilizing reels to showcase your product in action, sharing customer testimonials, or educating your audience about the problems your product solves, you position yourself as both a trusted resource and a solution provider.
Instagram Reels are one of the best ways to grow your online presence in today’s digital world. Clarity, consistency, and creativity are the three ingredients that help beginners create Reels that actually get noticed.
The best Reels aren’t always the most polished; they’re the ones that resonate with audiences, deliver value, and make your people want to come back for more.
Many beginners starting out in affiliate marketing share a moment of common frustrations. You start affiliate marketing in hopes of earning extra cash, post links, create content, and…crickets. That first sale feels like it's never going to happen.
If you’re reading this, you’re probably on your own Day 1 — curious, hopeful, and maybe a little unsure about where to start. The good news is, you don’t need a huge audience or expensive tools to start earning online.
This guide breaks down how to go from zero to your first $100 in affiliate commissions. You’ll learn what to sell, how to position yourself, where to promote, and who to reach.
By the end, you’ll have a clear roadmap to your first $100 and the confidence to turn it into steady income
You’ve probably heard of affiliate marketing, but what does it really mean?
In plain terms, affiliate marketing is a way to earn money online by promoting other people’s products or services, and when someone buys through your unique link, you earn a commission.
Think of it as recommending a product to a friend, but instead of doing it for free, you get paid every time someone takes your recommendation and makes a purchase.
Now that you understand what affiliate marketing is, let’s talk about how you can realistically make money from it.
On Day 1, you need clarity. Decide who you are selling to, and what are you selling?. Ask yourself: What problem am I solving? Who is my audience?
This mindset separates random link pushers from affiliates who actually make money. Your goal is to own a space and build trust around something you know and care about.
Choosing a niche is where that starts. If you get it wrong, nothing else matters.
Pick a space where your experience or interest gives you an edge, but make sure it is a niche in high demand. Choose a niche people are actively searching for and possibly spending on.
Successful affiliates often start with what they know. For example, affiliate marketers like Michelle Schroeder-Gardner started her affiliate journey with personal finance by sharing how she paid-off her student loans and recommending the tools she used.
John Chow, on the other hand, focused on building income through blogging, sharing what worked for him and promoting services he trusted. Because their story was authentic, their audience could feel that honesty and that’s what sold.
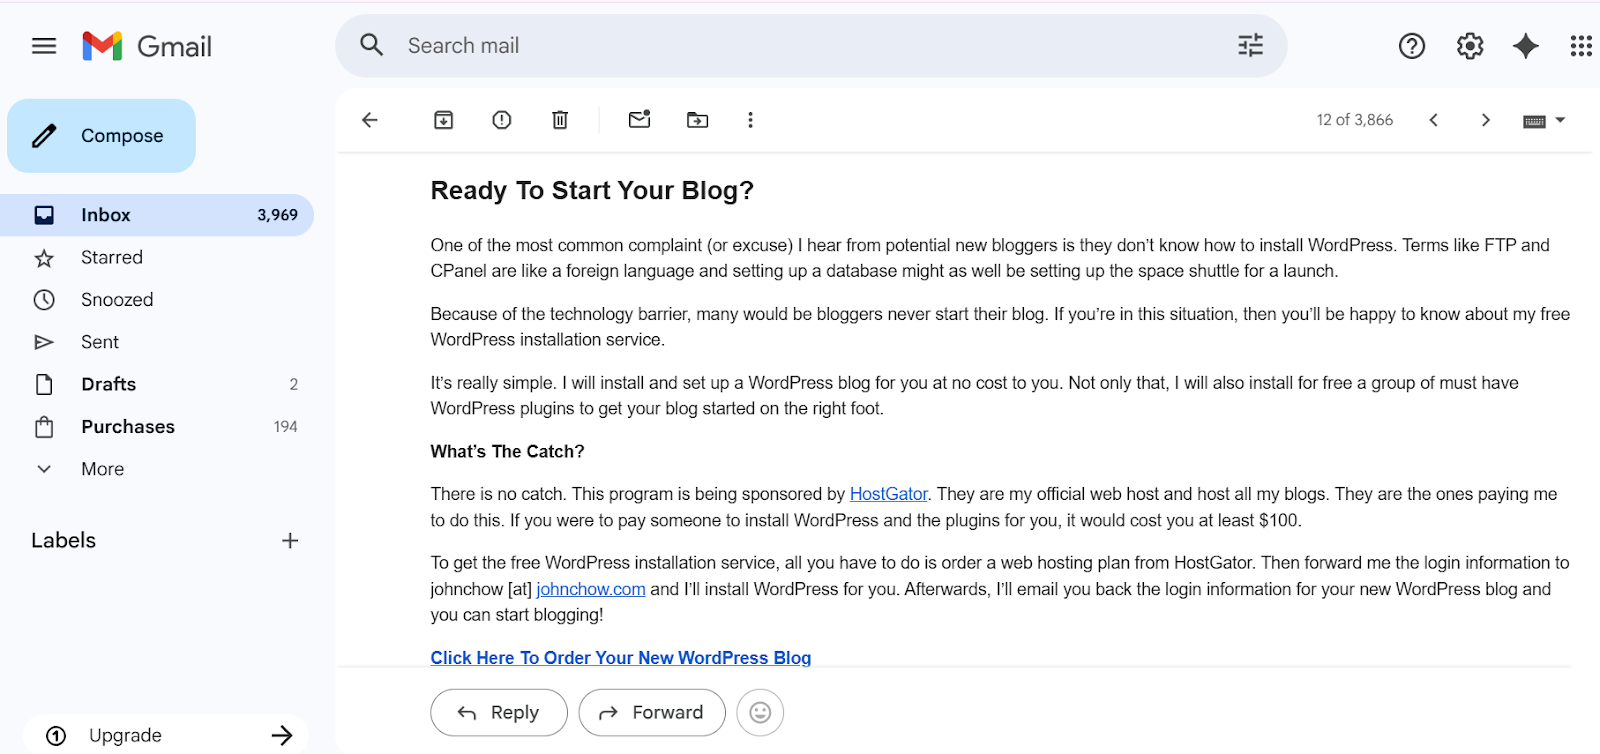
Action Step Today:
Pick one niche you care about. List three affiliate offers you could promote this week, and decide which platform you’ll use to promote your offers.
After you pick your niche and define your audience, the next step is finding an offer that’s easy to market. But first, you need to find a reputable platform that gives you access to affiliate products, high commission and makes it easy for signups.
Platforms like Mainstack, Amazon and Clickbank give you access to thousands of products that you can promote as an affiliate.
On Mainstack, you can find over 250+ affiliate offers, organize multiple links, and track all links from one dashboard without any extra tools.

Image Credit: Mainstack
What makes an affiliate offer worth your time? Here’s a quick checklist to help you choose the right product:
Now that you know what to look for, the next step is turning that knowledge into action.
Action Step:
Sign up on Mainstack today. Browse the affiliate marketplace, and pick 2–3 products you’d feel confident promoting this week.
Before promoting an affiliate link, you need reassurance that you’re picking the right one. Rather than promoting to a cold, unfamiliar audience, start with a warm market (e.g friends, peers, old classmates) as a testing ground for the products you intend to promote.
Share your affiliate link on iMessage, Instagram, TikTok, or Facebook Messenger and frame it like a tip, not a sales pitch.
Pay attention to their questions and hesitations. Use their feedback to sharpen your pitch, tweak your copy, and get ready for your cold-market launch.
The goal is to prove you can sell to people who already trust you before chasing strangers. Once you’ve validated this product with your circle, you’ll have a clearer sense of work.
Action Step Today:
Send your affiliate link to 10 people in your network and track clicks using your Mainstack link.
You don’t need a full website or a massive audience to start making money as an affiliate marketer. What you need is a credible home base where people can find your links and check your promos.
Your social channels (like TikTok, Pinterest, or Substack) are great for sharing links, but your platform is where they actually live. It could be a simple blog, a landing page, or even a Mainstack link-in-bio that keeps all your offers organized and trackable.
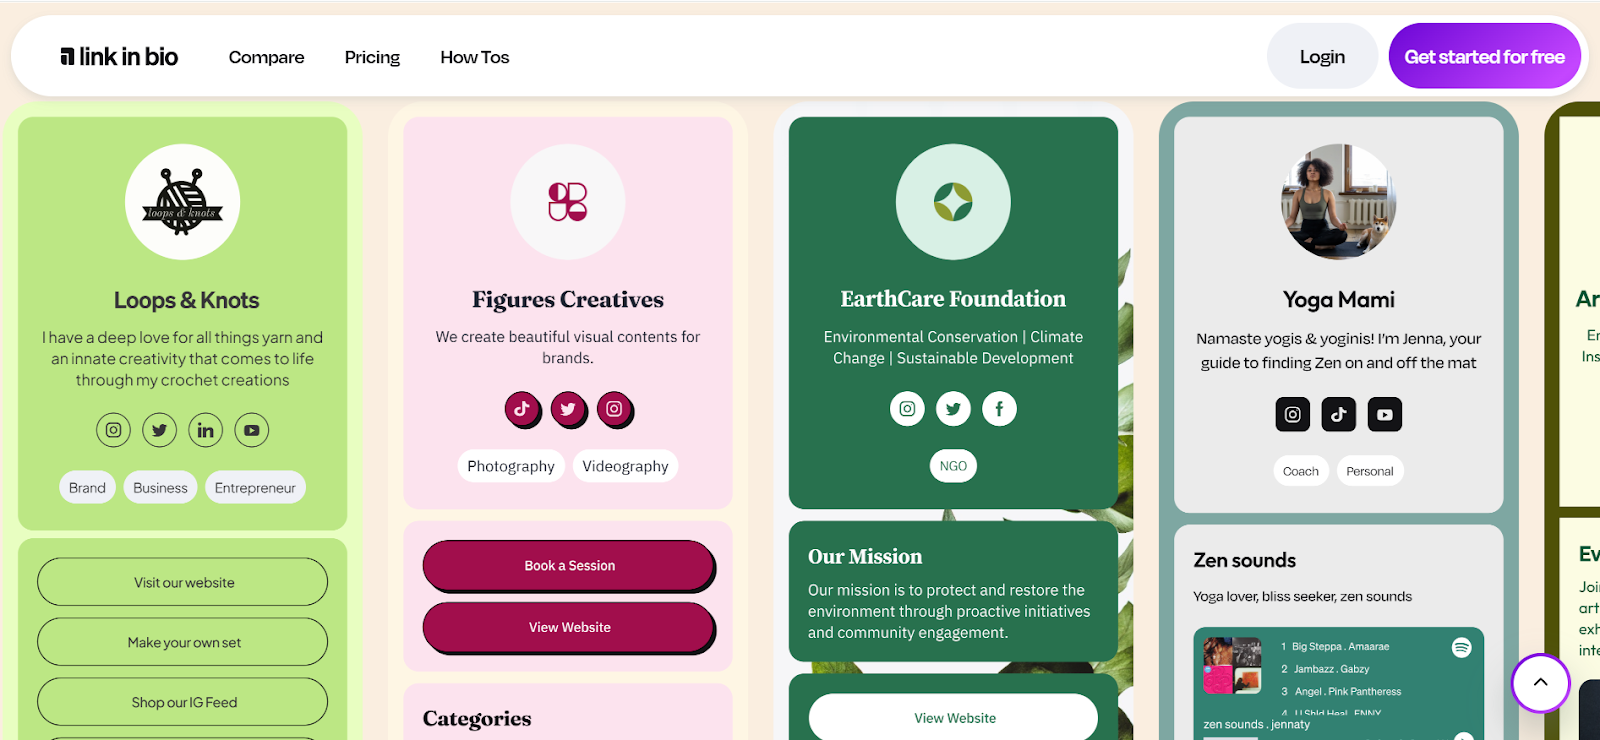
Image Credit: Mainstack
As you grow, start layering in structure: build a blog people can find, grow a community, or start a simple email list so you’re not stuck chasing algorithms.
Ana Savuica is a great example of this in action. She built her blog with one blog post about a $25 e-book she loved. Then added it to her sidebar, featured it in her welcome email, and created Pinterest graphics that kept sending traffic. That’s the kind of momentum you want.
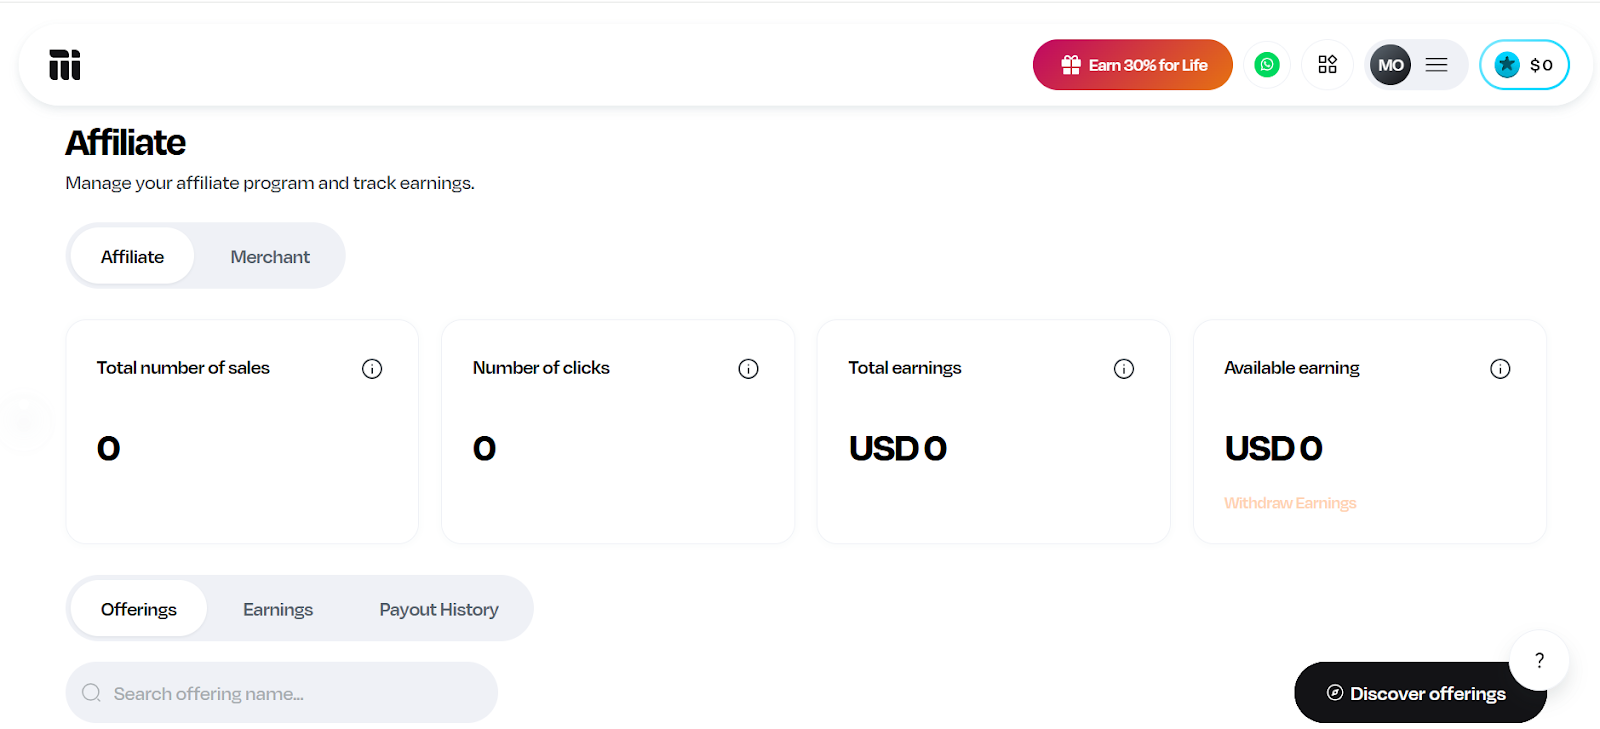
Tracking isn’t optional; it’s your personal report card for every link you share. For every affiliate link, you need to know two things:
Platforms like Mainstack let you easily track affiliate links. On Mainstack, you can instantly see which links pull the most clicks and what kind of content your audience actually cares about.
Make it a habit to check both dashboards every week. Those insights show you what to double down on, what to tweak, and what to stop wasting time on.
Action Step:
Make it a habit to review your stats every week. That’s how you figure out what’s hitting, what needs tweaking, and what to stop wasting time on.
Day 1 is about starting small and moving fast. You won’t get rich overnight, but you can post something today, drive clicks, and earn your first commission.
Before you launch, sign up on Mainstack and set up your affiliate dashboard. It’s the easiest way to organize offers, showcase promotions, and track results
Your first $100 matters less than what you do next. Use that momentum to test, refine, and grow.
1. What is the first step to starting affiliate marketing as a beginner?
Pick a niche you already know or use daily. Choose one or two products that solve real problems for that audience, then create content around them.
2. Do I need a website to start affiliate marketing on Day 1?
No, you don’t. All you need is a credible space like a Mainstack Affiliate dashboard page to host your links. You can always build a website later as you grow.
3. How do I find affiliate products that sell?
Look for products with good reviews that align with your audience’s needs. Platforms like Mainstack’s affiliate marketplace let you browse verified offers before you decide what to promote.
4. What should I look for before choosing an affiliate program?
Check for fair commissions, strong brand reputation, and solid customer feedback. Also, look at the competition; if too many people are already promoting the same thing, it’s harder to stand out.
5. Can I do affiliate marketing on social media platforms like TikTok or Instagram?
Absolutely. Share real experiences through short videos or posts and use your Mainstack link to track clicks and conversions.
6. How do I track clicks and sales from my affiliate links?
You need an affiliate marketplace like Mainstack to track affiliate links. Use Mainstack for click analytics and audience insights, then check your affiliate platform for sales data. Together, they show what’s working.
7. How does Mainstack make affiliate marketing easier for beginners?
Mainstack takes the stress out of link management. It keeps everything in one place—links, clicks, and audience data. If you promote Mainstack marketplace products, you can see clicks and sales in the same dashboard.
8. How long does it take to make your first sale in affiliate marketing?
It depends. Some people make their first sale in a week, others in a month. Stay consistent, test different content, and use data to improve.
9. What mistakes should beginners avoid on their first day of affiliate marketing?
Don’t promote too many products or stuff you don’t believe in. Start with one or two solid offers and focus on helping your audience.
10. How much can a beginner realistically earn from affiliate marketing?
Most beginners earn small amounts at first. On average, $50 to $200 in the early stages. As you learn your audience and refine your strategy, earnings can grow into steady income.

The best tools for affiliate marketers in 2025 are changing the way people earn money online. Affiliate marketing has grown from simple link sharing into a smart, data-driven business. With the rise of AI, automation, and better analytics, marketers now have access to tools that make it much easier to promote products, track performance, and increase revenue.
Here’s a roundup of 15 of the best software programs for affiliate marketers across key categories. Read more to find tools to help you manage your daily tasks and help your business grow fast.
Affiliate marketing is one of the most effective ways to make money online, but it requires the right tools to be successful. These tools enable you to save time, work smarter, and earn more.
Here’s why they’re so important:
Affiliate marketing is easier (and more profitable) when you have the right tools to support your work. Here are eight types of tools every affiliate marketer should use in 2025:
Managing multiple affiliate links across platforms can get overwhelming fast. All in one affiliate tools help you organize, track, and optimize every link in one place so you can easily see what’s performing, update links quickly, and stay focused on what drives revenue.
.png)
Mainstack gives affiliate marketers an all-in-one workspace to promote digital products, track performance, and manage payouts. The platform is built to support users across different countries, so creators and affiliates can work without worrying about currency limitations or regional restrictions.
Setting up your account is free, and once you’re in, you can immediately explore the digital products available for promotion in the affiliate marketplace. With Mainstack, you get your referral link along with a full workspace designed to help you manage your activity.
Your dashboard comes with built-in performance analytics, tools for shaping product pages, and other resources that make it easier for you to make sales, understand your results, and improve them.
Mainstack also has a Refer & Earn Program where you earn 30% of Mainstack’s revenue every time someone you invite makes a sale. The best part is that your commission comes directly from Mainstack, not from the seller’s income.
Pricing: Mainstack is free to join for both affiliates and merchants. You earn based on performance, and payouts are made automatically. No hidden fees or subscriptions, just a simple 3% transaction fee for commerce features.
Mainstack helps you manage links, track sales, and earn commissions all in one place, making it the perfect all-in-one affiliate tool for 2025. Here’s how to join the Mainstack Affiliate Program.
Content creation tools enable you to design, write, and edit the content that draws people to your links. Even if you don't have design skills, these tools make it easy to create eye-catching posts, short videos, and graphics.

Canva makes it easy to design graphics, thumbnails, and marketing materials without needing design skills. It has a huge library of ready-made templates and a drag-and-drop tool that can help you design Instagram posts, blog banners, in minutes. Affiliates love Canva because it helps their content look professional and stand out on social media.
Pricing: The free version covers most needs, while the Pro plan adds premium templates and brand tools. Canva Pro costs $12.99 per month or $119.99 per year for one user.
CapCut is a beginner-friendly video editor that helps you create short, engaging videos for platforms like TikTok, YouTube, and Instagram even without video editing knowledge. It comes with free templates, effects, and AI editing tools to make your videos look polished.
For affiliate marketers, CapCut is great for creating tutorials or product reviews that include affiliate links. It’s as simple as recording a video on your phone, uploading it on CapCut, trimming out unnecessary parts and exporting a clean video ready to post in minutes.
Pricing: It’s free to start with, but the pro version starts from $9.99/month or $74.99/year. In some locations, its up to $19.99/month.
If you want to grow, you need to know your numbers. Analytics tools show where your traffic comes from, your highest selling product, best-performing posts and number of sales through your affiliate links. The more you know, the better you can improve your strategy.
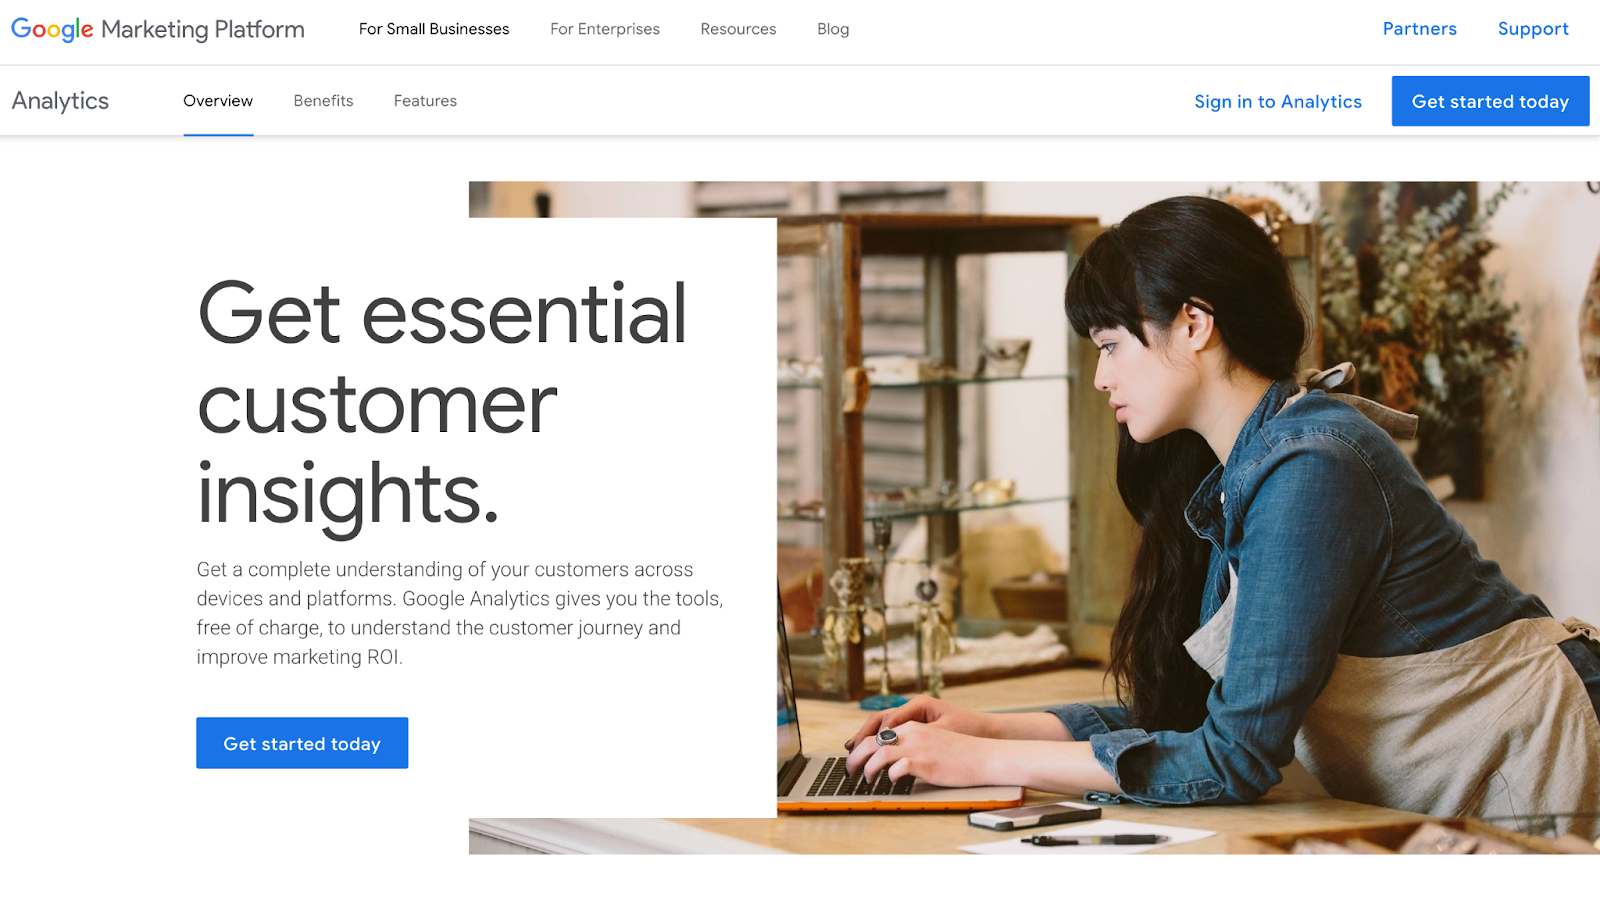
Google Analytics is great for affiliates because it provides a comprehensive picture of what’s actually driving clicks, leads, and sales. The platform is designed to help you track traffic sources to see which platform (e.g Youtube, TikTok) sends the most traffic to your affiliate links.
Google analytics also gives you insights into your audience insight and their behavior flow. You can see who your audience is, how they move through your site, what pages convert best and where they drop off.
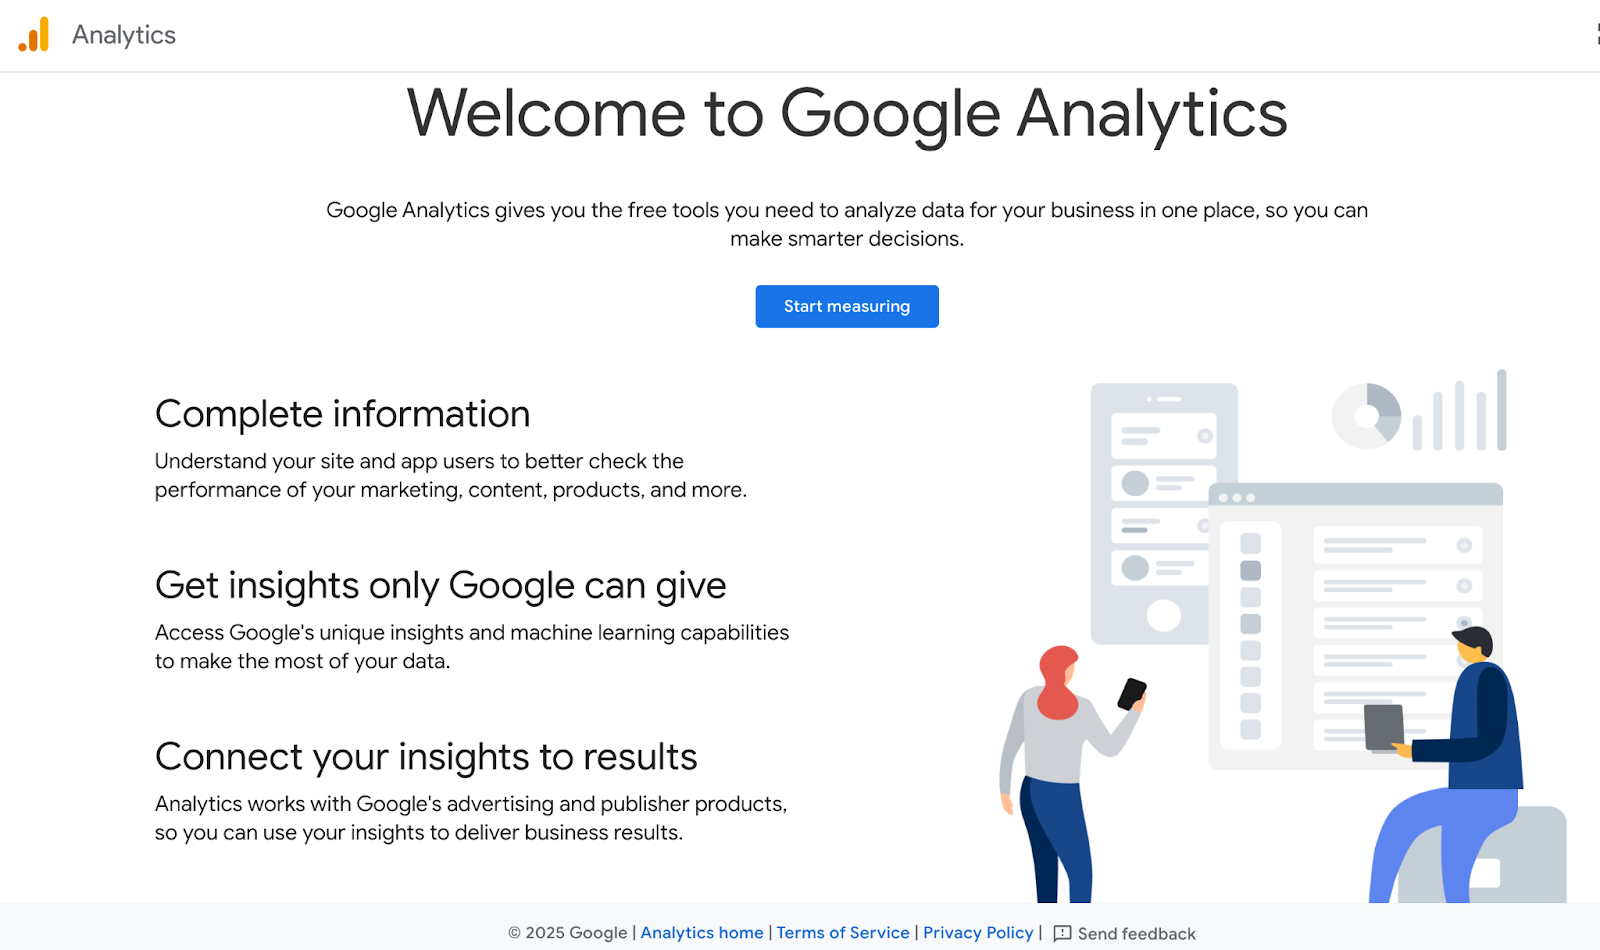
This helps affiliates understand what drives conversions and what needs improvement. It’s completely free and integrates easily with blogs and websites.
Pricing: Free to start with, but the paid plan (GA4 360) starts at approximately $50,000/year, depending on data volume and region.
SEO and keyword research tools help your content rank higher by finding profitable keywords, revealing competitor insights, and tracking performance over time.
Platforms like Ahrefs, Ubersuggest, and Google Keyword Planner show what your audience is actually searching for, so you can create content that attracts the right traffic.
Ahrefs is one of the most trusted SEO tools for find keywords, analyze competitors, and track backlinks. It helps affiliate marketers discover what topics are ranking and where to focus their content. For example, if you promote productivity software, Ahrefs can show you which blog titles or keywords get the most clicks. It’s a paid tool, but the insights it provides are well worth the investment for serious marketers.
Pricing: Paid plans start at $129/month and can go up to $1,499/month for advanced and enterprise plans.
Like Ahrefs, Google Keyword Planner helps affiliates discover keywords their audience is searching for. Beyond that, you also get insight into questions people are asking, understand search trends, estimate traffic potential and refine targeting.
It’s perfect for creating SEO-friendly blog posts, YouTube titles, or ad campaigns. You can compare keyword competition, search volume, and trends to target the right audience. The best part? It’s free and pairs perfectly with other Google tools for research and planning.
Pricing: Using Google Keyword Planner is free, although you need a Google Ads account to access it. Usage is free, though data precision may increase if you run paid ads.
Building an email list is one of the smartest moves in affiliate marketing. It’s a simple way to build an audience, keep them engaged and drive repeat sales.
Email marketing tools like ConvertKit or Mailchimp help you send updates, product recommendations, and exclusive offers to your followers.
Kit helps affiliates grow and engage their audience through email. You can set up automated email campaigns, send newsletters, and add affiliate links naturally within your messages. It’s built for creators who want to turn followers into loyal buyers.
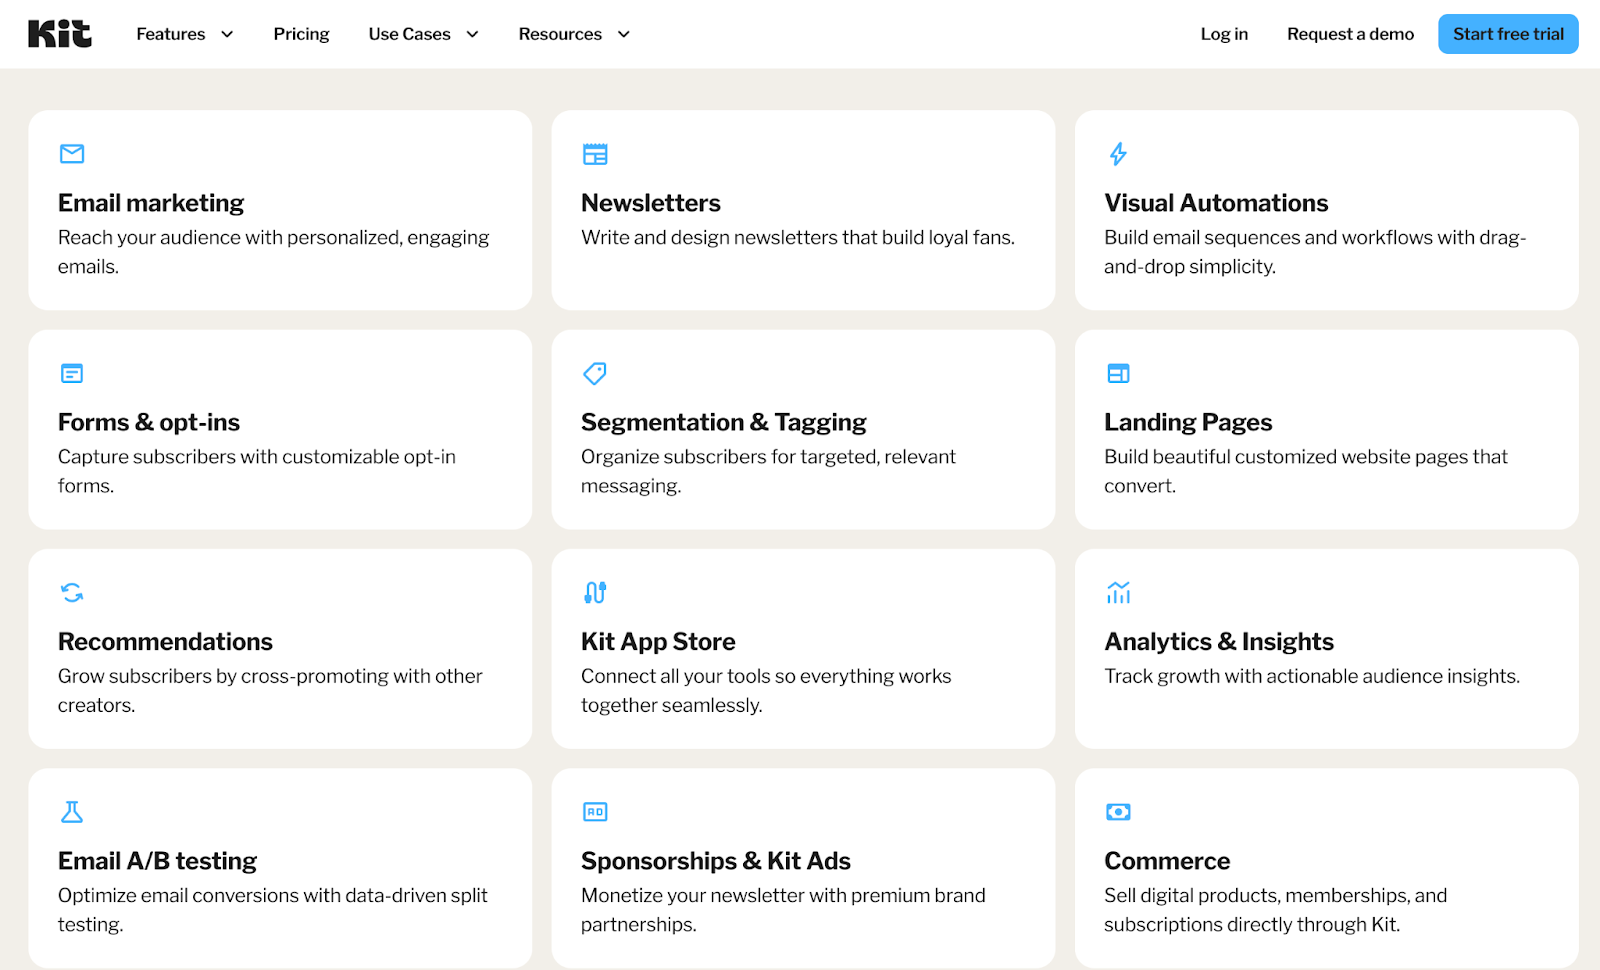
Pricing: There’s a free plan for beginners, with paid options for more advanced segmentation and automation, which starts at $15/month.

Mailchimp is one of the most popular email marketing tools for small businesses and affiliates. It offers templates, audience insights, and automation that make it easy to send professional campaigns. You can track open rates and clicks to see which products get the most attention.
Pricing: Mailchimp has a free plan for smaller lists and paid tiers for more advanced features that can go up to $350/month.
SMS/MMS add-ons, custom-coded templates, and priority support at top tier.
Posting regularly on multiple platforms can be stressful. Social media scheduling tools like Buffer, Later, or Meta Business Suite let you plan and schedule posts ahead of time. For example, you can set up a week’s worth of TikTok clips and Instagram posts that promote your affiliate products, and the tool will post them automatically.
Buffer helps you plan and schedule posts for platforms like Instagram, Facebook, LinkedIn, and X (Twitter). It’s perfect for affiliates who want to stay consistent without posting manually every day. Buffer also shows engagement data, helping you learn what type of content performs best.
Pricing: There’s a free plan for a few social channels, with paid upgrades for more accounts and detailed analytics.

Later is a comprehensive influencer marketing and social media management platform that helps affiliates plan, schedule, and optimize their promotional content across platforms like Instagram, TikTok, and YouTube.
With its visual planner, affiliates can organize posts, maintain consistency, and use features like “Best Time to Post” to boost engagement. It also offers detailed analytics to track which content drives the most clicks and conversions, helping users refine their strategy over time.
Pricing: There’s a free plan that’s available for basic use. However, for more advanced plans, pricing starts at $18.75/month and can go up to $82.50/month. Pricing increases with add-ons like additional social sets, AI credits, users.
Staying organized is key as an affiliate marketer, especially if you’re working with a team or juggling multiple brands. Project management tools like Asana, Clickup and Trello, help you manage tasks, plan campaigns, and keep track of deadlines. You can even share projects with designers, writers, or editors to keep everything running smoothly.
Asana helps you organize your projects, set deadlines, and track tasks in one clean workspace. It’s ideal for affiliate marketers who juggle multiple campaigns or work with a small team. You can plan your content calendar, assign tasks, and use timeline views to stay on track.
Pricing: Asana’s free plan covers basic project management, while premium versions unlock advanced automation and reporting tools. The paid plans start at $10.99/month per user.
ClickUp combines task management, docs, chat, and goal tracking in one platform. Affiliates can use it to plan campaigns, store affiliate program details, and manage workflows. Its dashboards give a clear overview of everything from content deadlines to income goals.
Pricing: ClickUp provides a free version with extensive features, while paid plans beginning at $7 include more integrations and automation.
Creating content regularly can be tough, especially when you run out of ideas or worry about making mistakes. Writing assistants and idea tools like Grammarly and ChatGPT make the process easier and faster.
Grammarly helps you write clearly and confidently, ensuring your content is polished and professional. It checks your grammar, spelling, tone, and readability in real-time, making it perfect for refining blog posts, emails, and social captions. For affiliates, clear, error-free writing is essential because it builds trust with the audience and ultimately boosts conversions.
Pricing: The free plan includes basic corrections, while the Premium version adds advanced writing suggestions and starts at $12 per month.
Key Features:
ChatGPT is one of the most popular AI writing tools that helps affiliates brainstorm ideas, write product reviews, create social captions, or even outline YouTube scripts, essentially working as a powerful brainstorming partner. By assisting with writing blog posts and product descriptions and even generating SEO-optimized content, ChatGPT saves hours of time and helps affiliates stay consistent with their brand voice while managing multiple campaigns.
Pricing: A free version is accessible, along with a paid plan starting at $200 per month, which offers faster performance and more advanced tools.
When Grammarly and Chat GPT are used together, these tools help you write better, think faster, and produce more engaging content that drives clicks and conversions.
Ad Campaign Tools help affiliates create, manage, and optimize paid ads across platforms. They simplify targeting, tracking, and improving ROI. Options like AdEspresso, Google Ads Manager, and Semrush Ads Toolkit make it easy to design, test, and analyze campaigns for better conversions.
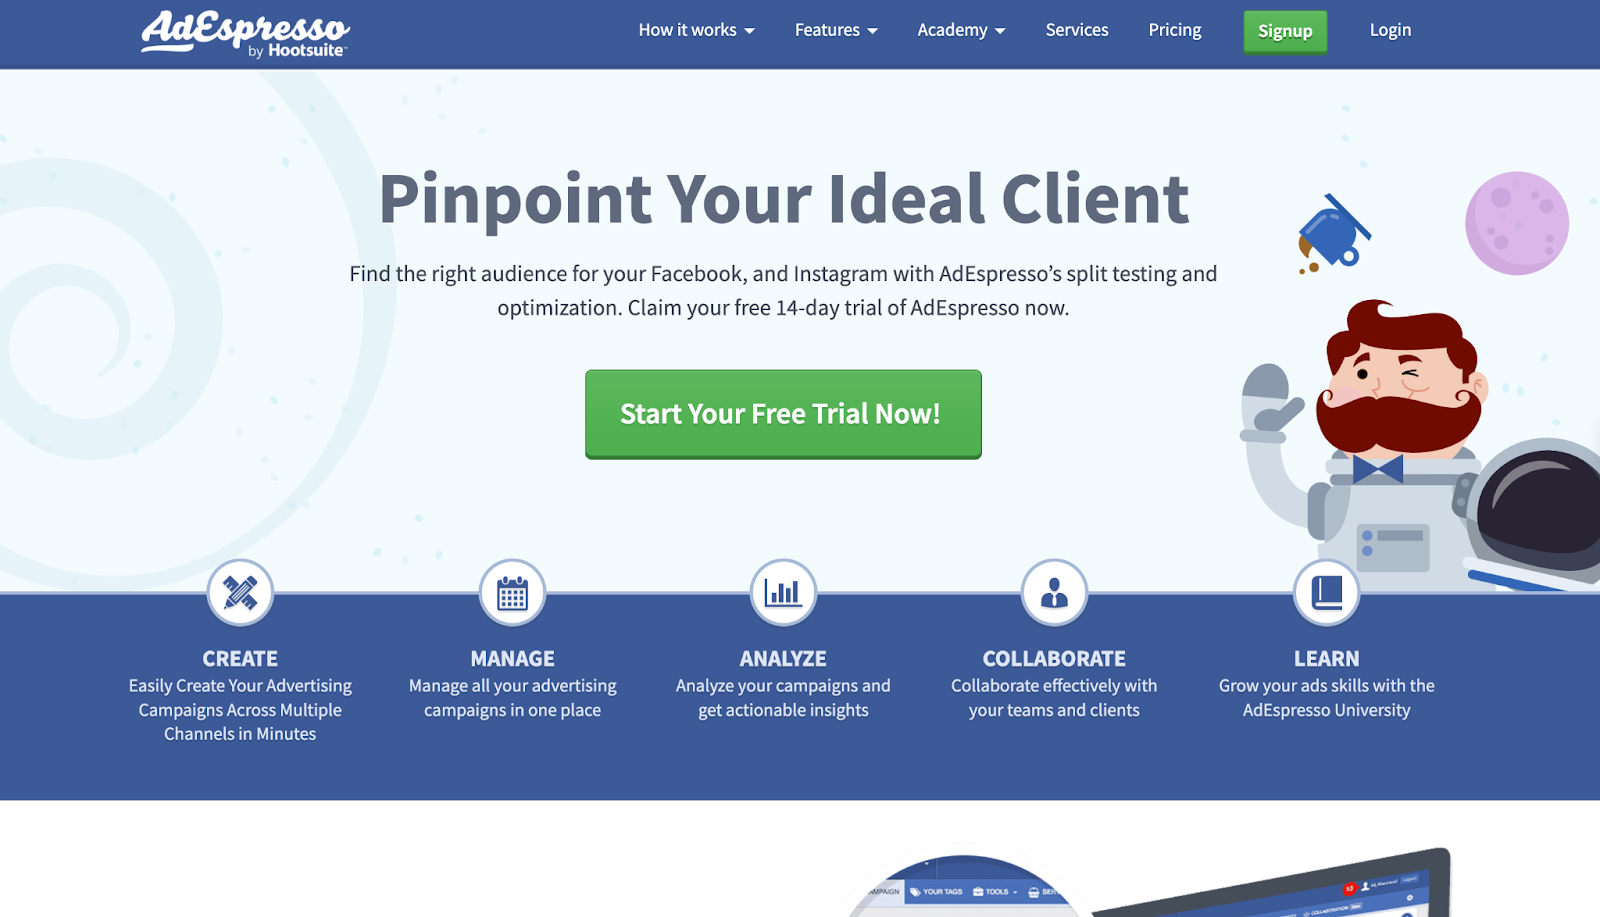
AdEspresso is an ad management tool that helps marketers and affiliates create, test, and optimize campaigns on Facebook, Instagram, and Google from one dashboard. Affiliates can use A/B testing to experiment with creatives, headlines, and audiences, while smart optimization tips and detailed analytics help improve campaign performance and conversions. It also integrates with other tools and CRMs for easier lead management.
Pricing: Pricing starts at $49 per month, and all plans include a 14-day free trial for new users.
When building your affiliate marketing strategy, start with essential tools for content creation, analytics, and link management. Choose tools based on your audience. YouTubers need video and SEO tools, bloggers need keyword research and writing assistants, and social media creators benefit from scheduling and engagement tools.
Use Mainstack as your foundation for link management and analytics. It organizes affiliate links, tracks clicks, and measures performance in one clean dashboard.
1. What tools do I need to start affiliate marketing?
You’ll need a link management tool like Mainstack, a content tool for creating posts (like Canva), and a traffic or analytics tool such as Google Analytics or Semrush.
2. What’s the best free tool for affiliate tracking?
Mainstack is a great free option. It helps you organize affiliate links, monitor clicks, and see performance insights in one place.
3. Can I start affiliate marketing without a website?
Yes. You can use platforms like TikTok, YouTube, or Instagram and share your affiliate links through a Mainstack link-in-bio or custom storefront page.
4. What’s a good tool for promoting affiliate links on social media?
Buffer and Later help you schedule and manage affiliate content across platforms like Instagram, X (Twitter), and TikTok.
5. How do I find good affiliate products or programs?
You can discover affiliate programs through Mainstack, Amazon Associates, ClickBank, or Impact. Always check for reliable payouts and product quality.

Let’s be honest, everyone wants to make money while they sleep. And in 2025, affiliate marketing makes that dream more realistic than ever. If you’ve been asking yourself how to start affiliate marketing in 2025, this guide is your blueprint.
Most people start affiliate marketing as a side hustle and eventually grow it into a thriving business. The best part? It requires little to no startup capital, just your commitment, consistency, and the right product with an irresistible offer.
Whether you’re a content creator, coach, or complete beginner, we’ll show you how to pick a niche, find the best programs, and build a system that earns money even when you’re offline.
Affiliate marketing is a performance-based marketing model where an individual promotes another person's product or services and earns a commission for each sale made through their unique affiliate link.
Affiliate marketing operates on a simple but powerful ecosystem. It involves four main players: the merchant, the affiliate, the consumer, and the network. Each plays a key role in turning a simple recommendation into real income.
A perfect example includes people like Elizabeth Olowu and The Elevated MC who use Mainstack’s referral program to push their products.
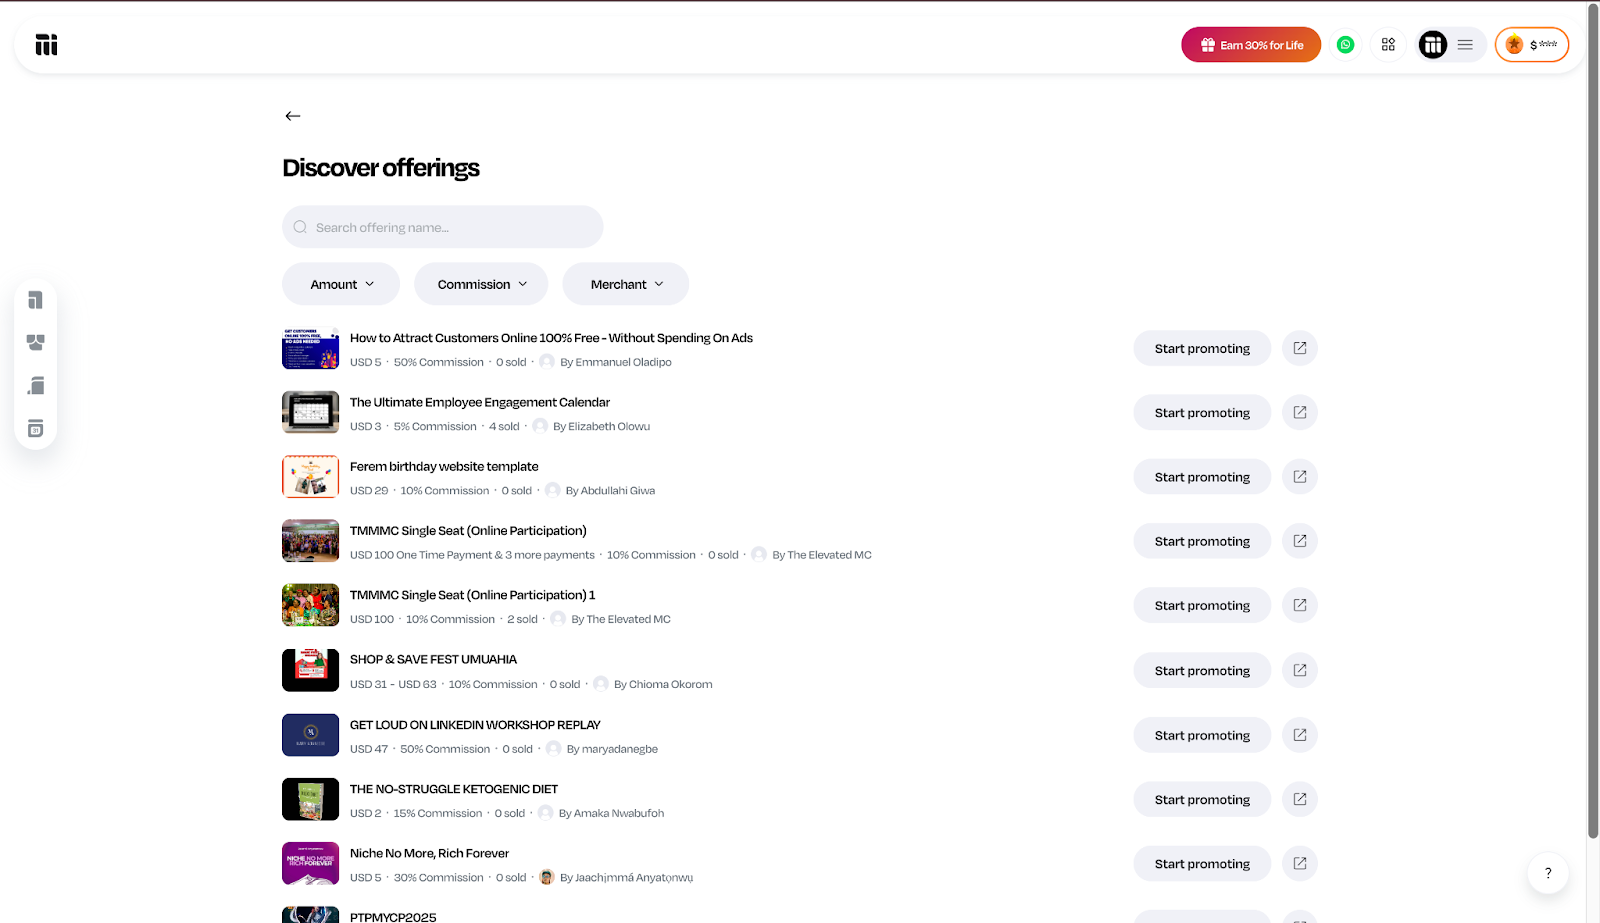

However, not all companies rely on external networks. Mainstack, for example, runs its own in-house affiliate system. This means affiliates can sign up directly on Mainstack, generate referral links, and track performance from their dashboards. Thus, no third-party platform is needed.
Affiliate marketing has transformed beyond simple website links. Now, affiliates leverage blogs, YouTube, TikTok, Instagram, and emails to promote products and earn commissions. Bloggers may compare digital tools with affiliate links, YouTubers create product tutorials with links in descriptions, and TikTok creators share engaging product demos. Email marketers also provide personalized recommendations, converting loyal subscribers into repeat customers.
If you're wondering if affiliate marketing is still profitable in 2025, the answer is yes, but it's evolved.
With the rise of the creator and influencer economy, anyone can now make money by promoting products they genuinely believe in. Whether you’re a YouTuber, blogger, or TikTok creator, it’s profitable because it’s built around freedom, creativity, and strategy. Here’s why it works so well:
Starting affiliate marketing in 2025 is easier than you think. You don’t need a large audience or costly tools—just strategy and consistency. This section covers how to set up your affiliate business, pick the right products, and earn commissions sustainably.
Choosing the right niche is key to success in affiliate marketing. It defines your audience, products, and earning potential. The best niche balances demand, relevance, and personal interest.
To pick a niche, start by focusing on topics you care about. Is it tech, lifestyle, beauty, or finance? Choose a product you believe in so your content feels authentic and builds trust. But passion alone isn’t enough. Your niche also needs to be in high demand and solve a real problem.
For example, a niche like “how to become a ghostwriter” works better because it targets people who already know what they want and are actively looking for tools, courses, or platforms to help them get started. On the other hand, a broad topic like “how to make money” might be too vague. It attracts a wide audience but rarely converts because most people are just browsing for ideas, not ready to buy.
The key is to find the sweet spot: something you're interested in, that people are looking for, and that has affiliate programs with good commissions.
Once you’ve defined that, everything else; your content, audience, and income, starts to fall into place.
After choosing your niche, the next step is finding the right affiliate programs to join. Not all programs are created equal, so it’s important to look for ones that align with your audience and offer real earning potential. Look for programs with good commissions, reliable tracking, timely payouts, and solid reputations.
Begin by looking at what successful creators in your niche are promoting; this is often an indicator of what works well. Then, compare the program structures. Check for details like:
For beginners, Mainstack offers an easy affiliate setup for creators selling digital products or services. You can generate links, track clicks, and earn up to 30% commission on each sale, which is paid monthly.

Other strong options include Amazon Associates for physical products, ClickBank for digital items, and Impact for big brands and SaaS tools.
Choose programs that align with your content and audience. Promoting products you trust builds credibility and trust drives sales.
After you've chosen your affiliate programs, the next step is to decide where you'll promote them. The best platform is determined by your strengths.
If you enjoy writing and sharing detailed insights, a blog or website is an excellent place to start. For example, successful affiliate marketers, like Wirecutter, use SEO-driven articles to review products, compare tools, and rank on Google for high-converting keywords.
This approach builds long-term visibility and passive traffic.
If you’re more comfortable on camera, YouTube is a great platform. Creators like Marques Brownlee (MKBHD) include affiliate links to products they review. Video content is great because it helps viewers see the product in action before making a decision.
For those who prefer short-form content, TikTok and Instagram are ideal for quick, engaging product demos or tips. Influencers like Erika Kullberg and Kat Norton (Miss Excel) utilize short videos to showcase products while subtly including affiliate links in captions or bios.


And if you already have an email list, newsletters can be an effective channel for affiliate promotions. Creators such as Ali Abdaal and James Clear use email to recommend products, courses, or tools they personally trust, driving high engagement and repeat clicks.
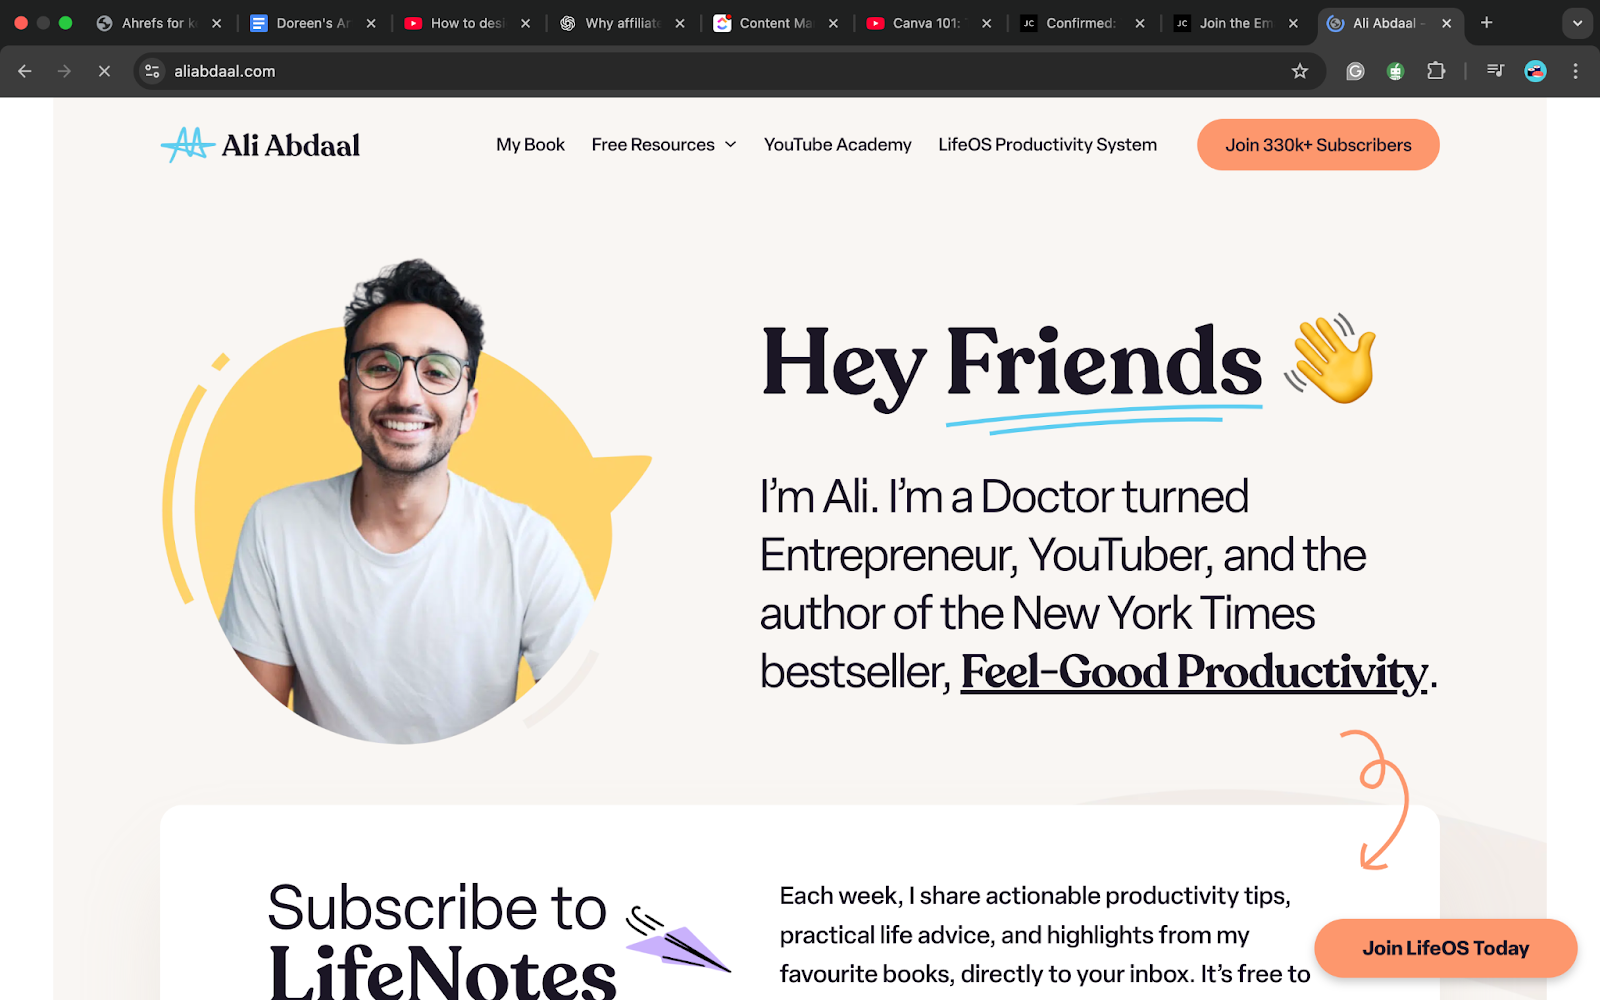
To make managing your links easier, Mainstack offers an all-in-one solution. You can create a personal link-in-bio page or digital storefront that houses all your affiliate links, products, and offers in one place.
Even better, it provides real-time analytics to track clicks and conversions, helping you see which platforms or products perform best.
Learn more: How to start Affiliate marketing on Mainstack
After choosing your niche and platform, decide which products to promote. The success of your affiliate marketing journey depends on what product you sell and how well it matches your audience’s needs.
Focus on three important factors: price, quality, and reputation. Products with favorable customer feedback and visible demand are more likely to convert. It's not just about making big commissions; it's about promoting something people will actually buy and appreciate you for recommending.
For beginners, avoid promoting too many products at once. Start small with two or three products that fit your niche, then expand as you grow. For example, designers can promote tools like Canva or Adobe Express that solve real problems.
Be authentic. Promote products you use or truly believe in. The most successful affiliates are not pushy salespeople; rather, they are helpful guides who provide real value.
Over time, you can test new offers or bundles, and consider creating your own digital products to scale further.
The success of affiliate marketing lies in creating content that informs, educates, or solves real problems. Audiences don’t respond to random product links; they want useful insights and genuine experiences.
Create content that builds trust and positions you as an authority in your niche. Some effective formats include:
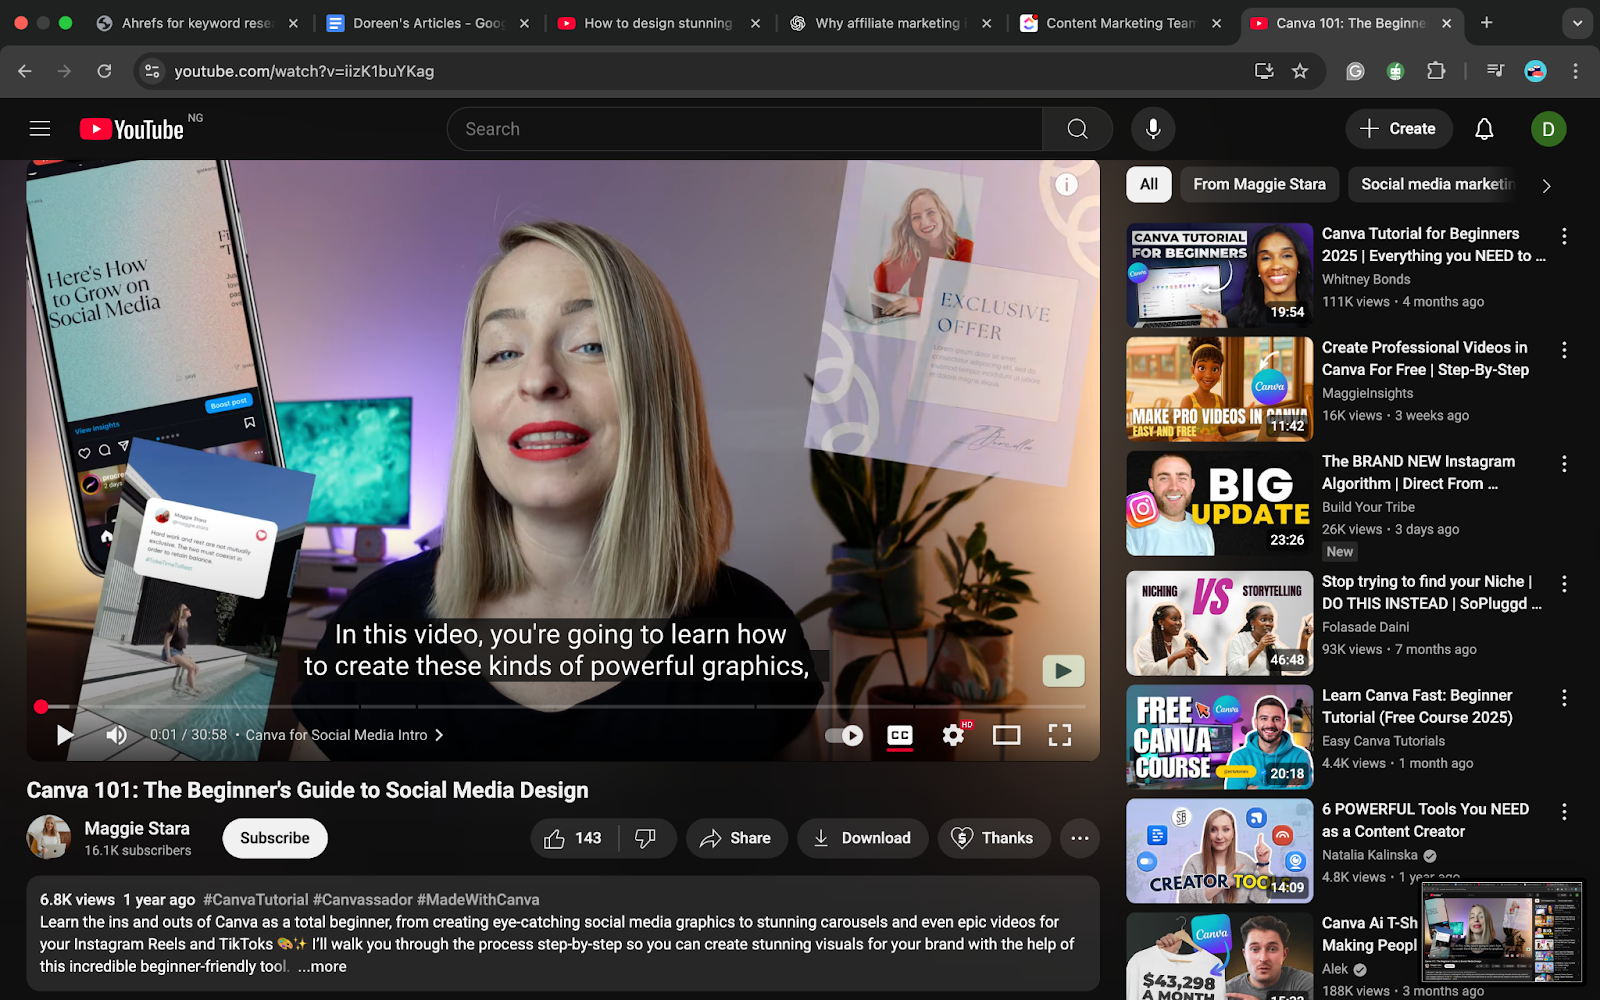
Use SEO to make your content discoverable and storytelling to make it relatable. Combine this with social media content for faster growth.
Ensure you publish consistently to keep your audience interested. The more value you deliver, the more trust you earn, and that’s what drives affiliate conversions.
Creating exceptional content is half the job; the next step is driving traffic to it. Without it, even top-notch affiliate content won’t convert.
There are both free and paid methods to drive traffic, and most beginners start with the free options before scaling up.
Master free strategies first to learn what works. For example, you can optimize for SEO to rank on Google or YouTube, share short tutorials or demos on Pinterest or TikTok, and use email marketing to send tips and recommendations to subscribers.
Once you gain traction, scale with paid promotion for faster growth. Test paid options like Instagram, Facebook, or Google Ads to reach targeted audiences, or collaborate with influencers for wider exposure.
Tracking performance separates hobbyists from serious affiliate marketers. After publishing your content, monitor clicks, conversions, and earnings. Ideally, your affiliate platform should have a dashboard to help you monitor this. You can also use tools like Google Analytics to track content and channels that drive results.
For instance, a “Top 10 Tools for Remote Work” post might outperform tutorials, or TikTok videos might convert better than emails. Use this data to refine what works; adjust link placement, update calls to action, or test new products.
Treat affiliate marketing as an ongoing experiment. Review data regularly, optimize top links, and refine strategy to increase conversions and income over time.
Many beginners rush into affiliate marketing without a strategy. One common mistake is promoting too many products at once, which makes content feel cluttered and less trustworthy.
Neglecting content quality also hurts sales; the best products won’t sell if your message isn’t valuable or actionable. Always disclose affiliate links to stay credible, and be patient; consistent effort is what leads to steady income.
Affiliate marketing isn’t about luck. It requires strategy, perseverance, and the use of the appropriate tools. The beauty of it lies in its flexibility: you can build a business from your laptop, promote products you already love, and earn while you sleep.
Every post, video, or email you share is an opportunity to grow your influence and your income.
If you want an easy way to organize your affiliate links, host products, and track clicks in one place, Mainstack gives you the structure you need to turn your ideas into income.

As more businesses find ways to thrive in a crowded market, the best digital marketing tools in 2025 provide smarter, faster, and more efficient methods to reach customers.
What began as manual tracking and guesswork has now evolved into powerful systems that streamline every stage of marketing. This evolution enables startups and established brands to compete and grow in meaningful ways.
This guide will give a complete, step-by-step plan and downloadable checklist to help you choose the right tools, set up effective strategies, and track your progress with ease.
Digital marketing tools are online platforms, apps, or software that help businesses plan, manage, and measure their marketing strategies across channels like social media, email, SEO, content, and advertising to boost engagement, generate leads, and increase sales.
Digital marketing tools make life easier by automating repetitive tasks such as post scheduling, email distribution, and campaign tracking. Instead of getting overwhelmed with manual tasks, you have more time to focus on the creative aspects of growing your business.
They also provide real-time feedback on what works and what doesn't. With clear data on customer behavior and campaign performance, it's much easier to make better decisions that are impactful to your business.
With how fast the business world is moving, the right tools can help your brand stand out. Whether it's personalizing your messages or reaching the right audience faster, they give you an advantage over businesses that still rely on traditional methods.
And the best part? They’re often far more affordable than traditional marketing. Small businesses can now benefit from effective tools without breaking the bank, making online growth more accessible than ever. Traditional marketing, on the other hand, usually involves methods like print ads, billboards, TV, or radio spots, all of which are costly and difficult to track.
For example, a small bakery wanting to advertise through a newspaper ad might spend hundreds of dollars for just a single placement, with no clear way to measure how many people actually came in because of it. With digital marketing tools, that same bakery could run targeted social media ads for a fraction of the price, track clicks and conversions in real time, and adjust the campaign instantly to get better results.
With many options available, the right tool depends on your marketing goals. Here’s a list of top digital marketing tools by category to help you find what fits your business.
For creators who want everything in one place, all-in-one tools make it easier to manage content, grow an audience, and track performance without juggling multiple platforms.
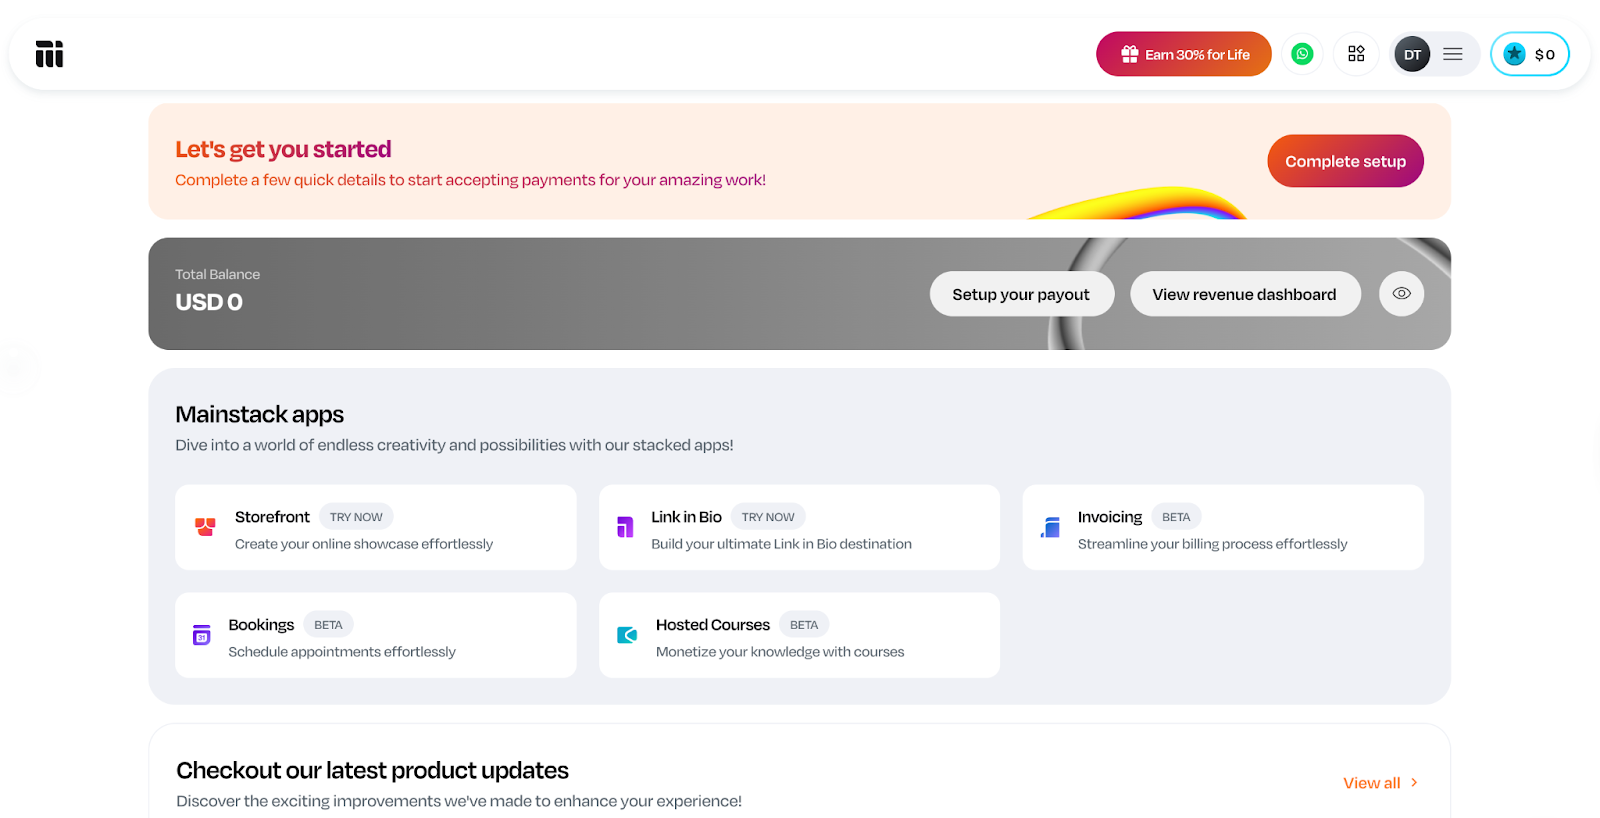
Mainstack is an all-in-one platform for creators, entrepreneurs, and small businesses to build landing pages, showcase products, and sell directly to their audience. It enables you to transform your online presence into a monetizable hub without the need for multiple tools, making it ideal for anyone who wants to manage everything in one place.
Some of its standout features include customizable landing pages, a built-in storefront for both digital and physical products, and an analytics dashboard that tracks audience engagement. It also comes with payment integrations for seamless sales and a simple link-in-bio option that works perfectly across social platforms.
Mainstack offers a free plan with core features, making it accessible to beginners. The platform supports flexible payment options, including one-time fees, subscriptions, pay-what-you-want models, and even crypto payments in over 135 currencies. The icing of the cake is that Mainstack doesn’t charge monthly fees. It only collects a small 3% platform fee when you earn, so you keep more of your revenue.
SEO and content marketing tools help businesses attract the right audience and rank higher on search engines. They simplify keyword research, on-page optimization, and content planning to improve results.
Ahrefs is a leading SEO platform for keyword research, backlink analysis, and competitor insights. Its free tools let you generate up to 150 keyword ideas, check difficulty, and track rankings. This makes it ideal for small businesses or individuals starting out.
Ahrefs is known for its accurate data and keyword precision, which gives marketers better keywords to target. The downside, however, is that you need a paid plan to unlock advanced features like detailed backlink reports or larger keyword volumes, which can be pricey.
Regardless, the upgrade unlocks one of the most powerful SEO suites on the market.
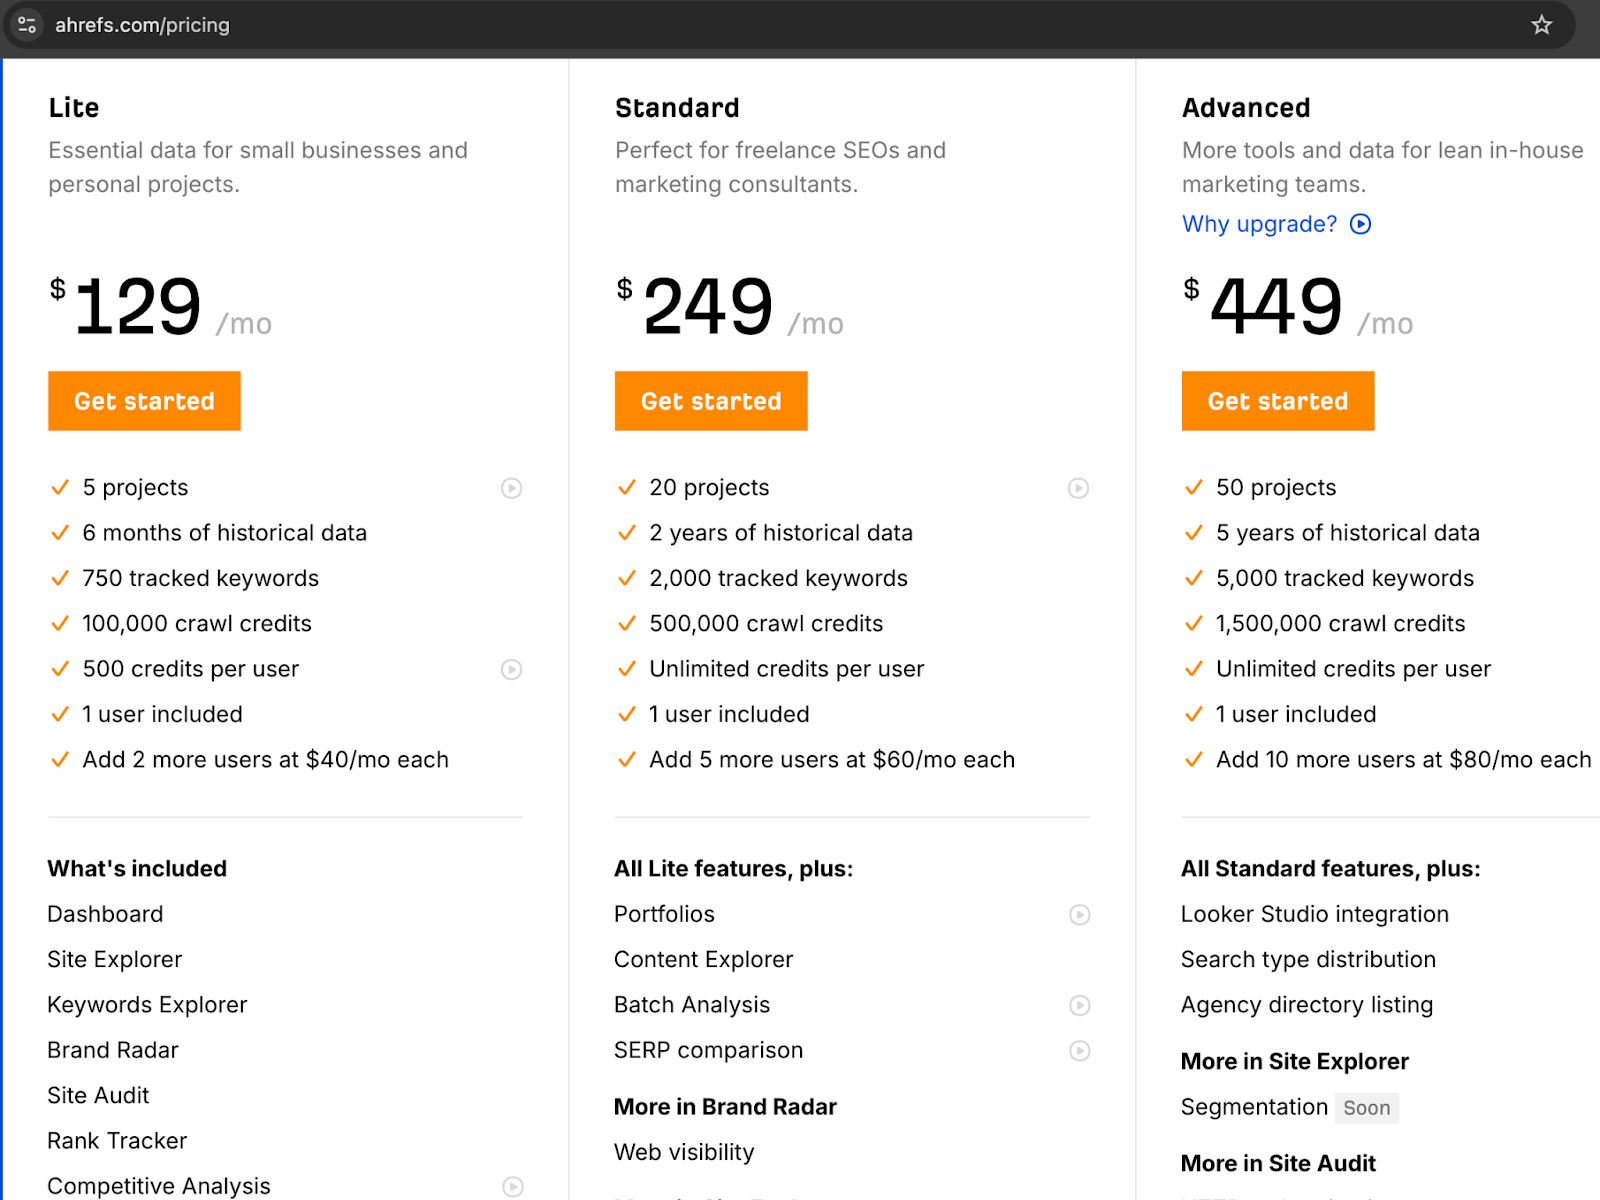
Pricing: Free; paid plans start at $129/month.

If you want to carry out a detailed competitor analysis, then Semrush is the best tool for that. It gives you a clear picture of who your competitors are, which keywords they rank for, where their traffic comes from, and what ads they run.
This makes it a powerful tool to find strategy gaps and new growth opportunities.
While using Semrush is great, its wide range of insights can be overwhelming for beginners. Also, pricing may be high for small teams. However, for businesses ready to take SEO and digital marketing seriously, Semrush provides exceptional value.
Pricing: Free trial available; paid plans start at $139/month.
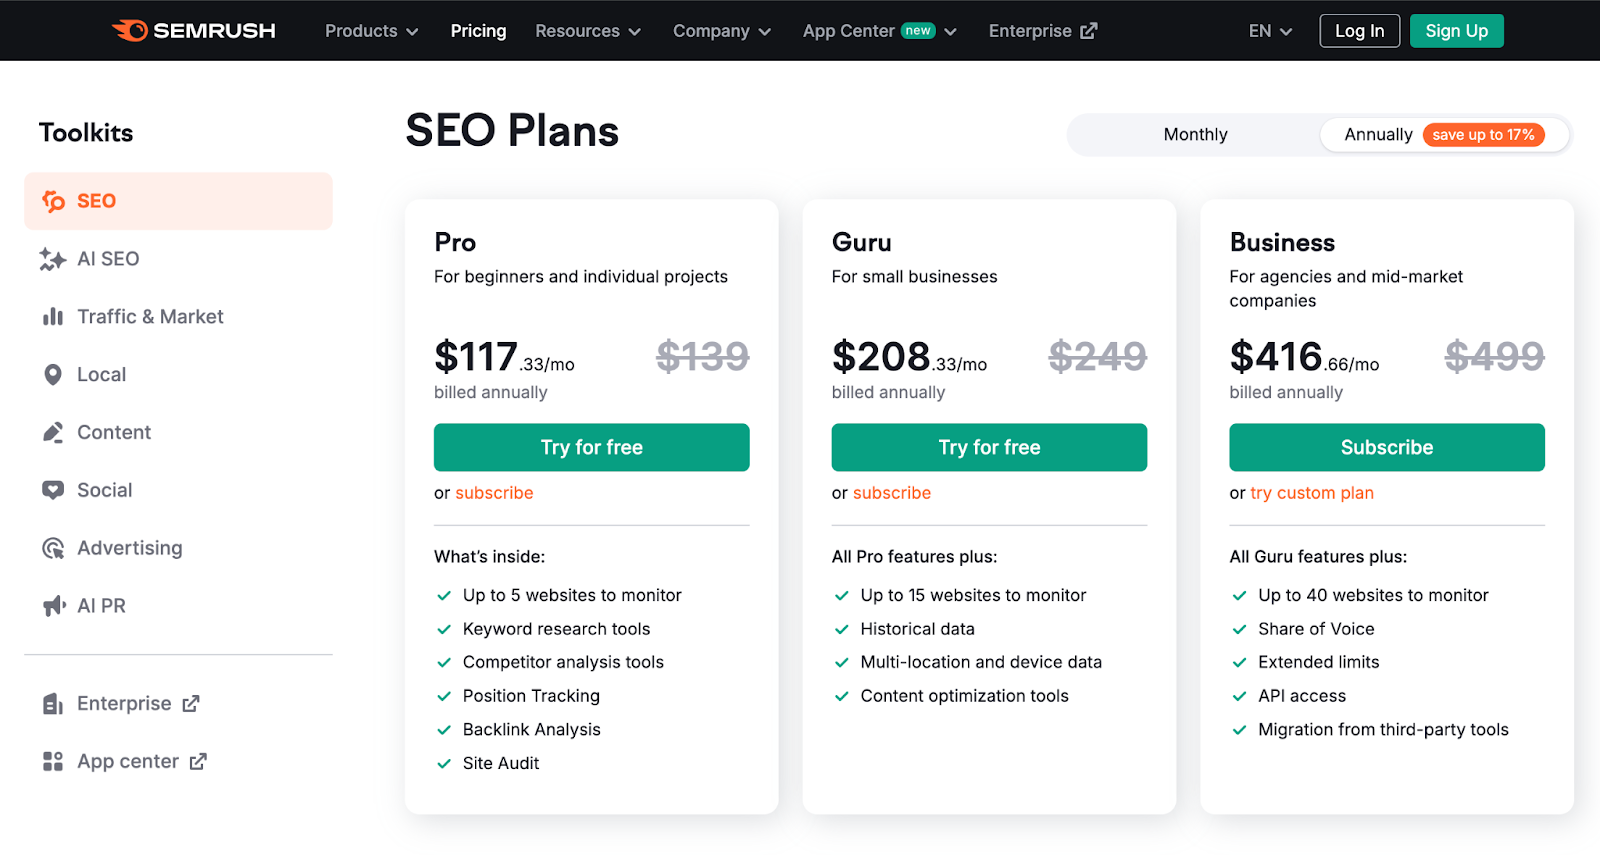
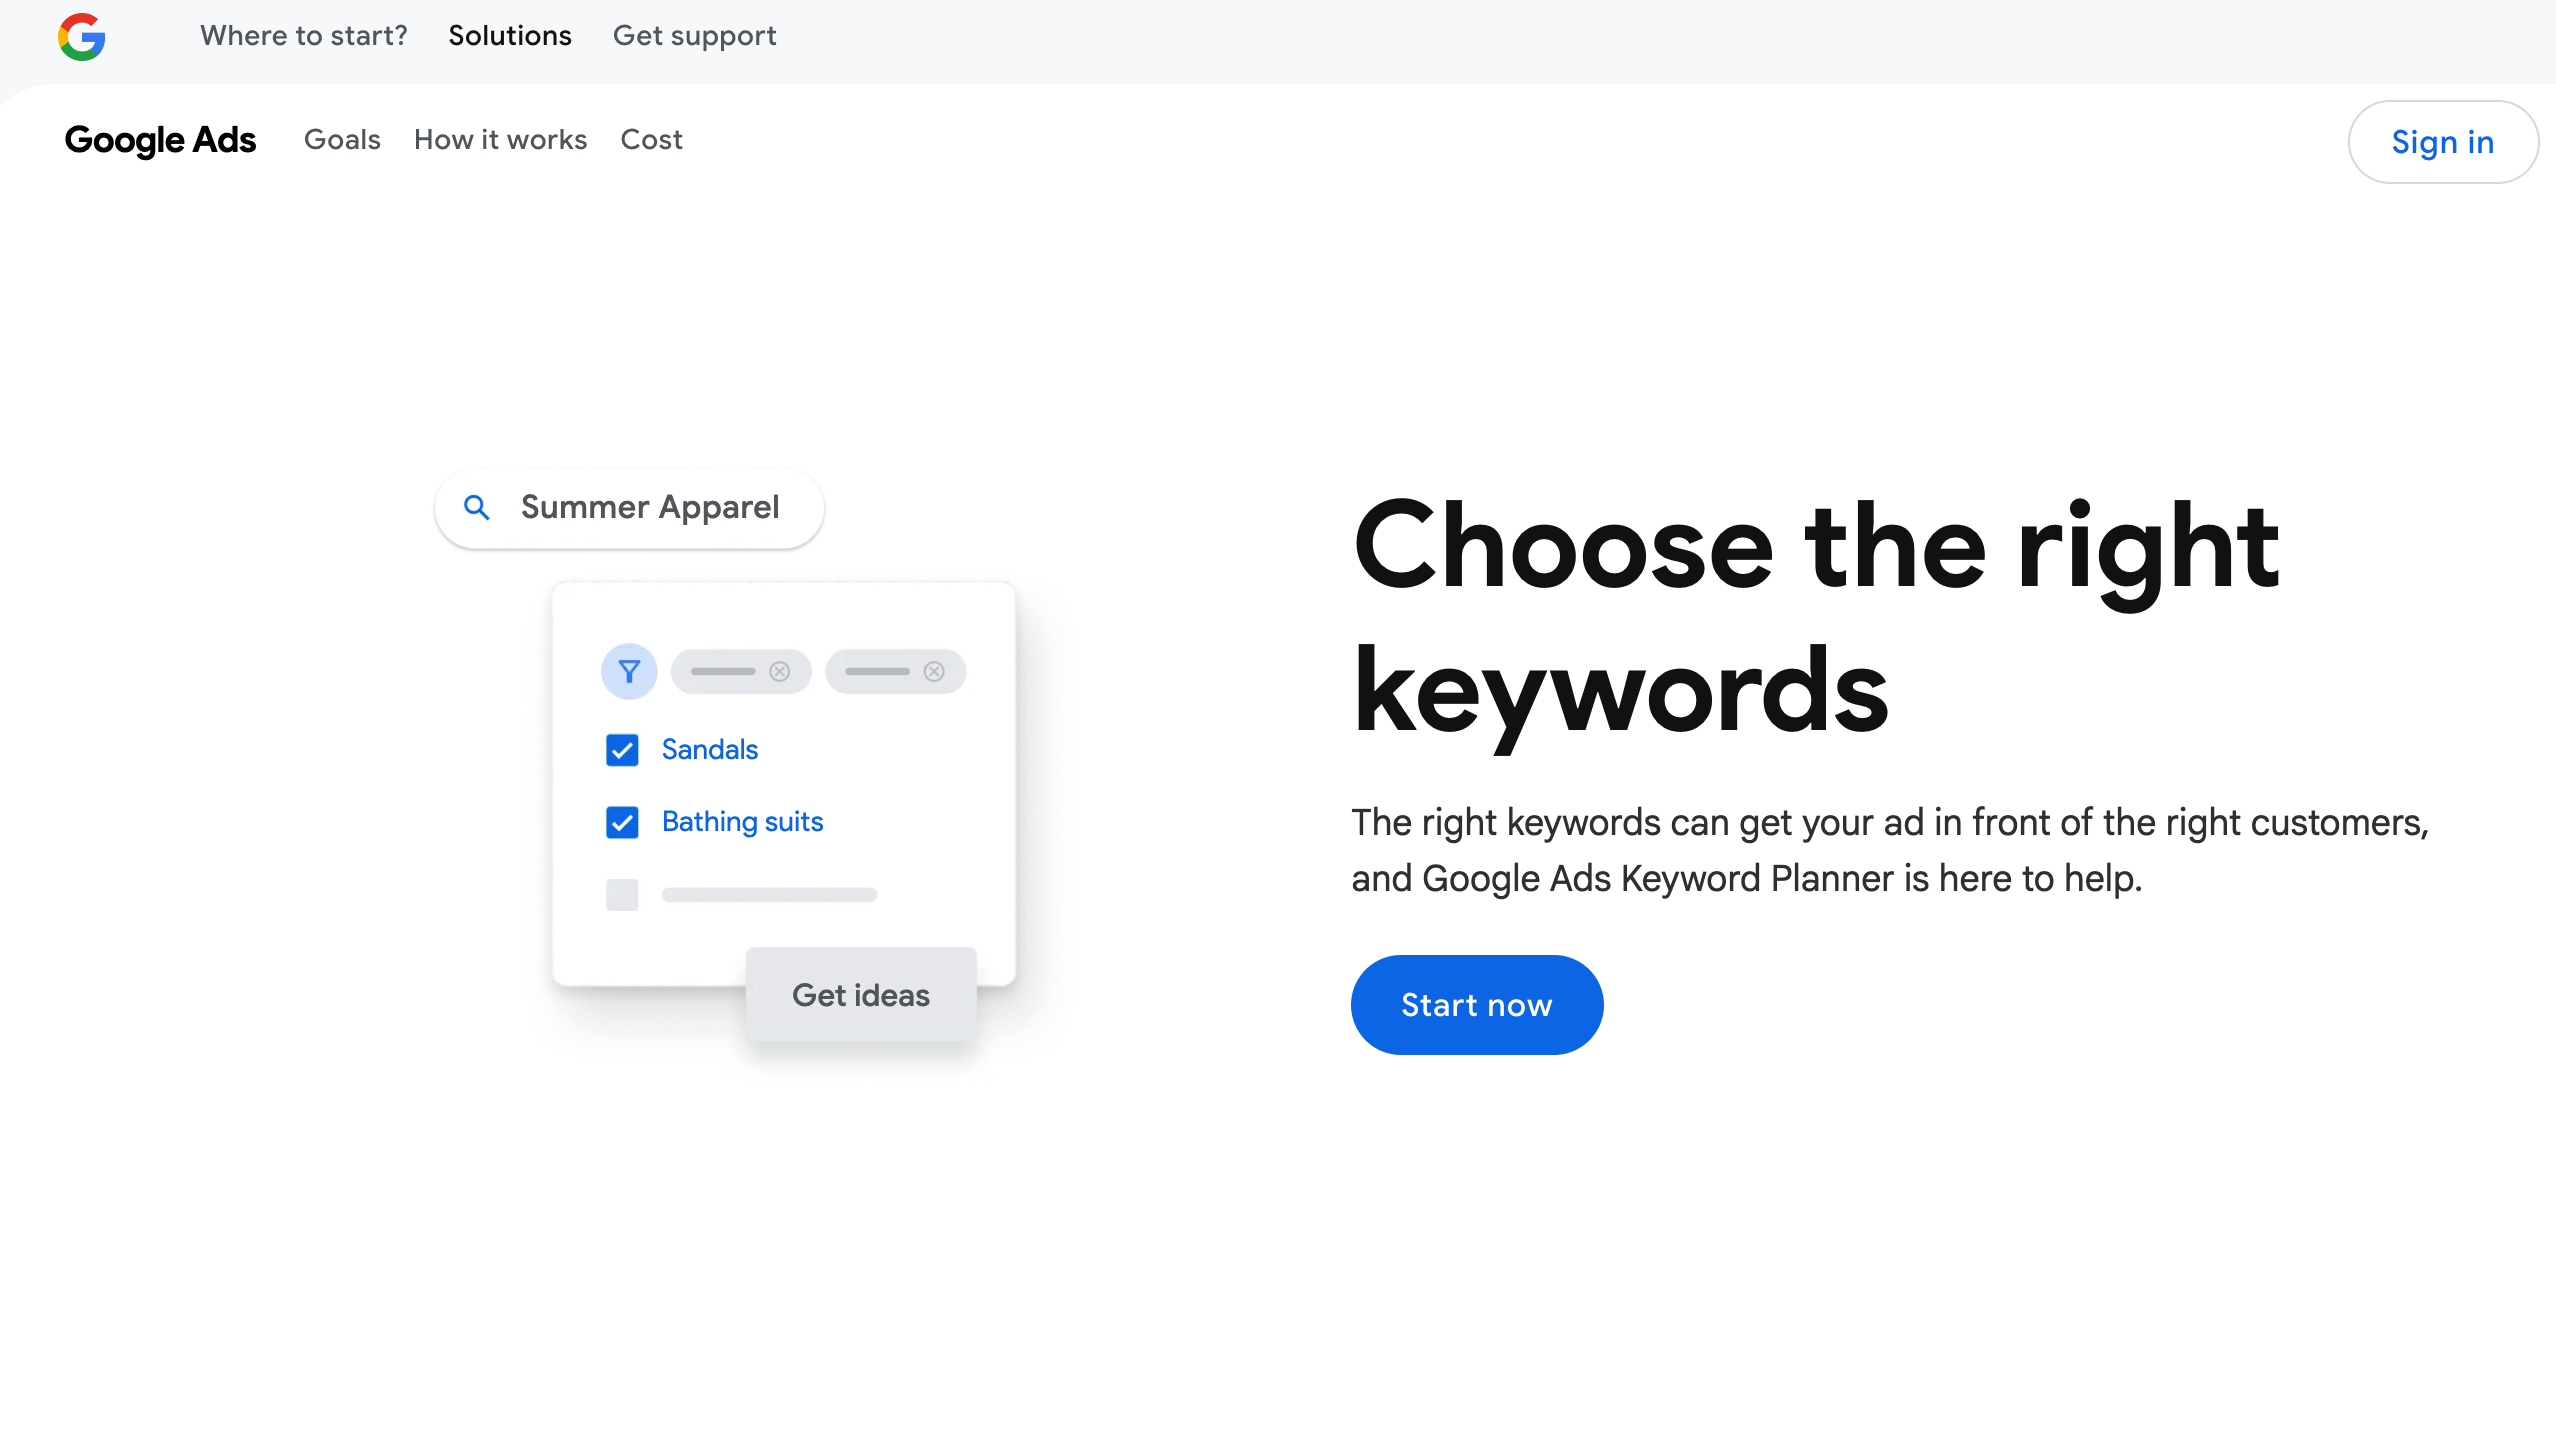
Google Keyword Planner is a solid free tool for basic keyword research. Originally built for Google Ads, it lets you find keyword ideas, search volumes, and competition levels using data directly from Google. It’s less detailed than paid tools like Ahrefs or Semrush but great for getting started on a budget.
Managing multiple social accounts is time-consuming, but social media tools help by scheduling posts, tracking performance, and boosting engagement. Here’s how the top options compare:
Buffer is a simple social media tool for scheduling and publishing posts across Facebook, Instagram, LinkedIn, and X (Twitter). Its clean interface makes it ideal for small businesses and creators who want an easy way to stay consistent.
While Buffer’s free and lower-tier plans offer only basic analytics, its paid plans include more in-depth performance insights. Where it really shines, though, is in reliable, straightforward scheduling that keeps your content organized and on time.
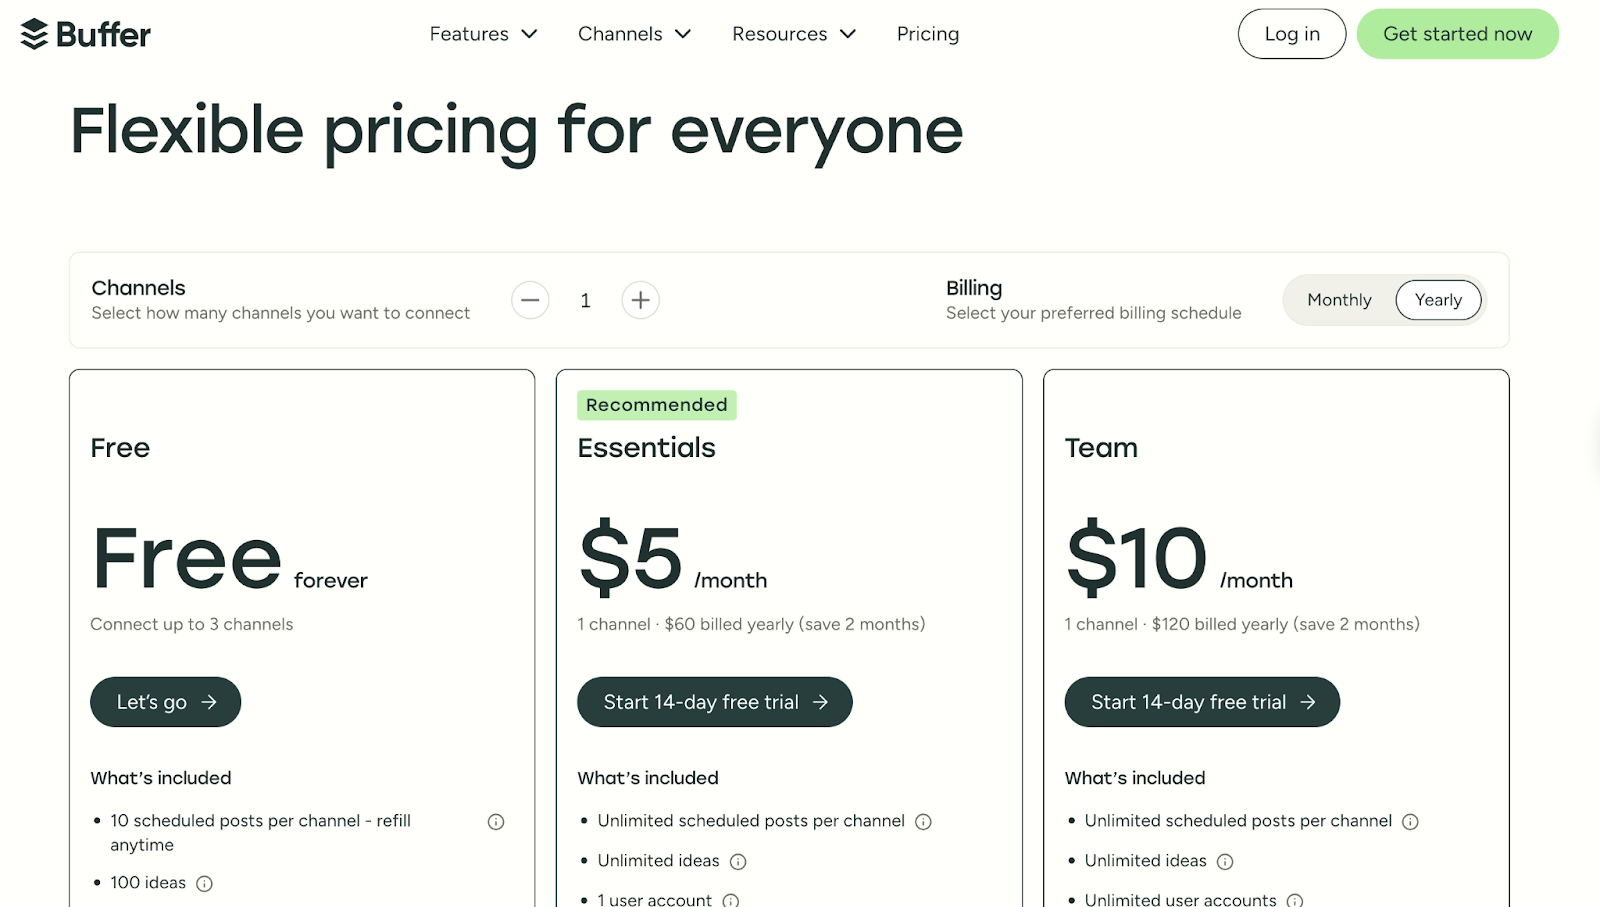
Pricing: Free plan available; paid plans start at $5/month per channel.
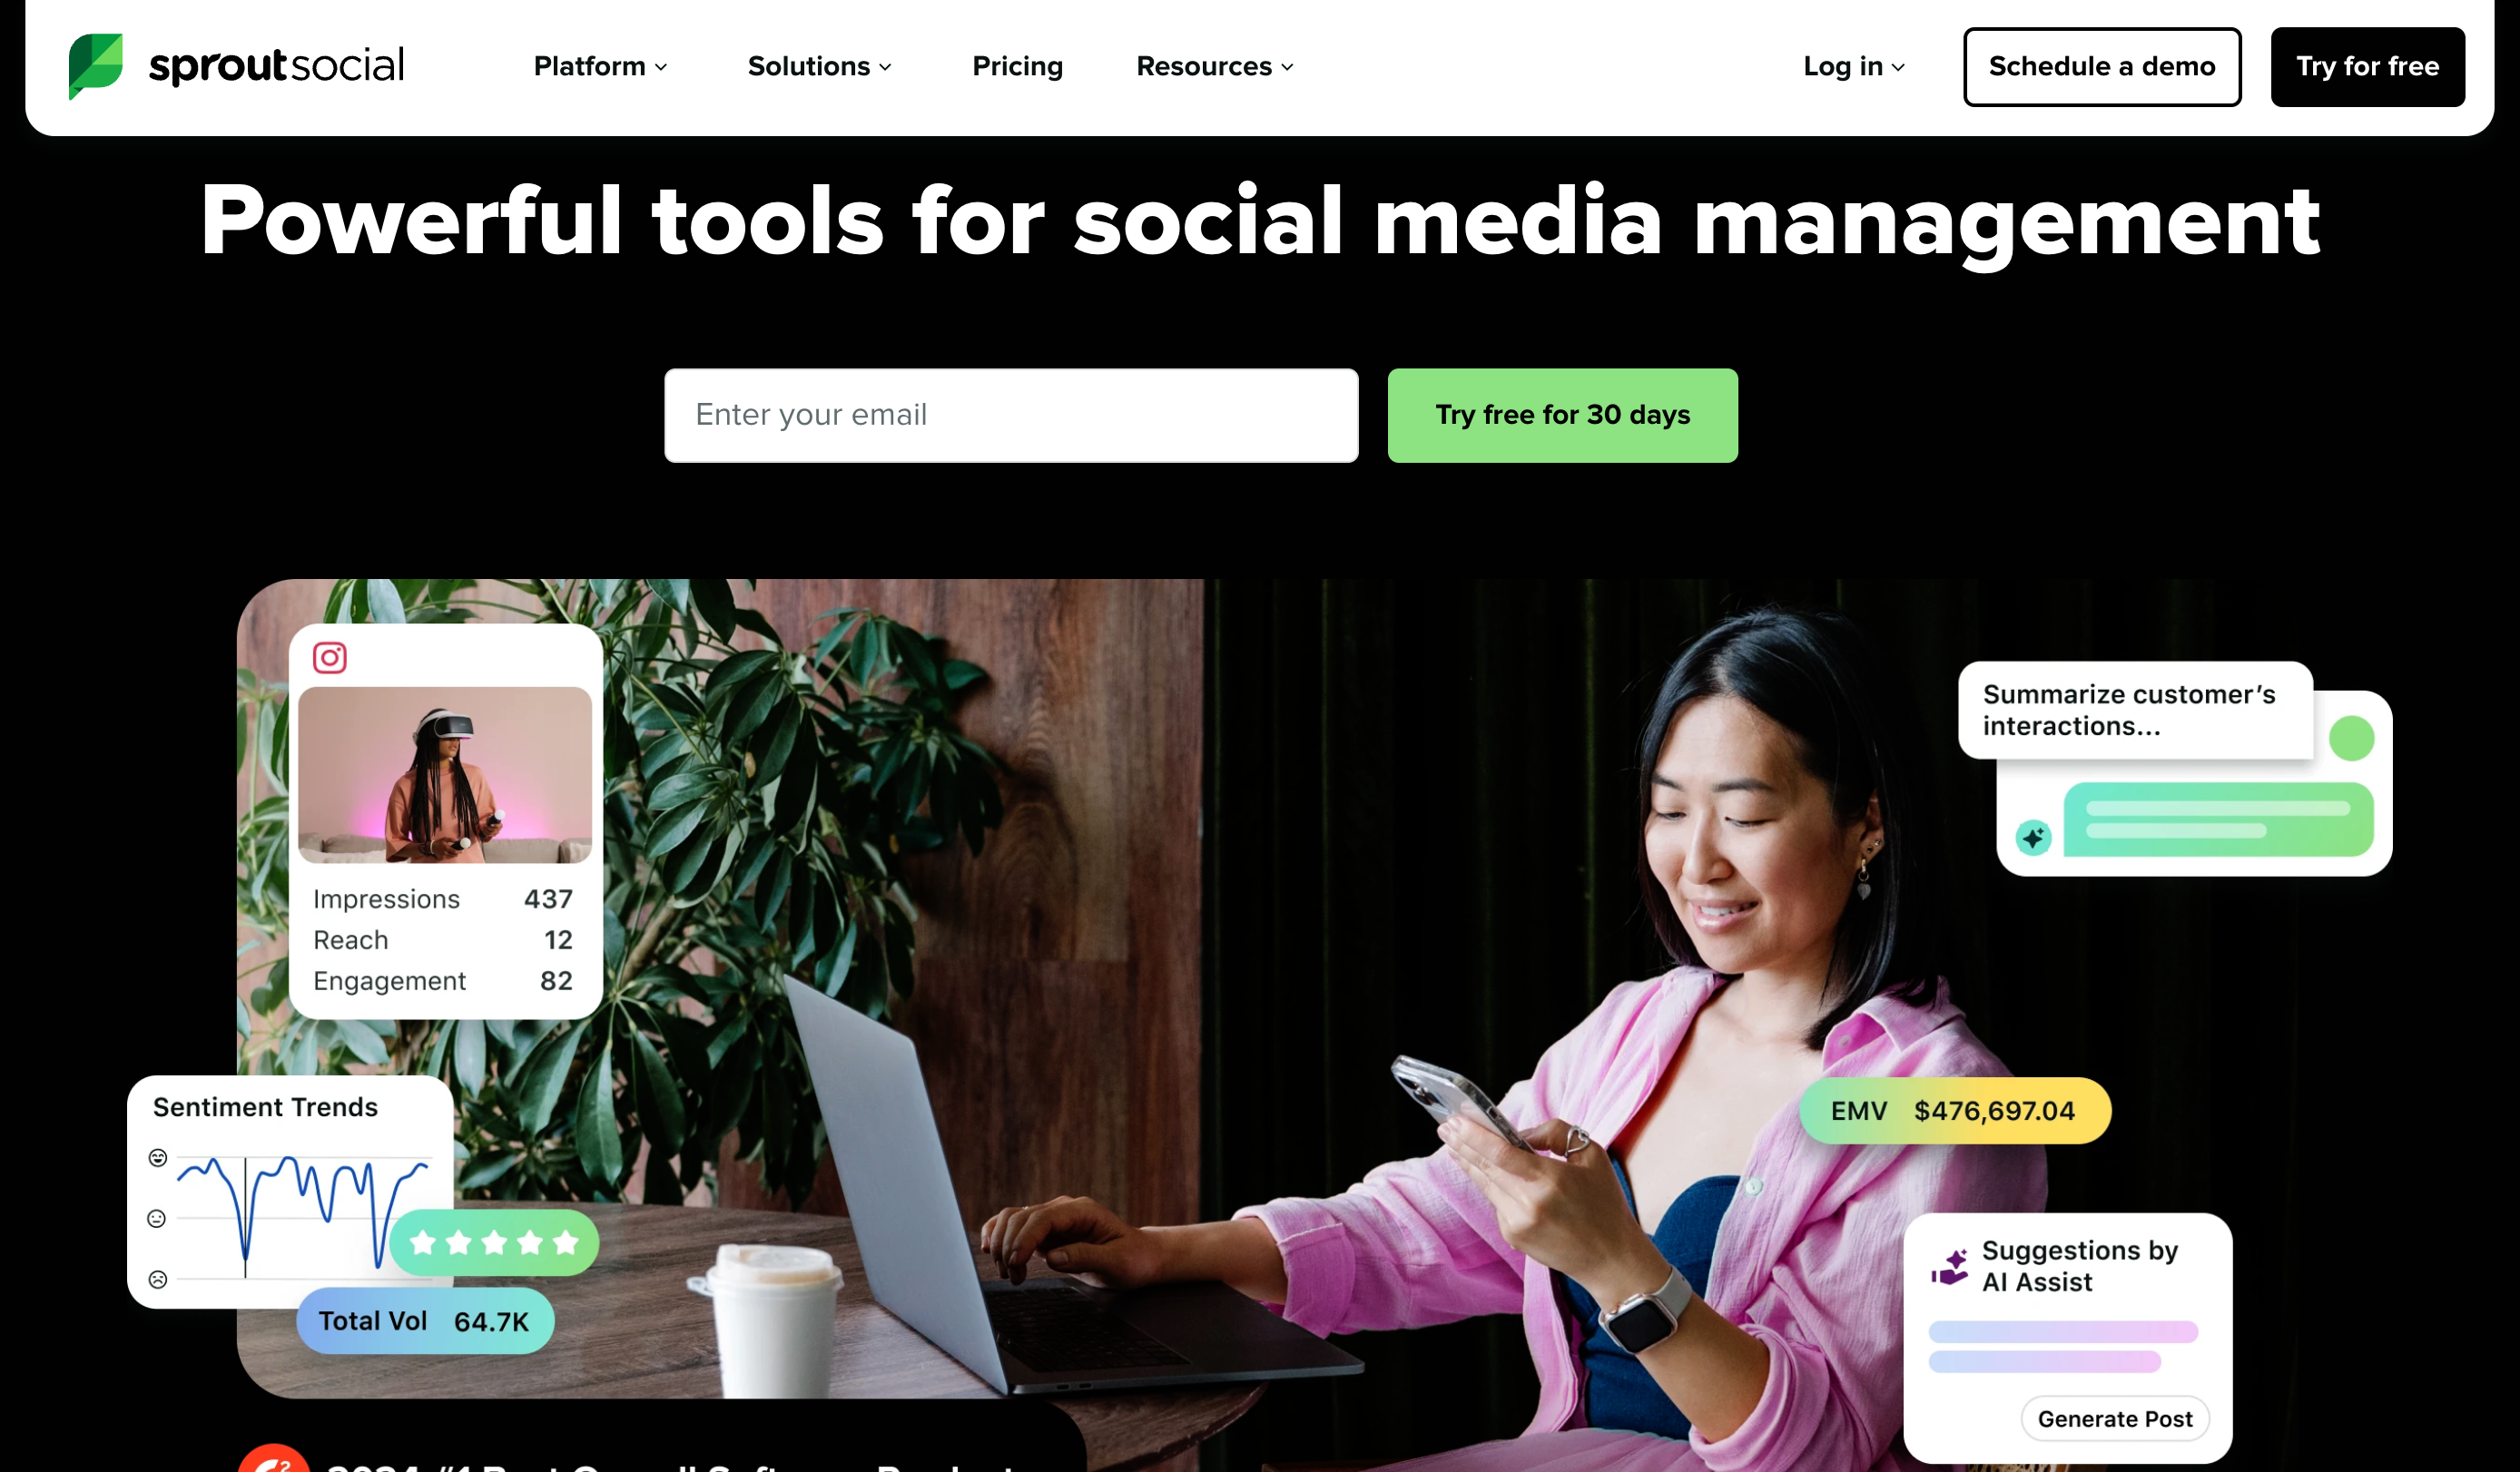
Sprout Social is a powerful social media tool with advanced analytics, detailed reporting, and engagement features. It’s ideal for teams and agencies that want to track campaign performance and make data-driven decisions.
What makes Sprout Social stand out is the quality of its insights. You can track audience growth, engagement trends, and campaign performance in detail, all while collaborating with your team on one platform. The downside of using Sprout Social is that it comes at a higher cost, which may be challenging for small businesses.
Pricing: Free trial available; paid plans start at $249/month.
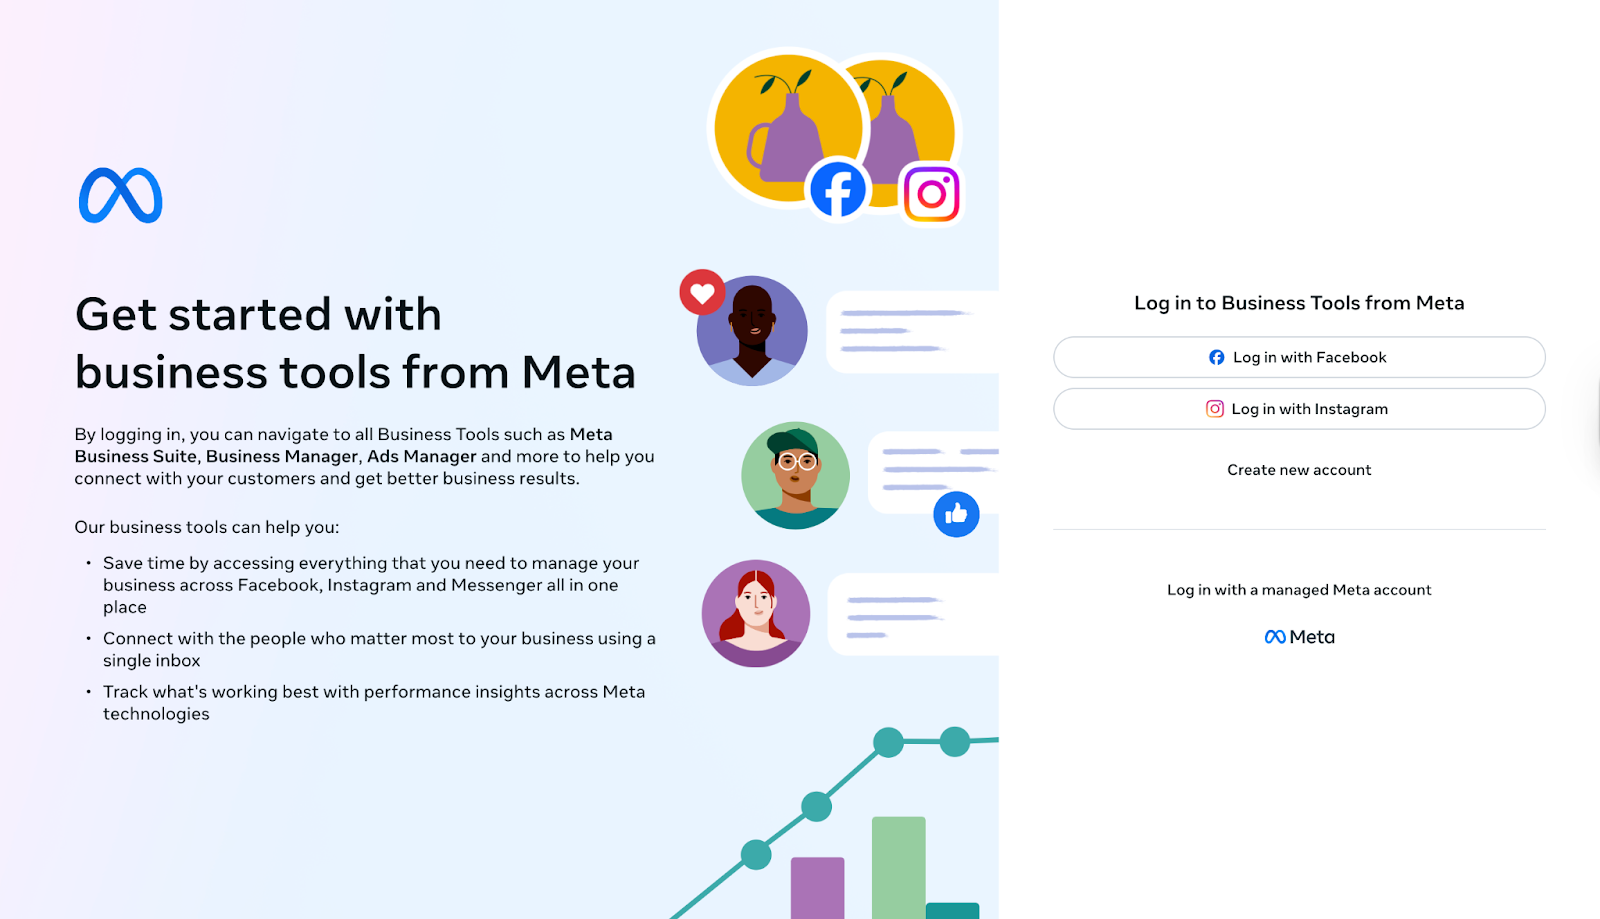
If you’re not ready to invest in a paid scheduling tool, Meta Business Suite is a great free option. Designed for Facebook and Instagram, it lets you plan and schedule posts, reply to messages, and check performance insights, all from one dashboard.
While it’s limited to Meta platforms, it’s surprisingly effective for small businesses, creators, and entrepreneurs who mainly use Facebook and Instagram to reach their audience. You can manage both accounts in one place without needing extra tools, making it a simple, no-cost way to stay consistent online.
Email marketing tools help businesses send campaigns, automate follow-ups, segment audiences, and personalize content. The right choice depends on your audience size and goals.
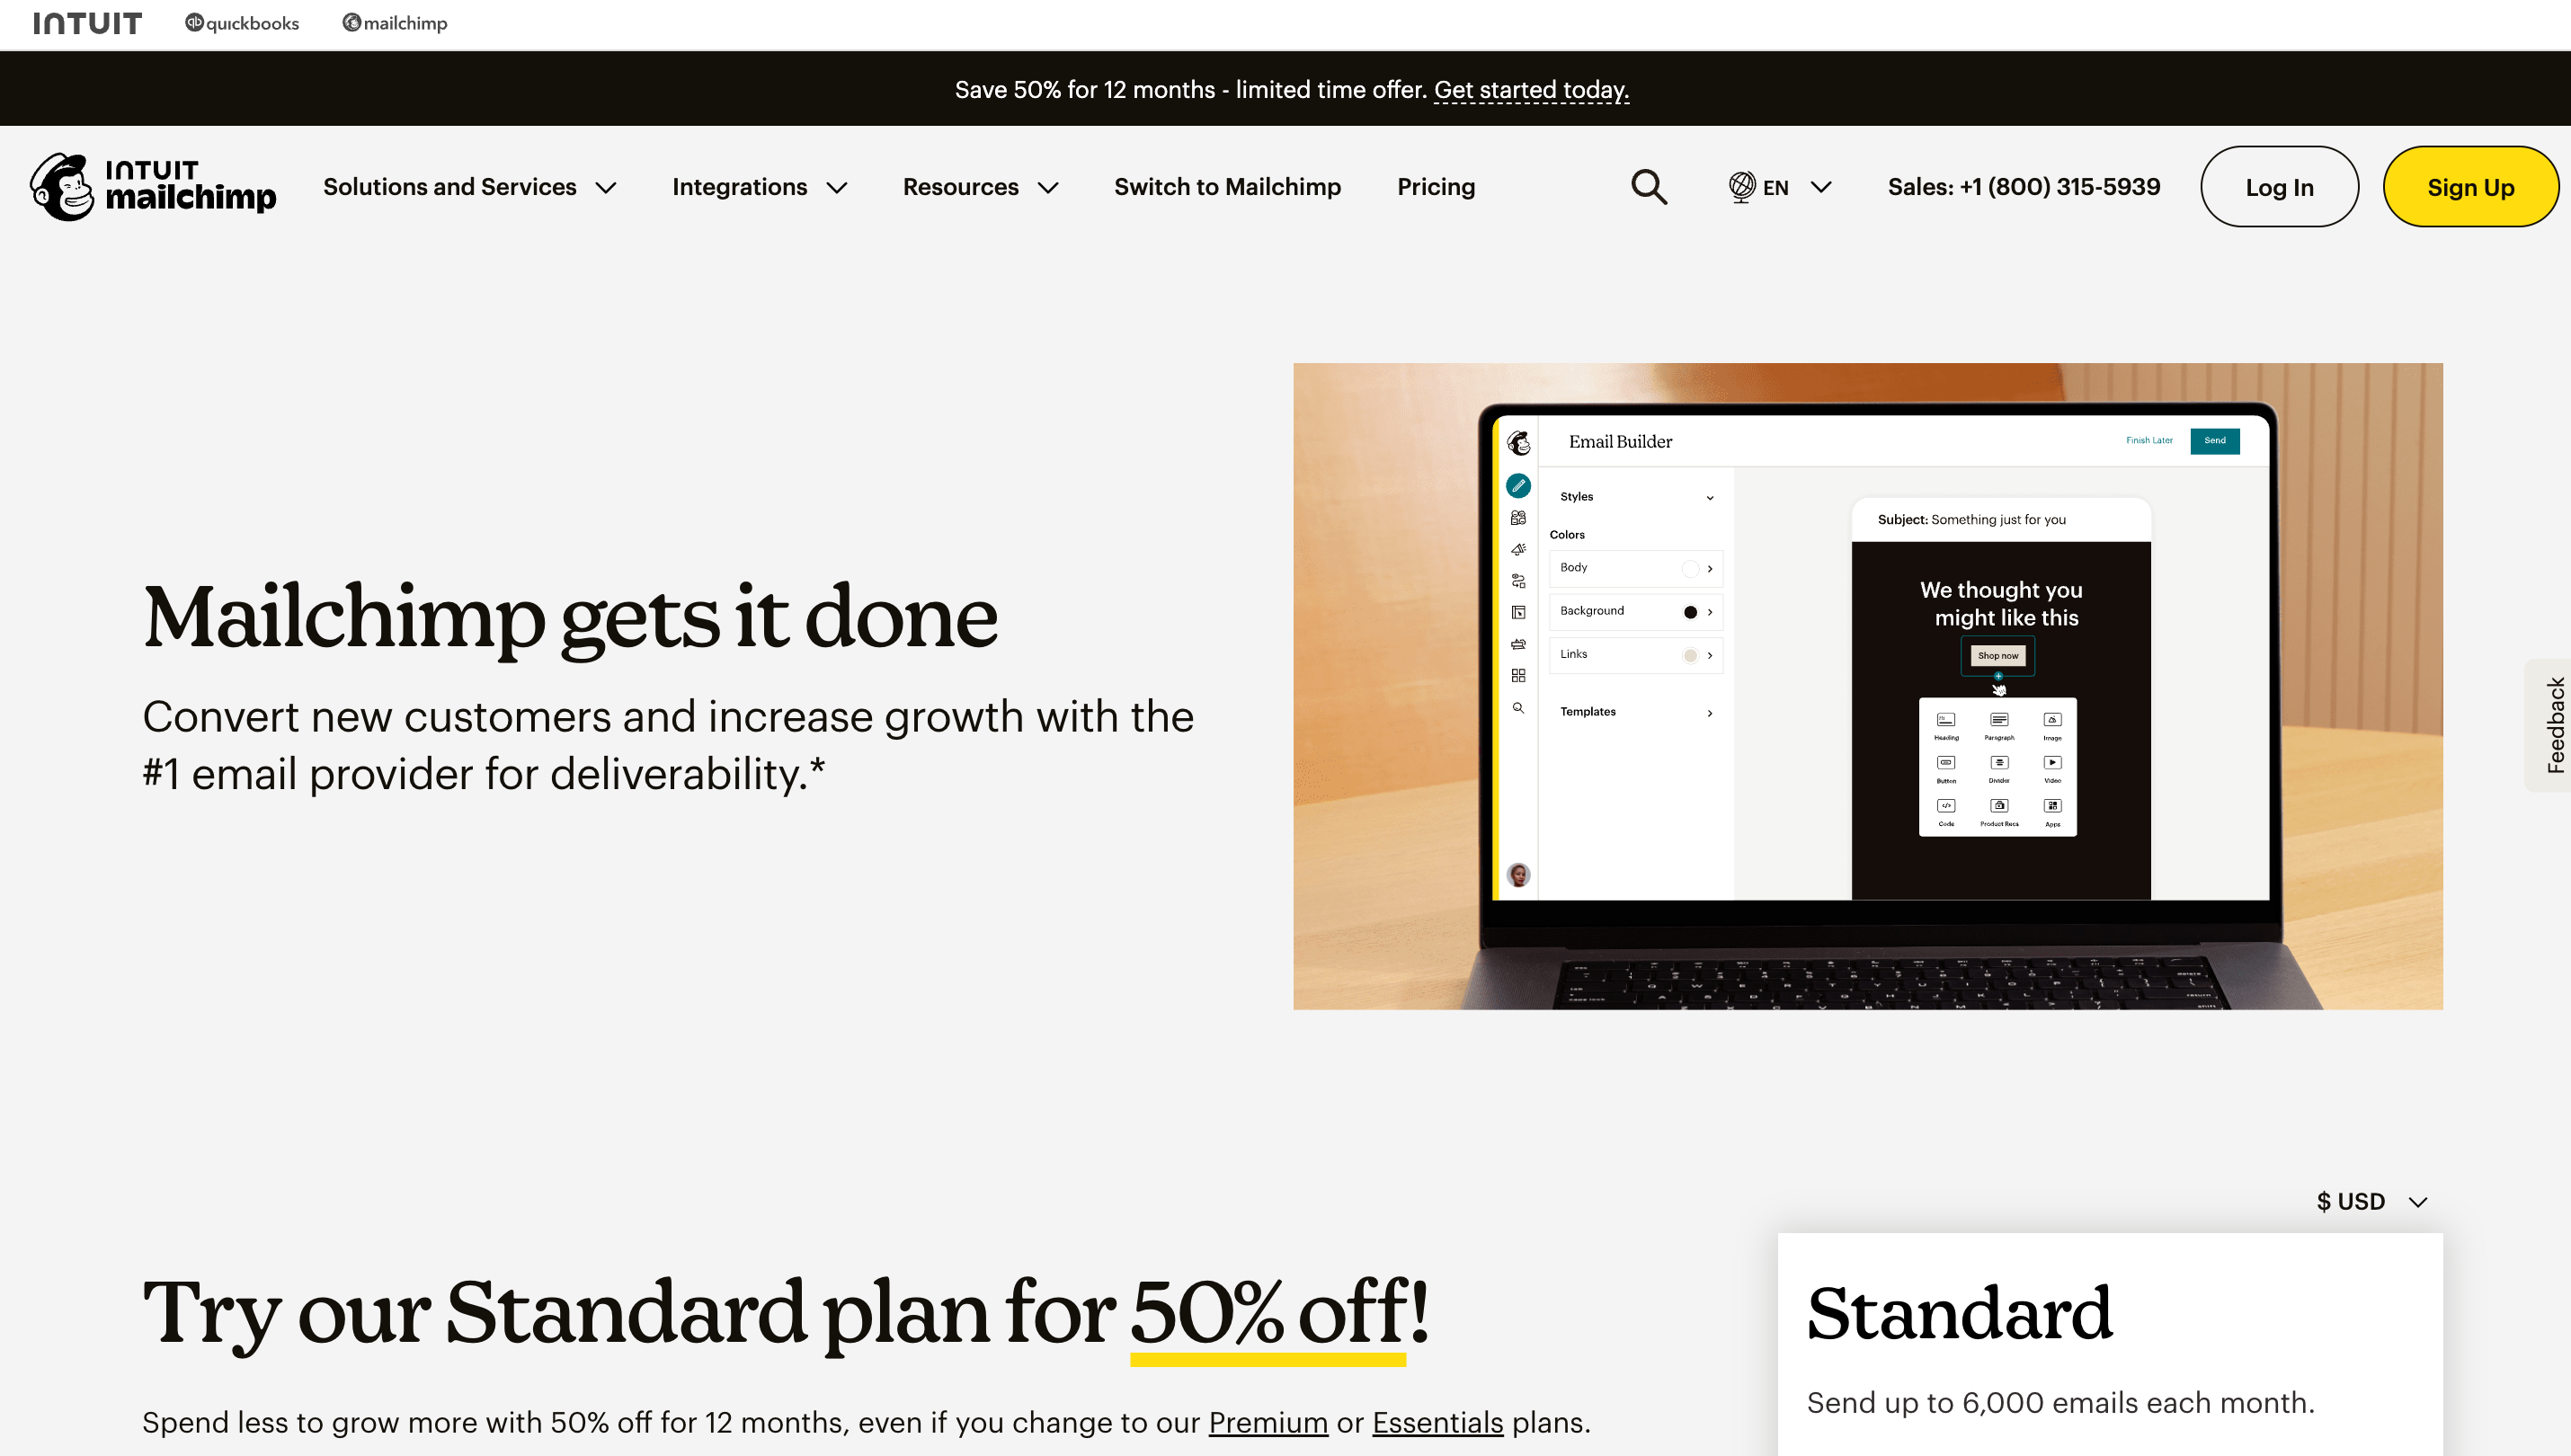
Mailchimp is known for its ease of use and range of features, from drag-and-drop email builders to automation workflows and audience segmentation. It’s great for managing campaigns in one place: from design to copy to planning to tracking analytics.
The free plan is generous, but pricing scales as your subscriber list grows.
Pricing: Free plan available; paid plans start at $13/month.
.png)
One advantage of using Kit is how it supports audience growth and monetization. You can tag and organize subscribers based on their actions, build custom sequences, and nurture leads without needing advanced technical skills.
While its email templates are minimal, it offers an efficient system for growing and monetizing your audience.
Pricing: Free plan available for up to 1,000 subscribers; paid plans start at $15/month.
MailerLite is a lightweight, budget-friendly option that still covers essential features like automation, landing pages, and sign-up forms. It’s particularly appealing to small businesses or beginners who want a straightforward way to run email campaigns without complexity.
Pricing: Free plan available for up to 500 subscribers; paid plans start at $9/month.
Analytics tools help businesses understand how campaigns perform, how users behave on websites or apps, and where to improve to maximize ROI. Here are some analytics tools:
Google Analytics 4 (GA4) is the go-to tool for tracking website traffic, conversions, and user behavior. It helps you understand where visitors are coming from, how they interact with your content, and which channels drive the most revenue. While it’s powerful, the setup can feel complex for beginners.
Pricing: Free.
Hotjar takes analytics further by providing heatmaps, session recordings, and user feedback tools. Instead of just numbers, you can see exactly how people click, scroll, and interact with your website, making it easier to spot usability issues and optimize conversions.
Pricing: Free plan available; paid plans start at $32/month.
AI tools are transforming digital marketing by helping businesses create content faster, personalize messaging, and make smarter predictions about customer behavior.
Jasper AI specializes in generating blog posts, ad copy, and marketing emails using AI. It’s trained on marketing frameworks and tones, making it a solid choice for brands that want polished, conversion-focused writing at scale.
Pricing: Plans start at $59/month.

Great marketing requires visuals that capture attention, and design tools make it easy for anyone even without design skills to create professional-looking graphics and campaigns.
Canva is one of the most popular design tools, offering templates for social media, presentations, ads, and more. It is so beginner-friendly that anyone could work around the already existing templates and create a masterpiece. Its drag-and-drop interface makes it simple for non-designers, and the free version is robust enough for most small business needs.
Pricing: Free plan available; Canva Pro starts at $12.99/month.
Figma is a design tool built for collaboration. Teams can create, edit, and comment on designs in real time, making it perfect for marketers working with designers or agencies. It’s especially useful for UI/UX projects and campaign mockups.
Pricing: Free plan available; paid plans start at $5/month depending on the collab, dev or dull seat..
Running paid ad campaigns requires precise targeting, careful budgeting, and clear tracking to make sure every dollar counts. Paid Ads and PPC tools simplify campaign management, measure ROI, and help businesses reach the right audiences faster.
Google Ads is the most widely used platform for pay-per-click advertising. It allows businesses to bid on keywords and display ads at the top of search results, reaching customers at the exact moment they’re searching for solutions. Its strength is intent-driven traffic, though competition for popular keywords can make costs high.
Pricing: Pay-per-click model, no fixed monthly fee.
Pricing: Flexible budget; pay-per-click or impression.
With so many moving parts in digital marketing, project management tools help teams stay organized, collaborate smoothly, and ensure campaigns launch on time.
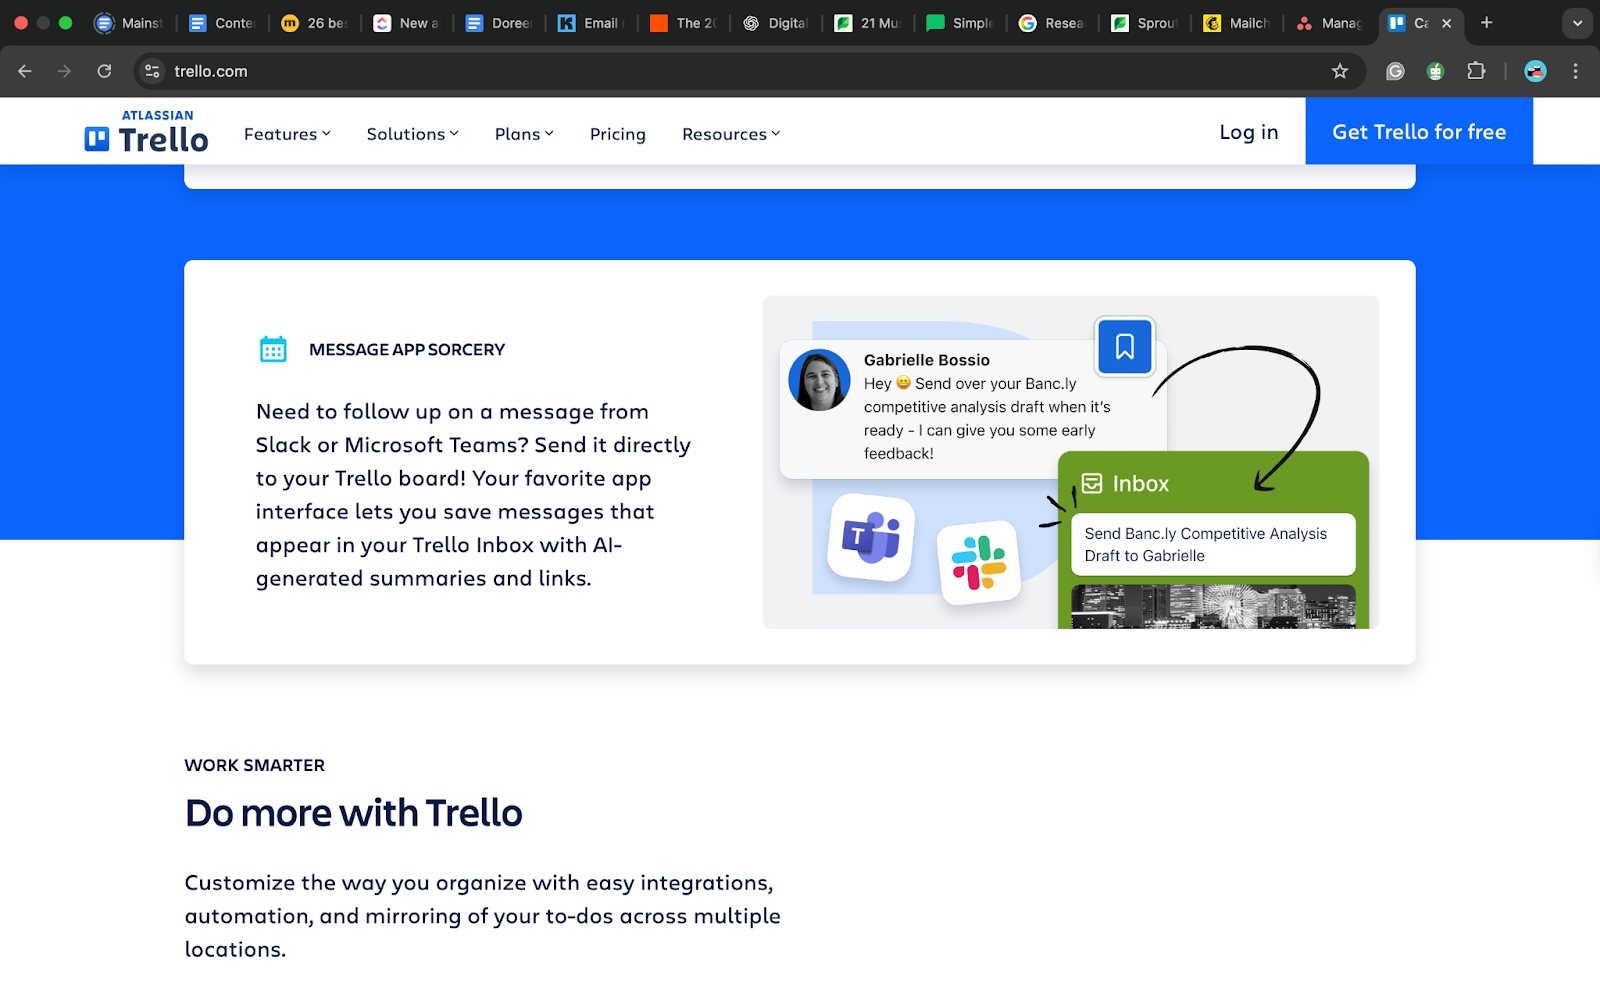
Trello uses boards, lists, and cards to organize tasks in a highly visual way. It’s simple, flexible, and perfect for small teams that want to manage campaigns, brainstorm ideas, or track workflows without overwhelming features.
Pricing: Free plan is available; paid plans start at $5/month per user.
Asana is more than just a to-do list. It’s a collaboration tool that helps teams stay organized and finish big projects on time. You can use it to see how tasks connect (called dependencies), view everything on a clear timeline, and start new projects quickly with ready-made templates. This makes it perfect for marketing or creative teams that handle tons of campaigns and deadlines at once.
Asana integrates with more than 200 applications, including Google Workspace, Slack, and Microsoft Teams, eliminating the need to switch between different programs.
You can add custom fields to track what matters most to your team, and use workload tools to see who’s busy and who has time to help. Automation saves time by handling small, repetitive jobs automatically. Plus, Asana now includes smart AI helpers that can spot delays, suggest next steps, and keep projects running smoothly.
Pricing: Free plan available; paid plans start at $10.99/month per user.
Using digital marketing tools effectively goes beyond just signing up. To maximize results, review analytics regularly and adjust strategies based on real data. Automate repetitive tasks like emails, scheduling, and reporting to free up more time for creativity and strategy.
Combine tools for a full stack. For example, you can pair analytics with email automation or project management with social scheduling to create a more powerful marketing system.
At the end of the day, marketing tools are there to make life easier, not harder. Start small; choose two or three that address your biggest needs, like audience growth, time savings, or better content, and expand as you grow.
Looking for an all-in-one digital marketing solution built for creators? Mainstack lets you host digital products, track analytics, and manage engagement, all from one simple dashboard.
Every day, people are monetising at scale and generating revenue globally- not because they launched a business, but because they started sharing links. While you’re still planning your next move, others are already earning from products that aren’t even theirs.
The window is wide open right now. The first set of affiliates is getting in early, securing the audience, and grabbing attention that’ll look unreal in a few weeks. You can either watch the numbers grow or be the one getting paid from them.
You already know how powerful Mainstack is - now imagine earning every time someone buys from it. No products to create. No barriers. Just your voice, your reach, and a link that makes you money.
Here’s how to start:
From your Mainstack dashboard, click your display picture and select Affiliate Program.

On the affiliate dashboard, click the “Discover Offerings” button. You’ll see a list of products from different merchants that you can promote to earn commissions.

Browse through the available products. You can filter them by amount, commission rate, or merchant.
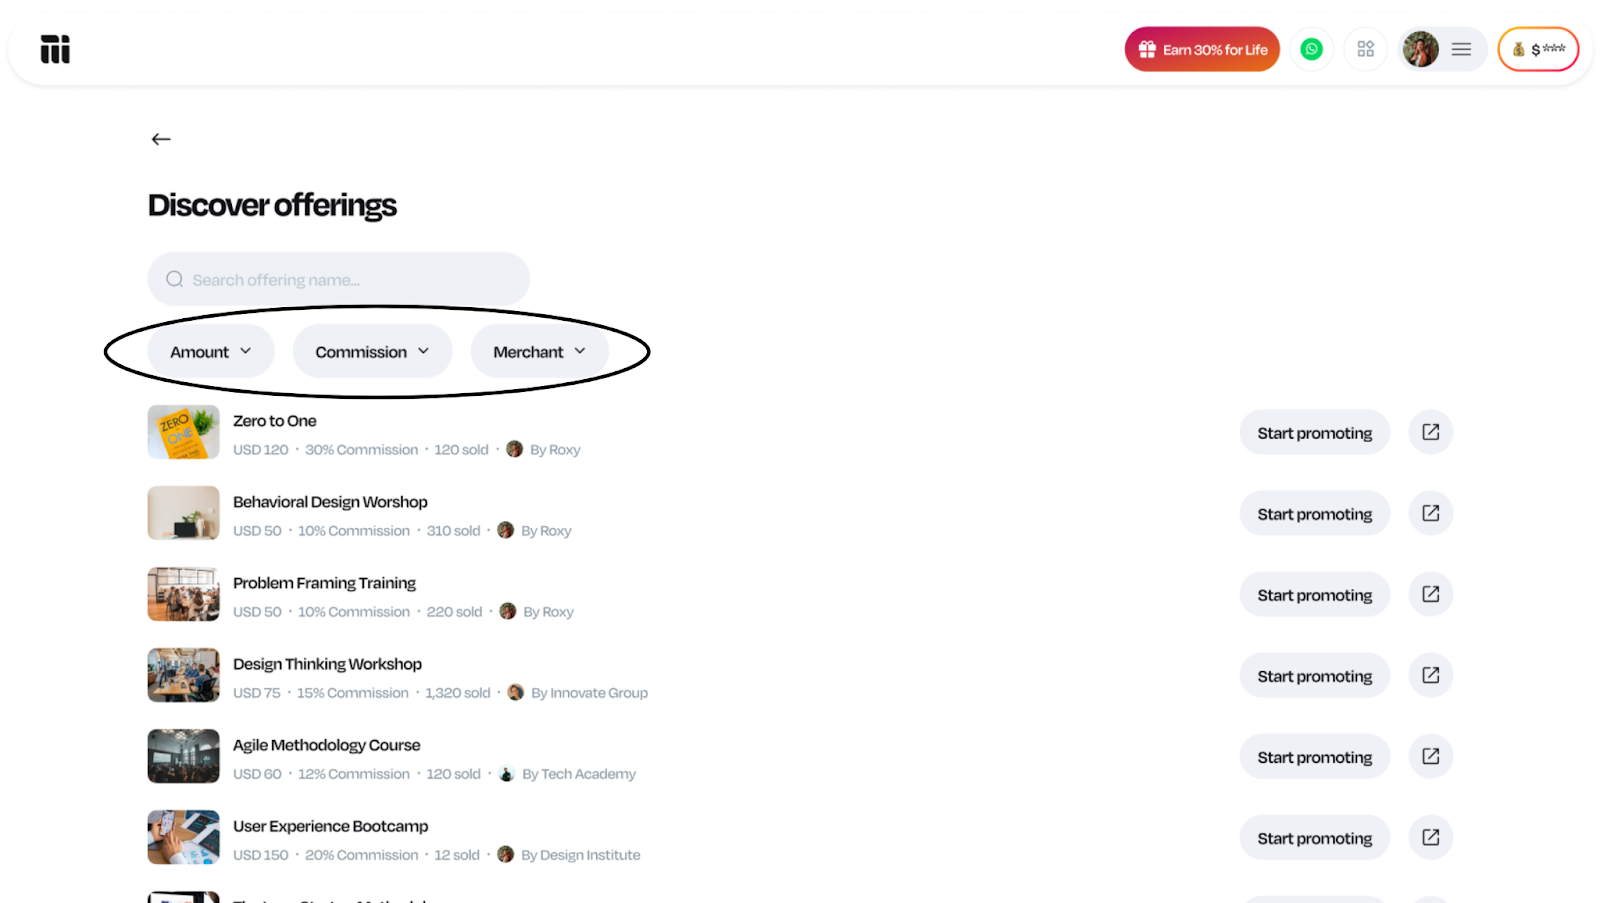
Once you find a product you’d like to promote, click on it to view more details and walk through its offer page.
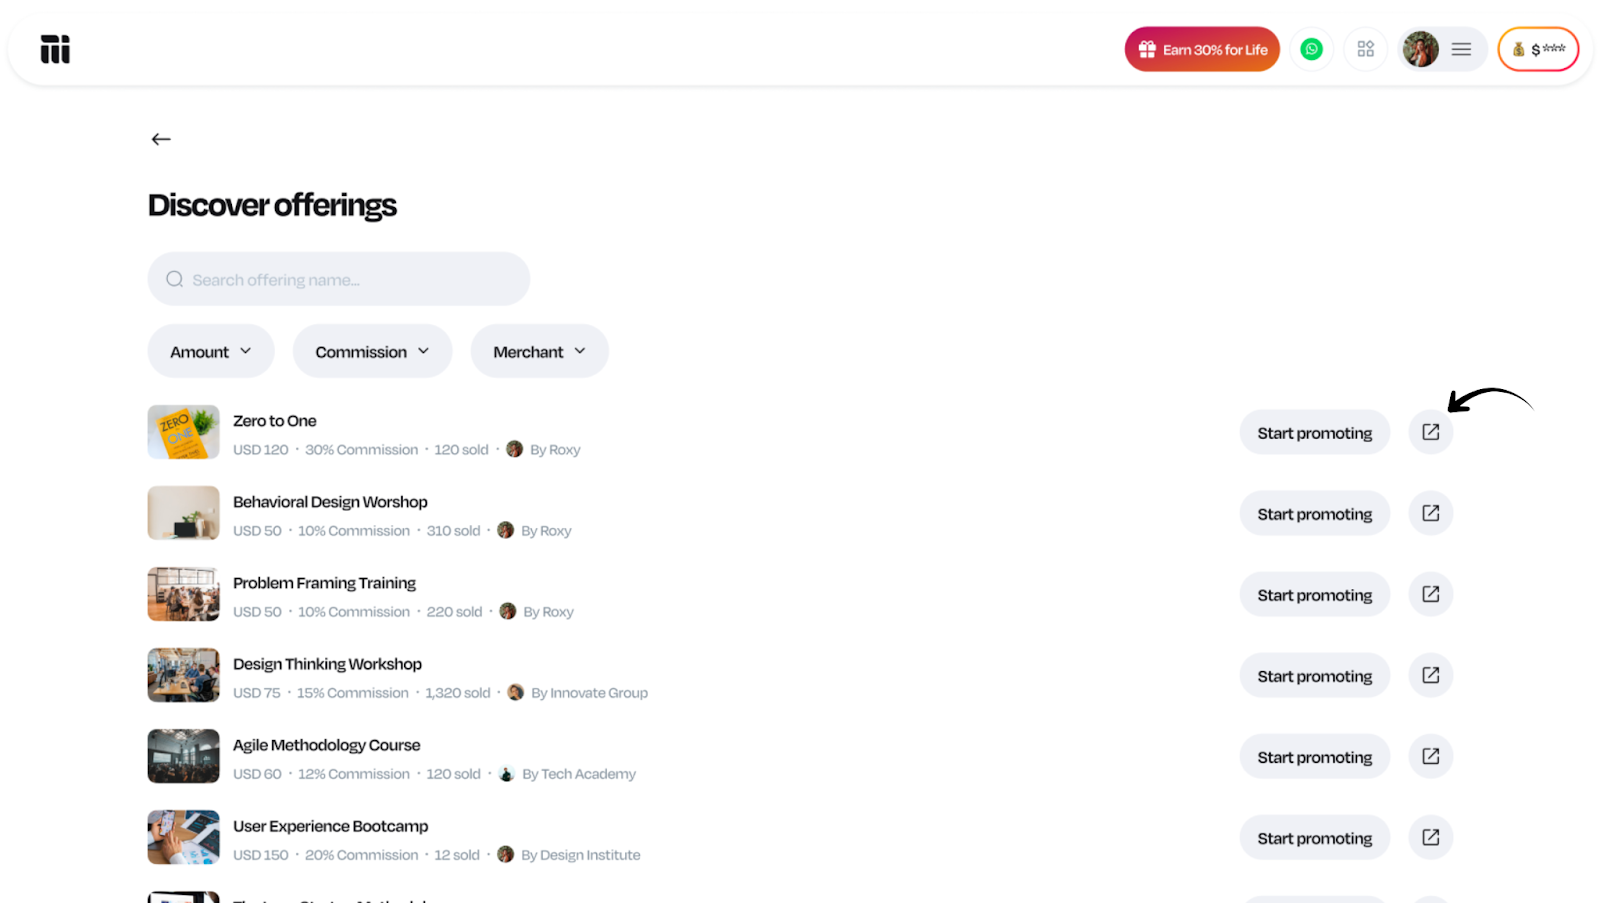
Choose an offer and click ‘become an affiliate’ which gives you access to share your unique affiliate link.
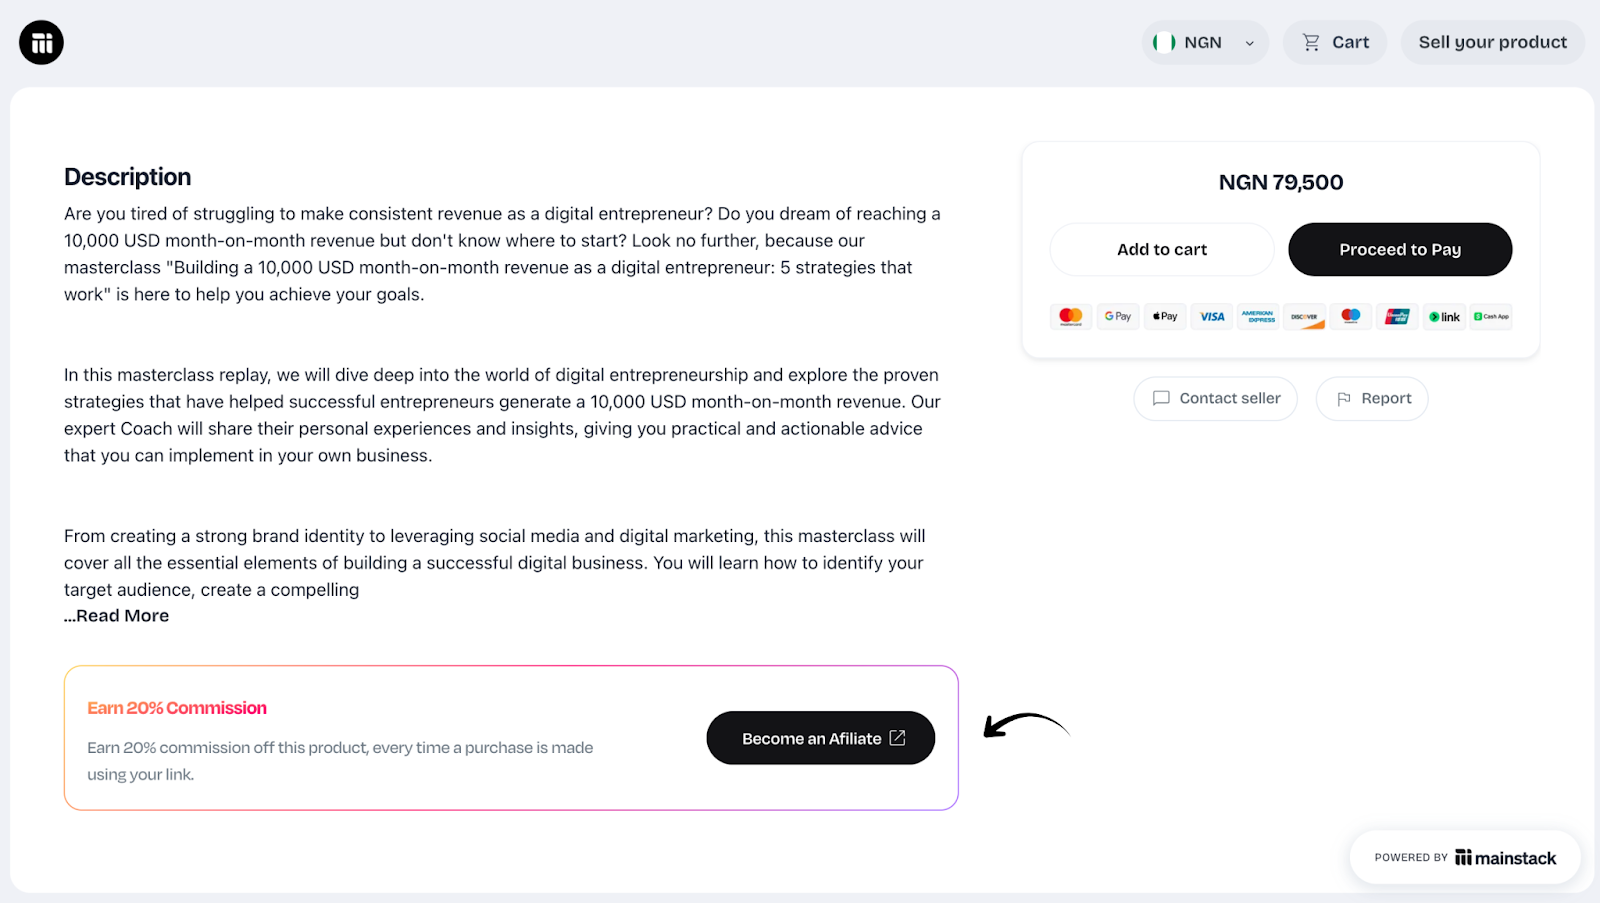
From the moment a sale comes through, you earn. Mainstack pays you directly - fast, clean, and in your preferred method.
While others are waiting to “start earning online,” you could already be collecting.
The only thing between you and your next payout is a few clicks.

It’s a whole new ballgame.
For years, creators and entrepreneurs in Africa have been told the same story: “Build your product. Sell it. Repeat.” However, the truth is that the online world doesn’t reward hard work alone; it rewards networks, visibility, and speed.
And that’s exactly what Mainstack’s Affiliate Program is built for.
This isn’t just another earning tool. It’s a gateway to limitless sales and income, powered by collaboration.
You already created something valuable. Now, imagine hundreds of people selling it for you.
That’s what happens when you list your product on Mainstack’s Affiliate Marketplace.
Instead of doing all the marketing yourself, you tap into an army of affiliates ready to share, promote, and sell your product to audiences you might never reach on your own. Every time they sell, you earn effortlessly.
It’s not just marketing. It’s multiplication.
Your reach expands. Your sales grow. Your brand travels faster than your ads ever could.
And with Mainstack’s 24-hour payouts across Naira, crypto, PayPal, and DOM accounts, you don’t wait to see results.
HERE IS HOW TO LIST YOUR PRODUCT
If you have influence, community, or just good digital instincts, Mainstack gives you a new way to earn without creating anything.
You can promote digital products from verified merchants -from courses to eBooks to templates - and earn a commission for every sale.
No setup. No stress. Just pure earning potential.
Whether you’re a content creator, influencer, or someone who just knows how to connect people to what they need. This is how you turn your voice into consistent income.
The Mainstack Affiliate Program isn’t about links. It’s about liberation.
It’s about creators and merchants across Africa finally getting paid for the value they bring - without waiting on gatekeepers, ad budgets, or platforms that don’t understand our market.
It’s the freedom to earn faster, smarter, and together.
It’s the new way to sell. The new way to grow. The new way to win.
You can be part of the movement - or watch from the sidelines while others cash out.
Start now. Build smarter. Earn faster.